Wednesday, March 27, 2013

the best baked apple tart ever!

Dalloyou's Baked Apple Tart via design. bake. run.

a while back one of my coworkers brought in this delicious apple tart. it is definitely one of the best if not the best apple tart i've ever had. so good that i had to make one myself so m and my MIL can confirm it with me. and since i had made that lemon cream tart recipe from tartine and had 3 extra pie/tart dough leftover, why not?! the sweet tart dough would be perfect for this apple tart recipe.

this recipe was adapated from dalloyau, a very well known and popular pastry company in paris and comes from dorie greenspan's paris sweets book. of course, i missed out on tasting all the goodies from dalloyau the last time i was there. one, let's just say i wasn't aware of them as i am now and two, i'd been eating paris sweets literally every day we were in paris. i know, i was too spoiled. i remembered we even walked pass dalloyau's pastry stands inside galeries lafayette (the giant shopping mall in paris). they had so many opera cakes, macarons and every pastry you can possibly imagine! but at the time i remembered all i wanted was real food (no more sweets, at least at the time anyway) and opted for some thai food. i know, thai food in paris (kind of disappointing huh?). but this place is for sure on my to-eat-list the next time i'm in paris. i can't wait to go back and try everything (okay, maybe not everything, but almost?!) on their menu.

so, what's sooooo good about it? let's just say not only do you get these nicely sauteed caramel-y sliced apples, but the added almond cream with the apple is just delish. it's really THAT good! i've never had a tart with almond cream before and i have to say, the almond cream makes a giant difference. it's a nice added sweetness to the tartiness of the apples. ever since i've made the almond cream in this tart recipe, i've been making the almond cream and putting it on everything! it's super simple that you can whisk up in a few short minutes. one of my personal favorites i like to put the almond cream on is french toast. it's sort of like a take on those delicious bostocks i had at b. patisserie a while back, but homemade and just as good. i'll have to put up a post on these later at some point, but for now… let's enjoy this delicious apple tart.

oh, so what did m and my MIL say? they loved it. like absolutely loved it! m said it's the best he's ever had and the only kind of apple tart or pie he'll ever eat! we're for sure adding this to the list of many baked goodies we make during the holidays. he loves the sweet dough tart with the apples. it's like a nice shortbread crust that compliments the apples and almond cream nicely. i told him i could also make it with puff pastry sheets as the pie crust but he said no. the sweet dough tart is perfect and loves the apple tart exactly the way i had made it. so i guess i'll stick with what i have.

below's the recipe if you'd like to make it. seriously, it's the best apple tart ever! :)

Dalloyou's Baked Apple Tart via design. bake. run.
this is really the best apple tart ever. even if you don't like apple pies or tarts, i say you should still give this a try. the almond cream will make you fall in love with it. really.

THE BEST Baked Apple Tart EVER! via design. bake. run.
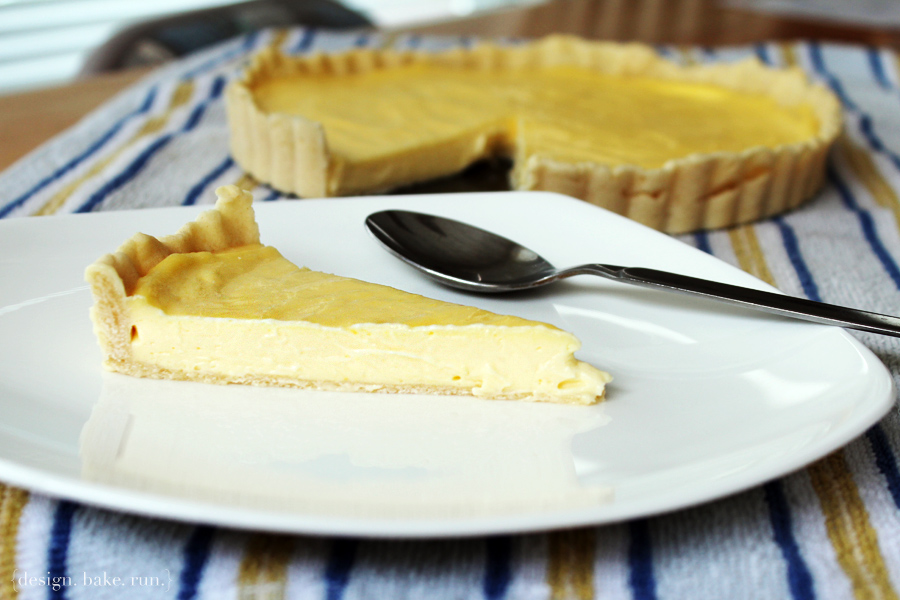
a close-up shot of a tart slice. seriously, so good. i can't wait until we go to paris again so i can really hit up dalloyau and have an actual slice made from the recipe maker themselves!

Baked Apple Tart via design. bake. run.
as i was taking a shot of this slice, little miss v couldn't help it. she wanted to get a piece (or this piece) of this delicious apple tart!

tarte aux pommes au four
dalloyau's baked apple tart recipe from sabrina ko's blog

ingredients:

the almond cream:
1-1/2 tablespoons (3/4 ounce; 20 grams) unsalted butter, at room temperature
1 tablespoon sugar
1/4 cup (30 grams) ground almonds
1 large egg, preferably at room temperature
2 tablespoons (30 grams) heavy cream
1 tablespoon calvados or apple brandy (or 1 tablespoon pure vanilla extract)

the apples:
6 large apples (2-1/4 pounds; 1 kilo), preferably Fuji or Granny Smith, peeled and cored (note: if you want to skip the grated apples part, you can use 4-5 apples instead)
7 tablespoons (3-1/2 ounces; 100 grams) unsalted butter (note: this can also be reduced without much sacrifice to the taste. i actually halved the butter here and it still came out delicious!)
1/2 cup sugar (75 grams)
2 tablespoons calvados or apple brandy (or 1-1/2 tablespoons pure vanilla extract)

the crust:
1 unbaked 9-inch (24-cm) tart shell made from sweet tart dough (recipe here) or you can use puff pastry (homemade or store-bought)
confectioners’ sugar for dusting

directions:

the apples:
  1. center a rack in the oven and preheat the oven to 350°F (180°c).
  2. cut 4 of the apples in half and slice each half into thirds. grate the remaining 2 apples on the coarse side of a box grater (you can skip the grating if you like – i didn't though).
  3. melt 1 tablespoon of the butter and 1 tablespoon of the sugar in a large skillet over high heat. add the grated apples and cook, stirring, until they are golden brown, about 3 minutes. using a slotted spoon, transfer the apples to a plate (if you skipped the grating, you can skip this step). add the remaining 6 tablespoons (85 grams) butter and the rest of the sugar to the pan and, when the butter is bubbling, toss in the apple slices. cook the apples, stirring frequently, until they are lightly caramelized, 5 to 7 minutes. pour in the calvados, turn off the heat, and carefully touch a match to the liquid. when the flames die down, pull the pan from the stove. (note: if you don't have the calvados, you can just add in the vanilla extract after turning off the heat. no need for lighting up a match or anything like that.)
  4. transfer the apple slices to a baking pan (or keep them in the skillet if it is ovenproof) and bake for 20 minutes, or until they are almost cooked through. cool for 30 minutes.
  5. while the apples are baking, make the almond cream. working in a medium bowl with a whisk, beat the butter and sugar together for a minute or so, until the sugar dissolves and the butter whitens a little. whisk in the almonds, then the egg, beating until the mixture is blended. finally, whisk in the cream and calvados (or vanilla extract). cover the bowl and refrigerate until needed. (the cream can be kept covered in the refrigerator for up to 3 days.)

to assemble the tart:
  1. position a rack in the lower third of the oven and preheat the oven to 350°F (180°C). line a rimmed baking sheet with parchment paper and put the tart shell on the sheet.
  2. spoon the almond cream evenly into the crust. top with the baked apples, arranging them attractively in a single layer. check the grated apples—if they are wet, press them either between your palms or between paper towels. fluff up the grated apples with your fingers or a fork and arrange them over the apple slices, leaving a bare border of an inch (2.5 cm) or so.
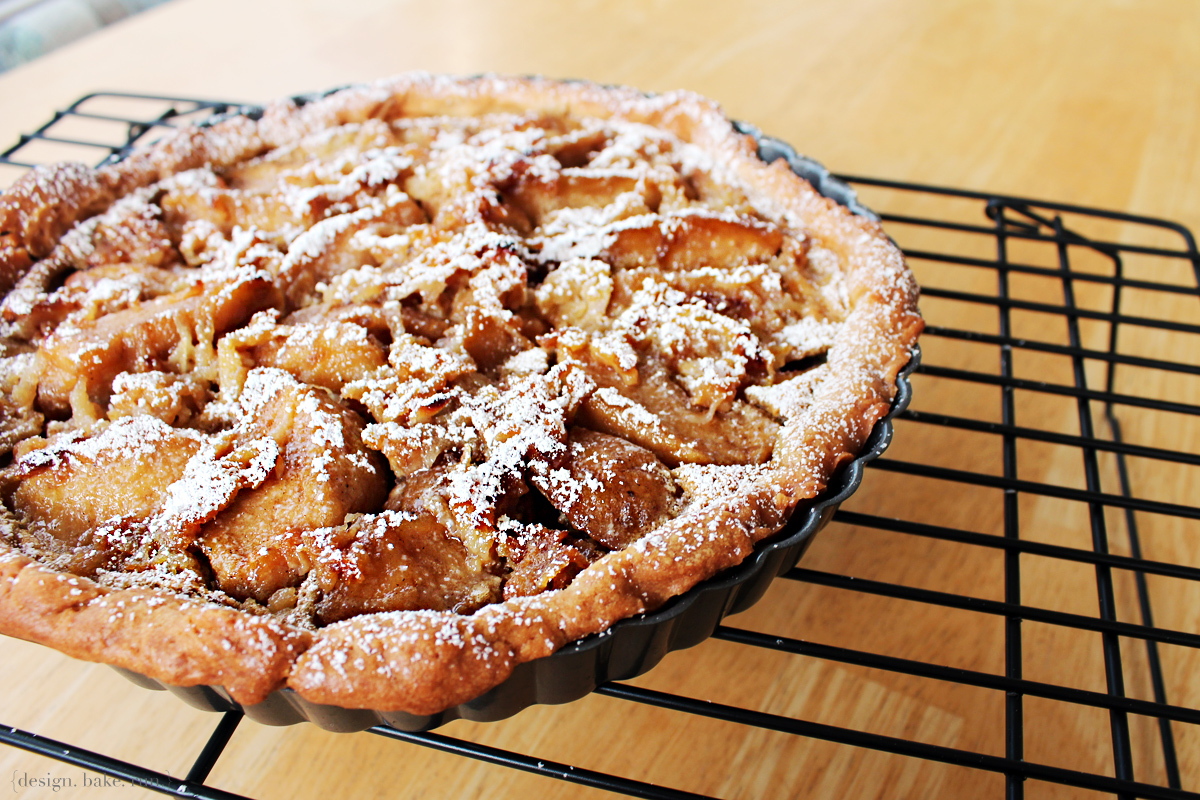
  3. bake the tart for 40 to 50 minutes, or until the almond cream has puffed and the apples are beautifully browned. cool the tart on a rack; unmold and serve it when it is either just warm or at room temperature. dust the tart generously with confectioners’ sugar right before bringing it to the table.

notes:
while all of the elements can be prepared ahead, once the tart is assembled, it should be baked immediately, and once it is baked, it should be served soon thereafter.

this tart is perfect on its own or if you prefer, is also delicious with either a bit of crème fraîche or vanilla crème anglaise. but in our household (being the very english people we are! hehe) we have it with evaporated milk and it's delish! of course, a giant scoop of good ol' vanilla ice cream is yummy as well. i do love my vanilla ice cream. :)

makes 8 servings. enjoy!

Thursday, March 21, 2013

york peppermint pattie cookies

York Peppermint Pattie Cookies via design. bake. run.

i'm not a big fan of peppermint patties, but i don't not like it enough to pass up on it. well, my MIL and m are big peppermint patties fan. right after the holidays i picked up a couple bags of york peppermint patties (because being the frugal person i am – i know, it doesn't show here, these were on clearance at half off!) with the intention of using them to make some yummy baked goodies. three months later i finally got around to making something with them.

these york peppermint pattie cookies turned out great. they taste delicious and i love how good they turned out (look-wise). they're like a different version of your classic delicious mint chocolate chip cookie you can say. i love how the minty sweet cream is scattered in various parts of the cookie as you bite into it. oh! and during the baking, some of them melted and crystalized turning into something that's toffee-like when it cooled and hardened. those bites are also delish.

below's the recipe should you want to try and bake some yourself. i say go for it, because these just like all the other chocolate chip cookies (or any cookie recipe really) that i've made are superb. of course, i'm biased here. enjoy! :)

York Peppermint Pattie Cookies Make Perfect Gifts! via design. bake. run.
i gave some of these away as mini gifts to coworkers. oh, and also tested out some hand-lettered packaging.

York Peppermint Pattie Cookies via design. bake. run.
if you're a minty chocolate chip kind of fan, i say this is a must try recipe!

york peppermint pattie cookies

ingredients:
1 stick of butter, room temperature
1 cup granulated sugar
1/2 cup brown sugar
2 eggs
1-3/4 cups + 2 tablespoons all purpose flour
1 teaspoon baking soda
a pinch of salt
1 bag of york peppermint patties (you may not need the whole bag)

directions:
  1. preheat oven to 350° f.
  2. in a medium bowl, sift the flour, salt and baking soda and set aside.
  3. in a separate bowl with a fork (or you can do all of this in a mixer or hand mixer if you like) beat the butter and sugar (both granulated & brown) together until the nice and fluffy.
  4. add in the eggs and mix until everything is combined.
  5. then add in the dry ingredients and mix until everything is incorporated.
  6. now, at this point you'll want to take the peppermint patties out of their individual wrappers (assuming they came individually wrapped because that's what i used). break up each pattie into 3-4 pieces and add it to the cookie dough batter. once you have enough patties (i say about 20-25 or you can use the entire bag) broken up and added, mix the dough until everything is combined.
  7. then using a small cookie scooper (about 1 tablespoon in size) or you can use whatever you like (a spoon is fine too!), spoon about 1 tablespoon of the cookie dough onto a parchment-lined (or silicone mat) baking sheet. make sure each dough tablespoon is at least 2 inches apart.
  8. bake for 9-10 minutes or until the cookies are a light golden brown and outer edges start to harden yet centers are still soft and puffy.
  9. take cookies out of the oven and let them cool on the sheet for 10 minutes before removing them.
  10. enjoy at slightly warm temperature or put them in an airtight container/cookie jar.
makes 30-36 small cookies. enjoy! happy baking and eating. :)

Wednesday, March 20, 2013

taking a look at my fitbit weekly data

as i mentioned in my last post regarding weight loss (and/or exercise), i mentioned that i've been using the fitbit one device. well, below are some summary data from my most recent week (march 11-17). i'm not sure how i compare to others out there who are using the same device or something similar on the fitbit website (the recommended daily steps is 10,000 steps), but from the group of people who are on my friends list, i am on top – so i guess that's not too bad. of course, i could personally improve my numbers for my own personal goals such as have more than one 20,000 step day in a week. as pointed out in the data graphics below, i for sure need to do something about my calories in and out. okay, i'm actually not monitoring what i'm eating right now, but i should start or do that. i feel like i can never stick to journaling any food down. it's like i'll do it for a week then forget all about it the next. that's probably because i find it time consuming entering every little piece of food consumed down.

ok... again, here is my data from this past week. i hope that this current week's data will be much better – although i'm not so sure as today i did not walk very much nor did i run this morning. usually on mornings when i run that helps my step count a whole lot. some running days are better than others, but for the most part i hit 10k steps quickly. today is a different story. i didn't run this morning nor did i walk that much during lunch because it sprinkled quite a bit today during lunch (and i didn't have an umbrella with me). so instead of going out for my usual walk, i just went and walked around indoor a little bit. yeah, that did not give me my usual 3-4k steps. i'll have to make sure i get to at least 10k tonight. we'll see how the rest of the week go. :)

my fitbit weekly data crunch
here's a glimpse of my data from the week of march 11-17, 2013. pretty decent, yet i don't know why i'm not losing any weight?! maybe because i'm eating too much still?!! ahhhhhh! (click image for larger view)

my fitbit weekly data crunch
again, from the same week (almost anyway). i need to improve on my little active time pie chart. right now, being more than 50% sedentary during my waking moments isn't that great. it's okay, but not great. i should put something into motion to improve this. (click image for larger view)

Monday, March 18, 2013

browned butter coconut macarons

Browned Butter Coconut French Macarons via design. bake. run.

last friday was one of my coworkers' last day. she's moving back to nyc to be closer with her family. as a parting gift, i decided to make her some french macarons. when making the browned butter buttercream, we had some leftover coconut milk from m's first go at chicken biryani that we had for dinner so i decided instead of milk or cream, i would add in a little coconut milk. once the buttercream was completed, i could taste the hint of coconut in it. so i guess you can say that's how i got about to the name of this french macaron. i absolutely love coconut and have recently taken a liking to browned butter, so i think i'll be making this again whenever there's coconut milk leftover available.

so, how good is it? one word. scrumptious. below's the recipe should you want to try it. and if you do make some and do feel free to let me know what you think. as always, happy baking and eating!

French Macarons with Browned Butter Coconut Buttercream Filling via design. bake. run.
browned butter buttercream or anything has become a new favorite in my baking. i love how yummy it smells and tastes. the coconut and browned butter combo is perfect for this macaron! delish.

browned butter coconut french macarons

ingredients:

macaron batter:
1 cup powdered sugar
3/4 cup almond meal
2 large egg whites, at room temperature
5 tablespoons granulated sugar

browned butter coconut buttercream filling:
4 tablespoons butter
2-1/2 to 3 cups powdered sugar
2 tablespoons coconut milk
cream or milk, if needed

directions:

to make the macaron batter/shells:
  1. line two baking sheets with parchment paper and have a pastry bag with a plain tip (about 1/2-inch, 2 cm) ready.
  2. sift together the powdered sugar and almond meal so there are no lumps. set aside.
  3. in the bowl of a standing electric mixer (or if you prefer, you can use a bowl and hand mixer), beat the egg whites until they begin to rise and hold their shape. while whipping, beat in the sugar until very stiff and firm, about 2 minutes.
  4. carefully fold the dry ingredients, in two batches, into the beaten egg whites with a flexible rubber spatula. when the mixture is just smooth and there are no streaks of egg white, stop folding and scrape the batter into the pastry bag (standing the bag in a tall glass helps if you’re alone).
  5. pipe the batter on the parchment-lined baking sheets in 1.35-inch circles evenly spaced one-inch apart.
  6. rap the baking sheet a few times firmly on the counter top to flatten the macarons. then let it sit for at least 30-60 minutes depending on humidity before baking them in the oven. about 10-15 minutes before baking, preheat oven to 350 degrees F. bake for 15 minutes.
  7. once macaron shells are out of the oven, let them sit for 30-60 seconds before removing the hot baking sheet underneath. let the macarons cool completely before removing them from the parchment paper.

for browned butter coconut buttercream filling:
  1. brown the butter in a small saucepan over medium heat. i say let the butter melt and hang out until it gets to that nice golden color and your kitchen smells delicious.
  2. turn off the stove and pour the brown butter into a medium size bowl. add in the powdered sugar and the coconut milk and mix the ingredients together on low speed until they're incorporated. then turn the speed to medium and mix for 2-3 more minutes until everything is blended and you've reached the right consistency for buttercream. add in a little milk or cream if the buttercream is too thick or more powdered sugar if it's too thin. once everything looks good it should be ready to use.
to assemble the macaron cookies:
  1. before assembling these cookies, make sure to pair up all the cookie shells so they are as close as possible in size.
  2. using a knife, spread a good amount of the brown butter coconut buttercream on the inside of the macarons then sandwich them together.
  3. let them stand at least one day (keep them refrigerated) before serving (serve at room temperature), to meld the flavors.

store in airtight container for up to 5 days. makes 20-24 macarons. happy eating because these are really, really, good! :)

Friday, March 15, 2013

passionfruit cupcakes with citrus buttercream frosting

Passionfruit Cupcakes with Citrus Buttercream Frosting via design. bake. run.

last friday i brought into work these delicious burnt sugar french macarons. i had made them earlier in the week and was letting them age in the fridge before bringing them to work to share. as it turned out, while the macarons were aging in our refrigerator, we've also been helping ourselves to them. i discovered that m absolutely loves them. come friday, instead of having 28 macarons, we were down to just 16. now, 16 macarons would have been fine, but being the typical me, i didn't think that was enough goodies to go around. so on a whim, last friday morning before work i decided to make some mini cupcakes. and so that explains these delicious passionfruit cupcakes here.

now, i absolutely love passionfruit. it's just unfortunate they aren't readily available here in the bay area like other more tropical and exotic places such as hawaii or australia. sure they do grow some variety of the fruit here in california, i've just yet to get my hands on them (at least not since maui of last year). so for these cupcakes, the juices will do just fine.

so, how were these cupcakes anyway? pretty awesome. you can still get a hint of the passionfruit in the cake. now, if it was 100% passionfruit (because it's got some pear juice in it – i wouldn't be surprised if it was 49% pear, 51% passionfruit), i say it would be pretty ridiculously delicious. the citrus buttercream really pairs well with the passionfruit. i love the whole combination. oh, and topping it off with some leftover candied citrus peels really elevated the citrus flavor (not that the buttercream didn't have enough of it already).

below's the recipe should you want to try and make these yourself. i based these cupcakes off of the eggless vanilla cupcakes that i often make so they're actually full size (or standard size i should say) cupcakes rather than mini cupcakes. but of course, if you want to bake them in mini cupcake liners, you certainly can. i would shorten the baking time to 15 minutes instead of 18.

okay, let me know if you do make some and how yours turn out. happy baking! :)

Passionfruit Cupcakes with Citrus Buttercream Frosting via design. bake. run.
i love the flavor combination of these cupcakes. passionfruit and citrus together is just delicious.

passionfruit cupcakes with citrus buttercream frosting

ingredients:

cupcakes:
1-1/4 cup all-purpose flour
2/3 cup granulated sugar
1 tsp baking powder
1/4 tsp baking soda
a pinch of salt
1/3 cup passionfruit juice or puree
2/3 cup milk
1 tbsp distilled vinegar (you can use cider too)
1/4 cup oil
1/2 tsp vanilla extract

citrus buttercream:
1/2 cup (1 stick) butter, room temperature
3 to 3-1/2 cups confectioners’ sugar
2 tbsp of orange juice
1 tbsp of lemon juice
some lemon & orange zest

milk or cream, as needed

directions:

for the cupcakes:
  1. preheat oven to 350°f.
  2. in a large bowl, sift together flour, baking powder, baking soda, and salt.
  3. then add in the sugar, oil, milk, passionfruit juice (or puree). mix until relatively smooth.
  4. fill cupcake liners with a scant 3 tablespoons of batter (cups should be just under 2/3 of the way full). bake for 18 minutes (or 15 if making mini cupcakes) or until lightly golden, and toothpick inserted in the center comes out clean. transfer to cooling rack and allow to cool completely.

for frosting:
  1. cream butter in electric mixer for 1-2 minutes until fluffy.
  2. slowly add in the sugar, citrus zest and juices and beat until light and fluffy; and has reached the right consistency; about 3-4 minutes. add cream or more sugar as necessary to achieve proper consistency.
  3. pipe or spread onto cooled cupcakes. optional: you can top it off with some thinly sliced candied citrus peels if you like!

makes 12 cupcakes (or 20-22 mini cupcakes).

enjoy and happy eating! :)

Tuesday, March 12, 2013

just run

just run

it's already 17 months after little miss v and i still have about 10 pounds to shed (ideally 12). it's so awful! a year ago i was so much better off, with only 5 or 6 pounds. instead, i've gained a good 5-6 pounds since! it's terrible.

well, i've decided that i'm not going to beat myself about it. what i've decided to do is to take little itty bitty baby steps. losing weight is a tough thing to do. i should know, since i did it before after c. i just need to really put my mind to it, and i know i will get back to pre-baby #2 weight again. of course, get there and stay there.

these are the tiny steps i am currently taking and plan on keeping/sticking to it. i've recently been testing out the fitbit one (a wireless activity plus sleep tracker) and i say it's fantastic! it's given me this little extra motivation i need to really push myself. so below are the things i'm currently monitoring with the fitbit one device and other stuff on my own.

go get it, girl!
  • walk at least 20 minutes during lunch (monday-friday)
  • accumulate at least 10,000 steps every day (the more, the better!)
  • have at least one 20,000 steps day in a week
  • run 4x a week, 2-5 miles
  • strength training exercises, 3x a week (no time limit required… just need to do some!)
  • be watchful and careful of what i eat. eat more fruits as snacks. and remember to drink more milk or have a piece of cheese for that calcium requirement!

i think that's it. nothing fancy, but i must really try and stick with it. :)

Friday, March 8, 2013

browned butter burnt sugar french macarons

Burnt Sugar French Macarons via design. bake. run.

okay, so i was trying to make that delicious smelling and oh-so-yummy browned butter toffee frosting i made a while back for these macarons. i said i would try it again since it tasted so good last time. well, i did, except for it wasn't quite browned butter toffee. this time, let's just say i didn't let the butter brown enough and the brown sugar sat too long in that saucepan that it was much darker (and tasted a little burnt or more bitter than normal sugar). anyway, i quickly took it off the stove and pour the butter mixture into a mixing bowl to see what i got. sure enough, the brown sugar was definitely so much darker and as the mixture cooled, it began to hardened a bit (just as i'd expected). long story short, i decided to go with this anyway than making a new batch of the browned butter sugar mixture. the end result? quite a delicious buttercream i would say. i love all the crunch from the hardened melted brown sugar. the hint of burnt or bitterness from the sugar and sweetness of the butter makes it quite nice also. it's like this sweet but just a tad bitter butterscotch-y taste. all the flavors actually work very well together. m said it's his favorite macaron flavor to date. he's usually a tough critic when it comes to my baking (and cooking) so i'll take it. as for me? it's pretty awesome, i'll definitely be making this one again.

below's the recipe should you want to try it. these are really good, i can assure you. so make some and let me know what you think. as always, happy baking and eating!

French Macarons with Browned Butter Burnt Sugar Buttercream Filling via design. bake. run.
i am in love with this browned butter burnt sugar buttercream filling. it's a little bitter yet sweet and has this buttersctoch-y taste to it and just taste really, really delicious!

browned butter burnt sugar french macarons

ingredients:

macaron batter:
1 cup powdered sugar
3/4 cup almond meal
2 large egg whites, at room temperature
1/4 cup brown sugar, firmly packed

browned butter burnt sugar buttercream filling:
4 tablespoons butter
3 tablespoons brown sugar
1-1/2 to 2 cups powdered sugar
cream or milk

directions:

to make the macaron batter/shells:
  1. line two baking sheets with parchment paper and have a pastry bag with a plain tip (about 1/2-inch, 2 cm) ready.
  2. sift together the powdered sugar and almond meal so there are no lumps. set aside.
  3. in the bowl of a standing electric mixer (or if you prefer, you can use a bowl and hand mixer), beat the egg whites until they begin to rise and hold their shape. while whipping, beat in the brown sugar until very stiff and firm, about 2 minutes.
  4. carefully fold the dry ingredients, in two batches, into the beaten egg whites with a flexible rubber spatula. when the mixture is just smooth and there are no streaks of egg white, stop folding and scrape the batter into the pastry bag (standing the bag in a tall glass helps if you’re alone).
  5. pipe the batter on the parchment-lined baking sheets in 1.35-inch circles evenly spaced one-inch apart.
  6. rap the baking sheet a few times firmly on the counter top to flatten the macarons. then let it sit for at least 30-60 minutes depending on humidity before baking them in the oven. about 10-15 minutes before baking, preheat oven to 350 degrees F. bake for 15 minutes.
  7. once macaron shells are out of the oven, let them sit for 30-60 seconds before removing the hot baking sheet underneath. let the macarons cool completely before removing them from the parchment paper.

for browned butter burnt sugar buttercream filling:
  1. brown the butter in a small saucepan over medium heat. i say let the butter melt and hang out until it gets to that nice golden color and your kitchen smells delicious.
  2. then add in the brown sugar and stir constantly until the sugar is dissolved. let it come to a boil if it's not already bubbly by now for an extra minute or two until you see the color really getting darker. it should be pretty dark by now. don't let it sit too long or else it will really burn or be too burnt! you want it to reach just burnt, not way over.
  3. turn off the stove and pour the brown butter and sugar mixture into a medium size bowl. stir it a few times with a fork to cool the mixture a little bit.
  4. add in the powdered sugar and with a fork (because that's what i use, but i guess you can use a hand mixer if you like) mix the ingredients together on low speed until they're all blended. you'll notice the sugar component hardening up. i just use the fork and try to break them up into bits. then turn to medium and mix until you've reached the right consistency for buttercream. add in a little cream or milk if it's too thick or more powdered sugar if it's too thin. once everything looks good it should be ready to use.
to assemble the macaron cookies:
  1. before assembling these cookies, make sure to pair up all the cookie shells so they are as close as possible in size.
  2. using a knife, spread a good amount of the brown butter burnt sugar buttercream on the inside of the macarons then sandwich them together.
  3. let them stand at least one day (keep them refrigerated) before serving (serve at room temperature), to meld the flavors.

store in airtight container for up to 5 days. makes 20-24 macarons. happy eating because these are really, really, good! :)

Tuesday, March 5, 2013

tartine's lemon cream tart

Tartine's Lemon Cream Tart via design. bake. run.

it seems like lemons are popping up everywhere these days. it is definitely lemon season you can say! a couple of weeks ago a friend gave me some meyer lemons from her garden. i knew exactly what i wanted to make with it. for sure some lemon curd and maybe some lemon cake or something lemony anyway. upon researching different lemon curd recipes i discovered tartine's lemon cream tart. i've gone to tartine multiple times, but i've yet to try their lemon tart. i don't know… must be because it's always so crowded there (the lines are ridiculous no matter what time of day – this place is hugely popular here in sf) that i feel a bit overwhelm sometimes even when i know exactly what i want to get (usually a morning bun and/or almond croissant).

okay, so after reading what it would take to make tartine's delicious lemon tart (as attested by many who've tried it and have made it themselves), i decided i too would attempt to make this yummy piece of goodness. so… how did it turn out? absolutely delicious! it is so lemony, creamy… and just so, so, good. even if you're not a fan, i say you fall in love it (and become a fan!?! =/). and if you are, you've got to make this! i love how the sweet dough for the tart gives that perfect amount of sweetness to offset the tartness from the lemon cream. everything just works well together in one scrumptious bite.

below is the recipe should you want to try and make this. it's super easy to make. usually i don't care for pie/tart dough because it's such a pain sometimes, but this one is a piece of cake. and the lemon cream is nothing if you've done plenty of double boiler stuff before. actually, even if you haven't, just follow the recipe and everything will turn out fabulous.

good luck and let me know how yours turn out! happy baking and eating, as always.

Tartine's Lemon Cream Tart via design. bake. run.

Tartine's Lemon Tart via design. bake. run.

sweet tart dough
by tartine (makes 4 9-inch tart shells or twelve 4-inch tartlet shells)

1 cup + 2 tbsp (9 oz/255 grams) unsalted butter, at room temperature
1 cup (7 oz/200 grams) sugar
1/4 tsp salt
2 large eggs, at room temperature
3 1/2 cups (17 1/2 oz/500 grams) all-purpose flour

directions:
  1. using a stand mixer fitted with the paddle attachment, combine the butter, sugar and salt and mix on medium speed until smooth.
  2. mix in 1 egg. add the remaining egg and mix until smooth. stop the mixer and scrape down the sides of the bowl with a rubber spatula.
  3. add the flour all at once and mix on low speed just until incorporated.
  4. on a lightly floured work surface, divide the dough into 4 equal balls and shape each ball into a disk 1/2 inch thick. wrap well in plastic wrap and chill for at least 2 hours or overnight or freeze 3 for future use (this dough will keep for up to 3 weeks).
  5. to line a tart pan, place a dough disk on a lightly floured surface and roll out 1/8 inch thick, rolling from the center toward the edge in all directions. lift and rotate the dough a quarter turn after every few strokes, dusting underneath as necessary to discourage sticking, and work quickly to prevent the dough from becoming warm. cut out a circle 2 inches larger than the pan. if the dough is still cool, carefully transfer the circle to the pan, easing it into the bottom and sides and then pressing gently into place. if the dough has become too soft to work with, put it in the refrigerator for a few minutes to firm up before transferring it to the pan. if the dough develops any tears, just patch with a little extra dough, pressing firmly to adhere. trim the dough level with the top of the pan with a sharp knife. place the pastry shell in the refrigerator or freezer until it is firm, about 15 minutes.
  6. if you are making tartlet shells, roll out the dough in the same way, cut out circles according to the size of your pans, and line the pans. the rest of the dough, including the scraps, can be frozen for future use.
  7. preheat the oven to 325 degrees fahrenheit.
  8. dock (make small holes in) the bottom of the tart shell or tartlet shells with a fork or the tip of a knife, making tiny holes 2 inches apart. place in the oven and bake for 7 to 10 minutes for a partially baked large shell or 5 to 7 minutes for tartlet shells. the pastry should be lightly coloured and look dry and opaque.
  9. let cool completely on wire racks. the pastry shells will keep, well wrapped, in the refrigerator for up to 1 week or in the freezer for up to 2 weeks.

lemon cream
by tartine (about 2.5 cups /625 ml)

1/2 cup + 2 tbsp (5 oz/155 ml) lemon juice
3 large eggs
1 large egg yolk
3/4 cup (6 oz/170 g) sugar
pinch of salt
1 cup (8 oz/225 g) unsalted butter

directions:
  1. pour water to a depth of about 2 inches into a saucepan, place over medium heat, and bring to a simmer.
  2. combine lemon juice, whole eggs, yolk, sugar and salt in a stainless steel bowl on top of double boiler. whisk ingredients constantly for 10-12 minutes until the mixture becomes very thick and registers 180°F on a thermometer.
  3. emote the bowl from over the water and stirring from time to time to release the heat.
  4. meanwhile, cut butter into 1 tbsp-pieces. when the cream is ready, using either a regular blender, or an immersion blender, add 1 piece of butter at a time to lemon mixture, blending after each addition of butter. the cream will be pale opaque yellow, and quite thick.
  5. you can use the cream immediately, or pour it into a storage container with a tight-fitting lid and refrigerate for up to 5 days.

to assemble the tart

have the tart shell ready for filling. pour the lemon cream directly into the cooled tart shell. shake the tart pan gently to smooth out the top of the filling. chill the tart until firm, about 2 hours before serving.

that's it, enjoy!
Related Posts Plugin for WordPress, Blogger...