Sunday, September 30, 2012

easy sunday night dinner - spam & rice

Sweet & Salty Spam over Steamed Jasmine Rice via design. bake. run.

five years ago if you asked me if i liked spam i would probably respond, "ewww? spam?!" but these days, you'd definitely find me chowing down some good old spam and rice – i'll take it any day. i love it, especially when it's glazed with a sweet salty sauce that's very similar to a teriyaki sauce like the simple one i made for tonight's dinner.

the sauce is so simple, you only need two ingredients and it totally transforms plain boring spam into something delicious and finger-licking good! hahaha, yes, that is if you eat without any forks or knives – which i must confess, i do occasionally. ;)

Sweet & Salty Spam via design. bake. run.
i used the oven to cook the spam – it makes for easy cleanup!

Sweet & Salty Spam over Rice via design. bake. run.
easy to make teriyaki-like glaze spam over steamed jasmine rice -- yum!

sweet & salty teriyaki-like spam over steamed jasmine rice

ingredients:
1 spam tin, sliced into 8 pieces
2 cups cooked jasmine rice
1/4 cup brown sugar
1/4 cup soy sauce
green onions for garnish (optional)

directions:
mix together the brown sugar and soy sauce in a small bowl and set aside. cook the sliced spam in a nonstick or frying pan over medium heat. once spam is seared enough on both sides (where it looks crusty) in the pan, add in the sauce. make sure to sauce all the pieces of spam. let the pieces sit for a minute or two to get the sauce to caramelize and thicken a bit. after those few minutes the spam should be ready to eat. serve spam over cooked jasmine rice.

suggested serving: 2 slices of spam per 1/2 cup rice. makes enough for 4 total servings. enjoy!

note: you can also cook the spam in the oven – that's what i did this time. i couldn't be bothered to fry them in a pan, so i used the oven instead. it makes the cleaning up process super easy actually. i would highly recommend cooking them in the oven. if you go this route, bake in 400°F for 10 mins, then add in half the sauce sauce, put back in the oven for a minute; take it out, flip the slices, add the rest of the sauce and put it back in the oven again for another minute; and voila! you're all done!

Friday, September 28, 2012

i love making (and eating) cream puffs

cream puffs via design. bake. run.

i absolutely love cream puffs. i can eat the entire batch myself. i know, it's so awful (and soooo not good for my waistline! hehe) – but delicious! i usually make them whenever there's leftover whipping cream, half-and-half, or egg yolks around. it's ashamed to let all those ingredients go to waste!

typically i make cream puffs with whipped cream as my filling, but lately i've been experimenting with different pastry cream recipes. i think i've finally found my favorite. it's from annie's eats, and i think her recipe is just perfect. i've adapted it to my liking, but overall i think it really works. the pastry cream comes out just right. it's very similar to pierre herme's vanilla pastry cream recipe, but i think i prefer half-and-half in my pastry cream like annie's than pierre herme's.

these cream puffs are so good. you must really try making them. it's not as hard as you think. sometimes one can be a little intimidated because the finish product looks so fancy, but they're really not hard at all. the pâte à choux is quite simple actually. and making the pastry cream's not bad at all. wait, you can skip the pastry cream filling if you prefer whipped cream instead! so really you have no excuse for not trying to make some yourself.

below's the recipe for these delicious cream puffs should you like to try them out yourself. enjoy!

cream puffs via design. bake. run.
these cream puffs are so good. the pastry cream is just perfect!

delicious cream puffs via design. bake. run.
a closer look of these yummy cream puffs -- delish!

cream puffs
adapted from here and here

ingredients

For the pastry cream:
1 cup half-and-half
1 cup whole milk
1/2 cup sugar
Pinch salt
5 large egg yolks
3 tbsp cornstarch
4 tbsp cold unsalted butter, cut into 4 pieces
1-1/2 tsp vanilla extract

For the pâte à choux:
1/2 cup all purpose flour
1/2 tsp sugar
1/4 tsp salt
1/4 cup (4 tbsp) unsalted butter, cut into pieces
1/2 cup water
2 large eggs, lightly beaten

for the chocolate ganache glaze:
4 oz chocolate, chopped into small pieces
1/3 cup heavy cream

directions

To make the pastry cream, heat the half-and-half and milk, 6 tablespoons of the sugar, and the salt in a saucepan over medium-high heat until simmering, stirring occasionally to dissolve the sugar. Meanwhile, combine the egg yolks and remaining 2 tablespoons sugar in a medium bowl and whisk until the sugar has begun to dissolve and the mixture is creamy, about 15 seconds. Whisk in the cornstarch until combined and the mixture is pale yellow and thick, about 30 seconds.

When the half-and-half and milk mixture has reached a simmer, slowly add it to the egg yolk mixture to temper, whisking constantly. Return the mixture to the saucepan, scraping the bowl with a rubber spatula. Return the mixture to a simmer over medium heat, whisking constantly, until a few bubbles burst on the surface and the mixture is thickened and glossy, about 30 seconds. Off the heat, whisk in the butter and vanilla. Strain the pastry cream through a fine mesh sieve set over a medium bowl. Press plastic wrap directly on the surface to prevent a skin from forming and refrigerate until cold and set, at least 3 hours and up to 2 days.

To make the choux pastry, preheat oven to 400°F (200°C) and place rack in center of oven. Line a baking sheet with parchment paper or lightly butter or spray the pan with a nonstick vegetable spray.

In a bowl sift or whisk together the flour, sugar and salt.

Place the butter and water in a heavy saucepan over medium high heat and bring to a boil. (Make sure that the butter melts before the water boils to reduce the amount of evaporation.) Remove from heat and, with a wooden spoon, add the flour mixture, all at once, and stir until combined. Return saucepan to the heat and stir constantly until the dough comes away from the sides of the pan and forms a thick smooth ball (about 1-2 minutes). Transfer the dough to your electric mixer, or use a hand mixer, and beat on low speed to release the steam from the dough (about a minute) &ndash actually, i just do everything in the saucepan, beat the dough, adding the eggs, etc. Once the dough is lukewarm start adding the lightly beaten eggs (dough will separate and then come together) and continue to mix until you have a smooth thick paste (dough will fall from a spoon in a thick ribbon). Spoon or pipe 12 small mounds of dough onto the baking sheet, spacing about 2 inches (5 cm) apart. Optional: You can gently brush the tops of the dough with a lightly beaten egg if you like. I usually don't.

Bake for 15 minutes and then reduce the oven temperature to 350°F (180°C). Continue to bake for a further 30 minutes or until the shells are a nice amber color and when split, are almost dry inside. Turn the oven off, poke a couple of holes in each puff and, with the oven door slightly ajar, let the shells completely cool (and dry out).

To fill the puffs, use the tip of a paring knife to make a small cut perpendicular to the first, creating an X in the side of each puff. Fill a pastry bag fitted with a 1/4-inch plain tip with the pastry cream. Pipe some of the pastry cream through the X into the side of each puff until it starts to ooze back out. Repeat to fill all the puffs.

To make the chocolate ganache glaze, place chocolate pieces and heavy cream in a microwave-safe bowl, cover with plastic wrap, and microwave for 20 seconds at a time, until the mixture just begins to steam. Whisk together thoroughly until completely mixed and glossy. Allow ganache to cool slightly before dipping the tops of the cream puffs. Set the puffs on a rack to let the chocolate glaze set completely. If you don't care for the chocolate ganache glaze, you can sprinkle confectioner's sugar on top of the filled cream puffs. I personally prefer dipping them in the ganache because it tastes yummier that way. Serve within a few hours. Happy eating! ;)

Wednesday, September 26, 2012

vanilla biscotti teething biscuits for the little one

teething biscuits -- vanilla biscotti via design. bake. run.

so my last teething biscuits for v didn't turn out the way i thought it would. like i mentioned in that blog post, the texture of the biscuit itself was unexpected and not in the (good) way i had hope. i expected it to be more of a crumbly cookie-like texture, but instead it was very doughy. i decided i try a different recipe and see how those turn out.

well, let me tell you, these vanilla biscottis turned out great! they are exactly like the regular kind the big kids can eat, firm but crumbly when gnawed, except that they're not as sweet. of course if you'd like to add more sugar in your version, go ahead. i'm sure you can even substitute whole wheat pastry flour for the all purpose flour if you want. i didn't substitute the flour because i didn't have any whole wheat handy or added a whole lot of sugar because i figure this is for my little one, a little hint of sweetness will do just fine. plus, the small amount of butter is giving this cookie that yummy buttery taste. i hope my little one will enjoy them as much as i'd enjoy making them for her.

below's the recipe should you be interested.

teething biscuits -- vanilla biscotti via design. bake. run.
these homemade cookies are great for the little ones and so easy to make

vanilla biscotti teething biscuits via design. bake. run.
a side view of these goodies

vanilla biscotti teething biscuits for the little ones via design. bake. run.
this recipe sure makes plenty! i know v will be so happy to see something else different for a change ;)

teething vanilla biscotti
recipe adapted from here

ingredients:
1/4 cup sugar
1-1/2 tbsp butter
1 egg
1/2 tsp baking powder
a pinch salt
1 tsp vanilla extract
1 cup flour, 1/4 cup extra if needed

directions:
Preheat the oven to 350°F.

Cream the sugar with the butter and beat in the egg. Add the vanilla extract, 1 cup of the flour, baking powder and salt and mix the dough well. It should be fairly sticky, but you should be able to gently mould it with your hands. If it's too sticky, add the extra 1/4 cup of flour. Form the dough into a long "log" shape (around 8-10 inches long) and bake for 20 minutes on a greased baking sheet/cookie sheet.

Allow to cool, then carefully cut into 1/2 in slices with a sharp knife. You should get around 16-24 slices. Place each slice, cut side down, on a baking/cookie sheet, then bake for another 15-20 mins, turning the Biscotti over half way through the cooking time. If they still feel soft, lower the heat and cook for an extra 5 to 10 minutes.

Remove from the oven and cool completely - they get harder as they cool. Store in airtight container. Should keep for 2-3 days.

Saturday, September 22, 2012

butterfinger cookies

butterfinger cookies from design. bake. run.

i work for a pretty cool place. at my office we have so many goodies available for snacks, whatever you name it, we just about have it. anyway, there's a secret drawer where all the candies are stashed. actually, the drawer's not so secret (if you eat candy, you'd know where), more like out of the way so you wouldn't eat so much. well, there are all these snack-sized butterfingers and no one eats them. i know i certainly don't. so instead of them just sitting there in that drawer, one day last week i decided that i take them home and make use of them – which i did, and here's the result!

i told a few of my coworkers what my intentions were and to expect some baked goodies the next day. and sure enough, i showed up to work with 2 dozens worth of freshly baked butterfinger cookies. i personally don't care for peanut butter in my sweets, but i did try one after they had cooled. i say these aren't bad at all. they're quite good. if i liked peanut butter, these would definitely be on my to-make/eat-list. the overall feedbacks i got from everyone who had one loved it, so i guess we do have a keeper. i'll be sure to keep this on my rotation of goodies to make for work whenever there are butterfingers lying around.

now, if you are a peanut butter lover or butterfinger fan, you might like these. below's the recipe should you be interested. enjoy!

butterfinger cookies cooling on the rack -- design. bake. run.
freshly baked butterfinger cookies cooling on the rack

homemade butterfinger cookies @ design. bake. run.
another shot of these good-tasting cookies

butterfinger cookies from design. bake. run.
this recipe is fantastic, especially when you have leftover butterfingers lying around

butterfinger cookies from design. bake. run.
they look so good, don't they?

delicious homemade butterfinger cookies from design. bake. run.
yummy!


butterfinger cookies
adapted from here

ingredients

1-3/4 cups all-purpose flour
3/4 teaspoon baking soda
1/4 teaspoon salt
3/4 cup granulated sugar
1/2 cup (1 stick) butter, softened
1 large egg
10 snack sized butterfinger candy bars, chopped

directions

Preheat oven to 375°F degrees.

Combine flour, baking soda, and salt in small bowl and set aside. With an electric mixer, beat sugar and butter until creamy. Beat in egg until just combined.

Gradually beat in flour mixture. Stir in butterfinger pieces by hand. The dough will be very thick. Drop by slightly rounded tablespoonfuls onto ungreased baking sheet.

Bake for 10-12 minutes or until lightly browned. Allow to cool and enjoy!

Makes 30-36 small cookies

note: i baked mine for just 9 minutes, but up to you on how you like your cookies done. the longer they are in the oven, the more crunchy/crispy they get. i think 9 minutes was sufficient for mine.

Friday, September 21, 2012

mango macarons

design. bake. run. -- mango french macarons

this is the outcome of a good afternoon when you get 3 hours nap from the little ones. yes, this past sunday both my little babies slept a good 2-3 hours; and with that time i was able to make these delectable mango flavored macarons (along with the coffee nutella seen here). i think they turned out quite nice. you see i had a bunch of very ripe mangoes in my fridge that has gone a little stringy on me. instead of eating it, i decided to puree it to get most of the juices out and use it to make a mango flavored buttercream (see recipe below). i think the buttercream frosting turned out great. the color was very beautiful and the flavor of the mango really came out. you can definitely tell it was mango. i should have taken a photo of it, but i forgot, so i guess we're stuck with just the macaron pictures here. enjoy! :)

design. bake. run. -- macarons shells cooling
these macaron shells turned out perfectly!

design. bake. run. -- mango macarons
the flavored mango buttercream filling is definitely a refreshing change from the typical vanilla buttercream

design. bake. run. -- homemade mango french macarons
these look so good!

design. bake. run. -- french macarons with mango buttercream filling
mango french macarons -- i must try them again, with added mango bits in the filling next time


mango buttercream

ingredients

2 tbsp butter, softened or melted
1 cup confectioner's sugar
1-2 tbsp mango pulp/puree

directions

using a fork or hand mixer, cream softened or melted butter with the confectioner's sugar in a bowl. once mixed (it may start to look like crumbs here), add the mango pulp/puree in. keep mixing until ready. add in more sugar if it's too runny or more pulp/puree if the buttercream is too thick. it shouldn't take too long, just a few minutes and there you have it. enjoy!

Wednesday, September 19, 2012

mr. men illustration posters

design. bake. run. -- mr. happy poster

design. bake. run. -- mr. tickle poster

design. bake. run. -- mr. forgetful poster

design. bake. run. -- mr. bump poster

design. bake. run. -- mr. grumpy poster

i guess you can say this is my first official "design" blog entry. okay, sure... there's not much design here, more illustration than design, but it works?!

we love the mr. men/little miss book collections from roger hargreaves. the poster illustrations above are just some of our favorites. c loves all the books and often times tell us which mr. men he is depending on how he's feeling. for examples, there are days when he's mr. bump or he's usually mr. grumpy when he wakes up from his nap. sometimes, he says he's mr. (little miss) contrary because he can't seem to get things straight/proper.

these books are great! if you don't have any in your household or haven't heard of them, you should definitely get a few to start. so, which little miss am i? i am for sure, no doubt, little miss chatterbox. i know it doesn't come through on here, but ask anyone in my family/circle and they'll agree. ;)

Tuesday, September 18, 2012

coffee nutella macarons

design. bake. run. -- coffee nutella macarons

i think i've really perfected my macarons recipe. yes, i'm super proud of myself. there are no longer any hollow shells or cracked/broken bottoms. and the cookies don't really stick to the parchment paper like they used to anymore. of course occasionally i get a few mini sticks here or there taking them off the sheet, but for the most part they come off just fine. i'm just so glad that after many, many trial-and-errors that i think i've gotten it down. i'm sure there will be future batches where it may not be 100% perfect, but for the most part will do just fine.

so what did i do differently these last few times? ummm... first off, not a whole lot. everything else is still pretty much the same, the only difference is my confectioner's sugar and almond flour ratio is now 1:3/4 instead of 2:1. before i used to do 2 parts sugar, 1 part almond flour, but now it's 1 part sugar and 3/4 part almond flour. for some reason the extra almond flour added has really allow the cookie to not have any hollow/air pockets and cook evenly.

now, did i measure (weigh) all my ingredients precisely? i have to admit, i don't always measure/weigh everything. most of the time i eyeball all my ingredients. i know, it's not the conventional way one should bake because sometimes one little thing off and you can totally screw up a recipe (yes, i've done that plenty of times, like adding too much cornstarch when making pastry cream!). but somehow with macarons, now that i've made them a bunch of times, i feel like i know exactly what's enough, etc. of course i still use a measuring cup to measure my dry ingredients, but the ingredients aren't always leveled. yes, terrible, i know! so if you're just starting out or have been baking for a long time you still shouldn't do what i do unless you don't mind the outcomes. anyway, these macarons turned out great and i'm so happy because i absolutely love coffee nutella macarons. it sure beats paying $1.75-2 for one tiny cookie. ;)

design. bake. run. -- piped macarons batter resting, waiting for skin to form
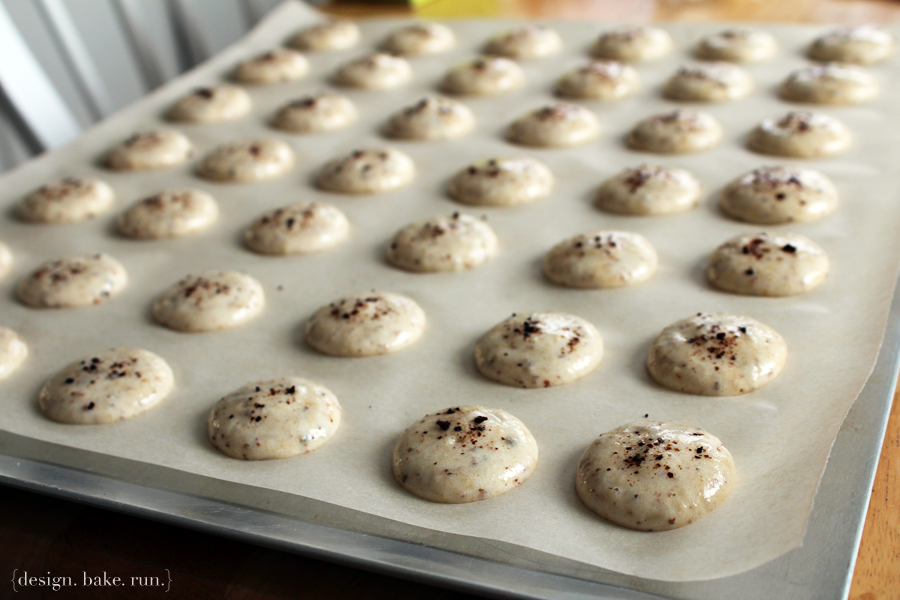
piped macaron batter, resting waiting for skin to form before heading into the oven

design. bake. run. -- freshly baked macaron shells cooling
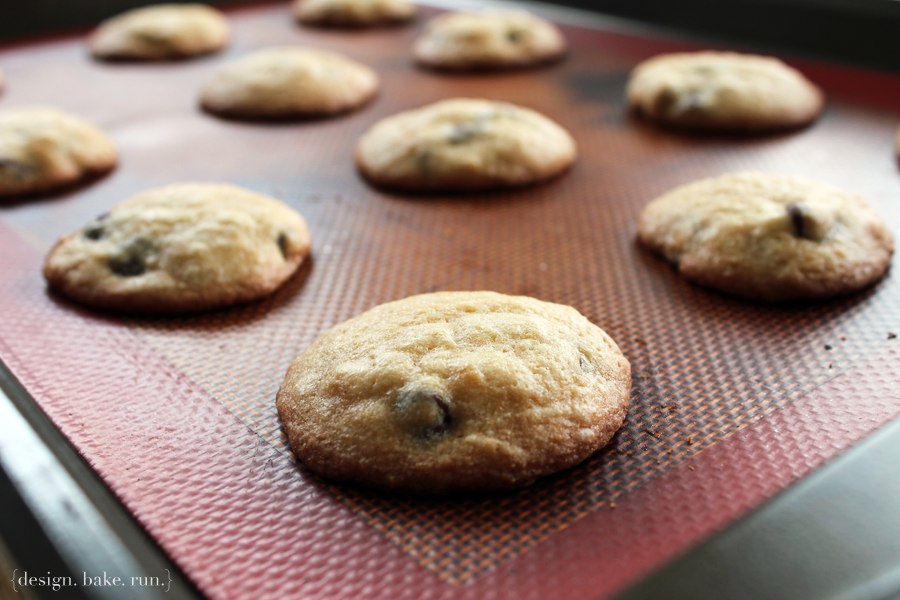
macaron shells out of the oven and cooling

design. bake. run. -- coffee nutella macarons
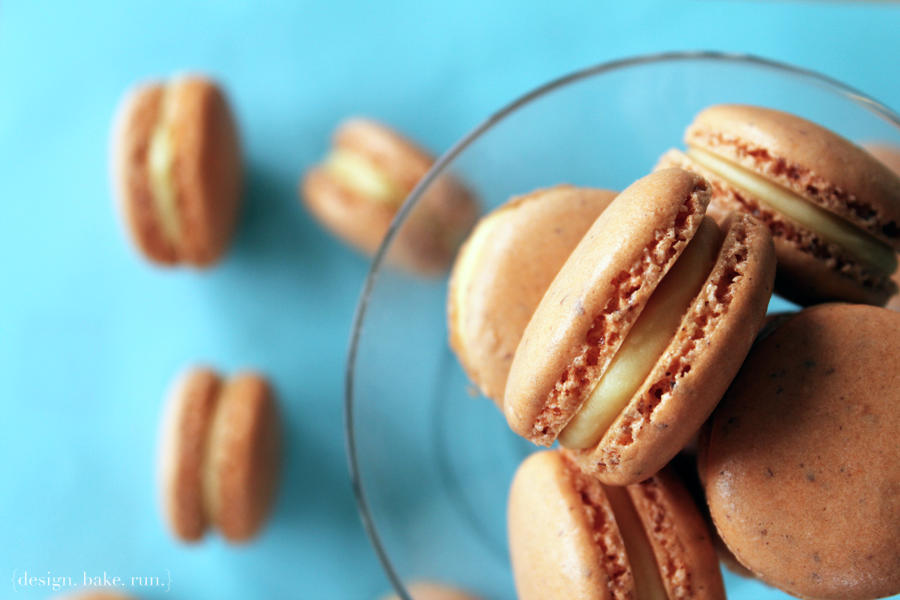
another view of these yummy coffee nutella macaron shells. the feet look great!

design. bake. run. -- assembling coffee nutella french macarons
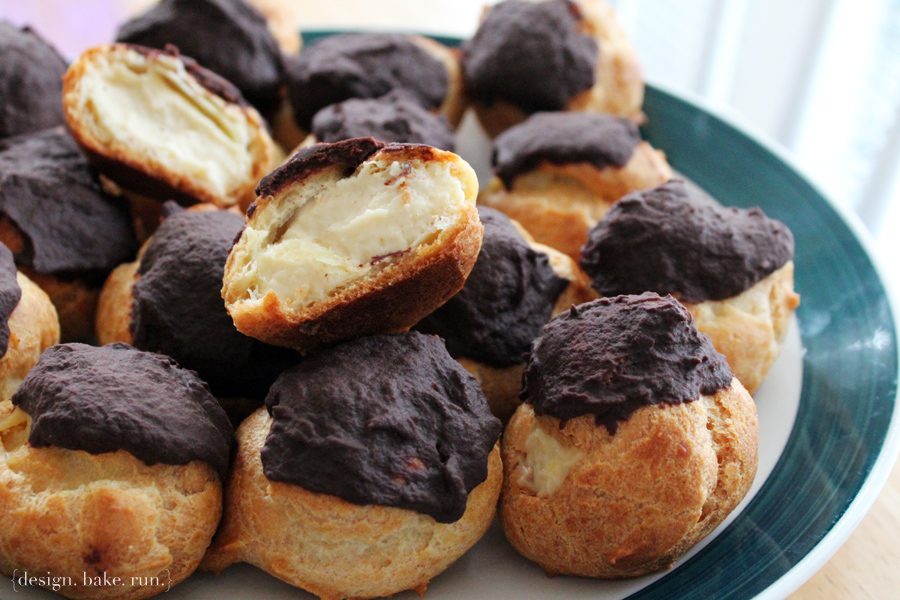
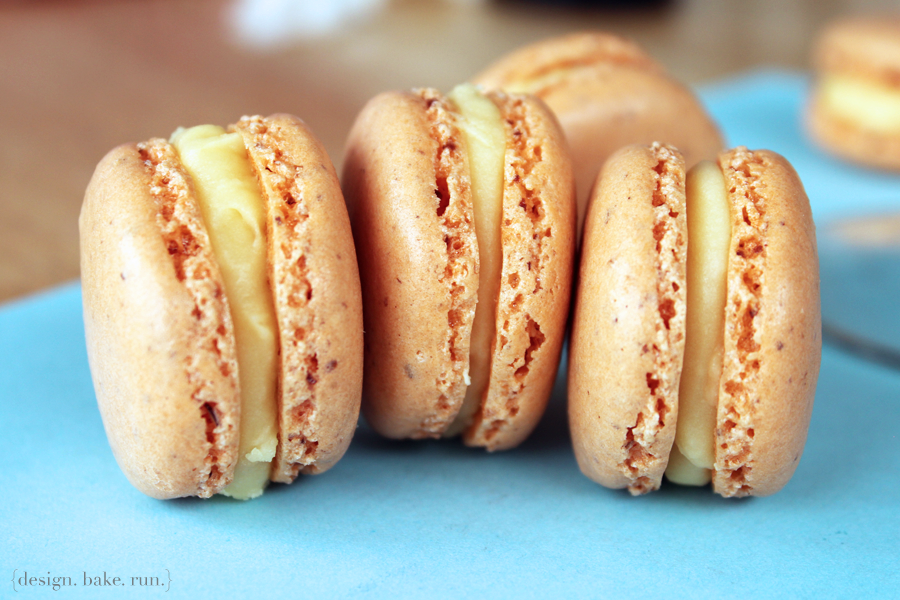
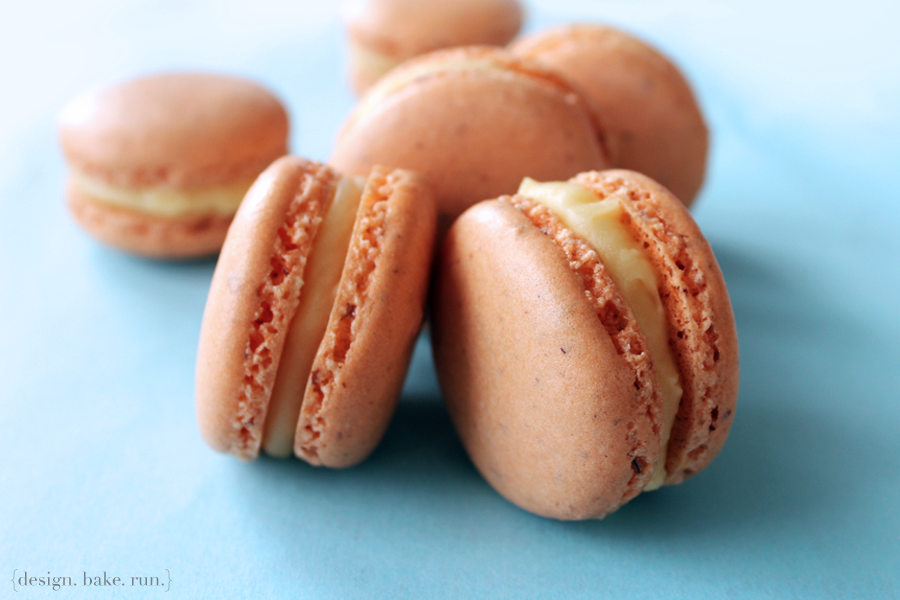
putting together these delicious coffee nutella french macarons

design. bake. run. -- coffee nutella french macarons
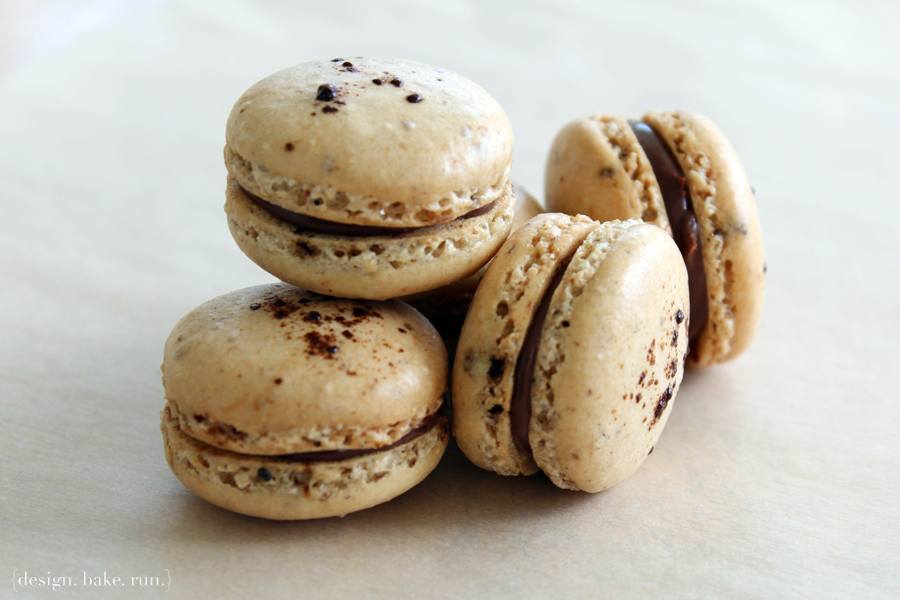
aren't they just scrumptious?


if you'd like to make some of these delicious cute little sandwich cookies yourself, i say david lebovitz's got a pretty decent french macaron recipe for anyone who wants to try a different recipe or make them for the first time. although i must say i think my mini adjustment to it makes it so much better. i'd love to share it, but i haven't put it all down and finalized it yet. when i do have the recipe all made up and ready to share, i will be sure to post it on here. i can't wait to see if you guys feel the same way as me, because it does make these cookies so much better! :)

***UPDATE 12/18/12***

here's the recipe at last! enjoy and let me know how yours turn out if you do make them! :)

Coffee Nutella Macarons
recipe adapted from David Lebovitz

Ingredients:

Macaron Batter:

1 cup (100 gr) powdered sugar

3/4 cup almond meal (about 3 ounces or 75 grams)

2 tablespoons instant espresso
more instant espresso for macaron shell topping (optional)

2 large egg whites, at room temperature

5 tablespoons (65 gr) granulated sugar

Filling:
1 Jar of Nutella (you won't need the whole jar! just enough)

Directions:
Preheat oven to 350º F (180º C).

Line two baking sheets with parchment paper and have a pastry bag with a plain tip (about 1/2-inch, 2 cm) ready.

Sift together the powdered sugar, almond meal and 2 tablespoons of espresso so there are no lumps (usually I just use a fork to break any large lumps). If your almond meal isn't so fine, you can put the ingredients into a blender or food processor to make it finer. Personally, I'd just use the sifter and dump out any remaining crumbs that didn't make it through the sifting process.

In the bowl of a standing electric mixer (or if you prefer, you can use a bowl and hand mixer), beat the egg whites until they begin to rise and hold their shape. While whipping, beat in the granulated sugar until very stiff and firm, about 2 minutes.

Carefully fold the dry ingredients, in two batches, into the beaten egg whites with a flexible rubber spatula. When the mixture is just smooth and there are no streaks of egg white, stop folding and scrape the batter into the pastry bag (standing the bag in a tall glass helps if you’re alone).

Pipe the batter on the parchment-lined baking sheets in 1.35-inch (3.5 cm) circles evenly spaced one-inch (3 cm) apart. Quickly after it's piped, sprinkle a few espresso powder over each shell (this step is optional, personally I do it because I like how the macarons look once they're baked).

Rap the baking sheet a few times firmly on the counter top to flatten the macarons. Then let it sit for at least 30-60 minutes depending on humidity (okay, I've done it with just 15 minutes before and they turned out fine, but whatever you do, do not skip this step; even at just 15 minutes) before baking them in the oven, 15-17 minutes (I typically bake mine on the middle rack). Let cool completely then remove from baking sheet.

To assemble: Before assembling these cookies, make sure to pair up all the cookie shells so they are as close as possible in size. Then using a knife, spread a good amount of Nutella on the inside of the macarons then sandwich them together. (You can pipe the filling it if you prefer less mess. I personally sometimes can't be bother to go through the hassle of putting my filling in a bag and cleaning up after it.)

Let them stand at least one day (keep them refrigerated) before serving (serve at room temperature), to meld the flavors. Or if you can't wait to dig in and eat, I say wait a few hours, at least! (Shhhh, I've eaten them newly assembled too, and they taste just as yummy. Just a little crunchy, but that's okay. hehehe). But really, for the best optimal flavor and taste, you must wait at least one day. They really are THAT good and worth the wait!

Store in an airtight container for up to 5 days.

Makes about 16-20 cookies. Enjoy and happy eating! :)

Note: I typically just bake mine for 15 minutes (middle rack in the oven) and they turn out fine. But yours may be different as all oven temperatures vary so letting them bake the full 17 minutes may be fine. I say set your timer for 15 minutes and add on from there. Regarding the sitting time, I've baked plenty of macarons with just having the piped batter sit for 15 minutes while the oven heats up because I don't always preheat my oven as the first step and they turn out fine too. You'll find it that once you've made these a few times, you'll get the system down. Good luck!

Monday, September 17, 2012

chocolate chip cookies

design. bake. run. -- chocolate chip cookies

it was so cold yesterday morning that i suggested baking some of c's favorite cookies, chocolate chip cookies. he absolutely loves these. actually, he loves making them more than eating them. that's because he loves eating the dough rather than the finished baked cookies. i'm sure if i let him eat the entire bowl of cookie dough, he would too.

this is my go to chocolate chip cookie recipe. i've been using this for quite a few years now. i think when i first started baking about 5 years ago, i went through a bunch of different ones and somehow, this was the most simplest, easiest to remember. i don't even look at the recipe anymore when it comes to making this. you just kind of throw things in and they turn out fine. of course, sometimes it may be a tad sweeter than another, but in our household, we'd rather take it sweeter than not as sweet. i know, that's awful, yes! but ahhh, indulging once in a while is okay. heh! i only bake like 3-4 times a week! actually, not everyone in my household eat everything i bake. that's where my coworkers come in. they'll take any baked goods i can offer – which is fantastic. i really wouldn't know where the goodies will go if no one will eat them.

below's the recipe should you be interested in trying them yourself. it's really easy. you can do them in a mixer or with a bowl & fork if you don't have one. i can't be bothered to get out the mixer so i just do mine with a microwaveable bowl and fork. it's gotta be microwaveable so i can melt the butter. yes, i don't always have time or think ahead to leave the butter out to room temperature so it's soft enough to beat with the sugar. therefore a bowl where i can melt the butter in is great (and add all the other stuff in later too to limit the cleaning).

design. bake. run. -- adding in the chocolate chips
adding the chocolate chips into the cookie dough

design. bake. run. -- chocolate chip cookie dough ready to be baked
these little dough balls are all ready to be baked

design. bake. run. -- freshly baked chocolate chip cookies
freshly baked chocolate chip cookies out of the oven

chocolate chip cookies ready to eat or gift! via design. bake. run.
the cookies are all done and ready to gift (or eat!)


chocolate chip cookies

ingredients

8oz (1 stick) butter, softened or melted
3/4 cup sugar
3/4 cup brown sugar
2 eggs
3/4 tsp baking soda
3/4 tsp baking powder
pinch of salt
1-3/4 to 2 cups all purpose flour
12 oz (or 1 bag) chocolate chips

directions

preheat oven to 350°F. line baking sheet with parchment paper or silicone sheet.

cream softened butter (or melt butter in microwave safe bowl) and sugar together. then add in the egg. once mixed, add in the baking soda, baking powder, salt and flour. mix until incorporated, then add in the chocolate chips.

scoop out a tablespoon portion (ball-like) onto the baking sheet. make sure to spread out them at least 2-inches apart. bake for 8-10 minutes until golden but still soft in the center (baking time varies depending on how chewy or crunchy you like your cookies). transfer hot cookies with a spatula to a rack to cool. after a few minutes, they're ready to eat! enjoy. :)

makes 24-36 small cookies. store cookies in a tightly sealed container for up to 5 days.

note: the 1-3/4 to 2 cups of flour is based on how thin or thick you'd like your cookies. i sometimes prefer them thin and crunchy so i put in less flour (hence the 1-3/4 cups). with this batch of cookies, i actually used 2 cups of flour. the more flour, the less thin/crispy they are.

Friday, September 14, 2012

wild blackberry crumb bars

design. bake. run. -- blackberry crumb bars

this was the blackberry crumb bars i made during labor day weekend earlier this month. on labor day c really wanted to go hiking so he insisted that we take him. we live pretty close to a state park with gorgeous view of the sf bay and beyond so going there for a hike was no biggie. plus we hadn't gone hiking in months (that was probably why c wanted to go).

halfway through our hike along this very overgrown trail we came across some bushes of wild blackberries. i'm not sure if c has ever had a freshly picked blackberry off the bush before so we picked a couple up and washed them for him. they were just ripe and perfectly sweet. we told ourselves we would get on with the hike and forget about the blackberries, but a few moments later we found ourselves picking a few blackberries here, a few there and before you know it, we had quite the handful of blackberries. let's just say all of our hands were full walking all the way back to the parking lot.

when we got home c said, "mommy, you could make a pie with that." i told him i could and i thought about it, but after a while, i couldn't be bothered to go through the process of making a pie crust. i'm not saying pie crusts are hard to make, i just didn't feel like making it that day. so long story short, i ended up making these delicious blackberry crumb bars. you see i've made these before but had never really made them with fresh blackberries. every time i thought about making them, i didn't have any fresh ones on hand and would always have to resort to the frozen kind. they would turn out alright, but not quite the same (now that i've had them with fresh ones).

these crumb bars turned out fantastic! c was so proud of himself for having been part of the berry picking and seeing an end result to it all.

below's the recipe should you be interested. i love these and cannot wait to make them again. you can substitute the blackberry for other berries. i'm sure another kind of fruit altogether will work just fine too. :)

design. bake. run. -- the making of these yummy blackberry crumb bars
mixing up the crumbly butter goodness topping

design. bake. run. -- freshly picked blackberries
the unexpected find from our hike, fresh blackberries!

design. bake. run. -- wild blackberries
a closeup shot of the wild blackberries

design. bake. run. -- delicious blackberry crumb bars right out of the oven
a close-up of the finished delicious crumb bars out of the oven and cooling on the rack

design. bake. run. -- mmmm... blackberry crumb bars
a shot of it out of the pan, before cutting

design. bake. run. -- yum! blackberry crumb bars
i couldn't help it, i had to eat the first cut square before taking this picture. so good! hehehe


blackberry crumb bars
recipe taken from martha stewart

Ingredients

6 tablespoons unsalted butter melted, and 1/2 cup (1 stick), room temperature, plus more for pan
1 3/4 cups all-purpose flour (spooned and leveled), plus more for pan
1/2 cup packed light-brown sugar
1/2 teaspoon salt
1/2 teaspoon baking powder
1 cup confectioners' sugar
1/2 teaspoon pure vanilla extract
2 large eggs
2 containers (5 ounces each) blackberries

Directions

Preheat oven to 350 degrees. Butter an 8-inch square baking pan. Line bottom with parchment paper, leaving an overhang on two sides; butter and flour paper, tapping out excess.

Make topping: In a medium bowl, whisk together melted butter, brown sugar, and 1/4 teaspoon salt; add 1 cup flour, and mix with a fork until large moist crumbs form. Refrigerate topping until ready to use.

In a medium bowl, whisk together remaining 3/4 cup flour, baking powder, and remaining 1/4 teaspoon salt; set aside. In a large bowl, using an electric mixer, beat room-temperature butter, confectioners' sugar, and vanilla until light and fluffy; add eggs, one at a time, beating well after each addition. Reduce speed to low; mix in flour mixture. Spread batter evenly in pan; sprinkle with blackberries, then chilled topping.

Bake until golden and a toothpick inserted in center comes out with moist crumbs attached, 40 to 45 minutes. Cool completely in pan. Using paper overhang, lift cake onto a work surface; cut into 16 squares.

Cook's Note: While you prepare the cake, refrigerate the crumb topping. This will help give it a nubbly texture once baked. To store, keep in an airtight container at room temperature, up to 3 days.

Thursday, September 13, 2012

chocolate cream cheese cupcakes

design. bake. run. -- chocolate cream cheese cupcakes

yes, i made some cupcakes last night! finally got around to trying out a recipe i pinned on pinterest (here and here). these are delish! you can have them as is (without the frosting). i added in that extra frosting because i personally have taken to liking my baked goods extra sweet. i know, it's awful huh? but yes, i really think the extra white chocolate frosting on top is just right. either that or the next time i make these again i must add in an extra spoonful of the cream cheese filling.

below's the recipe should you be interested in baking these yourself. they're super easy to make and the cake comes out moist and delicious. enjoy!

Chocolate Cream Cheese Cupcakes
recipe adapted from here

INGREDIENTS:

For the filling:
8 oz. cream cheese, softened
1/3 cup granulated sugar
1 egg
Pinch of salt
1 cup mini semisweet chocolate chips

For the cupcakes:
3 cups all purpose flour
2 cups sugar
2/3 cup cocoa powder
2 tsp. baking soda
1 tsp. salt
2 cups of water
2/3 cups vegetable oil
2 tbsp. white vinegar
2 tsp. vanilla extract

white chocolate frosting:
1 cup white chocolate chips
1-2 tbsp butter
1 cup powdered sugar
milk

INSTRUCTIONS:

Preheat oven to 350 degrees. Prepare muffin pan by lining with muffin liners or by spraying with cooking spray.

In the mixing bowl of a stand mixer, beat together the ingredients for the filling (except the chocolate chips) until light and fluffy. Gently fold in the chocolate chips. Set aside.

In a large bowl, mix together flour, sugar, cocoa powder, baking soda, and salt. Make a well in the middle of the dry ingredients and add in the water, oil, vinegar, and vanilla extract. With a whisk or wooden spoon, mix together the dry with the wet ingredients until well combined.

Fill muffin cups with 2/3 full of batter then spool 1 level tbsp. of filling into the center of each cupcake. Repeat until all batter and filling have been used up. Bake 20-25 minutes or until cake portion comes out clean with a toothpick (Personally, I usually just bake mine for 17-18 minutes only and they turn out fine). Let cupcakes cool in pan for 5 minutes before removing and transferring to wire rack to cool completely. Once cool, you can choose them to frost if you like!

Make frosting: Heat the white chocolate chips with the butter in the microwave for 30-40 seconds until melted. Then beat until mixed/smoothed and add in powdered sugar. Mix again to incorporate the sugar. At this point you'll want to add in a few tablespoons of milk to thin it out so it's not so stiff where you can actually mix it. Make sure to not add too much milk or it'll get runny. Once you find the right consistency, beat until it looks good and you should be all sit!

Store in airtight container.

Makes 24-30 cupcakes. Enjoy! :)

design. bake. run. -- homemade chocolate cream cheese cupcakes with white chocolate frosting

design. bake. run. -- chocolate cream cheese cupcakes

design. bake. run. -- homemade chocolate cream cheese cupcakes, so good!

design. bake. run. -- delish, chocolate cupcakes!

Monday, September 10, 2012

teething baby biscuits for the little one

design. bake. run. -- homemade teething baby biscuits

heart-shaped banana baby biscuits

baby teething biscuits

design. bake. run. -- homemade teething biscuits


i finally got around to making these teething baby biscuits for our little one. i have no idea what homemade teething biscuits are like, so i don't really know what to say about these. i guess i've always kind of imagined them sort of like a shortbread cookie, but these are nothing like that. they're a bit doughy. but that could be because of the ingredients used. it is a very simple recipe. please feel free to chime in if you know what they're supposed to taste like because i really have no idea.

below's the recipe should you like to try them for your little one(s). overall, i think this is a good starter recipe. you can adjust the ingredients to your liking. i personally like it because it's very simple and uses no added sugar. you can substitute regular flour for whole wheat or rice flour (gluten-free friendly). actually, you can even use barley or oat flour. your pick. ;)

Banana Teething Biscuits
recipe from here

- 1 cup whole wheat, all-purpose, rice, barley or oat flour
- 1 cup dry infant rice or oat cereal
- 1 very ripe banana, mashed until smooth
- 2 Tbsp. canola or olive oil

Preheat oven to 375°F. 
In a medium bowl, stir together the flour and cereal. In a small bowl, stir together the banana, oil and about 2 Tbsp. water; add to the dry ingredients and stir until you have a soft dough, adding a bit more water or flour as needed until the dough comes together and is not too sticky. (It will depend largely on the size of the banana, and how juicy it is.)

On a lightly floured surface, roll the dough out about 1/4-inch thick and cut into smooth shapes. i had a heart-shaped play dough cutter on hand so i used that. you can of course do circles or sticks (without pointy edges – squish them a bit with your fingers). Bake on an ungreased cookie sheet for 10-15 minutes, or until golden. Cool completely and store extras in an airtight container.

Note: Instead of the infant cereal, these can also be made with oats, ground in the food processor to a coarse flour.
Related Posts Plugin for WordPress, Blogger...