Showing posts with label brown sugar. Show all posts

Friday, March 8, 2013

browned butter burnt sugar french macarons

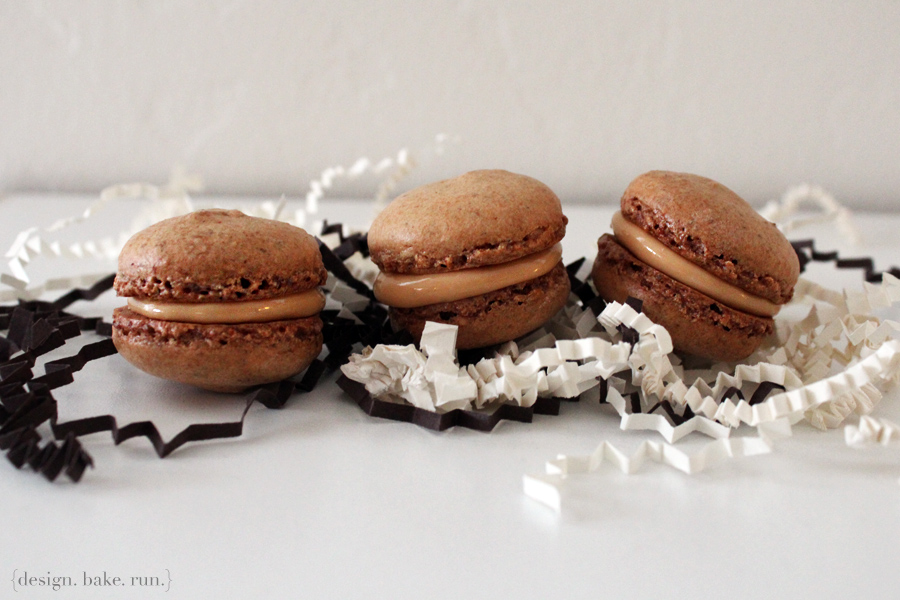
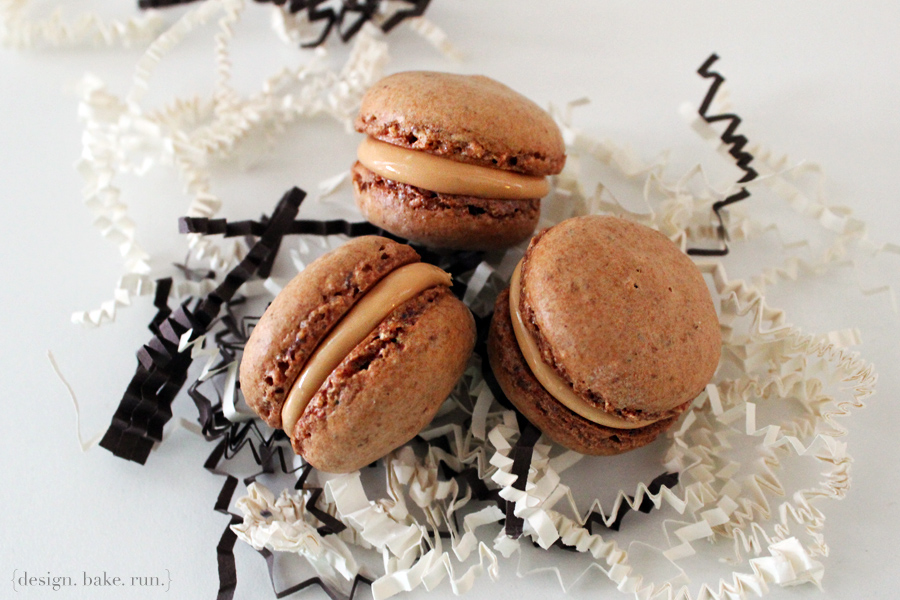
Burnt Sugar French Macarons via design. bake. run.

okay, so i was trying to make that delicious smelling and oh-so-yummy browned butter toffee frosting i made a while back for these macarons. i said i would try it again since it tasted so good last time. well, i did, except for it wasn't quite browned butter toffee. this time, let's just say i didn't let the butter brown enough and the brown sugar sat too long in that saucepan that it was much darker (and tasted a little burnt or more bitter than normal sugar). anyway, i quickly took it off the stove and pour the butter mixture into a mixing bowl to see what i got. sure enough, the brown sugar was definitely so much darker and as the mixture cooled, it began to hardened a bit (just as i'd expected). long story short, i decided to go with this anyway than making a new batch of the browned butter sugar mixture. the end result? quite a delicious buttercream i would say. i love all the crunch from the hardened melted brown sugar. the hint of burnt or bitterness from the sugar and sweetness of the butter makes it quite nice also. it's like this sweet but just a tad bitter butterscotch-y taste. all the flavors actually work very well together. m said it's his favorite macaron flavor to date. he's usually a tough critic when it comes to my baking (and cooking) so i'll take it. as for me? it's pretty awesome, i'll definitely be making this one again.

below's the recipe should you want to try it. these are really good, i can assure you. so make some and let me know what you think. as always, happy baking and eating!
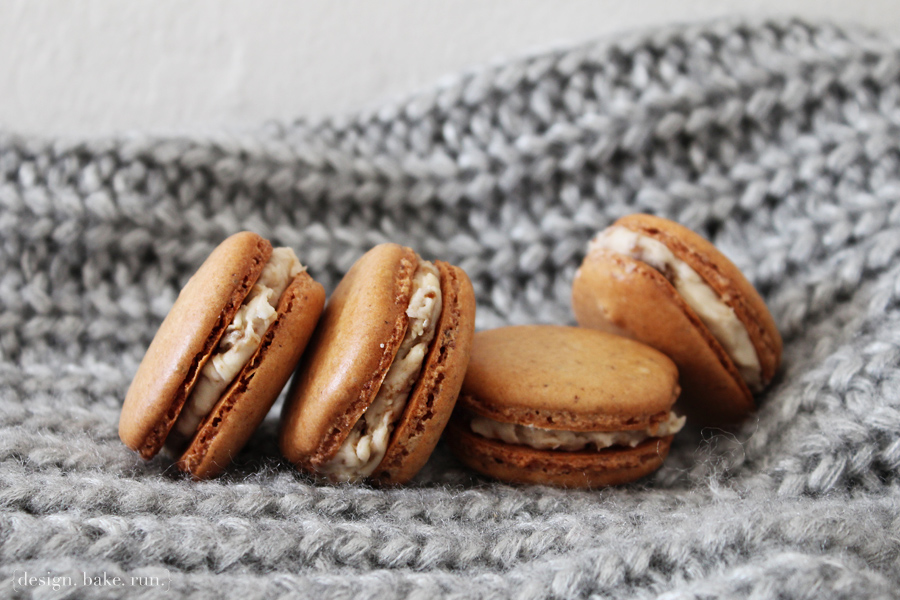
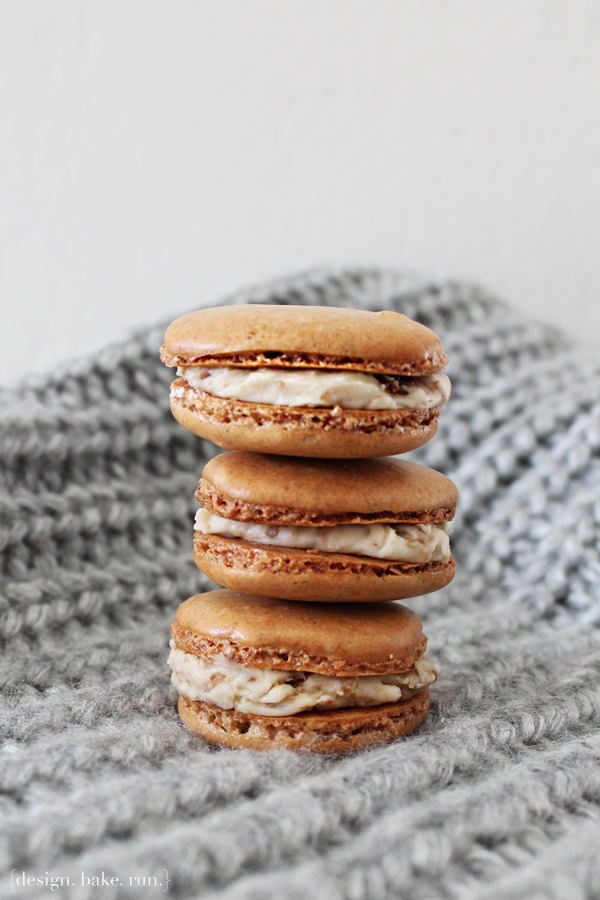
French Macarons with Browned Butter Burnt Sugar Buttercream Filling via design. bake. run.
i am in love with this browned butter burnt sugar buttercream filling. it's a little bitter yet sweet and has this buttersctoch-y taste to it and just taste really, really delicious!

browned butter burnt sugar french macarons

ingredients:

macaron batter:
1 cup powdered sugar
3/4 cup almond meal
2 large egg whites, at room temperature
1/4 cup brown sugar, firmly packed

browned butter burnt sugar buttercream filling:
4 tablespoons butter
3 tablespoons brown sugar
1-1/2 to 2 cups powdered sugar
cream or milk

directions:

to make the macaron batter/shells:
  1. line two baking sheets with parchment paper and have a pastry bag with a plain tip (about 1/2-inch, 2 cm) ready.
  2. sift together the powdered sugar and almond meal so there are no lumps. set aside.
  3. in the bowl of a standing electric mixer (or if you prefer, you can use a bowl and hand mixer), beat the egg whites until they begin to rise and hold their shape. while whipping, beat in the brown sugar until very stiff and firm, about 2 minutes.
  4. carefully fold the dry ingredients, in two batches, into the beaten egg whites with a flexible rubber spatula. when the mixture is just smooth and there are no streaks of egg white, stop folding and scrape the batter into the pastry bag (standing the bag in a tall glass helps if you’re alone).
  5. pipe the batter on the parchment-lined baking sheets in 1.35-inch circles evenly spaced one-inch apart.
  6. rap the baking sheet a few times firmly on the counter top to flatten the macarons. then let it sit for at least 30-60 minutes depending on humidity before baking them in the oven. about 10-15 minutes before baking, preheat oven to 350 degrees F. bake for 15 minutes.
  7. once macaron shells are out of the oven, let them sit for 30-60 seconds before removing the hot baking sheet underneath. let the macarons cool completely before removing them from the parchment paper.

for browned butter burnt sugar buttercream filling:
  1. brown the butter in a small saucepan over medium heat. i say let the butter melt and hang out until it gets to that nice golden color and your kitchen smells delicious.
  2. then add in the brown sugar and stir constantly until the sugar is dissolved. let it come to a boil if it's not already bubbly by now for an extra minute or two until you see the color really getting darker. it should be pretty dark by now. don't let it sit too long or else it will really burn or be too burnt! you want it to reach just burnt, not way over.
  3. turn off the stove and pour the brown butter and sugar mixture into a medium size bowl. stir it a few times with a fork to cool the mixture a little bit.
  4. add in the powdered sugar and with a fork (because that's what i use, but i guess you can use a hand mixer if you like) mix the ingredients together on low speed until they're all blended. you'll notice the sugar component hardening up. i just use the fork and try to break them up into bits. then turn to medium and mix until you've reached the right consistency for buttercream. add in a little cream or milk if it's too thick or more powdered sugar if it's too thin. once everything looks good it should be ready to use.
to assemble the macaron cookies:
  1. before assembling these cookies, make sure to pair up all the cookie shells so they are as close as possible in size.
  2. using a knife, spread a good amount of the brown butter burnt sugar buttercream on the inside of the macarons then sandwich them together.
  3. let them stand at least one day (keep them refrigerated) before serving (serve at room temperature), to meld the flavors.

store in airtight container for up to 5 days. makes 20-24 macarons. happy eating because these are really, really, good! :)

Wednesday, February 20, 2013

earl grey mini cupcakes with lemon buttercream frosting

Earl Grey Mini Cupcakes with Lemon Buttercream Frosting via design. bake. run.

a while ago i made some mini cupcakes. well, i made these as well. i have to say i love earl grey and lemon as a combination. it is the perfect little bite in your mouth. like a cute cup of lemony tea (although i must admit, i don't like and don't drink tea). mmmm... nevertheless, still delish!

below's the recipe for these cute little cupcakes should you be interested in making some. i say they work great for that next tea party or any occasion. so bake away and let me know what you think! :)

Earl Grey Mini Cupcakes with Lemon Buttercream Frosting via design. bake. run.
i'm not a big tea person, but i have to say, i love this lemon and earl grey tea combination. so good, the perfect little bite in your mouth for that afternoon sweet. :)

earl grey mini cupcakes with lemon buttercream frosting

ingredients:

mini cupcakes:

1-1/4 cup all-purpose flour
1/2 cup granulated sugar
1/4 cup brown sugar
1 tsp baking powder
1/4 tsp baking soda
1 earl grey tea bag

pinch of salt
1 cup buttermilk (you can use milk + 1 tbsp distilled vinegar)

1/4 cup oil

lemon buttercream:

 1/2 cup (1 stick) butter, room temperature

 3-3 1/2 cups confectioners’ sugar

 2-4 tablespoons of lemon juice
milk or cream, as needed

directions:

for the mini cupcakes:
  1. preheat oven to 350°f
  2. if using milk + vinegar as substitute buttermilk, combine milk and vinegar and stir to combine. set aside for 5 minutes. mixture will curdle. otherwise, if you're using buttermilk you can skip this step.
  3. in a large bowl, sift together flour, baking powder, baking soda, and salt. add in the earl grey tea bag and stir until combined.
  4. whisk sugar, oil and vinegar into buttermilk (or curdled milk mixture). make a well in the center of the dry ingredients and pour in the wet ingredients. mix until relatively smooth.
  5. fill mini cupcake liners with a scant tablespoon of batter (cups should be just under 2/3 of the way full). bake for 15 minutes or until lightly golden, and toothpick inserted in the center comes out clean.
  6. transfer to cooling rack and allow to cool completely.

for the frosting:
  1. cream butter in electric mixer for 1-2 minutes until fluffy.
  2. slowly add 1 cup sugar and beat until smooth. add in the lemon juice, a little bit at a time and mix until combined.
  3. add remaining confectioners’ sugar, 1/2 cup at a time, and beat until well incorporated. mix at medium-high speed until light and fluffy (2-3 minutes).
  4. add cream or more sugar as necessary to achieve proper consistency. pipe or spread onto cooled cupcakes.

makes 36 mini cupcakes (or 16 regular ones). enjoy and happy eating! :)

Wednesday, February 13, 2013

mini creme brulee cupcakes

Mini Creme Brulee Cupcakes via design. bake. run.

sometime last week i saw a creme brulee cupcake pinned on my pinterest feed. i've never attempted making creme brulee before because i couldn't be bothered to make the custard on the stovetop, then bake it in a hot water bath. but creme brulee as a filling in a cupcake? i thought, sure… why not. that must be a whole lot easier than making actual creme brulee! and i tell you, it was because making the custard is easy peasy. i've done a bunch of pastry cream before, this is just like it, minus an ingredient or two.

i have to say, these mini creme brulee cupcakes turned out fabulous and they taste so good! i didn't have a blow torch so i stuck these babies in the broiler for a minute (although next time i might try less, more like 45 seconds) to brown before serving. so yes, i don't have a blow torch currently, although i have a feeling i may be getting one very soon in the near future as the hubby did ask me if i had one and would i like one – haha! i told him, of course you know i don't have one and sure, i could use one so we can have more of these yummy custard desserts! blow torch or not, you can still make them!

below's the recipe should you want to make them. i modified my eggless vanilla recipe for these cupcakes with a little bit of brown sugar. i say the brown sugar really adds something extra to the cake, because the custard and cake together is just divine! try it, you won't be disappointed. happy baking (and eating)!

Mini Creme Brulee Cupcakes via design. bake. run.
yes, that's a lot of mini creme brulee cupcakes! but that's okay, because they are so good. :)

Mini Creme Brulee Cupcakes via design. bake. run.
i think this is my new favorite cupcake! a must-try, for sure.

creme brulee mini cupcakes

ingredients:

cupcakes:
1-1/4 cup all-purpose flour
1/2 cup granulated sugar
1/4 cup brown sugar
1 teaspoon baking powder
1/4 teaspoon baking soda

pinch of salt
1 cup milk (if using buttermilk, skip vinegar)
1 tablespoon cider vinegar

1/4 cup oil
1/2 teaspoon vanilla extract

creme brulee:
4 egg yolks
3 tablespoons sugar
2 cups heavy cream
1/2 teaspoon vanilla extract
1/4 cup brown sugar

directions:

mini cupcakes:
  1. preheat oven to 350°f.
  2. combine milk and vinegar and stir to combine. set aside for 5 minutes. mixture will curdle. if using buttermilk, skip this.
  3. in a large bowl, sift together flour, baking powder, baking soda, and salt.
  4. whisk sugar, oil, vanilla extract into curdled milk mixture (or buttermilk). make a well in the center of the dry ingredients and pour in the wet ingredients. mix until relatively smooth.
  5. fill mini cupcake liners with a scant tablespoon of batter (cups should be just under 2/3 of the way full).
  6. bake for 14-15 minutes or until lightly golden, and toothpick inserted in the center comes out clean. transfer to cooling rack and allow to cool completely.
  7. once cooled, core out the middle, enough to fill it with the creme brulee mixture. this step is important to do before moving on to the creme brulee mixture as you'll want to pour the mixture into the cupcakes as soon as it's complete.

creme brulee:
  1. beat egg yolks in medium bowl with electric mixer on high speed (or you can use a hand mixer if you like, or do it by hand with a whisk or fork), 5 minutes or until thick and light yellow. gradually beat in sugar.
  2. heat cream in medium saucepan over medium heat until just hot to the touch. stir in vanilla.
  3. a little at a time, so the eggs do not curdle, stir half of the cream into the egg yolk mixture.
  4. then stir all the egg yolk and cream mixture into the remaining cream in the saucepan. cook, stirring continuously, over low heat, 5 to 8 minutes, until mixture thickens; do not boil.
  5. remove from heat and use immediately to fill your cored mini cupcakes.

assembly:
  1. using a small spoon, spoon a generous portion of the custard to fill the cupcakes.
  2. let the cupcakes sit at room temperature for at least 30 minutes before refrigerating. refrigerate the mini cupcakes at least 2 hours before serving.
  3. before serving, sprinkle with brown sugar and place under preheated oven broiler (45-60 seconds, no more than 60 seconds unless you really like burnt sugar). or if you have a blow torch, torch the top of the cupcakes to get it to brown (like shown in the pictures above).
  4. serve immediately. enjoy!

makes 36 mini creme brulee-filled cupcakes (or about 16 regular ones). happy baking and eating! :) oh, if you don't want to eat them all right away (although i don't know why you wouldn't because they're so good! hehe), you can keep them in an airtight container, in the refrigerator for up to 2 days. anything after that, i'm not sure how good the cake or custard will be.

Friday, February 1, 2013

earl grey mini cupcakes with brown butter toffee frosting

Earl Grey Mini Cupcakes with Brown Butter Toffee Frosting via design. bake. run.

in honor of the san francisco 49ers being in the super bowl this super bowl sunday, i decided why not make some mini cupcakes. it's the perfect excuse to finally bake again, after taking a little break. the last time i made anything was for m's birthday party and those macarons for that contest and that was a couple of weekends ago, at least. i have to admit, i was a little burnt out from all the holiday baking.

alright, so back to these delicious looking cupcakes. yes, i knew i wanted to make some mini cupcakes, just wasn't sure which ones exactly. i didn't want to make the usual (chocolate or vanilla cupcakes), and after some time looking through the pantry i settled on some earl grey tea bags. so there you have it. why not?! earl grey mini cupcakes. either that or maybe some mini red velvets? well, i decided on the earl grey instead and i'm very glad i did because both recipes (the cake & frosting) turned out fabulous. one mini bonus is, the cake recipe is egg-free so it's great for anyone with an egg allergy! they are really the perfect bite.

i am in love with the brown butter toffee buttercream. i told m i will have to make it again and use it as a filling for whenever i make macarons. so glad i stumbled upon it... and all thanks to a crappy microwave at the moment. yes, i believe our microwave needs replacing. i couldn't even microwave the stick of butter to get it soften for just a few seconds that i decided to brown the butter instead. i'd never done a brown butter frosting before because i couldn't be bothered with cleaning another piece of equipment. but now that i've made it and tried it, i am for sure willing to go through the hassle of it all just for this delicious frosting. it is really THAT good!

below's the recipe for these delicious little one-bite (okay, maybe two from some?!) cupcakes. feel free to try them out and let me know how you like it. enjoy and happy baking! :)

Earl Grey Mini Cupcakes with Brown Butter Toffee Buttercream Frosting via design. bake. run.
i am in love with this buttercream frosting. the brown butter smells so good and the bits of toffee adds that perfect little crunch when biting into this mini cupcake. it's for sure a happy yummy bite!

earl grey mini cupcakes with brown butter toffee buttercream frosting

ingredients:

mini cupcakes:

1-1/4 cup all-purpose flour

1/2 cup granulated sugar
1/4 cup brown sugar

1 tsp baking powder

1/4 tsp baking soda
1 earl grey tea bag

pinch of salt

1 cup buttermilk (you can use 1 cup milk + 1 tbsp distilled vinegar)


1/4 cup oil

brown butter toffee buttercream:

1/2 cup (1 stick) butter, room temperature

3 to 3-1/2 cups confectioners’ sugar

1/4 cup brown sugar

milk or cream, as needed

directions:

for the mini cupcakes:
  1. preheat oven to 350°f
  2. if using milk + vinegar as substitute buttermilk, combine milk and vinegar and stir to combine. set aside for 5 minutes. mixture will curdle. otherwise, if you're using buttermilk you can skip this step.
  3. in a large bowl, sift together flour, baking powder, baking soda, and salt. add in the earl grey tea bag and stir until combined.
  4. whisk sugar and oil into buttermilk (or curdled milk mixture). make a well in the center of the dry ingredients and pour in the wet ingredients. mix until relatively smooth.
  5. fill mini cupcake liners with a scant tablespoon of batter (cups should be just under 2/3 of the way full). bake for 15 minutes or until lightly golden, and toothpick inserted in the center comes out clean.
  6. transfer to cooling rack and allow to cool completely.


for the frosting:
  1. melt brown butter in a small saucepan over low heat.
  2. once butter melts, let it simmer for a minute or two (or until it gets to that yummy golden color and smells wonderful!). add in the 1/4 cup of brown sugar. mix until incorporated (about 30-60 seconds maybe?), then remove from heat. if you go beyond, you may get burnt sugar and that's not so good.
  3. transfer browned butter and brown sugar mixture into the bowl of a mixer (or a medium size bowl if using a hand mixer).
  4. add in the confectioners' sugar, a couple tablespoons of milk or cream, and mix on low until everything is somewhat combined. at this point you'll notice that you have hard bits. those are what i'm calling it "toffee" in this frosting recipe. those sugar bits are so yummy and crunchy when you bite into them. okay, once the mixture is combined, turn the mixer to medium-high and mix until light and fluffy (2-3 minutes). add cream or more sugar as necessary to achieve proper consistency. pipe or spread onto cooled cupcakes.

makes 36 mini cupcakes. enjoy and happy eating! :)

Wednesday, January 9, 2013

brown sugar salted caramel macarons

Brown Sugar Salted Caramel French Macarons via design. bake. run.

who doesn't love salted caramel? i know i do!

so i decided to be a tad adventurous with my usual macaron recipe. instead of your good old white sugar, i went for the brown one instead. and what do you know? the brown sugar works just fine too! in fact, they actually give you a nice tint of brown to the shells and that sweet butterscotch-y flavor. it's really good, i must say. the added salted caramel filling is just scrumptious.

below's the recipe should you be interested. let me know how yours turn out if you do make them. happy baking and eating! :)

Brown Sugar Salted Caramel French Macarons via design. bake. run.
the brown sugar substitution give these macarons a nice butterscotch flavor. and to top it off with the salted caramel filling is just divine.

Brown Sugar French Macarons with Salted Caramel via design. bake. run.
these macarons make for the perfect gift, for anyone and any occasion. :)

brown sugar salted caramel french macarons

ingredients:

macaron batter:
1 cup powdered sugar
3/4 cup almond meal
2 large egg whites, at room temperature
5 tablespoons brown sugar, firmly packed

salted caramel filling:
1 bag of kraft caramel bits
2 tablespoons of milk (you can use water too)
1 teaspoon sea salt
1-2 cups powdered sugar (optional, i use this to thicken my caramel a bit)

directions:

to make the macaron batter/shells:
  1. line two baking sheets with parchment paper and have a pastry bag with a plain tip (about 1/2-inch, 2 cm) ready.
  2. sift together the powdered sugar and almond meal so there are no lumps. set aside.
  3. in the bowl of a standing electric mixer (or if you prefer, you can use a bowl and hand mixer), beat the egg whites until they begin to rise and hold their shape. while whipping, beat in the brown sugar until very stiff and firm, about 2 minutes.
  4. carefully fold the dry ingredients, in two batches, into the beaten egg whites with a flexible rubber spatula. when the mixture is just smooth and there are no streaks of egg white, stop folding and scrape the batter into the pastry bag (standing the bag in a tall glass helps if you’re alone).
  5. pipe the batter on the parchment-lined baking sheets in 1.35-inch circles evenly spaced one-inch apart.
  6. rap the baking sheet a few times firmly on the counter top to flatten the macarons. then let it sit for at least 30-60 minutes depending on humidity before baking them in the oven. about 10-15 minutes before baking, preheat oven to 350 degrees F. bake for 15 minutes.
  7. once macaron shells are out of the oven, let them sit for 30-60 seconds before removing the hot baking sheet underneath. let the macarons cool completely before removing them from the parchment paper.

for the salted caramel filling:
  1. put the caramel bits with the milk and sea salt in a microwaveable bowl and microwave for 1-1/2 to 2 minutes (i usually do it in 30 second increments).
  2. once it looks like the bits are melted or soft enough to stir, take it out and stir until everything is fully incorporated.
  3. let it cool until it's thick enough to spread. if it's still too runny, it's not ready yet. at this point, you can add in the powdered sugar to thicken up the mixture so you can use it quicker if you like. otherwise, i say hang out for a bit until it's ready. of course, if you've gone too long and the mixture is too stiff to spread, you can pop it back in the microwave for a few seconds to soften it.

to assemble the macaron cookies:
  1. before assembling these cookies, make sure to pair up all the cookie shells so they are as close as possible in size.
  2. using a knife, spread a good amount of the salted caramel on the inside of the macarons then sandwich them together.
  3. let them stand at least one day (keep them refrigerated) before serving (serve at room temperature), to meld the flavors.

store in airtight container for up to 5 days. makes 20-24 macarons. happy eating because these are really, really, good! :)
Related Posts Plugin for WordPress, Blogger...