Showing posts with label gifts. Show all posts

Tuesday, May 12, 2015

fruity cheerios macarons

Fruity Cheerios Cereal Macarons with Fruity Cheerios Buttercream Filling | design. bake. run.

hello again! yes, i know it's been forever since the last time i posted something here. i haven't been baking a whole lot lately just because i'm trying not to eat too much sweets these days. anyway, i did however get around to baking some french macarons for mother's day and actually remember to take some photos. :)

what i have here are fruity cereal french macarons. who says you can't use kiddie cereals as a macaron flavor? of course, the only not so great thing about this is i have no idea if the cereal is gluten-free or not. mostly likely not in my case. of course, if you want to make some cereal flavored macarons, you can always check your cereal to make sure if it's GF, or else keep in mind these macarons may not be so GF friendly.

okay, so these have become my favorite flavor at the moment. i'm not a big cereal fan but i do love my fruity sugary cereal. this is one way to eat it, you can say. actually, it may be one of the best ways to enjoy those colorful sugary cereals. so if you're up for baking up a batch, why not give this a try?! enjoy and happy baking. :)

Fruity Cheerios Cereal Macarons with Fruity Cheerios Buttercream Filling | design. bake. run.
this is my new favorite macaron flavor. who says crunched up colorful kiddie cereal can't make for some good-tasting and looking macarons? in love with these.

fruity cheerios french macarons with fruity cheerios buttercream filling

ingredients:

macaron batter:
1 cup powdered sugar
3/4 cup almond meal
2 large egg whites, at room temperature
5 tablespoons granulated sugar
1/4 tsp gel food coloring (optional – i didn't use any here)
1/4 cup crushed fruity cereal (i used fruity cheerios but i'm sure you can use fruit loops or equivalent), for sprinkling on top of piped macaron batter

fruity cereal buttercream:
1/4 cup crushed fruity cereal
2-4 tbsp milk
1/2 stick of butter, room temperature
1 to 1-1/2 cups of powdered sugar

directions:

to make the macaron batter/shells:
  1. line two baking sheets with parchment paper and have a pastry bag with a plain tip (about 1/2-inch, 2 cm) ready.
  2. sift together the powdered sugar and almond meal so there are no lumps. set aside.
  3. in the bowl of a standing electric mixer (or if you prefer, you can use a bowl and hand mixer – this is my prefer method), beat the egg whites until they begin to rise and hold their shape. while whipping, beat in the sugar until very stiff and firm, about 2 minutes.
  4. optinal: add in the gel food coloring.
  5. carefully fold the dry ingredients, in two batches, into the beaten egg whites with a flexible rubber spatula. when the mixture is just smooth and there are no streaks of egg white and the colors have combined, stop folding and scrape the batter into the pastry bag (standing the bag in a tall glass helps if you're alone).
  6. pipe the batter on the parchment-lined baking sheets in 1.35-inch circles evenly spaced one-inch apart. then sprinkle the piped batter with crushed fruity cereal.
  7. rap the baking sheet a few times firmly on the counter top to flatten the macarons. then let it sit for at least 30-60 minutes depending on humidity before baking them in the oven. about 10-15 minutes before baking, preheat oven to 350 degrees F. bake for 15 minutes.
  8. once macaron shells are out of the oven, let them sit for 30-60 seconds before removing the hot baking sheet underneath. let the macarons cool completely before removing them from the parchment paper.

for the fruity cereal buttercream filling:
  1. in a medium bowl combine the butter and sugar and mix until incorporated. then add in the crushed fruity cereal and mix until combine.
  2. next, add in the milk (1 tablespoon at a time) and mix until combine and you've reached the right consistency for buttercream. if it's too thick, thin it out with a little bit with more milk. if too thin, add in a little more powdered sugar.

to assemble the macaron cookies:
  1. before assembling these cookies, make sure to pair up all the cookie shells so they are as close as possible in size.
  2. using a knife, spread a good amount of the buttercream on the inside of the macarons then sandwich them together. note: you can certainly put the buttercream in a piping bag and pipe the buttercream onto the cookie. it's a lot easier i think and less mess. but i can't be bother to do this so i almost always just spread it with a knife.
  3. let them stand at least one day (keep them refrigerated in an airtight container) before serving (serve at room temperature), to meld the flavors.

store in airtight container for up to 5 days. makes 20-24 macarons. enjoy! :)


Friday, April 25, 2014

martha stewart's outrageous chocolate cookies

Martha Stewart's Outrageous Chocolate Cookies via design. bake. run.

i'm always a fan of a good cookie (recipe). this one here is for sure a keeper. plus, it comes from good old martha, which is a major plus. and on top of that, it's chocolate! what i love most about this recipe though is the fact that i don't need any fancy ingredients. everything you see here are items you pretty should have in stock already (assuming you are the occasional baker). or even if you don't, you can get these items easily with a quick trip to the grocery store.

these chocolate cookies are great. i love how soft and chewy they are. it's almost like eating a brownie, but in a cookie form. they make for great gifts as well. i actually made these for a girls night in event and we all loved it. well, i know i did. ;)

so if you're craving for some chocolates, or (chocolate) cookies.. why not give this a try? you won't be disappointed. :)

Martha Stewart's Outrageous Chocolate Cookies via design. bake. run.

Martha Stewart's Outrageous Chocolate Cookies via design. bake. run.

martha stewart's outrageous chocolate cookies
recipe from here

ingredients:
  • 8 ounces semisweet chocolate, roughly chopped
  • 4 tablespoons unsalted butter
  • 2/3 cup all-purpose flour
  • 1/2 teaspoon baking powder
  • 1/2 teaspoon salt
  • 2 large eggs
  • 3/4 cup packed light-brown sugar
  • 1 teaspoon pure vanilla extract
  • 1 package (12 ounces) semisweet chocolate chunks

directions:
  1. preheat the oven to 350 degrees.
  2. heat chopped chocolate and butter in a microwave-safe bowl in 20-second increments, stirring between each, until almost melted; do not overheat.
  3. in another bowl, whisk together flour, baking powder, and salt.
  4. in a mixing bowl, beat eggs, brown sugar, and vanilla on high speed until light and fluffy. reduce speed to low; beat in melted chocolate. mix in flour mixture until just combined. stir in chocolate chunks.
  5. drop heaping tablespoons of dough 2 to 3 inches apart onto baking sheets.
  6. bake, rotating sheets halfway through, until cookies are shiny and crackly yet soft in centers, 12 to 15 minutes. cool on baking sheets 10 minutes; transfer to a wire rack to cool completely. or if you prefer (which is what i do) you can eat them after they've cooled a little bit. typically that's a few minutes out of the oven. they taste best warm, i think.

note: don't worry if the batter seems thin. it should look more like a brownie batter than a cookie dough. oh, and do not bake the cookies to a crisp; they are meant to be soft and chewy.

Tuesday, February 11, 2014

chocolate-cinnamon cupcakes with mocha buttercream frosting

Mini Chocolate-Cinnamon Cupcakes with Mocha Buttercream Frosting via design. bake. run.

is it february already? and valentine's day is around the corner?!! alright, i haven't baked cupcakes in like forever. it's only fitting i make some (mini) chocolate cupcakes again, just in time for valentine's day. yes, i made some last year as well, in addition to the super popular (on pinterest) mini creme brulee cupcakes. those are pretty awesome as well.

to change it up a bit, i decided to add a little cinnamon to the usual (eggless) chocolate cupcake recipe. according to m, the cinnamon didn't come through a whole lot. i guess you could sort of tell it's there, but not really because once it's baked the chocolate and coffee flavors overpower the cinnamon? i don't know. so if you really like cinnamon, i say add in another teaspoon or so. otherwise, the recipe the way it is below will do just fine. and if you're a coffee fan, the mocha frosting is perfection. chocolate and coffee? done.

alright, below's the recipe if you'd like to bake some for this upcoming valentine's day or any day. i say it works for any occasion. so go ahead. they're super simple to make and the end results are always stunning... delish! enjoy and as always, happy baking!

The Perfect Valentine's Day Sweet! Chocolate-Cinnamon Cupcakes with Mocha Buttercream Frosting via design. bake. run.
who doesn't want to get some mini chocolate cupcakes this valentine's day? these are the perfect little gifts. we gave some away to c's teacher as an early valentine's day gift.

Chocolate-Cinnamon Cupcakes with Mocha Buttercream Frosting via design. bake. run.
i love how festive and valentine-y the added heart sprinkles are in these mini cupcakes.

chocolate-cinnamon cupcakes with mocha buttercream frosting

chocolate cupcakes:
1-1/2 cups flour
1 cup granulated sugar
1 tsp baking soda
1 tsp salt
1/3 cup cocoa powder
1 tsp instant coffee
2 tsp ground cinnamon
1/2 cup oil
1 cup water
1 tsp vanilla extract
1 tbsp vinegar

mocha buttercream frosting:
1/2 cup (1 stick) butter, room temperature
3 cups powdered sugar
2 tbsp instant coffee
2 tbsp cocoa powder
1/4 cup milk

directions:
for the cake: mix all ingredients together until moist and well blended. put in mini cupcake cups (1/2 full) and bake for 17-18 minutes at 350 degrees F.

for the mocha buttercream frosting: using a handmixer or in a stand mixer, mix all ingredients together until you've reached the right consistency for buttercream. if it's too thick, add in a little bit more milk. if it's too thin, you can add more powdered sugar. once everything looks good, pipe/frost and enjoy!

chocolate cake recipe makes about 16 regular cupcakes (or 45-50 mini cupcakes). buttercream frosting should make enough to frost all cupcakes (well, at least when i did it).

Monday, November 4, 2013

salted caramel french macarons

Salted Caramel French Macarons via design. bake. run.

happy november. we're in november already?!! well, that's a-okay with me. we are getting closer and closer to THE. BEST. TIME. OF. THE. YEAR. you know what that is! christmas. actually, no. thanksgiving and christmas. best holidays ever. or two of the best. ;)

okay, so i had my second wedding baking gig last month and these salted caramel french macarons were one of the four flavors requested. i have to say it was quite the yummy request because these turned out great. the salted caramel buttercream was light and almost fluffy-like. so airy and just perfect with the right amount of salty and sweetness combo. i don't think i've made a better salted caramel buttercream than this one.

below's the recipe for these good-looking french macarons should you want to make some. i say why not?! salted caramel is quite the hit these days. you cannot go wrong with it. and especially with the holidays coming up, these would make for a great holiday gift to anyone and everyone. i know i plan to bake some goodies and give them away this holiday season. you can too! :)

French Macarons with Salted Caramel Buttercream via design. bake. run.
i think i've found the perfect salted caramel buttercream recipe. these cute little french macaron cookies are so good and tastes even better as you age them longer. i say at least 3 full days.

french macarons with salted caramel buttercream

for the macaron shells:
1 cup (100g) powdered sugar
3/4 cup (60g) almond meal
2 large egg whites (60g), at room temperature
5 tablespoons (65g) granulated sugar
1/4 tsp golden yellow or any gel food coloring of your choice
salted caramel buttercream (recipe below)

for the salted caramel buttercream:
1/4 cup salted caramel sauce (recipe here)
1 stick (8 oz) butter, room temperature
1/2 tsp vanilla extract
1 cup powdered sugar

directions:

to make the macaron batter/shells:
  1. line two baking sheets with parchment paper and have a pastry bag with a plain tip (about 1/2-inch, 2 cm) ready.
  2. sift together the powdered sugar and almond meal so there are no lumps. set aside.
  3. in the bowl of a standing electric mixer (or if you prefer, you can use a bowl and hand mixer), beat the egg whites until they begin to rise and hold their shape. while whipping, beat in the sugar until very stiff and firm, about 2 minutes.
  4. add in the gel food coloring. then carefully fold the dry ingredients, in two batches, into the beaten egg whites with a flexible rubber spatula. when the mixture is just smooth and there are no streaks of egg white, stop folding and scrape the batter into the pastry bag (standing the bag in a tall glass helps if you’re alone).
  5. pipe the batter on the parchment-lined baking sheets in 1.35-inch circles evenly spaced one-inch apart.
  6. rap the baking sheet a few times firmly on the counter top to flatten the macarons. then let it sit for at least 30-60 minutes depending on humidity before baking them in the oven (okay, if you can't wait 30-60 minutes, i say at least 15 minutes to let them settle a little. just make sure the humidity isn't ridiculously high or your macarons won't turn out so pretty). about 10-15 minutes before baking, preheat oven to 350°F. bake for 15 minutes.
  7. once the macaron shells are out of the oven, let them sit for 30-60 seconds before removing the hot baking sheet underneath. let the macarons cool completely before removing them from the parchment paper.

to make the salted caramel buttercream:
  1. make the salted caramel sauce according to the recipe and cool to room temperature.
  2. in an electric mixer, beat the butter on medium high, speed until light and fluffy, about 3 minutes. then gradually add in the 1/4 cup salted caramel sauce.
  3. put the mixer on low and add the powdered sugar and vanilla. then increase the speed to medium and beat until fully incorporated.
  4. your buttercream should be good and ready for use!

to assemble the macaron cookies:
  1. before assembling these cookies, make sure to pair up all the cookie shells so they are as close as possible in size.
  2. using a knife, spread a good amount of the salted caramel buttercream on the inside of the macarons then sandwich them together. you can also put the buttercream in a piping bag and pipe the filling onto the cookie if you like. i do that sometimes, but most time i just spread it on.
  3. let them stand at least one day (keep them refrigerated) before serving (serve at room temperature), to meld the flavors. note: i say 3 days is the magic number. they taste so good after 3 days.

store in airtight container for up to 5 days. makes 20-24 macarons. happy eating because these are really, really, good! :)

Wednesday, June 19, 2013

raspberry jam french macarons

Raspberry Jam French Macarons via design. bake. run.

it's been a while since i've made french macarons. actually, these ones here i made last month for sabrina and andrew's one-year wedding anniversary. there wasn't a whole lot because i only made half the recipe. i of course, made her favorite ones as well, the coffee nutella, in addition to the salted caramel macarons as well. but needless to say, i thought the raspberry jam ones turned out fabulous. actually, all of them did. i personally love raspberry jam, so raspberry jam as a french macaron filling is just yummy.

below's the recipe should you want to make some. it's pretty simple so i say if you'd like to make some, go ahead. nothing too fancy, just a little gel or powder food coloring to add some color to your cookie shells and filling it with your favorite jam, store-bought or homemade.

okay, enjoy! :)

Raspberry Jam French Macarons via design. bake. run.
i love raspberry jam. so raspberry jam in a french macaron cookie is just a great creation. seriously, so good. :)

French Macarons with Raspberry Jam via design. bake. run.
these french macarons do make for the perfect gift.

raspberry jam french macarons

ingredients:

1 cup powdered sugar
3/4 cup almond meal
2 large egg whites, at room temperature
5 tablespoons granulated sugar
1/4 tsp red or pink gel food coloring
raspberry jam (or any jam of your choice), store-bought or homemade

directions:

to make the macaron batter/shells:
  1. line two baking sheets with parchment paper and have a pastry bag with a plain tip (about 1/2-inch, 2 cm) ready.
  2. sift together the powdered sugar and almond meal so there are no lumps. set aside.
  3. in the bowl of a standing electric mixer (or if you prefer, you can use a bowl and hand mixer), beat the egg whites until they begin to rise and hold their shape. while whipping, beat in the sugar until very stiff and firm, about 2 minutes.
  4. add in the gel food coloring. then carefully fold the dry ingredients, in two batches, into the beaten egg whites with a flexible rubber spatula. when the mixture is just smooth and there are no streaks of egg white, stop folding and scrape the batter into the pastry bag (standing the bag in a tall glass helps if you’re alone).
  5. pipe the batter on the parchment-lined baking sheets in 1.35-inch circles evenly spaced one-inch apart.
  6. rap the baking sheet a few times firmly on the counter top to flatten the macarons. then let it sit for at least 30-60 minutes depending on humidity before baking them in the oven. about 10-15 minutes before baking, preheat oven to 350 degrees F. bake for 15 minutes.
  7. once macaron shells are out of the oven, let them sit for 30-60 seconds before removing the hot baking sheet underneath. let the macarons cool completely before removing them from the parchment paper.

to assemble the macaron cookies:
  1. before assembling these cookies, make sure to pair up all the cookie shells so they are as close as possible in size.
  2. using a knife, spread a good amount of raspberry jam (or any jam really, of your choice) on the inside of the macarons then sandwich them together.
  3. let them stand at least one day (keep them refrigerated) before serving (serve at room temperature), to meld the flavors.

store in airtight container for up to 5 days. makes 20-24 macarons. happy eating because these are really, really, good! :)

Monday, June 3, 2013

mini vanilla cupcakes with lemon curd + vanilla buttercream

Mini Vanilla Cupcakes with Lemon Curd + Vanilla Buttercream via design. bake. run.

so far this year we've had 3 people leave us at my work place. and this most recent one will be missed a whole lot. let's just say lunches aren't quite the same without him or the overall vibe isn't quite the same without him. he's fun and has quite the personality anyone would love to have around. so as a little farewell whatever-you-call-it, i made him some mini cupcakes. i asked him what he'd like but he couldn't decide and said for me to bake whatever. and cupcakes it was.

below's the recipe for one of the cupcakes i made. i've always been a fan of amy sedaris's vanilla cupcake recipe so i took her recipe and adapted it a little bit for my little take on her vanilla cupcakes. the overall result? the mini cupcakes turned out great. very nice and moist and with the lemon curd and buttercream combo, they were scrumptious. oh, and yes, i made others as well. you'll see there are mini red velvets with cream cheese frosting and another vanilla with chocolate coffee frosting. but these mini vanilla cupcakes with lemon curd and vanilla buttercream toppings are getting the feature in this post. they really are good. i absolutely love that hit of tartness from the lemon curd as you plop that one-bite mini cupcake in your mouth. seriously, the combination of sweet and sour is just perfect.

so go ahead and make some. you can even make your own lemon curd or use store-bought ones. hey, even a favorite jam could work too. but i say the whole lemon and vanilla combo is the way to go if you're up to making the whole cupcake from scratch. give it a try and let me know what you think! enjoy and happy baking. :)

Mini Vanilla Cupcakes with Lemon Curd + Vanilla Buttercream Frosting via design. bake. run.
these mini vanilla cupcakes are delicious. i absolutely love amy sedaris's vanilla cupcake recipe and the lemon curd pairs perfectly with it.

Mini Red Velvets and Vanilla Cupcakes via design. bake. run.
everyone at work enjoyed these goodies. who doesn't like one-bite mini cupcakes?! :)

Mini Red Velvets and Vanilla Cupcakes via design. bake. run.
mini red velvets w/ cream cheese frosting + vanilla w/ chocolate coffee frosting + vanilla w/ lemon curd + vanilla frosting: these were some tasty cupcakes and they made the perfect mini going away gifts.

going away gifts for @sfkaos -- photo via mzrichee on instagram
yes, i instagram everything and lately it's been a lot of food photos. this was my instagram shot of the goodies i gave to my going away coworker.

mini vanilla cupcakes with lemon curd & vanilla buttercream frosting
cupcake recipe adapted from amy sedaris

cupcakes:
  • 1/2 stick unsalted butter, room temperature
  • 1/2 cup sugar
  • 1 egg
  • 1 teaspoon pure vanilla extract
  • 3/4 cup + 1 tablespoon all-purpose flour
  • 3/4 teaspoon baking powder
  • a pinch of salt
  • 2/3 cup buttermilk

vanilla buttercream frosting:
  • 1/2 stick unsalted butter, room temperature
  • 2 cups powdered sugar
  • 1 teaspoon pure vanilla extract
  • cream or milk

directions for cupcakes:
  1. preheat oven on to 375°F.
  2. in a medium bowl, sift together the flour, baking powder and salt and set aside.
  3. put butter in mixer and beat at medium speed until somewhat smooth.
  4. pour in sugar and beat well. add in the egg and mix well.
  5. then add: vanilla, the dry ingredients and buttermilk. beat until it looks like it is supposed to and pour into individual baking cups, until they are about 2/3 full.
  6. bake for 13-15 minutes or until golden brown.
  7. let cakes cool completely before topping it off with the lemon curd and frosting.
  8. makes 20-24 mini one-bite (or two?) cupcakes. or 6-8 regular ones (i can't guarantee the exact amount though because i only made mini ones).

directions for vanilla buttercream frosting:
  1. cream butter in electric mixer for 1-2 minutes until fluffy.
  2. slowly add in the sugar, vanilla extract and beat until light and fluffy; and has reached the right consistency; about 3-4 minutes. add cream or more sugar as necessary to achieve proper consistency.

enjoy! these mini cupcakes are best enjoyed within a day or two. happy eating! :)

you can check out these recipes as well:

Thursday, March 21, 2013

york peppermint pattie cookies

York Peppermint Pattie Cookies via design. bake. run.

i'm not a big fan of peppermint patties, but i don't not like it enough to pass up on it. well, my MIL and m are big peppermint patties fan. right after the holidays i picked up a couple bags of york peppermint patties (because being the frugal person i am – i know, it doesn't show here, these were on clearance at half off!) with the intention of using them to make some yummy baked goodies. three months later i finally got around to making something with them.

these york peppermint pattie cookies turned out great. they taste delicious and i love how good they turned out (look-wise). they're like a different version of your classic delicious mint chocolate chip cookie you can say. i love how the minty sweet cream is scattered in various parts of the cookie as you bite into it. oh! and during the baking, some of them melted and crystalized turning into something that's toffee-like when it cooled and hardened. those bites are also delish.

below's the recipe should you want to try and bake some yourself. i say go for it, because these just like all the other chocolate chip cookies (or any cookie recipe really) that i've made are superb. of course, i'm biased here. enjoy! :)

York Peppermint Pattie Cookies Make Perfect Gifts! via design. bake. run.
i gave some of these away as mini gifts to coworkers. oh, and also tested out some hand-lettered packaging.

York Peppermint Pattie Cookies via design. bake. run.
if you're a minty chocolate chip kind of fan, i say this is a must try recipe!

york peppermint pattie cookies

ingredients:
1 stick of butter, room temperature
1 cup granulated sugar
1/2 cup brown sugar
2 eggs
1-3/4 cups + 2 tablespoons all purpose flour
1 teaspoon baking soda
a pinch of salt
1 bag of york peppermint patties (you may not need the whole bag)

directions:
  1. preheat oven to 350° f.
  2. in a medium bowl, sift the flour, salt and baking soda and set aside.
  3. in a separate bowl with a fork (or you can do all of this in a mixer or hand mixer if you like) beat the butter and sugar (both granulated & brown) together until the nice and fluffy.
  4. add in the eggs and mix until everything is combined.
  5. then add in the dry ingredients and mix until everything is incorporated.
  6. now, at this point you'll want to take the peppermint patties out of their individual wrappers (assuming they came individually wrapped because that's what i used). break up each pattie into 3-4 pieces and add it to the cookie dough batter. once you have enough patties (i say about 20-25 or you can use the entire bag) broken up and added, mix the dough until everything is combined.
  7. then using a small cookie scooper (about 1 tablespoon in size) or you can use whatever you like (a spoon is fine too!), spoon about 1 tablespoon of the cookie dough onto a parchment-lined (or silicone mat) baking sheet. make sure each dough tablespoon is at least 2 inches apart.
  8. bake for 9-10 minutes or until the cookies are a light golden brown and outer edges start to harden yet centers are still soft and puffy.
  9. take cookies out of the oven and let them cool on the sheet for 10 minutes before removing them.
  10. enjoy at slightly warm temperature or put them in an airtight container/cookie jar.
makes 30-36 small cookies. enjoy! happy baking and eating. :)

Monday, March 18, 2013

browned butter coconut macarons

Browned Butter Coconut French Macarons via design. bake. run.

last friday was one of my coworkers' last day. she's moving back to nyc to be closer with her family. as a parting gift, i decided to make her some french macarons. when making the browned butter buttercream, we had some leftover coconut milk from m's first go at chicken biryani that we had for dinner so i decided instead of milk or cream, i would add in a little coconut milk. once the buttercream was completed, i could taste the hint of coconut in it. so i guess you can say that's how i got about to the name of this french macaron. i absolutely love coconut and have recently taken a liking to browned butter, so i think i'll be making this again whenever there's coconut milk leftover available.

so, how good is it? one word. scrumptious. below's the recipe should you want to try it. and if you do make some and do feel free to let me know what you think. as always, happy baking and eating!

French Macarons with Browned Butter Coconut Buttercream Filling via design. bake. run.
browned butter buttercream or anything has become a new favorite in my baking. i love how yummy it smells and tastes. the coconut and browned butter combo is perfect for this macaron! delish.

browned butter coconut french macarons

ingredients:

macaron batter:
1 cup powdered sugar
3/4 cup almond meal
2 large egg whites, at room temperature
5 tablespoons granulated sugar

browned butter coconut buttercream filling:
4 tablespoons butter
2-1/2 to 3 cups powdered sugar
2 tablespoons coconut milk
cream or milk, if needed

directions:

to make the macaron batter/shells:
  1. line two baking sheets with parchment paper and have a pastry bag with a plain tip (about 1/2-inch, 2 cm) ready.
  2. sift together the powdered sugar and almond meal so there are no lumps. set aside.
  3. in the bowl of a standing electric mixer (or if you prefer, you can use a bowl and hand mixer), beat the egg whites until they begin to rise and hold their shape. while whipping, beat in the sugar until very stiff and firm, about 2 minutes.
  4. carefully fold the dry ingredients, in two batches, into the beaten egg whites with a flexible rubber spatula. when the mixture is just smooth and there are no streaks of egg white, stop folding and scrape the batter into the pastry bag (standing the bag in a tall glass helps if you’re alone).
  5. pipe the batter on the parchment-lined baking sheets in 1.35-inch circles evenly spaced one-inch apart.
  6. rap the baking sheet a few times firmly on the counter top to flatten the macarons. then let it sit for at least 30-60 minutes depending on humidity before baking them in the oven. about 10-15 minutes before baking, preheat oven to 350 degrees F. bake for 15 minutes.
  7. once macaron shells are out of the oven, let them sit for 30-60 seconds before removing the hot baking sheet underneath. let the macarons cool completely before removing them from the parchment paper.

for browned butter coconut buttercream filling:
  1. brown the butter in a small saucepan over medium heat. i say let the butter melt and hang out until it gets to that nice golden color and your kitchen smells delicious.
  2. turn off the stove and pour the brown butter into a medium size bowl. add in the powdered sugar and the coconut milk and mix the ingredients together on low speed until they're incorporated. then turn the speed to medium and mix for 2-3 more minutes until everything is blended and you've reached the right consistency for buttercream. add in a little milk or cream if the buttercream is too thick or more powdered sugar if it's too thin. once everything looks good it should be ready to use.
to assemble the macaron cookies:
  1. before assembling these cookies, make sure to pair up all the cookie shells so they are as close as possible in size.
  2. using a knife, spread a good amount of the brown butter coconut buttercream on the inside of the macarons then sandwich them together.
  3. let them stand at least one day (keep them refrigerated) before serving (serve at room temperature), to meld the flavors.

store in airtight container for up to 5 days. makes 20-24 macarons. happy eating because these are really, really, good! :)

Tuesday, February 5, 2013

the perfect homemade gift -- brown butter chocolate chip cookies

Brown Butter Chocolate Chip Cookies via design. bake. run.

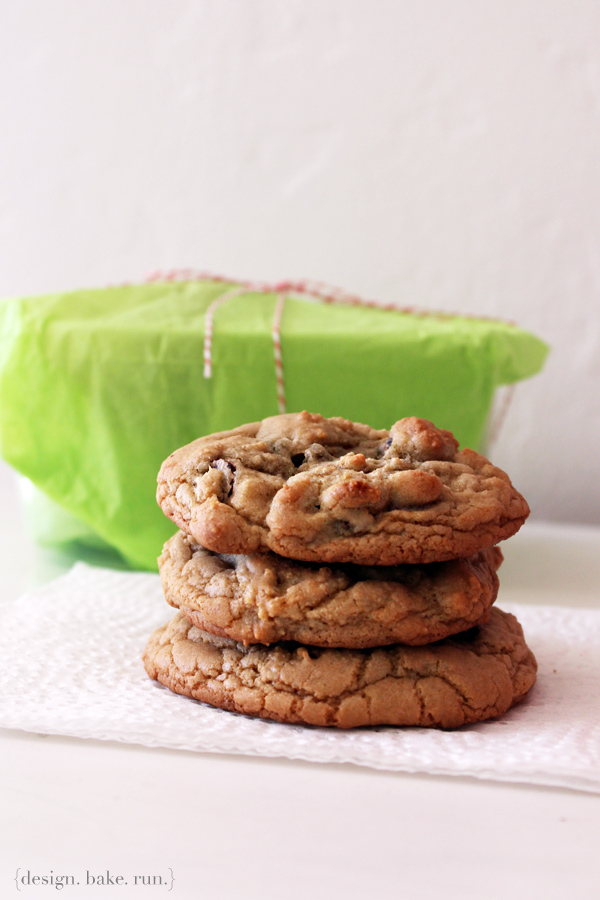
a while ago one of my co-workers gave me some old thomas the tank engine toys (trains/tracks/etc) that his daughter had outgrown. he asked me if i thought we would want them for c and i said sure. anyway, as a thank you gift, c and i made these yummy smelling and oh so tasty brown butter chocolate chip cookies for them. sure it was 2-3 weeks after the fact, but yes, we eventually got around to thanking them. c loves thomas, and so does little miss v. so it's not like one can never have too many tracks or trains. i don't think he'll really ever outgrow thomas or trains. he's your typical little boy.

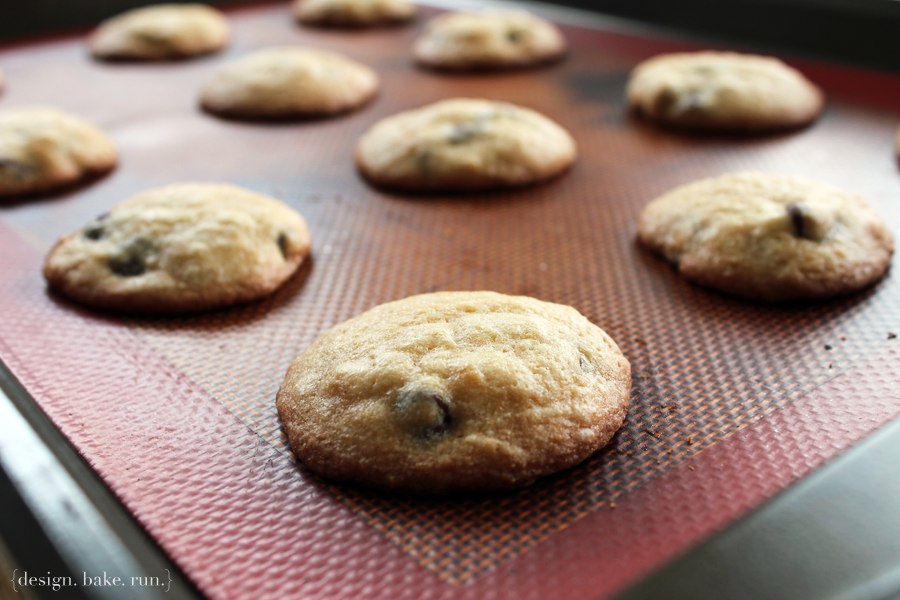
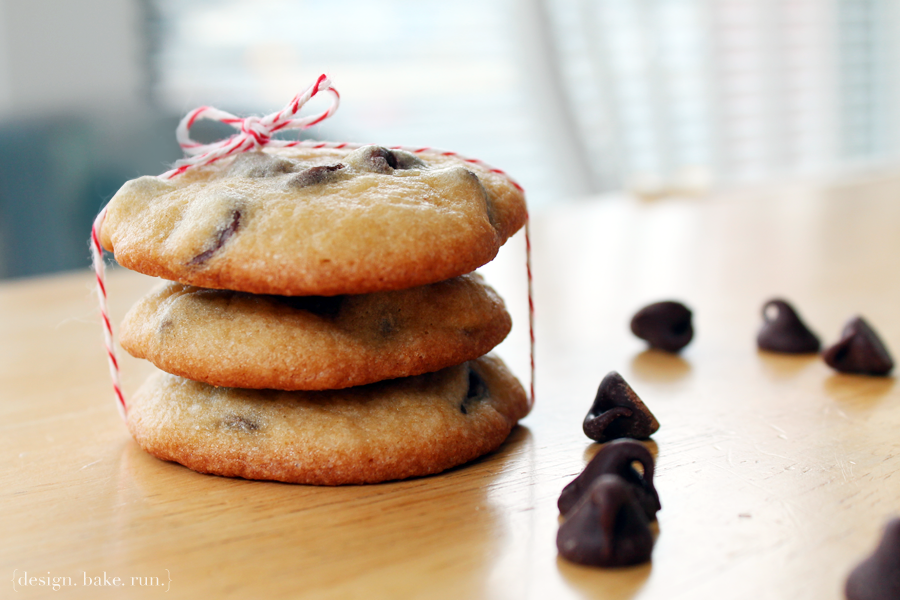
below's the recipe for these yummy cookies should you be interested in making some yourself. it's similar to other recipes, but not quite. i have to say browning the butter really makes a difference. i love how they crinkle once they come out of the oven. they give you that perfect chocolate chip cookie look, and taste just as good as they look too!

Brown Butter Chocolate Chip Cookies via design. bake. run.
chocolate chip cookies are one of our favorites! this brown butter recipe is so easy and simple, we'll be making it again soon. :)

brown butter chocolate chip cookies

ingredients:

1/2 cup (1 stick) butter
1-3/4 cups + 2 tablespoons all purpose flour
1 cup brown sugar
1/2 cup granulated sugar
1/2 tsp baking powder
1/2 tsp baking soda
1/4 tsp salt
2 large eggs
1 to 1-1/2 cups semi-sweet chocolate chips (you can use milk or dark if you prefer)

directions:
  1. preheat oven to 350° f.
  2. sift the flour, baking powder, baking soda and salt together in a bowl and set it aside.
  3. in a small saucepan, melt the butter and let it sit until it browns. you'll know it when you see a golden color and your kitchen smells wonderfully sweet!
  4. pour the browned butter into a mixer bowl (if you're using a mixer) or into a medium bowl (if using a hand mixer or fork -- that's my prefer method, easy cleanup!). add in the brown sugar and granulated sugar. mix butter and sugars until thoroughly blended. then mix in the 2 eggs. add the dry ingredients and mix until just combined. then stir in the chocolate chips.
  5. form scant 1/4 cup dough into ball. holding dough ball using fingertips of both hands, pull into two equal halves. rotate halves ninety degrees and, with jagged surfaces exposed, join halves together at their base, again forming a single cookie, being careful not to smooth dough’s uneven surface. place formed dough onto a silpat or parchment-lined cookie sheet, about 6 dough balls per sheet.
  6. bake for 10 minutes or until golden brown. you can rotate the sheet halfway through baking to ensure even baking if you like. i do it sometimes, other times i just skip it.
  7. let the cookies cool on the baking sheet for a few minutes before putting them on a rack to cool completely. serve warm with a glass of milk if you like. delicious!

makes 16 (3-1/2") large cookies. enjoy and happy eating! :)

Monday, December 17, 2012

12 days of christmas baking - day 11: peppermint bark

Milk Chocolate and White Chocolate Peppermint Bark via design. bake. run.

i was short on time this morning so for the 11th day of my christmas baking, i went with a no-bake holiday classic. yes, the ever so popular peppermint bark. typically you could just use white chocolate but today i decided that i'd do some milk chocolate version as well. i guess i could have combined both all in one so you get a little bit of each, but instead i did them separately. these are so good especially if you're a chocolate lover. the peppermint adds that nice christmas-y and festive feel to these chocolates. they really are delish! plus, it's so easy to make, you cannot pass up making these this holiday season.

below's the recipe should you be interested. i say go ahead and make some yourself! enjoy. :)

Black & White Peppermint Bark via design. bake. run.
we love peppermint bark. this classic christmas candy is perfect for any day of the week or gift-giving... and they're so easy to make too!

Chocolate & White Chocolate Peppermint Bark via design. bake. run.
here's another shot of these delicious peppermint bark :)

black & white peppermint bark
recipe adapted from all recipes

ingredients:
8 ounces high-quality semisweet chocolate, broken into pieces
2 teaspoons canola oil, divided
1/2 teaspoon peppermint extract, divided
8 ounces high-quality white chocolate, broken into pieces
25 peppermint candies or 6 candy canes, crushed

directions:
  1. Lightly grease a 2 9x9 inch pan and line with waxed paper, smoothing out wrinkles; set aside.
  2. Place the semisweet chocolate and 1 teaspoon of the canola oil in the top of a double boiler over just barely simmering water, stirring frequently and scraping down the sides with a rubber spatula to avoid scorching. When the chocolate is melted, stir in 1/4 teaspoon of the peppermint extract. Pour the melted chocolate into the prepared pan, and spread evenly over the bottom of the pan. Sprinkle half of the crushed peppermints over the chocolate layer. Refrigerate until completely hardened, about 1 hour.
  3. Repeat the steps above for the white chocolate portion.

note: if you want to make them all in the same pan (similar to ghirardelli's), then instead of prepping 2 pans, use just one and pour the white chocolate mixture on top of the semisweet one (just make sure you cool the semisweet mixture completely first). then wait until they're set before breaking them. enjoy! :)

Monday, September 17, 2012

chocolate chip cookies

design. bake. run. -- chocolate chip cookies

it was so cold yesterday morning that i suggested baking some of c's favorite cookies, chocolate chip cookies. he absolutely loves these. actually, he loves making them more than eating them. that's because he loves eating the dough rather than the finished baked cookies. i'm sure if i let him eat the entire bowl of cookie dough, he would too.

this is my go to chocolate chip cookie recipe. i've been using this for quite a few years now. i think when i first started baking about 5 years ago, i went through a bunch of different ones and somehow, this was the most simplest, easiest to remember. i don't even look at the recipe anymore when it comes to making this. you just kind of throw things in and they turn out fine. of course, sometimes it may be a tad sweeter than another, but in our household, we'd rather take it sweeter than not as sweet. i know, that's awful, yes! but ahhh, indulging once in a while is okay. heh! i only bake like 3-4 times a week! actually, not everyone in my household eat everything i bake. that's where my coworkers come in. they'll take any baked goods i can offer – which is fantastic. i really wouldn't know where the goodies will go if no one will eat them.

below's the recipe should you be interested in trying them yourself. it's really easy. you can do them in a mixer or with a bowl & fork if you don't have one. i can't be bothered to get out the mixer so i just do mine with a microwaveable bowl and fork. it's gotta be microwaveable so i can melt the butter. yes, i don't always have time or think ahead to leave the butter out to room temperature so it's soft enough to beat with the sugar. therefore a bowl where i can melt the butter in is great (and add all the other stuff in later too to limit the cleaning).

design. bake. run. -- adding in the chocolate chips
adding the chocolate chips into the cookie dough

design. bake. run. -- chocolate chip cookie dough ready to be baked
these little dough balls are all ready to be baked

design. bake. run. -- freshly baked chocolate chip cookies
freshly baked chocolate chip cookies out of the oven

chocolate chip cookies ready to eat or gift! via design. bake. run.
the cookies are all done and ready to gift (or eat!)


chocolate chip cookies

ingredients

8oz (1 stick) butter, softened or melted
3/4 cup sugar
3/4 cup brown sugar
2 eggs
3/4 tsp baking soda
3/4 tsp baking powder
pinch of salt
1-3/4 to 2 cups all purpose flour
12 oz (or 1 bag) chocolate chips

directions

preheat oven to 350°F. line baking sheet with parchment paper or silicone sheet.

cream softened butter (or melt butter in microwave safe bowl) and sugar together. then add in the egg. once mixed, add in the baking soda, baking powder, salt and flour. mix until incorporated, then add in the chocolate chips.

scoop out a tablespoon portion (ball-like) onto the baking sheet. make sure to spread out them at least 2-inches apart. bake for 8-10 minutes until golden but still soft in the center (baking time varies depending on how chewy or crunchy you like your cookies). transfer hot cookies with a spatula to a rack to cool. after a few minutes, they're ready to eat! enjoy. :)

makes 24-36 small cookies. store cookies in a tightly sealed container for up to 5 days.

note: the 1-3/4 to 2 cups of flour is based on how thin or thick you'd like your cookies. i sometimes prefer them thin and crunchy so i put in less flour (hence the 1-3/4 cups). with this batch of cookies, i actually used 2 cups of flour. the more flour, the less thin/crispy they are.

Thursday, September 6, 2012

more macarons!

i have been baking lately. i've just been too busy or lazy to post up pictures. below are a few macarons i've baked within the last couple of weeks. i think i've got my own little french macaron recipe down now. i know i mentioned before how i use david lebovitz's, but i think from his... i've derived my own little recipe, which is almost foolproof (well, at least the 3-4 times i've made it, it's turned out great!). i cannot wait to make some more macarons. until next time, enjoy the photos below! and yes, i'm still working on my food photo skills. right now they suck. it doesn't help i don't have a fancy camera either. hehehe.. enjoy!

french coffee macarons
coffee macarons with coffee chocolate filling -- these turned out sooooo yummy!

marbled coffee macarons with chocolate ganache

classic vanilla macarons
sometimes, the classic vanilla macaron is best. i love simple things and this is definitely one of them.

homemade baked goods as gifts
my gift packaging isn't quite there yet, but i'm trying. these look so much better than many of my previous ones.

Monday, July 23, 2012

i love french macarons

assorted french macarons

like i said in the previous post, i've been so busy i haven't had any time to bake! i can't get into details what's been taking up my time at the moment. anyway, i recently had a birthday and asked for pierre herme's macaron book as well as laduree's sucre book. i cannot wait to try out those recipes. macarons and i aren't quite there yet. we still have some things we need to work out. i know, you think by now i should have it down right? as you see, i have been making these cute little sandwich cookies for a little over a year now. they really are a challenge. sometimes you just don't know if the batch you just whipped up is going to come out right.

well, for now, enjoy these photos of some good-looking yummy macarons i made a couple months ago as a wedding gift for one of my coworkers. i think they really did turn out perfect, and so cute! but of course, i may be just a tad biased here. now, i just need to find some time to make these again.

i love macarons

french macaron gift box

delicious homemade french macarons

macarons! gift box

Tuesday, July 3, 2012

say hello!

hi there! as you can see, this is the official first entry of this newly created blog. design. bake. run. those three things are what i love to do most, apart from spending time with family and friends, of course. but as you'll notice as i get going on this blog, and hopefully i won't veer off course a whole lot here, but the majority of this blog will consist of anything design related, baking (cooking sometimes?!) and/or running (okay, exercise) happenings in and around my life. at least those are my intentions at the moment. so far now, sit back and enjoy some goodies i've collected for this first entry.


THE GIRL:

us in maui -- may 2012
yes, that above is yours truly and my always so wonderful and supportive hubby!

me in paris @ pierre herme - march 2012
while in paris this spring 2012, i got to try pierre herme. this is by far my favorite macaron place!

i run most mornings
i love early morning runs. not the best terrain, but for now, this will do.

san francisco, ca
this is where we call home. i love this city!

THE GOODS:

macarons! -- photo by sabrina ko
coffee nutella and salted caramel macarons for sabrina & andrew; photo courtesy of sabrina ko

love day cupcakes
i love baking mini cupcakes

hump days are better with cupcakes!
regular size cupcakes are delish as well!

i love macarons!
but lately, macarons have taken over. i'm still trying to perfect these babies.

[note: all baked goods apart from pierre herme, of course, were baked by me! :)]
Related Posts Plugin for WordPress, Blogger...