Showing posts with label parties. Show all posts

Wednesday, January 28, 2015

baked goodies perfect for a tea party!

Tea Party Goodies via design. bake. run.

ummm... so, i sort of hosted a mini tea party at work this week. any excuse to bake some yummy baked goods, right? i'm not big on tea or anything, but i'll take all the goodies that come with it. :)

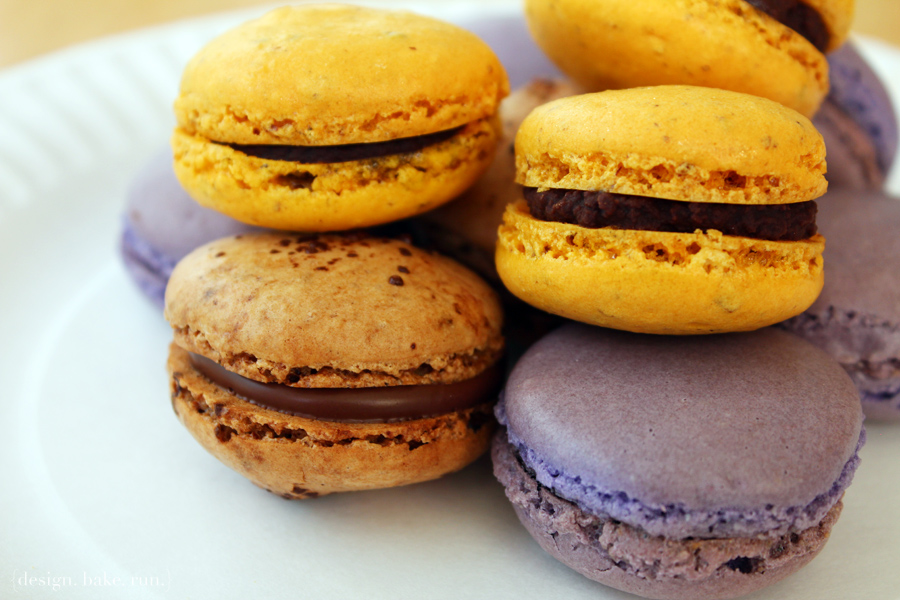
for our initial afternoon tea party kick-off, i settled on some coffee nutella macarons as well as some lemon cream cheese macarons (thanks to all the lemons in my garden), some mini lemon cupcakes with lemon icing, multi-berries scones, jam thumbprints and what better way to top it off then your not-so-typical savory bites, spam musubi. yup, you heard that right. we didn't have cute little tea sandwiches. we opted for spam musubi instead and those were delish! spam musubi is quite a hit with my coworkers and me. we'll take it any time of day, any day of the week, just as we'll take any of the other baked goodies.

anyway, the recipes are below if you'd like to bake any for your tea party or any party or just because. yeah, when you think about it, who needs an excuse to bake? i sometimes just bake because i wanted to. okay, enjoy and happy baking! :)

Mini Lemon Cakes and Multi-Berries Scones via design. bake. run.

multi-berries scones
recipe adapted from smells like home's blueberry scones

ingredients:
  • 8 tbsp (1 stick) unsalted butter, frozen whole
  • 1-1/2 cups fresh or frozen berries (i used a mix of blueberries, blackberries and raspberries)
  • 1/2 cup milk
  • 1/2 cup sour cream
  • 2 cups all-purpose flour, plus more for dusting the work surface
  • 1/2 cup sugar, plus extra for sprinkling
  • 2 tsp baking powder
  • 1/4 tsp baking soda
  • 1/2 tsp salt
  • 1 tsp finely grated lemon zest
  • 1 egg, for egg wash


directions:
  1. adjust an oven rack to middle position and preheat to 425° F. grate the frozen butter on the holes of a large box grater. if using fresh berries, place the berries in the freezer until needed. whisk together the milk and sour cream in a medium bowl; refrigerate until needed. combine the flour, 1/2 cup sugar, baking powder, baking soda, salt and lemon zest in a medium mixing bowl. whisk to combine. add the grated butter to the flour mixture and toss with fingers until thoroughly coated.
  2. add the milk mixture to the dry ingredients and fold with a spatula just until combined. transfer the dough to a generously floured work surface. dust the top of the dough with flour, and knead with well floured hands, 6-8 times, just until the dough holds together in a ragged ball. add small amounts of flour as needed to prevent sticking.
  3. roll the dough into a 12-inch square. fold the dough into thirds like a business letter (a dough scraper really helps with these steps). fold the short ends of the dough into the center in thirds, to form an approximate 4-inch square. transfer the dough to a plate lightly dusted with flour and chill in the freezer for 5 minutes.
  4. return the dough to the floured work surface and roll into an approximately 12-inch square again. sprinkle the berries evenly over the surface of the dough, and gently press down so that they are slightly embedded in the dough surface. using a dough scraper, roll the dough up to form a tight log. lay the log seam side down and press the the log into a 12 by 4-inch rectangle. using a sharp, floured knife, cut the rectangle crosswise into 4 equal rectangles. cut each rectangle diagonally to form 2 triangles. transfer to a parchment lined baking sheet.
  5. brush the tops of the scones with the egg wash and sprinkle lightly with sugar. if freezing ahead of time, flash freeze on the baking sheet for 20 minutes, then wrap individually and store in a freezer bag until needed. bake until the tops and bottoms are golden brown, 18-25 minutes. transfer to a wire rack and let cool at least 10 minutes before serving.


makes 12 scones (or however big/small you cut it)


Baked goodies perfect for any (tea) party! via design. bake. run.

mini eggless lemon cupcakes
recipe adapted from yum'e'licious

ingredients:

for the cupcakes
  • 1/2 cup butter
  • 1/2 cup sugar
  • 1 cup all purpose flour
  • 1 cup buttermilk (or do what i do; add 1 tbsp lemon juice to 1 cup of milk, stir, and let it sit for 5 minutes before using)
  • 1 tsp baking powder
  • 1/2 tsp baking soda
  • 1 tbsp lemon juice
  • zest of 1 medium sized lemon
  • few drops of yellow color, optional


for the lemon icing drizzle
  • 1/4 cup powdered sugar
  • 2 tbsp lemon juice


directions:
  1. if you don't have buttermilk, this is when you mix the lemon juice and milk together and set it aside while you do everything else.
  2. preheat oven to 350°F. then sift the flour, baking powder and the baking soda in a good size bowl and set that aside.
  3. in another bowl, cream the butter and sugar until light and fluffy. then add in 1/3 cup buttermilk and beat again until fluffy. repeat again with another 1/3 cup. then add the lemon zest and lemon juice and mix well. now, if you want to use some yellow food coloring, this is where i add it in.
  4. now add in the dry ingredients and mix well before adding in the remaining buttermilk; mix again until incorporated.
  5. fill the mini cupcake cups to 2/3 full (makes about 20-24) and bake it in the oven for 14-15 minutes. or if you'd rather do a loaf cake instead, pour the batter into a greased loaf tin (9"x5") and bake it for 20-25 minutes or until a toothpick comes out clean.
  6. let the mini cupcakes (or loaf) cool completely before drizzling the icing over. to make the icing, just mix the powdered sugar and lemon juice together. if it's too runny, just add more powdered sugar; and if too thick, add more lemon juice.


makes about 20-24 mini cupcakes or one loaf


French macarons, mini cupcakes, scones, jam thumbprints and spam musubi... perfect treats for any party via design. bake. run.

other goodies you can find recipes for:

Tuesday, February 25, 2014

mini apple crumbles

Mini Apple Crumbles via design. bake. run.

i was going through my stacks and stacks of magazines sometime last week and ran across a recipe for mini apple crumbles. yes, i've got piles of shape, marie claire, better homes & gardens, 7x7 and ca home & design magazines just to name some that i've left it piled on (and some i have yet to go through them). i guess i'm still one of the few left who appreciates actual printed materials over those ebooks or e-zines. okay, going off topic here. yes, as i was going through one of my shape magazines from a few months back, i noticed a recipe for mini apple crumbles. i think it must have been shape's november 2013 issue. leafing through the pages and seeing that, a lightbulb went in my head. well, hello… we've got a bunch of oatmeal lying around, i could actually put some to use with this recipe! so off i went with it.

okay, i've actually adapted the recipe a bit because i didn't have any maple syrup on hand or couldn't be bothered with the spices that were in it. but overall, the recipe was pretty straight forward. so go ahead and bake some. these make for perfect little one-bite treats and are great for parties or any occasions. :)

One-Bite Mini Apple Crumbles via design. bake. run.
these one-bite mini apple crumbles make for the perfect little party treats and has only 95 calories.

Mini Apple Crumbles via design. bake. run.
this recipe is super simple to make. i love how you get many different kinds of texture, crunch and flavors from just one tiny bite.

mini apple crumbles
recipe from shape magazine's november 2013 issue

crumble topping:
cooking spray
1/2 cup rolled oats
1/2 cup whole-wheat flour
1 teaspoon ground cinnamon
pinch kosher salt
1/3 c maple syrup
2 tablespoons cold, unsalted butter, cut into small pieces

apple filling:
2 firm apples, peeled, cored and diced
2 tablespoons maple syrup

directions:
preheat over to 350°F. lightly coat a 12-cup mini muffing pan with cooking spray and set aside.

to make the crumble topping, combine oats, flour, cinnamon, and salt in medium bowl. stir in maple syrup until well coated. use a fork to smash the butter pieces into the oat mixture until crumbly. Set aside.

to make the apple filling, add apples, maple syrup, and 1/2 cup water to a small saucepan. cook over medium heat, stirring occasionally, for 5 minutes. remove from heat and let cool slightly.

meanwhile, place 1 teaspoon of the oat mixture into the bottom of each muffin cup. see your fingers to gently press down to form  a solid crust. Place 1 tablespoon of the apple  mixture over each and top with remaining crumble distributing evenly among all muffin cups.

bake for 10 to 15 minutes or until golden brown. remove from oven, let cool to room temperature, then use an offset spatula or a butter knife to gently remove from pan. serve at room temperature.

makes 12 mini apple crumbles. enjoy!

nutrition facts: 95 calories; 3 g fat; 18 g carbs; 1 g protein; 1 g fiber; 22 mg sodium; 20 mg calcium

Monday, February 3, 2014

coral french macarons with citrus buttercream filling

Coral Macarons with Citrus Buttercream Filling via design. bake. run.

okay, i finally got around to posting the recipe for these coral shell french macarons with citrust buttercream. yeah, as mentioned before... i've just been busy with life in general. ;)

a few weeks ago i test baked some coral color macarons for a friend's baby shower (that's the link for the awesome photos she took of the baby shower) she was hosting. i haven't made any in that particular color before so i wanted to make sure i got the color right before doing the real thing. well… the test macarons turn out fantastic! the coral color was spot on and super vibrant. the shells were baked perfectly and the whole cookie flavor combination was pretty good (i only say pretty good because i'm not that fond of citrus buttercream or citrus baked goods too much). if only the ones i delivered was just like these test versions, i wouldn't have had to bake 3 consecutive nights just to get them to par. yeah, it sucked the first two nights getting hollow cookie shells after hollow cookie shells. on the surface they look perfect… yeah, until you break into them and all you see is an empty shell. boo. so yeah, i tried correcting them as much as i could and finally was able to get some decent ones. just sucked it took so long and so many batches. a lot of macaron shells ended up in the garbage. some, i did save and kept them as is (without filling) to have them available for a sweet treat.

alright, here's the recipe. now, just don't over whip the egg whites or fold too much okay? that way your shells will come out perfect and not crazy hollow or spread like crazy and have no feet. good luck and enjoy! :)

Coral Macarons with Citrus Buttercream Filling via design. bake. run.
for any citrus flavor fan, these should hit the spot. try adding in some marmalade and it's even better. the ones i delivered for the baby shower had a little spread of kumquat marmalade on top of the buttercream.

Coral and aqua shell macarons for Hot Air Balloon-Themed Baby Shower -- photo via Sabrina Ko Photography
here's a photo of the macarons (vanilla, mint-chocolate and citrus) i made for the baby shower. notice how the coral color isn't as vibrant as the test ones above? yeah, i did try! photo via sabrina ko.

Coffee Nutella French Macarons -- photo via Sabrina Ko Photography
here's a shot of the coffee nutella french macarons. these are always a hit. photo via sabrina ko.

coral macarons with citrus buttercream filling

ingredients:

macaron batter:
1 cup powdered sugar
3/4 cup almond meal
1/8 tsp pink and 1/4 tsp orange gel food coloring (or any food coloring of your choice)
1 tbsp citrus (orange, lime & lemon) zest
2 large egg whites, at room temperature
5 tablespoons granulated sugar

citrus buttercream:
1 tbsp citrus zest
2-4 tbsp citrus juice
1/2 stick of butter, room temperature
2 cups of powdered sugar

directions:

to make the macaron batter/shells:
  1. line two baking sheets with parchment paper and have a pastry bag with a plain tip (about 1/2-inch, 2 cm) ready.
  2. sift together the powdered sugar and almond meal so there are no lumps. add in the citrus zest and stir it to make sure it's fully incorporated with the sugar and almond meal mixture. set aside.
  3. in the bowl of a standing electric mixer (or if you prefer, you can use a bowl and hand mixer), beat the egg whites until they begin to rise and hold their shape. while whipping, beat in the sugar until very stiff and firm, about 2 minutes.
  4. add in the gel food coloring.
  5. carefully fold the dry ingredients, in two batches, into the beaten egg whites with a flexible rubber spatula. when the mixture is just smooth and there are no streaks of egg white and the colors have combined, stop folding and scrape the batter into the pastry bag (standing the bag in a tall glass helps if you’re alone).
  6. pipe the batter on the parchment-lined baking sheets in 1.35-inch circles evenly spaced one-inch apart.
  7. rap the baking sheet a few times firmly on the counter top to flatten the macarons. then let it sit for at least 30-60 minutes depending on humidity before baking them in the oven. about 10-15 minutes before baking, preheat oven to 350 degrees F. bake for 15 minutes.
  8. once macaron shells are out of the oven, let them sit for 30-60 seconds before removing the hot baking sheet underneath. let the macarons cool completely before removing them from the parchment paper.

for the citrus buttercream filling:
  1. in a medium bowl combine the butter and sugar and mix until incorporated.
  2. then add in the citrus juice (1 tablespoon at a time) and zest and mix until combine and you've reached the right consistency for buttercream. if it's too thick, thin it out with a little bit with more juice or milk or cream. if too thin, add in a little more powdered sugar.

to assemble the macaron cookies:
  1. before assembling these cookies, make sure to pair up all the cookie shells so they are as close as possible in size.
  2. using a knife, spread a good amount of the buttercream on the inside of the macarons then sandwich them together. note: you can certainly put the buttercream in a piping bag and pipe the buttercream onto the cookie. it's a lot easier i think and less mess. but i can't be bother to do this so i almost always just spread it with a knife.
  3. let them stand at least one day (keep them refrigerated) before serving (serve at room temperature), to meld the flavors.

store in airtight container for up to 5 days. makes 20-24 macarons.


Wednesday, January 29, 2014

caramel popcorn

Caramel Popcorn via design. bake. run.

i have been eyeing homemade caramel popcorn for the longest time. i think i've had these down for the little kiddies birthday party 2 years ago but never really got around to it. well, i finally made some a couple of weeks ago for m's birthday party. and i have to say, they are so easy to make! why have i not just done it then? i don't know... but what i do know is, once you've got the caramel made (you'll need a candy thermometer for this), the rest is easy peasy. and besides, who says you have to use the popcorn kernels and not regular microwavable popcorn? i just went ahead with the classic microwavable bags of popcorn (because you can't beat an easy cleanup) and these sweet treats still turned out delicious. plus, doing the whole popcorn kernel thing with oil in a pot is just too much work! oh, and this recipe uses apple juice so it's even better. it gives you a nice hint of apple flavor which you cannot beat. and for sure a great way to use up those half gallons or whatever size of apple juice bottle that's been sitting in our fridge for days and days (maybe weeks even?) – because we can't drink it all!

alright, the recipe for this caramel popcorn is below if you'd like to make some yourself. i say go ahead because it's really that good. you'll literally eat half of it in one sitting if you don't stop yourself already. hahaha... that's what m and i did the night i made these. we had to remove ourselves away from the sheet pan while these goodies rest.

okay, enjoy! :)

Caramel Popcorn via design. bake. run.
this recipe is super easy to make. i never thought it was this simple!

Caramel Popcorn via design. bake. run.
simply made paper cones are a great way to distribute these sticky but super yummy treats. who says you can't have a bouquet of caramel popcorn?

Caramel Popcorn via design. bake. run.
make these sweet stuff for your next birthday party or any occasion. they'll sure to be a hit. these definitely were for m's birthday party.

caramel popcorn
recipe adapted from the food network

ingredients:
  • 2 tablespoons vegetable oil
  • 2/3 cup popcorn kernels (or you can use two bags of microwave popcorn and omit the oil above)
  • 2 cups apple juice
  • 2 cups packed light brown sugar
  • 1/4 cup light corn syrup
  • 12 tablespoons (1 1/2 sticks) unsalted butter, cut into pieces
  • kosher salt

directions:
  1. line 2 baking sheets with parchment paper (or a silpat will do too). if using popcorn kernels, heat the vegetable oil in a pot over medium-high heat. add the popcorn kernels; cover and cook, shaking the pan, until the popping subsides. remove from the heat and let any remaining kernels pop for 30 more seconds. if using microwave popcorn bags, follow the directions on the package. once popcorns are popped, divide the popcorn between the prepared baking sheets, discarding any unpopped kernels.
  2. make the caramel: bring the apple juice, brown sugar and corn syrup to a boil in a large heavy-bottomed saucepan over medium-high heat. cook without stirring until the mixture is deep amber and a candy thermometer registers 280 degrees F, about 30 minutes (the caramel will bubble vigorously toward the end of the cooking time).
  3. stir the butter into the caramel until melted. add 2 teaspoons salt and cook for another minute. remove from the heat. pour the hot caramel over the popcorn mixture and carefully toss with two rubber spatulas. let cool slightly, then separate the mixture into clusters while still warm. let cool completely.

note: i actually pour all my popcorn into a large bowl instead of putting them on the baking sheets. once the caramel was made, i pour those over the popcorn and tossed them while still in the bowl (kind of like making rice krispy treats). but the above method works too. i guess you can pick whichever is easiest. :)

Wednesday, November 14, 2012

now that's a lot of macarons!

That's A LOT of Macarons via design. bake. run.

as mentioned in a previous post, yes, i did make 120 macarons (40 of each: coffee nutella, raspberry and chocolate ganache -- that's the one with the gold sparkly macaron shells) for a wedding a few weeks back. here are the photos of them and oh, they look scrumptious. i haven't baked any macarons since and now looking at them, it makes me want to bake some. hmmmm... one day soon, i'm sure. maybe i'll experiment with some holiday christmas-y flavor or something. you can't go wrong with a peppermint candy and eggnog or i don't know, something with marshmallow and hot cocoa. we'll see what i come up with the next time i bake these babies again. :)

alright, enjoy the photos! of course, if you'd like to make some macarons yourself, i do apologize that i don't have my recipe up yet. but when i do, i will certainly share it on here. in the meantime, you can browse through these previous posts and get david lebovitz's recipe from one of these posts.

Delicious French Macarons via design. bake. run.

Sparkly Gold French Macarons with Chocolate Ganache via design. bake. run.

Chocolate Ganache French Macarons via design. bake. run.

Homemade French Macarons via design. bake. run.

Coffee Nutella French Macarons via design. bake. run.

Coffee Nutella and Raspberry French Macarons via design. bake. run.

Wednesday, November 7, 2012

mini chocolate cupcakes with chocolate ganache

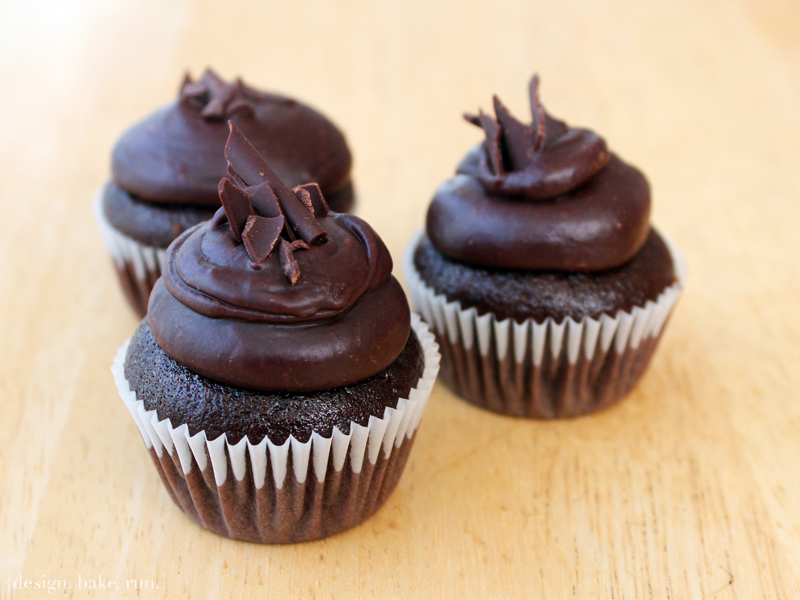
Mini Eggless Chocolate Cupcakes with Chocolate Ganache via design. bake. run.

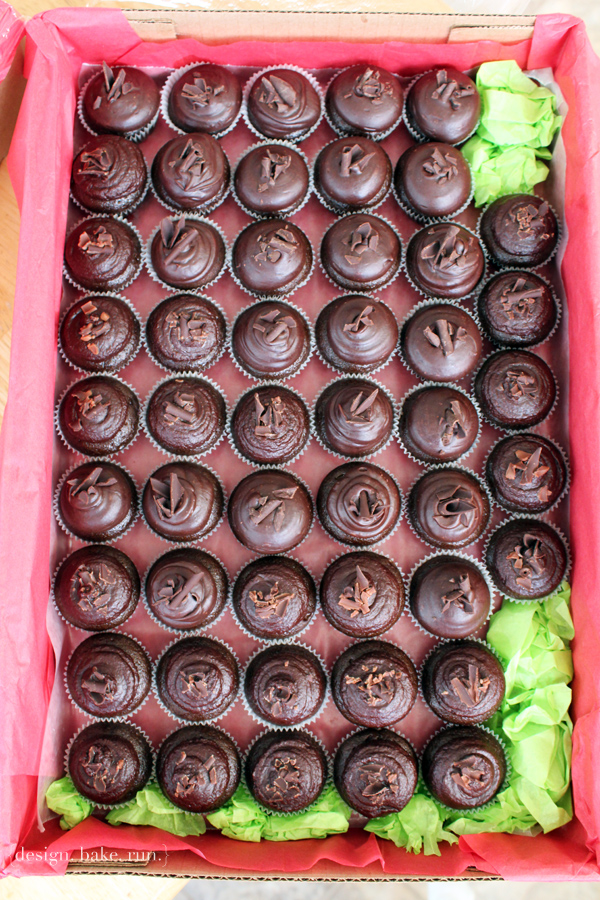
a couple of weeks ago i had the honor and pleasure of baking 100 mini cupcakes (50 chocolate & 50 red velvets) and 120 macarons (these photos to come later in another post when i have time) for one of my coworker's friend's wedding reception. the friend wanted to have a dessert table and have these goodies there. so with that said, i got baking a couple of days leading up to the big day. of course, not these cupcakes. these babies were made the night before/morning of the reception. i have to say they turned out beautifully and tasted yum!

below's the recipe should you be interested in making some yourself. i absolutely love this recipe. it has been my go-to chocolate cupcake recipe ever since i discovered it within the last year. it's also an egg-free recipe so it's perfect for anyone who's got an egg allergy. definitely cannot beat that. enjoy! oh, and if you do make some, please feel free to share your thoughts on it and how they turn out! ;)

Mini Chocolate Cupcakes with Chocolate Ganache Frosting via design. bake. run.
now, that's A LOT of chocolate cupcakes eh? and did i mention, they're eggless?! yup, so eat up! :)

Mini Chocolate Cupcakes with Chocolate Ganache Frosting via design. bake. run.
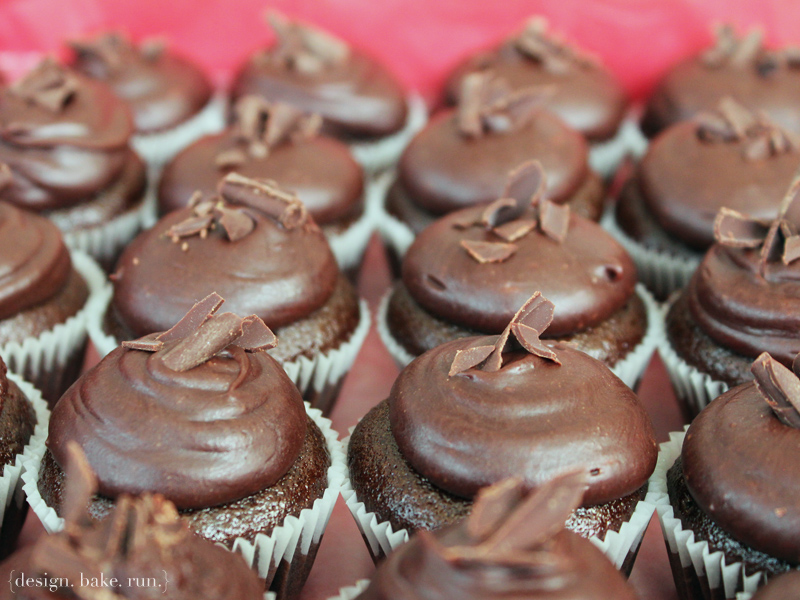
a closer shot of these yummy one bite (or two!) cupcakes

Mini Chocolate Cupcakes with Chocolate Ganache Frosting via design. bake. run.
i absolutely love this cake recipe. they turn out perfect every time and the chocolate ganache is just delish, especially for chocolate lovers.

mini chocolate cupcakes with chocolate ganache
cake recipe from here and ganache recipe from sweet savory life

chocolate cupcakes:
1-1/2 cups flour
1 cup granulated sugar
1 tsp baking soda
1 tsp salt
1/3 cup cocoa powder
1/2 cup oil
1 cup water
1 tsp vanilla extract
1 tbsp vinegar

chocolate ganache:
12 oz chocolate, chopped into small pieces
1 cup heavy cream
directions:
for the cake: mix all ingredients together until moist and well blended. put in mini cupcake cups and bake for 17-18 minutes at 350 degrees F.

for the ganache: place chocolate pieces in a large bowl. heat heavy cream on medium high until it comes to a boil. remove from heat and immediately pour cream over chocolate and stir until completely mixed and glossy. allow ganache to completely cool and set up. when you are able to spoon the ganache and it can hold its texture, it is ready for piping. pipe/frost and enjoy!

chocolate cake recipe makes 50 mini cupcakes (or 16 regular ones). ganache recipe makes 1-1/2 cups.

Monday, October 22, 2012

one-bite mini sliders

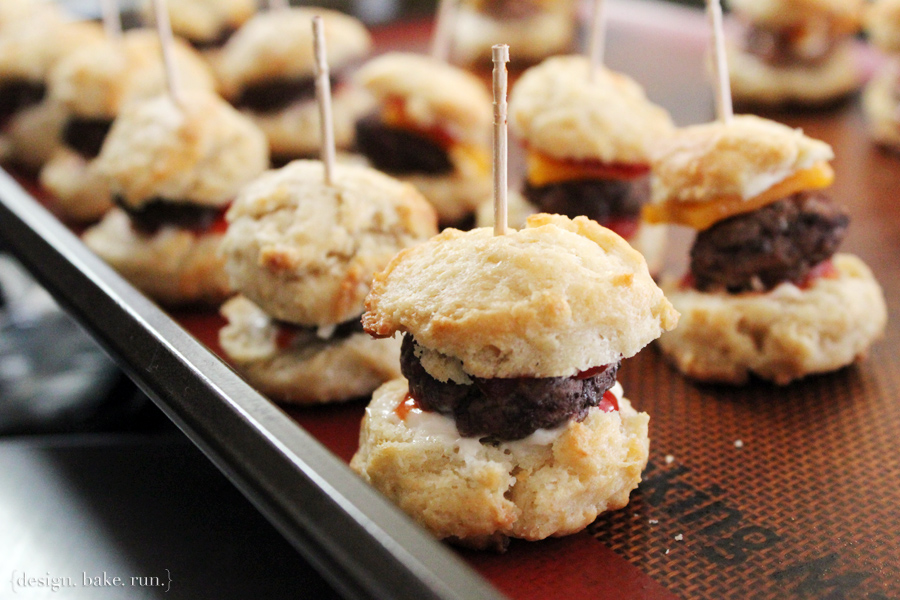
One-Bite Mini Burger Sliders via design. bake. run.

over the weekend we had another birthday party again (it was our third birthday party, three weekends in a row). to change up the food from weekend to weekend i went ahead and did these mini burger sliders. i knew i wanted to do little sliders, but wanted something different for the bun. you can say i didn't really want to shell out $5 for 12 or 24 dinner rolls. plus, those would be too big for what i was trying to do anyway. so what did i do instead? make my own buns? umm.. yeah, you can say that. now, these buns are not your typical bready buns. i have yet to bake a single loaf of bread in my life (i believe it'll happen some day, just not this past weekend, or today, or anytime soon).

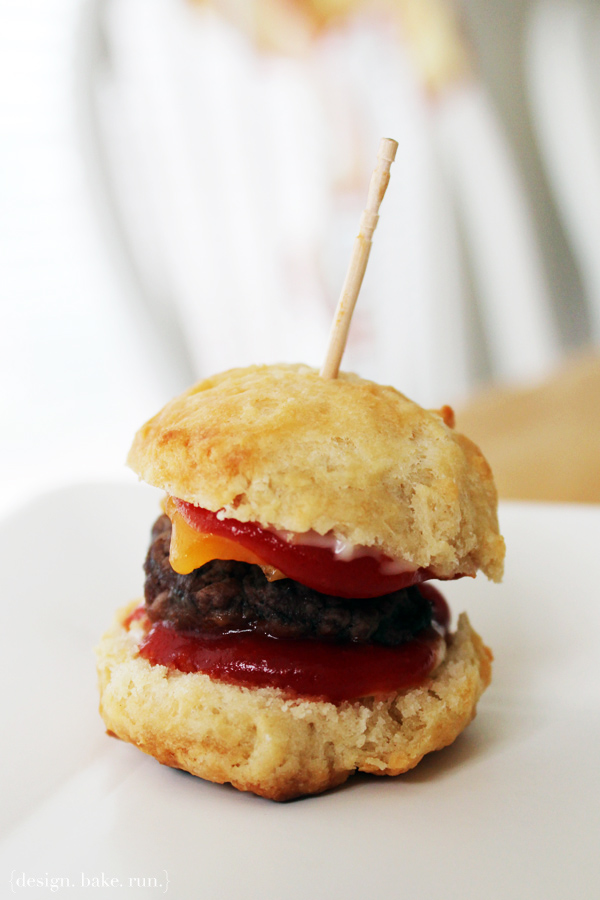
for these one-bite mini burger sliders i actually used a drop biscuit recipe. the recipe came from cook's illustrated's website. i say it's pretty good. no, make it excellent! especially if you eat it warm. the biscuit was just delicious and the small size was great, making it the perfect little bite in one mouthful.

below's the recipe for the biscuit should you want to make your own drop biscuits. for these mini slider buns, i actually used a tiny circle cutter and shaped them to get the biscuits to the right shape and size (about 1 tbsp or 1-inch in size). of course you can do what i did if you're going the mini bun route or just leave them as is (drop biscuits). both variations will be just fine.

One-Bite Mini Burger Sliders via design. bake. run.
these one bite burger mini sliders turned out fantastic!

Drop Biscuits as Mini Slider Buns via design. bake. run.
don't they just look so good?

One Bite Mini Cheeseburger Sliders via design. bake. run.
this drop biscuit recipe makes for the perfect alternative to typical burger buns

One Bite Mini Cheeseburger Slider via design. bake. run.
these biscuits are really good, especially right out of the oven when they're still nice and warm

best drop biscuits
recipe from cook's illustrated

INGREDIENTS:
2 cups unbleached all-purpose flour (10 ounces)
2 tsp baking powder
1/2 tsp baking soda
1 tsp sugar
3/4 tsp table salt
1 cup buttermilk (cold)
8 tbsp unsalted butter , melted and cooled slightly (about 5 minutes), plus 2 tbsp melted butter for brushing biscuits

DIRECTIONS:
  1. Adjust oven rack to middle position and heat oven to 475 degrees F. Whisk flour, baking powder, baking soda, sugar, and salt in large bowl. Combine buttermilk and 8 tablespoons melted butter in medium bowl, stirring until butter forms small clumps (see tip).
  2. Add buttermilk mixture to dry ingredients and stir with rubber spatula until just incorporated and batter pulls away from sides of bowl. Using greased 1/4-cup dry measure, scoop level amount of batter and drop onto parchment-lined rimmed baking sheet (biscuits should measure about 2 1/4 inches in diameter and 1 1/4 inches high). Repeat with remaining batter, spacing biscuits about 1 1/2 inches apart. Bake until tops are golden brown and crisp, 12 to 14 minutes.
  3. Brush biscuit tops with remaining 2 tablespoons melted butter. Transfer to wire rack and let cool 5 minutes before serving.
Makes 12 biscuits. Enjoy!

Tip: When you stir slightly cooled melted butter into cold buttermilk, the butter will clump. Although this might look like a mistake, it's one of the secrets to this recipe. The clumps of butter are similar to the small bits of cold butter in biscuits prepared according to the traditional method and help guarantee a light and fluffy interior.

Tuesday, October 9, 2012

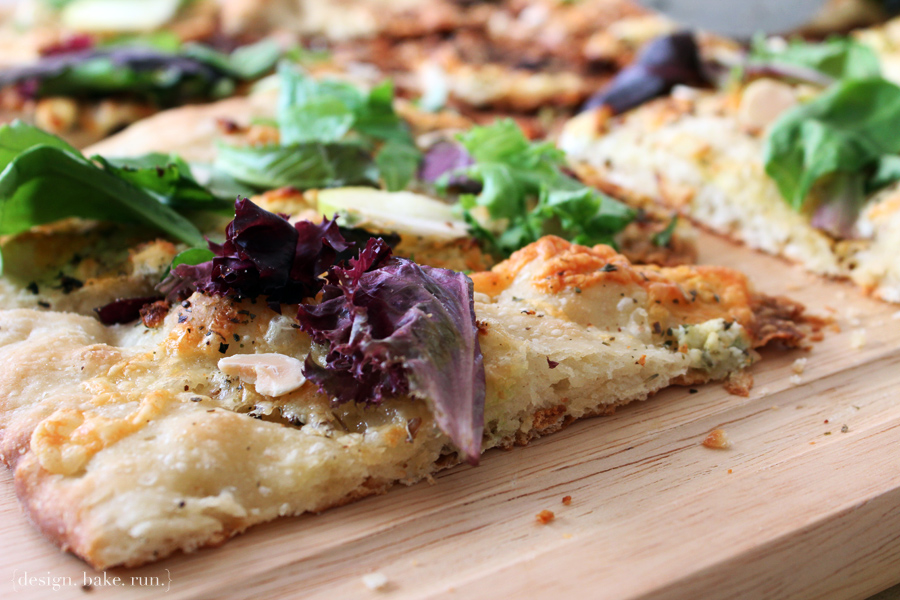
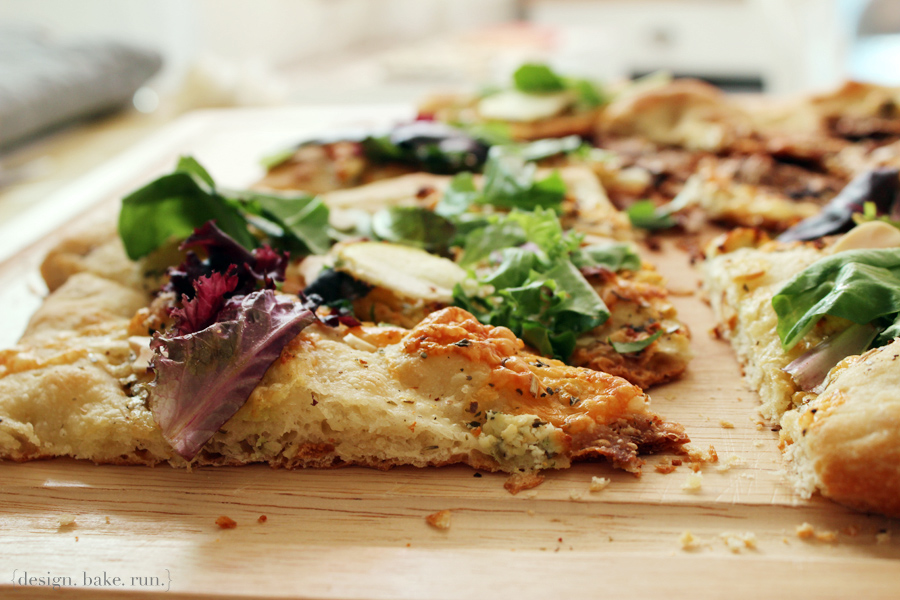
goat cheese garlic pizza with fresh greens

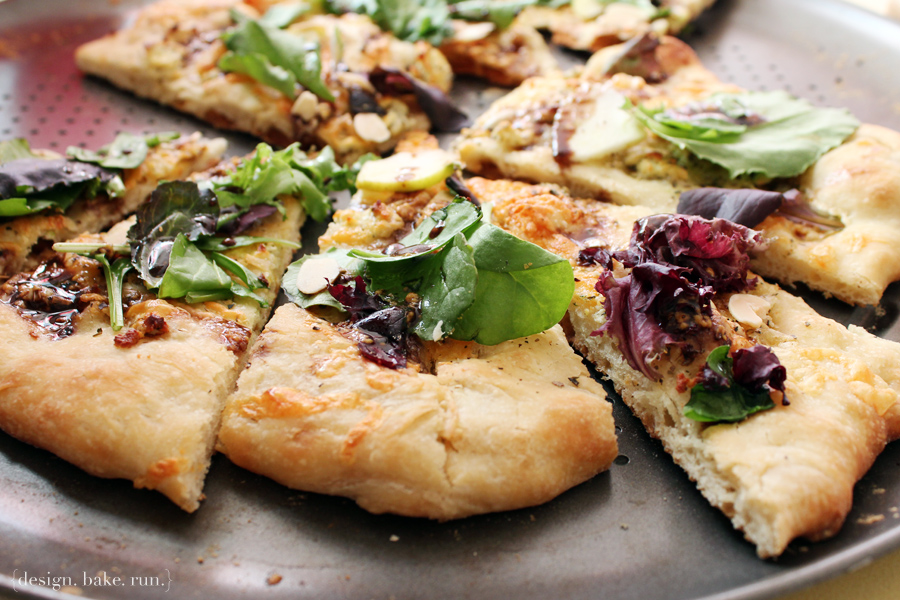
Homemade Pizza with Fresh Greens + Almond Slivers + Goat Cheese + Balsamic Vinaigrette via design. bake. run.

over the weekend i wanted to be a little bit adventurous with my party food options so i decided to try a totally random recipe. actually, there really wasn't a recipe for this particular pizza that i made here. i just sort of made it up. i think it turned out quite well. it's like killing two birds with one stone. you get a pizza and salad in one! the pizza was definitely a hit with the hubby. he absolutely loves pizza but such a tough critic at times. this time, he actually said there was a lot of flavor picked in one bite. so the overall verdict? yay! he loves it; and everyone at the party liked it too.

below's the recipe should you want to try this out yourself. i hope you'll enjoy it as much as everyone did here. enjoy! :)

Goat Cheese Garlic Pizza with Fresh Greens + Almonds + Balsamic Drizzle via design. bake. run.
on a whim i made this pizza topped with goat cheese, fresh spring salad mix, almond slivers, and drizzled with balsamic vinaigrette

Goat Cheese Garlic Pizza with Fresh Greens + Almonds Slivers + Balsamic Drizzle via design. bake. run.
a bite of this pizza packs quite the flavor punch

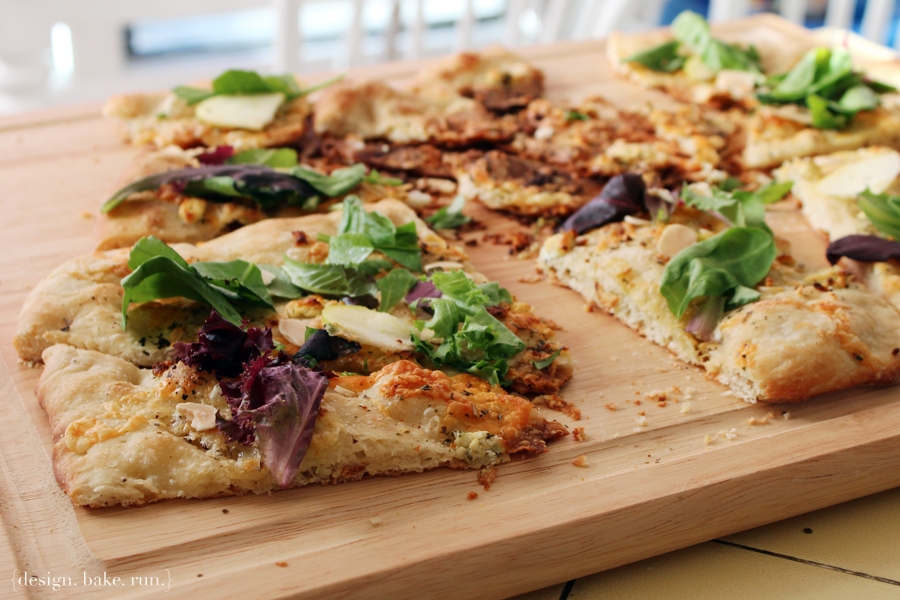
Goat Cheese Garlic Pizza with Fresh Greens + Almonds Slivers + Balsamic Drizzle via design. bake. run.
yum! try the recipe out for yourself and let me know what you think ;)

Goat Cheese Garlic Pizza with Fresh Greens + Almonds Slivers + Balsamic Drizzle via design. bake. run.
i think this is a new favorite, simple and easy to make


goat cheese garlic pizza with fresh greens, almond slivers + balsamic vinaigrette

ingredients:

1 ball of pizza dough
1/4 cup flour (or enough for rolling out pizza dough)
4 garlic cloves, chopped
3 tbsp olive oil
1 tbsp pizza or italian seasoning
1/4 cup mozzerella & cheddar cheese mix, shredded
1/4 cup goat cheese, crumbled + 2 tbsp for topping
1-2 cups spring salad mix
1/2 an apple, sliced thinly
almond slivers, as much as needed

balsamic vinaigrette (for drizzle before serving):
1 tsp dijon mustard
3 tbsp balsamic vinegar
2 tbsp olive oil

directions:

preheat oven to 450°F.

sprinkle some flour on a working area where you'll be rolling out your pizza dough. form dough into circular or any shape you'd like for your pizza. once you've shaped your desired pizza shape, put it on a pizza pan. make sure to dust your pan with flour or spray it with some oil before putting the dough on there so that the pizza doesn't stick once it's baked (that happens sometimes to me when i skip this part, it can be very annoying trying to get the pizza off the pan). once your rolled out dough is on the pan, mix the chopped garlic cloves and olive oil together. then brush (generously) 3/4 of the garlic oil mixture onto the dough (it's okay to leave the garlic pieces on the dough). once that's done, sprinkle in some pizza or italian seasoning. then add in the 1/4 cup mozzerella and cheddar cheese mixture.

put the pizza crust in the oven and let it bake for 5 minutes. after 5 minutes, take it out and brush the rest of the garlic oil mixture onto the partially cooked crust. sprinkle 1/4 cup of the crumbled goat cheese onto the crust and put it back in the oven for another 12-15 minutes or until golden.

once the crust is baked, take it out and let it cool for a few minutes before cutting. once cut, sprinkle the spring salad mix along with the rest of the crumbled goat cheese (2 tbsp), apple slices and almond slivers. then drizzle the balsamic vinaigrette over the topped pizza and serve. enjoy!

makes one whole 10-12" pizza (about 8 slices depending on how big/small you cut the slices).

Monday, October 8, 2012

dessert table for a first birthday party

Dessert Table via design. bake. run.

i just wanted to share a photo i took with instagram. i really think my first attempt at a dessert table this past weekend turned out beautifully. you can't really go wrong with mini cupcakes and macarons; oh, and of course, the full birthday cake. everything was lovely and cute as can be for a little girl having her first ever birthday (party).

so how was the party and goodies? a big successful! ;)

for the (similar) recipes shown in the pictures above, you can access them here:

- eggless vanilla (and chocolate) mini cupcakes
- coconut and raspberry macarons (coconut macaron recipe to come – no recipe posted yet. but you can get other macarons recipes here)
- martha stewart one-bowl chocolate cupcakes

enjoy!

------------------------------------

UPDATE: a few more photos from the party ;)

Eggless Vanilla & Chocolate Mini Cupcakes with Vanilla Buttercream via design. bake. run.
not only are these mini vanilla and chocolate cupcakes so cute and adorable, they're egg-free and perfect for any no-egg diet!

Coconut and Raspberry French Macarons via design. bake. run.
i had been meaning to make these coconut macarons and i think they turned out great! so yummy, and the raspberry ones are just as good.

Yummy Birthday Dessert Table via design. bake. run.
so here's a (similar to my instagram) photo of the dessert table (this one was taken with my canon). i love how cute this dessert table turned out!

Related Posts Plugin for WordPress, Blogger...