Showing posts with label baked goods. Show all posts

Wednesday, January 28, 2015

baked goodies perfect for a tea party!

Tea Party Goodies via design. bake. run.

ummm... so, i sort of hosted a mini tea party at work this week. any excuse to bake some yummy baked goods, right? i'm not big on tea or anything, but i'll take all the goodies that come with it. :)

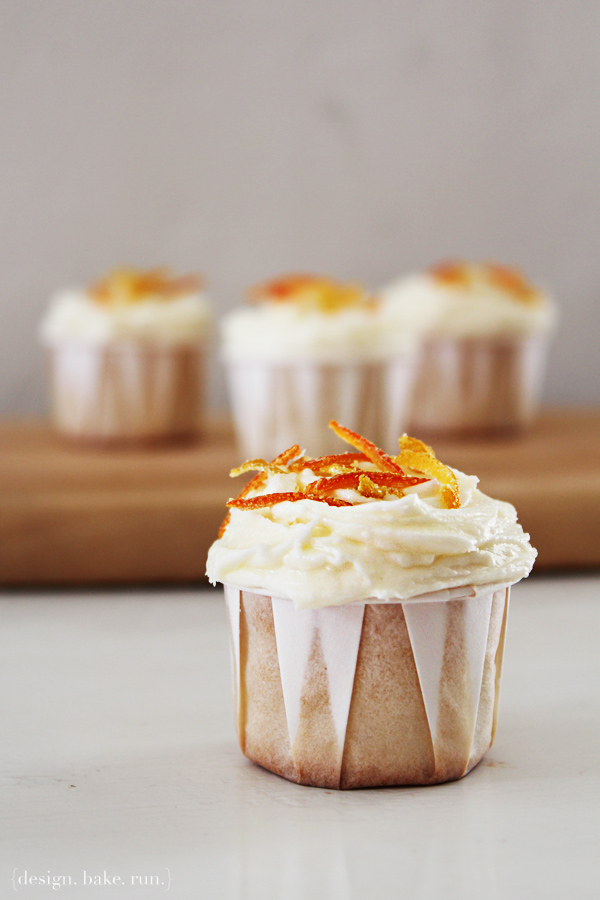
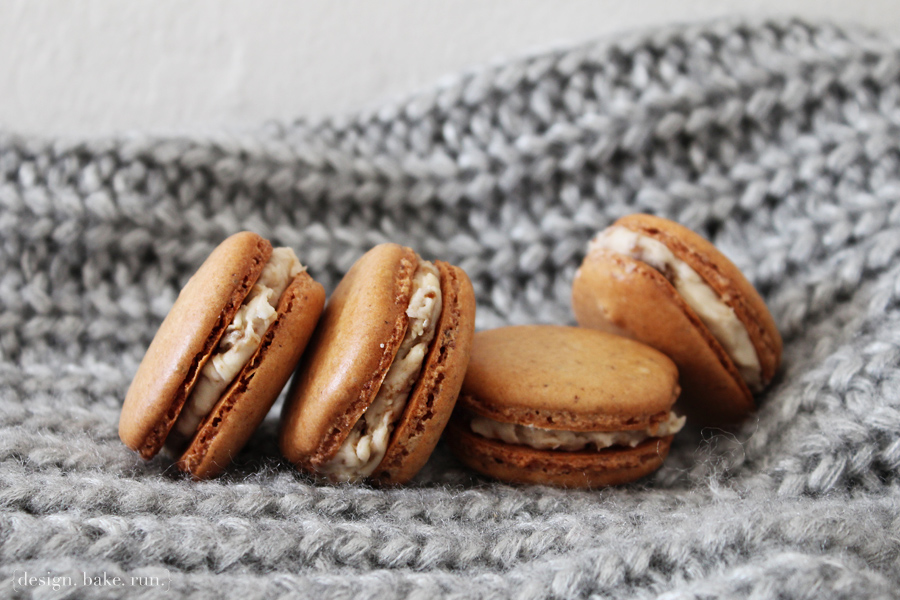
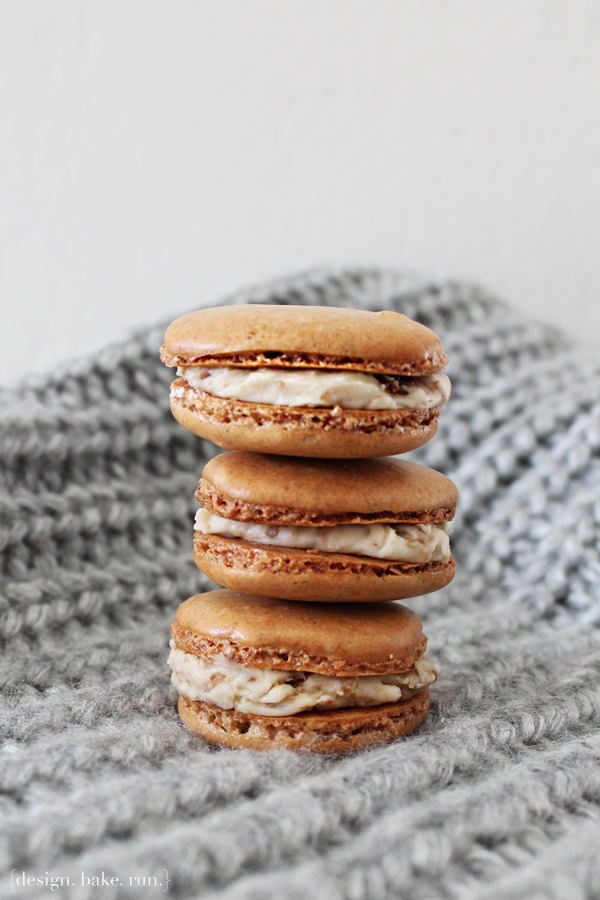
for our initial afternoon tea party kick-off, i settled on some coffee nutella macarons as well as some lemon cream cheese macarons (thanks to all the lemons in my garden), some mini lemon cupcakes with lemon icing, multi-berries scones, jam thumbprints and what better way to top it off then your not-so-typical savory bites, spam musubi. yup, you heard that right. we didn't have cute little tea sandwiches. we opted for spam musubi instead and those were delish! spam musubi is quite a hit with my coworkers and me. we'll take it any time of day, any day of the week, just as we'll take any of the other baked goodies.

anyway, the recipes are below if you'd like to bake any for your tea party or any party or just because. yeah, when you think about it, who needs an excuse to bake? i sometimes just bake because i wanted to. okay, enjoy and happy baking! :)

Mini Lemon Cakes and Multi-Berries Scones via design. bake. run.

multi-berries scones
recipe adapted from smells like home's blueberry scones

ingredients:
  • 8 tbsp (1 stick) unsalted butter, frozen whole
  • 1-1/2 cups fresh or frozen berries (i used a mix of blueberries, blackberries and raspberries)
  • 1/2 cup milk
  • 1/2 cup sour cream
  • 2 cups all-purpose flour, plus more for dusting the work surface
  • 1/2 cup sugar, plus extra for sprinkling
  • 2 tsp baking powder
  • 1/4 tsp baking soda
  • 1/2 tsp salt
  • 1 tsp finely grated lemon zest
  • 1 egg, for egg wash


directions:
  1. adjust an oven rack to middle position and preheat to 425° F. grate the frozen butter on the holes of a large box grater. if using fresh berries, place the berries in the freezer until needed. whisk together the milk and sour cream in a medium bowl; refrigerate until needed. combine the flour, 1/2 cup sugar, baking powder, baking soda, salt and lemon zest in a medium mixing bowl. whisk to combine. add the grated butter to the flour mixture and toss with fingers until thoroughly coated.
  2. add the milk mixture to the dry ingredients and fold with a spatula just until combined. transfer the dough to a generously floured work surface. dust the top of the dough with flour, and knead with well floured hands, 6-8 times, just until the dough holds together in a ragged ball. add small amounts of flour as needed to prevent sticking.
  3. roll the dough into a 12-inch square. fold the dough into thirds like a business letter (a dough scraper really helps with these steps). fold the short ends of the dough into the center in thirds, to form an approximate 4-inch square. transfer the dough to a plate lightly dusted with flour and chill in the freezer for 5 minutes.
  4. return the dough to the floured work surface and roll into an approximately 12-inch square again. sprinkle the berries evenly over the surface of the dough, and gently press down so that they are slightly embedded in the dough surface. using a dough scraper, roll the dough up to form a tight log. lay the log seam side down and press the the log into a 12 by 4-inch rectangle. using a sharp, floured knife, cut the rectangle crosswise into 4 equal rectangles. cut each rectangle diagonally to form 2 triangles. transfer to a parchment lined baking sheet.
  5. brush the tops of the scones with the egg wash and sprinkle lightly with sugar. if freezing ahead of time, flash freeze on the baking sheet for 20 minutes, then wrap individually and store in a freezer bag until needed. bake until the tops and bottoms are golden brown, 18-25 minutes. transfer to a wire rack and let cool at least 10 minutes before serving.


makes 12 scones (or however big/small you cut it)


Baked goodies perfect for any (tea) party! via design. bake. run.

mini eggless lemon cupcakes
recipe adapted from yum'e'licious

ingredients:

for the cupcakes
  • 1/2 cup butter
  • 1/2 cup sugar
  • 1 cup all purpose flour
  • 1 cup buttermilk (or do what i do; add 1 tbsp lemon juice to 1 cup of milk, stir, and let it sit for 5 minutes before using)
  • 1 tsp baking powder
  • 1/2 tsp baking soda
  • 1 tbsp lemon juice
  • zest of 1 medium sized lemon
  • few drops of yellow color, optional


for the lemon icing drizzle
  • 1/4 cup powdered sugar
  • 2 tbsp lemon juice


directions:
  1. if you don't have buttermilk, this is when you mix the lemon juice and milk together and set it aside while you do everything else.
  2. preheat oven to 350°F. then sift the flour, baking powder and the baking soda in a good size bowl and set that aside.
  3. in another bowl, cream the butter and sugar until light and fluffy. then add in 1/3 cup buttermilk and beat again until fluffy. repeat again with another 1/3 cup. then add the lemon zest and lemon juice and mix well. now, if you want to use some yellow food coloring, this is where i add it in.
  4. now add in the dry ingredients and mix well before adding in the remaining buttermilk; mix again until incorporated.
  5. fill the mini cupcake cups to 2/3 full (makes about 20-24) and bake it in the oven for 14-15 minutes. or if you'd rather do a loaf cake instead, pour the batter into a greased loaf tin (9"x5") and bake it for 20-25 minutes or until a toothpick comes out clean.
  6. let the mini cupcakes (or loaf) cool completely before drizzling the icing over. to make the icing, just mix the powdered sugar and lemon juice together. if it's too runny, just add more powdered sugar; and if too thick, add more lemon juice.


makes about 20-24 mini cupcakes or one loaf


French macarons, mini cupcakes, scones, jam thumbprints and spam musubi... perfect treats for any party via design. bake. run.

other goodies you can find recipes for:

Monday, May 27, 2013

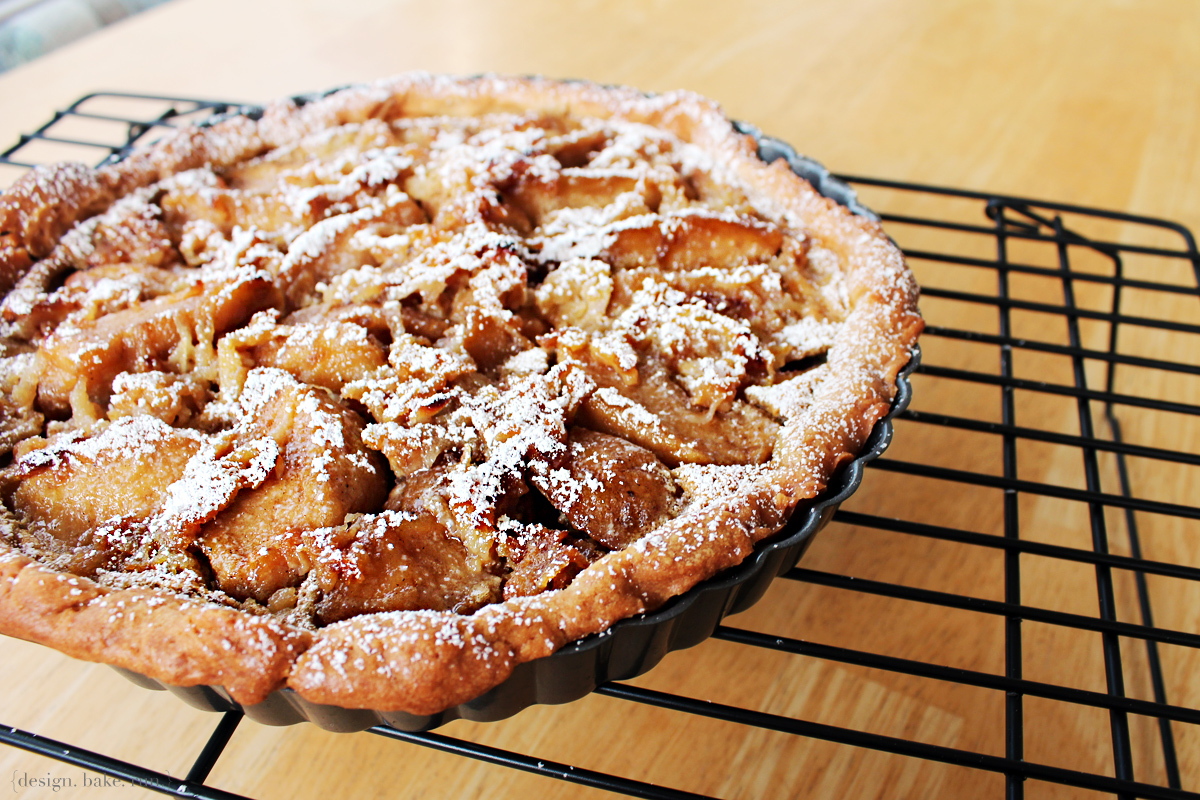
tartine's bread pudding

Tartine's Bread Pudding via design. bake. run.

happy memorial day everyone and thank you to all of you who have put your lives out there (and/or still are) to serve and protect our beautiful country of u-s-a!

i love 3-day weekends. nothing particular about it, just the fact that i get one extra "weekend" day or two sundays as m calls it. now, with the weather being gloomy and all today, it was the perfect day to bake something delicious this morning. yesterday during one of my outings, i needed to stop at trader joe's to pick up some of their naan bread for m's chicken tikka masala he's making tonight for dinner. yes, someday we'll make our own naan bread to go with m's indian cooking, just not today. while i was there i noticed that they had some challah bread in stock. usually i always end up going to trader joe's at the end of the day and almost always they are out of challah bread. but nope, not yesterday. actually, that was probably because i went early enough in the day!
anyway, i bought the challah bread. why challah and not brioche? well, that's because they don't sell brioche anymore – i asked a while back and they said they're still trying to work out a deal w/ their bread vendor for brioche breads. i decided that it was finally about time i make tartine's famous bread pudding. and hopefully that it would turn out okay if not as good as the actual one from tartine itself?! well, sure enough i did make it this morning and i have to say, it was delicious! just as good as i remembered it, eating their bread pudding at the bakery. so, so good! i made the entire recipe (minus the making your own brioche bread of course!), from the bread pudding itself to the caramel sauce and even caramelized fruit toppings to add to it. oh, i have to say, it was seriously that good! even m was impressed and he said he doesn't care for bread pudding (hehehe.. that's because he grew up having to so much eat bread pudding as a kid and somewhat despises it these days). well, he said this bread pudding was quite good and if all bread puddings were like this, he wouldn't have a problem eating it. it's sort of like a yummy french toast. very rich and buttery – just yum, period.

below's the recipe if you want to make it yourself. i say it's totally worth a try. someday when i'm up to making bread (i can't be bothered because i don't have enough patient for it, waiting for the dough to rise, etc), i will make my own brioche and make this bread pudding again. otherwise, i'll stick to my store-bought or bakery-bought brioche or challah bread. yes, you can make tartine's brioche bread pudding with challah or croissant, and that's exactly what i did, using challah because brioche wasn't available. it's just as good.

Tartine's Bread Pudding topped with Caramel Sauce & Caramelized Fresh Fruits via design. bake. run.
i had been eyeing this recipe for the longest time ever. and finally, i've made it! too bad no one else in my family likes bread pudding. i may have to share it with my coworkers.

Tartine's Bread Pudding topped with Caramel Sauce & Caramelized Fresh Fruits via design. bake. run.
a close-up of all this yummy goodness.

tartine's bread pudding
recipes from tartine cookbook

bread pudding:
  • 6 brioche slices*, cut 1-inch thick
  • 8 large eggs
  • 3/4 cup sugar
  • 4 cups whole milk
  • 1-1/2 tsp. vanilla
  • 1/2 tsp. salt
caramel sauce (for topping):
  • 2/3 cup heavy cream
  • 1/4 of one vanilla bean
  • 1-1/4 cup sugar
  • 1/4 cup water
  • 1/4 tsp salt
  • 2 tablespoons light corn syrup
  • 3/4 tsp lemon juice
  • 4 tablespoons unsalted butter

directions for bread pudding:
  1. Preheat the oven to 350°f. Butter a 9×5-inch glass loaf dish (i used an 8x8 glass dish and that works fine too!). Arrange the brioche slices on a baking sheet. Place in the oven until lightly toasted, 4 to 10 minutes. Remove from the oven and set aside to cool.
  2. Crack the eggs into a mixing bowl and whisk until blended. Add the sugar and whisk until smooth. Add the milk, vanilla and salt and whisk until fully incorporated. Pour the custard through a fine-mesh sieve.
  3. Place the toasted bread slices in the prepared loaf pan, cutting the slices to fit as needed. Pour the custard evenly over the bread, filling the dish to the top. You may not be able to add all of the custard at this point. Let the mixture sit for 10 minutes, so that the bread can absorb the custard.
  4. Just before baking, top off the dish with more of the custard if the previous addition has been completely absorbed. Cover the dish with aluminum foil, place in the oven, and bake the pudding for about 1 hour. To test for doneness, uncover the dish, slip a knife into the center, and push the bread aside. If the custard is still very liquid, re-cover the dish and return the pudding to the oven for another 10 minutes. If only a little liquid remains, the pudding is ready to come out of the oven. The custard will continue to cook after it is removed from the oven and it will set up as it cools.
  5. Let the pudding cool for about 10 minutes before serving. You can serve the bread pudding by slicing it and removing each slice with an offset spatula, or by scooping it out with a serving spoon.
  6. Serve with fresh or sautéed fruit and caramel sauce (directions below). Makes 6-8 servings.
*note: you can use challah bread (which is what i did) or croissants if you can't find or have brioche available. both alternative bread options should yield a very satisfactory result. :)

directions for caramel sauce:
  1. Pour the cream into a small, heavy saucepan. Split the vanilla bean in half lengthwise and use the tip of a sharp knife to scrape the seeds from the pod halves into the cream. Place over medium-high heat and bring to just under a boil, stirring occasionally. Reduce the heat to low to keep the cream warm.
  2. In a medium, heavy saucepan, combine the sugar, water, salt and corn syrup. Bring to a boil over medium heat, stirring to dissolve the sugar. Then cook, without stirring, until the mixture is amber colored, 5 to 8 minutes. Remove from the heat.
  3. The mixture will continue to cook off the heat and become darker, so make sure to have your cream close by. Carefully and slowly add the cream to the sugar syrup. The mixture will boil vigorously at first. Let the mixture simmer down, and then whisk until smooth. Add the lemon juice. Let cool for about 10 minutes.
  4. Cut the butter into 1-inch chunks and add them to the caramel one at a time, whisking constantly after each addition. Then whisk the caramel periodically as it continues to cool.
  5. The caramel will keep in an airtight container in the refrigerator for up to one month.
  6. Makes 1-1/2 cups.

*note: Use a good-sized pan when preparing this caramel. When the hot cream is added, the caramel will boil furiously at first, increasing dramatically in volume. Have ice water nearby in case of burns.

for photos of the step-by-step, you can visit Jun-blog or Alexandra's Kitchen. they've got great photos. ;)

Friday, May 17, 2013

banana nut bread

Banana Nut Bread via design. bake. run.

as mentioned in my cranberry scones post, i also made a bunch of banana bread for my uncle's funeral service. below is one of the recipes i used. i think i tried at least 3 different ones, some with nuts and some without. how did they all taste? i'm afraid i can't really tell you because i didn't try all three. but what i can say is, banana bread is banana bread. okay, actually, that's no true. some banana bread could be pretty dry out. this one here isn't too bad actually. i love how it stayed nice and moist even overnight (i made it friday, served it saturday morning).

so if you have some brown bananas you'd like to use up, i say go ahead and make some banana bread today. the recipe below is so easy to make and whips up in a flash. the only time consuming thing is waiting for it to finish baking in the oven. but it's kind of like, you set it and forget it (well, not totally, but while it's baking you can do other stuff).

below's the recipe should you want to make some. and if you do, let me know what you think. enjoy and happy baking!

Banana Nut Bread via design. bake. run.
i love my banana bread lightly toasted with a little butter spread on. so good.

Easy Banana Nut Bread via design. bake. run.
banana breads are so easy to make. i love how they really put all those browning bananas to good use.

banana nut bread
adapted from my baking addiction

ingredients:
  • 2 cups all-purpose flour
  • 1 teaspoon baking soda
  • 1/4 teaspoon salt
  • 1/2 cup unsalted butter, softened
  • 3/4 cup packed light brown sugar
  • 2 large eggs, lightly beaten
  • 2 teaspoons pure vanilla extract
  • 2 overripe bananas
  • 1/4 cup to 1/2 cup walnuts

directions:
  1. preheat oven to 350°F. lightly grease a 9x5 inch loaf pan – i used olive oil, but you can use butter or any oil of your choice.
  2. in a large bowl, combine flour, baking soda, salt and cake spice. in another large bowl, using an electric hand mixer on medium speed, cream together butter and brown sugar until light and fluffy – about 3 minutes. stir in eggs, vanilla and mashed bananas until well blended. using a wooden spoon or rubber spatula, gently stir banana mixture and walnuts into flour mixture – stirring until ingredients are just combined. pour batter into prepared loaf pan.
  3. bake in preheated oven for 60 to 65 minutes, until a toothpick inserted into center of the loaf comes out clean. let bread cool in pan for 10 minutes, then carefully turn out onto a wire rack.

notes:
  • you can add 1/2 teaspoon cinnamon to your batter if you like. i personally don't care for it so i skipped it.
  • banana bread is better served after it has had time to sit overnight at room temperature.
  • banana bread will keep wrapped in plastic wrap and aluminum foil for up to 3 days.
  • this banana bread is amazing toasted with a pat of butter.


Tuesday, May 14, 2013

cranberry scones

Cranberry Scones via design. bake. run.

i know i haven't posted too many new entries lately, regardless if it was food related or exercise or whatever. this last week has been really tough. i think i averaged about 4-5 hours of sleep each night. yeah, pretty brutal. i'm not sure how i made it through though, but somehow i managed.

almost two weeks ago one of my uncles passed away. in doing my part or pitching in, i volunteered to bake some goodies for the funeral service this past weekend. my volunteering to make some cookies as snacks to pass out throughout the day during the weekend service turned into baking enough goodies for one morning breakfast (there are 3 mornings, i ended up with one morning). not knowing how many people i would be serving, i just knew there would be a lot of people. i asked my mom how many cakes and other goodies i should make and she said at least 10 breakfast cakes. and so with that number i spent literally the entire friday last week (from 11am to 11pm) baking a bunch of lemon loaves, fruit cakes (apple, strawberry, raspberry, lemon), and banana breads. in all, i think i had about 11 or 12 different cake-like goodies. in addition to all the cakes there were also a bunch of cranberry and raisin scones for the non-sweet eaters, blueberry muffins for the muffin fans and over 100 chocolate chip cookies. i think there was about 125 cookies or more in all. i lost count after so many dozens. in all, there were probably about at least 300-400 pieces of baked goods once all the cakes and loaves were sliced/cut. by friday evening i think my entire family was annoyed at me for being in the kitchen all day and taking up every counter space in the house, plus the dining room table. but i am glad and very pleased to say that m was so impressed with all my goodies that next morning (saturday) when i served all the goodies at the funeral service. he couldn't stop eating the toffee apple cake and rosemary lemon cake i made. he's such a tough critic, i couldn't believe he loved them. i will have to make those two again, take some pics and write a blog about it.

i have to say, that 12-hour baking marathon last friday in addition to the previous two nights of baking for the event was so worth it. it felt really good knowing i could contribute/give something to my uncle who has passed. everyone in my family: mom, dad, brothers and sisters, aunts and uncles and cousins all wanted to make sure we gave my uncle the best send off we possibly could, especially since he never had a family of his own. he lived a tough life, but i'm sure in a way it was a very happy life. i know everyone loved him and will miss him dearly.

i'm terrible at taking pictures and i was so tired after all the baking i couldn't be bothered to take pictures of most of the goodies. what i did manage to take was the cranberry scones and banana bread. as for the others, i only took a few and those i posted them onto my instagram. below are the pictures and recipes for the cranberry scones if you'd like to make some for your next event or just because. i say these scones were quite the hit and i love how flaky they turned out. yummy! :)

baking away here -- photo via mzrichee on instagram
this was only part of the kitchen that was captured on instagram. the dining table was a giant mess as well with baked goodies cooling, cakes waiting to be bake, ingredients and lots of miscellaneous baking items.

blueberry muffins -- photo via mzrichee on instagram
i never got to try these blueberry muffins or the strawberry cakes in the background. but from what i gathered on saturday, everyone liked it. i hope to make it again one of these days and actually eat one myself.

cranberry and raisin scones -- photo via mzrichee on instagram
my instagram photo of the scones

Cranberry Scones via design. bake. run.
this is only my second attempt at making scones and i have to say i've fallen in love with these delicious english biscuit-like treat. they are buttery and perfectly flaky when done right. add some butter or jam on them and you've got quite a treat for tea time or any time of day!

Classic Cranberry Scones via design. bake. run.
noticed all those layers in the scones? omg! so flaky and good.

Cranberry Scones via design. bake. run.
i can't wait to make this recipe again. i know that from now on when i make scones, i will think of my 12-hour baking marathon for my uncle's funeral; and how special that feeling felt knowing i was part of the celebration of his life.

cranberry scones
adapted from cooking light

ingredients:
  • 2 cups all-purpose flour (about 9 ounces)
  • 3 tablespoons granulated sugar
  • 1-1/2 teaspoons baking powder
  • 1/2 teaspoon salt
  • 5 tablespoons chilled butter, cut into small pieces
  • 1/2 cup milk
  • 1/4 teaspoon vanilla extract
  • 1 large egg white
  • 1/3 cup dried cranberries
  • 2 teaspoons milk
  • 2 teaspoons turbinado or granulated sugar

directions:
  1. preheat oven to 425°F.
  2. lightly spoon flour into dry measuring cups; level with a knife. combine flour, 3 tablespoons granulated sugar, baking powder, and salt in a bowl; stir with a whisk.
  3. cut in butter with a pastry blender or 2 knives until mixture resembles coarse meal.
  4. combine 1/2 cup milk, vanilla, and egg white in a bowl. add milk mixture to flour mixture, stirring just until moist (dough will be soft).
  5. turn dough out onto a lightly floured surface. sprinkle surface of dough with dried cranberries. with floured hands, knead 4 times or just until the cranberries are incorporated.
  6. pat dough into an 8-inch circle on a baking sheet lined with parchment paper. cut dough into 12 wedges, cutting into, but not through, dough. note: at this point, i like to chill my shaped dough in the freezer for at least 30 minutes (okay, 15 minutes if you can't really wait the whole 30). see tip notes as to why below.
  7. just before baking, brush 2 teaspoons milk over surface of dough; sprinkle with 2 teaspoons turbinado sugar. bake at 425°F for 17 minutes or until golden.
  8. serve warm, or cool on a wire rack. optional: if you like you can even dip the slightly cooled scones with some icing glaze (i like my glaze w/ a hint of lemon so i add a little bit of lemon juice to mine for a lemon glaze to dip them in) or drizzle the glaze over the scones for an added touch of sweetness. oh so good!

makes 8-12 wedges depending on how you cut your dough. enjoy! :)

tips to making and eating delicious scones:
  • freezing scone dough for 30 minutes in the freezer relaxes the gluten in the flour, which makes the scones more tender and allows them to rise higher. it also chills the fat, which will make the scones a bit flakier.
  • scones are best served warm. they're delicious as is, but add butter and/or jam (or clotted cream as they do in england), if you like. to reheat room-temperature scones, place on a baking sheet, tent lightly with foil, and warm in a preheated 350°F oven for about 10 minutes.

Monday, April 29, 2013

angel food cake cupcakes with strawberries & cream

Angel Food Cake Cupcakes with Sliced Strawberries & Whipped Cream via design. bake. run.

i'm loving the spring season at the moment. i can't complain about it, especially not here in san francisco. the last few weeks we've been so fortunate with mother nature giving us gorgeous sunshine and almost no-jacket/sweater weather. seriously, today was about 80 degrees in the city! i went out for my daily lunch walks earlier today not needing to bring a coat. you don't get this too often here in the city. but lately, it's been fabulous. i can't complain. i just hope this weather trend stays like this for several more days, weeks even! too bad it doesn't usually last very long. but in the mean time, i'll take it.

alright, so with spring comes all the amazing spring fruits such as strawberries. over the last few weeks i've been eating strawberries nonstop. i couldn't help it. it's everywhere in the grocery stores, farmer's market… wherever. so what better way to use up some of the strawberries than your classic angel food cake for a little of that delicious berries and cream combo?! oh boy, this strawberry angel food cake dessert is to die for. it is so perfect; nice and light with that fresh taste of strawberries and the sweetened freshly whipped cream. mmmm… delish!

so there's a backstory to this angel food cake dessert. you see i've never ever attempted to make angel food cake before. yes, like ever! a year or so back when i asked for requests from my coworkers as to what kind of baked goods to bring them, one of them asked if i could make an angel food cake. i told him, no way, not in a million years. i would have to like him a whole lot, like a lot LOT or somehow be bored out of my mind to make one. i'll make anything else but angel food cake. so yes, for some odd reason, i've just never cared or be bothered to make angel food cake. i guess you could say, and i will admit this here that i was a bit intimidated by all those egg whites! yes, there are so many egg whites you have to whip up just to make one angel food cake. even in this first attempt, i didn't even make the full recipe. actually, i didn't even use your typical angel food cake pan mold. i made mine as cupcakes instead. even mini ones! but yes, i was intimidated by the egg whites. looking at the recipe i'm thinking, "what?! i have to whip all those egg whites? what am i going to do with all the yolks. there are so many egg yolks!" -- hahaha, silly i know. but these days, i have ways to use up those egg yolks. yeah, i still have those yolks sitting in the fridge. they'll probably either (a) end up in the garbage, (b) turned into some delicious pastry cream for cream puffs or whatever, or (c) it's about time i make some lemon curd with all those lemons in our backyard (yes, we have an itty bitty meyer lemon tree out back that actually has some lemon on it! i know, it's pretty incredible considering how tiny it is and the fact that there's hardly ever any fruits in all the years we've had it!)

mmm… so there you have it. i'm not sure what happened, but i guess i did sort of make some form of angel food cake. yes, not the real thing, but close enough. you can say it was because of all the fresh strawberries and sunshine that inspired me to finally attempt to make this cake. will i make it again and am i intimidated by all those egg whites now that i've done it once? nah, no way. blah. easy peasy. i can do it in my sleep! hehe jk i'll probably make this cake batter again, and yes, one day in the proper form and all. the cake is lovely and turned out fantastic. yeah, it's the diet dessert -- actually, not! no dessert is a diet dessert. but i have to say, it is seriously super light (at least it tastes like it, minus the sugar?! haha) and delicious.

below's the recipe i used to make the cupcake form of angel food cake. feel free to make some and let me know what you think. so, what do you say? pretty good eh?! i'm in love with these and they taste absolutely amazing -- fresh and sweet just like the perfect spring weather we are enjoying right now! enjoy and happy baking! :)

we love SF -- instagram photo by mzrichee
the weather here in san francisco has really been that awesome. for sure beach-worthy.

angel food cake cupcake treat for sfkaos -- instagram photo by mzrichee
an instagram photo of this yummy treat a lucky few received one day at work last week.

Angel Food Cake Cupcakes with Fresh Strawberries & Cream via design. bake. run.
i am in love with this angel food cake cupcake. it is such a refreshing spring treat with the fresh strawberries!

angel food cake cupcakes with strawberries & cream
recipe adapted from the baker upstairs

ingredients:

cupcakes:
  • 1/2 cup + 2 tablespoons flour
  • 1/2 cup powdered sugar
  • 1/2 cup granulated sugar
  • 6 egg whites
  • 3/4 teaspoon cream of tartar
  • 1 teaspoon vanilla
  • 1/8 teaspoon salt

strawberries & cream filling:
  • 12 strawberries, washed (you can use more or less strawberries depending on your preference, i used a strawberry per cupcake)
  • 1 cup heavy whipping cream
  • 3 tablespoons granulated sugar

directions:
  1. preheat your oven to 350° F and prepare a cupcake pan (12-count) with paper liners.
  2. in a small bowl, combine the flour and sugars, set aside.
  3. in the bowl of your stand mixer whip the egg whites for one minute, until frothy. add the cream of tartar, vanilla and salt, and whip for 5-6 minutes until stiff peaks form.
  4. then sprinkle 1/4 cup of the flour mixture over the egg mixture and fold in gently, repeating until all the flour is incorporated.
  5. spoon the batter into the paper liners and bake for 15-17 minutes, until lightly golden and springy to the touch.
  6. remove from the oven and cool completely in the pans.
  7. while cupcakes are cooling, make the whipped cream and slice the berries.
  8. for the whipped cream: add the heavy whipping cream and sugar to a medium size bowl and whip for 3-4 minutes, until light and airy. refrigerate the whipped cream in the refrigerator while you slice the berries.
  9. to assemble the cupcakes: take the paper liners off the cupcakes very carefully. slice the cake in half and top the bottom half with a very good spoonful of whipped cream. then add the slices of fresh strawberries before topping it off with another spoonful of whipped cream. put the top half of the cake back on to finish. if the cupcake looks like it's falling apart you can use a toothpick to hold it in place. of course, remove the toothpick before consuming. serve immediately or keep refrigerated until ready to eat.

makes 12 cupcakes. enjoy and happy eating! :)

Friday, April 12, 2013

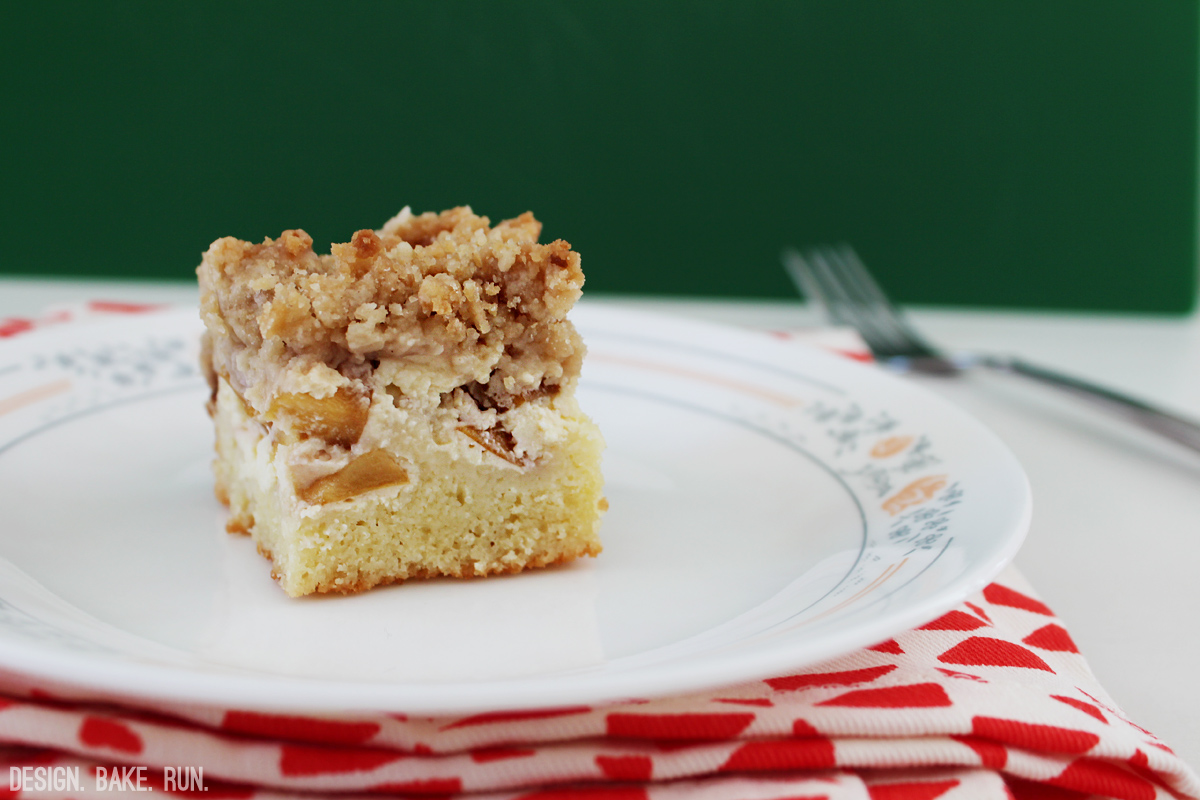
peach with cream cheese crumb bars

Peach Cream Cheese Crumb Bars via design. bake. run.

i haven't been baking the last few days or week… actually, i can't remember the last time i baked before making these peach cream cheese crumb bars here. i just know it has been a while in my book. that's because i can't seem to find any time to bake! or want to bake. i'm always exhausted at night (that's when i usually do my baking). anyway, somehow i managed to get myself to make these crumb bars. i wanted to try out a recipe i saw on interest but didn't have any strawberries on hand. plus, i needed to use up the rest of whatever fruit we had in the fridge before it all spoiled.

so, the results? ahhh, yeah, these peach cream cheese crumb bars. the recipe below is really just martha stewart's blackberry crumb bars recipe that i've made many times in the past, but i just added a new layer to it, the cream cheese. it turned out pretty good. i do love my cream cheese. i think the cream cheese definitely added another layer of yumminess to this crumb bar recipe.

below's the recipe should you want to try and make it yourself. trust me, if you make it, you won't be disappointed. all that crumb toppings with the peach and cream cheese filling in the middle, then the bottom cake layer all together… mmmm…. so good. enjoy and happy baking and eating! :)

Peach Crumb Bars with Cream Cheese Center via design. bake. run.
the crumb topping in this recipe is just delicious. i love how it adds a nice sweet crunch to the bars when you bite into it.

Peach with Cream Cheese Crumb Bars via design bake. run.
an overhead shot of the peach cream cheese crumb bars

peach with cream cheese crumb bars
recipe adapted from martha stewart

ingredients:
  • 6 tablespoons unsalted butter melted, and 1/2 cup (1 stick), room temperature, plus more for pan
  • 1-3/4 cups all-purpose flour (spooned and leveled), plus more for pan
  • 1/2 cup packed light-brown sugar
  • 1/4 cup granulated sugar
  • 1/2 teaspoon salt
  • 1/2 teaspoon baking powder
  • 1 cup confectioners' sugar
  • 1/2 teaspoon pure vanilla extract
  • 3 large eggs
  • 1 bar (8 oz) cream cheese, softened
  • 4 medium size peaches, cut up into tiny pieces (or you can slice them if you like – if you do that, maybe you might not need as many?!)

directions:
  1. preheat oven to 350°f. butter an 8-inch square baking pan. line bottom with parchment paper, leaving an overhang on two sides; butter and flour paper, tapping out excess.
  2. make topping: in a medium bowl, whisk together melted butter, brown sugar, and 1/4 teaspoon salt; add 1 cup flour, and mix with a fork until large moist crumbs form. refrigerate topping until ready to use.
  3. make cream cheese layer/filling: in a separate medium bowl, mix together the 1/4 cup granulated sugar and cream cheese together until blended. then add in one egg and mix until everything is incorporated. set aside.
  4. in another separate medium bowl, whisk together remaining 3/4 cup flour, baking powder, and remaining 1/4 teaspoon salt; set aside. in a large bowl, using an electric mixer, beat room-temperature butter, confectioners' sugar, and vanilla until light and fluffy; add the two eggs, one at a time, beating well after each addition. reduce speed to low; mix in flour mixture. spread batter evenly in pan; then pour in the cream cheese filling and spread evenly. once that's done, sprinkle with peach pieces, then chilled topping.
  5. bake until golden and a toothpick inserted in center comes out with moist crumbs attached, 40 to 45 minutes. cool completely in pan. using paper overhang, lift cake onto a work surface; cut into 16 squares.

note: while you prepare the cake, refrigerate the crumb topping. this will help give it a nubbly texture once baked. to store, keep in an airtight container at room temperature, up to 3 days.

Wednesday, April 3, 2013

macarons make the best mini gifts

Guava French Macarons via design. bake. run.

i love making macarons. in addition to that lemony peach cake that i made last week to bring up to my mom, i also made these french macarons. i had some guava sitting in my fridge and decided i needed to use them up too. so i grabbed whatever was left (about 5-6 mini ones) and mashed them up. i didn't bother taking the seeds out. i figured it would add a nice unexpected crunch or whatever when you bite into the cookie. of course, should you decide to do this, you can certainly take out the seeds or leave them as is. i still have some leftover guava puree in the fridge so i may make these again. if i do, i think i'll remove the seeds from the puree. i'm sure people will appreciate that very much.

below's the recipe for the guava macarons. i also made a plain shell cocao-dusted macaron with chocolate ganache filling. i'm sure if you want to make those instead, you can modify the recipe to your liking. otherwise, maybe i'll make those again and write up a post for that in a future post. enjoy and happy baking! :)

Guava French Macarons via design. bake. run.
these macarons are scrumptious. they look so pretty in these homemade origami boxes.

Guava French Macarons via design. bake. run.
i say go ahead and make some macarons and give them away!

french macarons with guava buttercream filling

ingredients:

macaron batter:
1 cup powdered sugar
3/4 cup almond meal
2 large egg whites, at room temperature
5 tablespoons granulated sugar
1/4 teaspoon pink gel food coloring (or any gel food coloring of your choice, or none at all)

guava buttercream filling:
4 tablespoons butter, room temperature
2-1/2 to 3 cups powdered sugar
2 tablespoons guava puree
cream or milk, if needed

directions:

to make the macaron batter/shells:
  1. line two baking sheets with parchment paper and have a pastry bag with a plain tip (about 1/2-inch, 2 cm) ready.
  2. sift together the powdered sugar and almond meal so there are no lumps. set aside.
  3. in the bowl of a standing electric mixer (or if you prefer, you can use a bowl and hand mixer), beat the egg whites until they begin to rise and hold their shape. while whipping, beat in the brown sugar until very stiff and firm, about 2 minutes.
  4. add in the gel food coloring. then carefully fold in the dry ingredients, in two batches, into the beaten egg whites with a flexible rubber spatula. when the mixture is just smooth and there are no streaks of egg white and the food coloring looks like it's fully incorporated, stop folding and scrape the batter into the pastry bag (standing the bag in a tall glass helps if you’re alone). note: it's very important to not overmix/fold here. it's better to go under than over because if it's too runny, you may have ruined the batter. and you can't go back. if it's too stiff, at least you can fold it a few more times.
  5. pipe the batter on the parchment-lined baking sheets in 1.35-inch circles evenly spaced one-inch apart.
  6. rap the baking sheet a few times firmly on the counter top to flatten the macarons. then let it sit for at least 30-60 minutes depending on humidity before baking them in the oven. about 10-15 minutes before baking, preheat oven to 350 degrees F. bake for 15 minutes.
  7. once macaron shells are out of the oven, let them sit for 30-60 seconds before removing the hot baking sheet underneath. let the macarons cool completely before removing them from the parchment paper.
for the guava buttercream filling:
  1. in a medium size bowl, using either a handmixer (i usually just go with a fork) mix the butter, powdered sugar and guava on low speed together until they're incorporated.
  2. then turn the speed to medium and mix for 2-3 more minutes until everything is blended and you've reached the right consistency for buttercream. add in a little milk or cream if the buttercream is too thick or more powdered sugar if it's too thin. once everything looks good it should be ready to use.
to assemble the macaron cookies:
  1. before assembling these cookies, make sure to pair up all the cookie shells so they are as close as possible in size.
  2. using a knife, spread a good amount of the guava buttercream on the inside of the macarons then sandwich them together.
  3. let them stand at least one day (keep them refrigerated) before serving (serve at room temperature), to meld the flavors.

store in airtight container for up to 5 days. makes 20-24 macarons. happy eating because these are really, really, good! :)

if the above recipe isn't for you, but you'd still like to try and make some other kind of macarons, you can certainly check out these recipes:

Monday, April 1, 2013

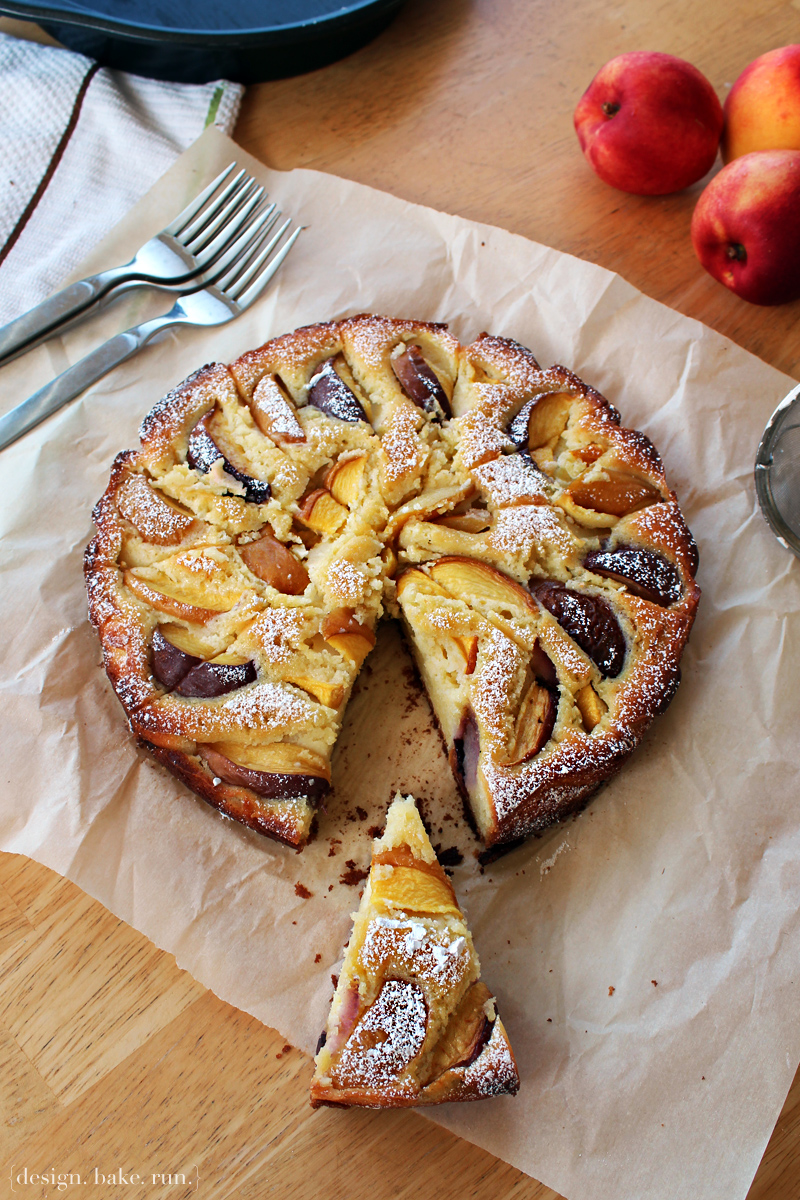
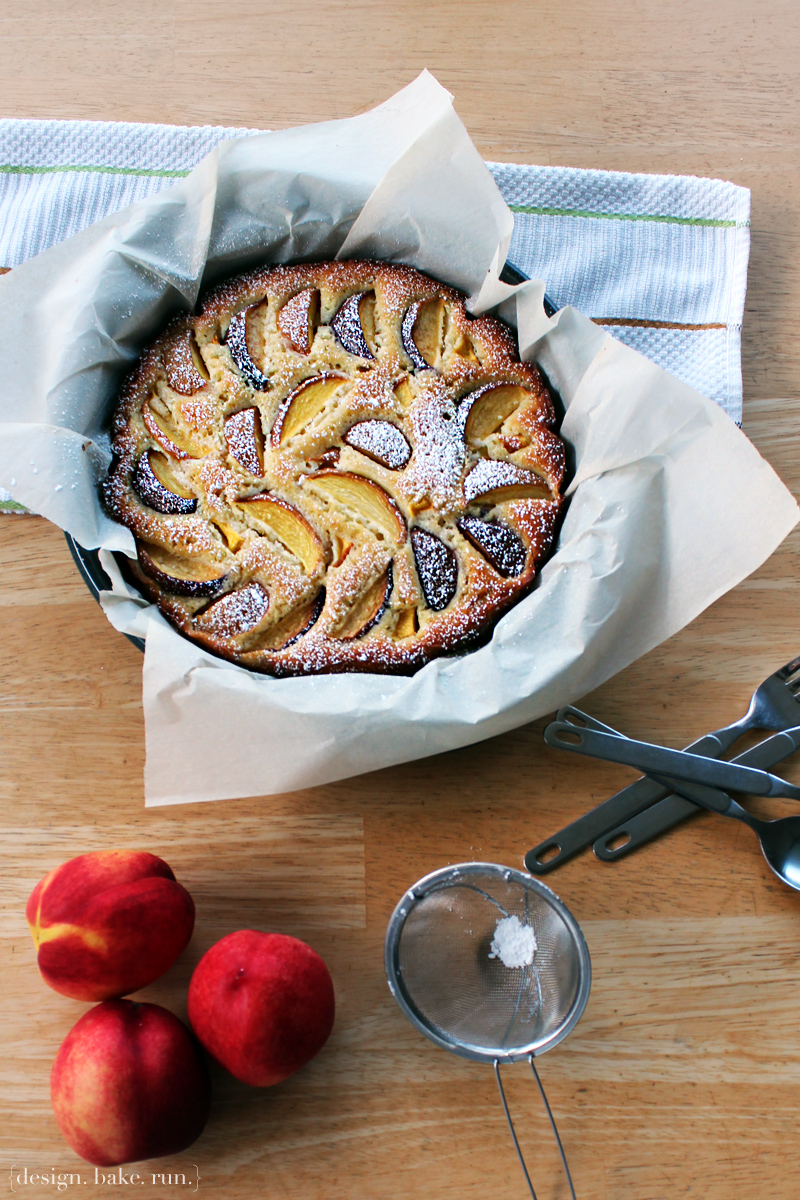
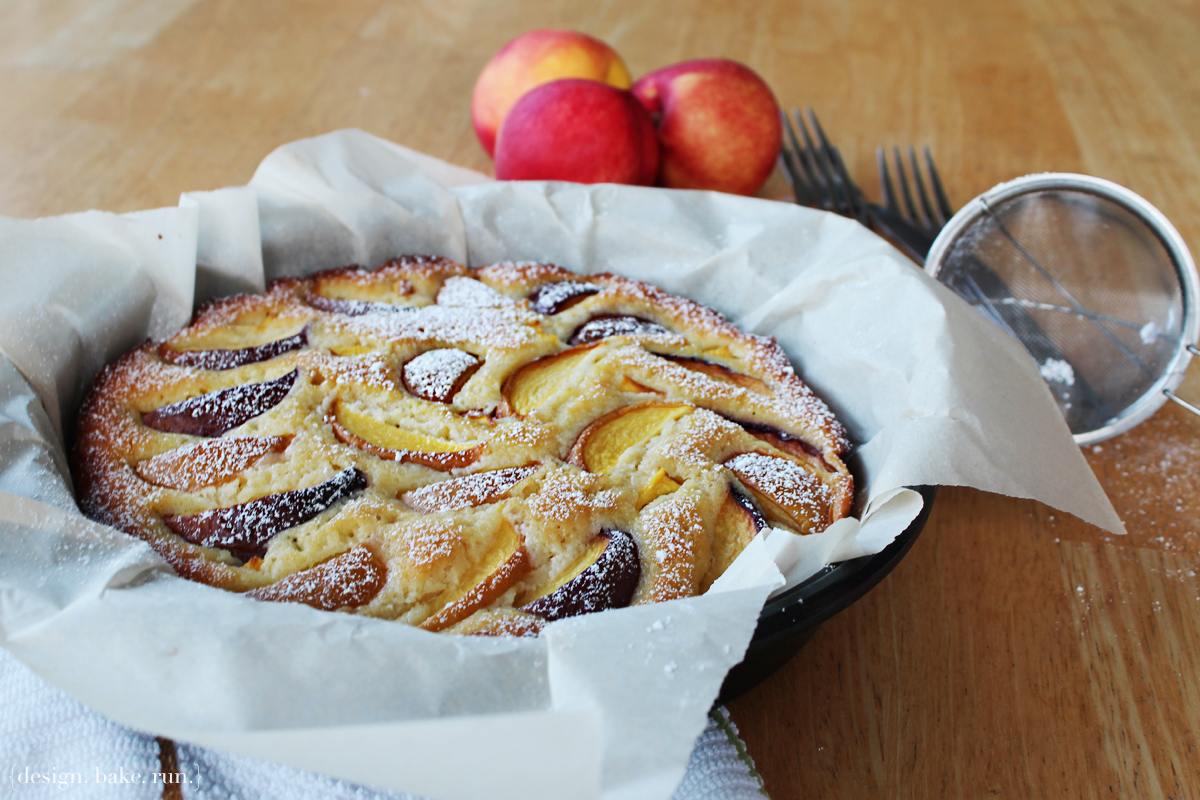
donna hay's lemony peach cake

Donna Hay's Lemony Peach Cake via design. bake. run.

this past weekend was easter weekend. c and i made a quick trip to visit my mom and came back before easter sunday. before we went up i knew i wanted to bake some goodies and bring it to them. actually, my family isn't very big on sweets or any baked goods. must be a cultural thing. i never grew up craving candy, desserts or delicious baked goods. we never had afters (dessert) after a meal or afternoon tea with pastry (unlike m's because he grew up very english with tea time, afters and all). it wasn't until i met m and had c that i eventually acquired or grew to like all these delicious baked goodies. now, i'm a big fan of very well made pastry and sweets. it's a big deal in our house these days.

okay, so back to what i was saying. yes, my mom doesn't really care for very sweet things so i decided to bake her this peach cake (okay, more like nectarines because that was all i had in the fridge and needed to use them up before they went bad). i still had 6-7 nectarines lying around in the fridge that i had bought a week or so back. they were really firm when i got them (that's how i like my peaches and nectarines). they were still firm, but i knew they would be going if i didn't eat them or use them up somehow. upon a quick search on pinterest, i saw a recipe for a peach cake. the recipe and ingredients looked simple enough so i decided to go ahead and made it.

so, how was it? pretty good. if you're not a sweets fan, i say you'll like this cake. actually, even if you are, it's good to change it up. the texture of the cake is just perfect and i love the added bite of the fruit. i like how the nectarine slices kept the cake nice and moist. the dusting of the powdered sugar on top adds an extra bit of sweetness and finishes the cake really well. my mom loved it – and i'm really shocked because she almost always never eat any baked goods. and she ate like three slices! that says a lot. hehehe ;)

below's the recipe should you want to try it. let me know what you think. enjoy and happy baking!

Donna Hay's Peach Cake via design. bake. run.
my mom loved this peach cake. the simple confectioners' sugar dusting at the end adds a nice touch of sweetness to this simple, yet very elegant looking cake.

Peach Cake via design. bake. run.
i say this peach cake would go very well with any afternoon tea or brunch. or any occasion, or no occasion at all! hehe

lemony peach cake
recipe from donna hay

ingredients:
1-1/2 stick (175g) butter, softened and chopped
3/4 cup (165g) caster (superfine) sugar
2 tablespoons finely grated lemon rind
3 eggs
1 cup (150g) plain (all-purpose) flour, sifted
1 teaspoon baking powder, sifted
3/4 cup (70g) natural yoghurt
3 peaches, sliced
powdered (confectioner’s) sugar, for dusting
double (thick) cream, to serve

directions:
  1. preheat oven to 325°F (160°C). place the butter, sugar and lemon rind in the bowl of an electric mixer and beat for 6–8 minutes or until light and creamy.
  2. gradually add the eggs, beating well after each addition. add the flour, baking powder and yoghurt and beat until just combined.
  3. spoon into a lightly greased 9-inch (25cm) round cake tin lined with non-stick baking paper. top with the peaches and bake for 1 hour or until cooked when tested with a skewer. allow to cool for 10 minutes in the tin, then turn out onto a wire rack to cool. dust with powdered sugar and serve with cream.
serves 6. enjoy and happy eating! :)

Wednesday, March 27, 2013

the best baked apple tart ever!

Dalloyou's Baked Apple Tart via design. bake. run.

a while back one of my coworkers brought in this delicious apple tart. it is definitely one of the best if not the best apple tart i've ever had. so good that i had to make one myself so m and my MIL can confirm it with me. and since i had made that lemon cream tart recipe from tartine and had 3 extra pie/tart dough leftover, why not?! the sweet tart dough would be perfect for this apple tart recipe.

this recipe was adapated from dalloyau, a very well known and popular pastry company in paris and comes from dorie greenspan's paris sweets book. of course, i missed out on tasting all the goodies from dalloyau the last time i was there. one, let's just say i wasn't aware of them as i am now and two, i'd been eating paris sweets literally every day we were in paris. i know, i was too spoiled. i remembered we even walked pass dalloyau's pastry stands inside galeries lafayette (the giant shopping mall in paris). they had so many opera cakes, macarons and every pastry you can possibly imagine! but at the time i remembered all i wanted was real food (no more sweets, at least at the time anyway) and opted for some thai food. i know, thai food in paris (kind of disappointing huh?). but this place is for sure on my to-eat-list the next time i'm in paris. i can't wait to go back and try everything (okay, maybe not everything, but almost?!) on their menu.

so, what's sooooo good about it? let's just say not only do you get these nicely sauteed caramel-y sliced apples, but the added almond cream with the apple is just delish. it's really THAT good! i've never had a tart with almond cream before and i have to say, the almond cream makes a giant difference. it's a nice added sweetness to the tartiness of the apples. ever since i've made the almond cream in this tart recipe, i've been making the almond cream and putting it on everything! it's super simple that you can whisk up in a few short minutes. one of my personal favorites i like to put the almond cream on is french toast. it's sort of like a take on those delicious bostocks i had at b. patisserie a while back, but homemade and just as good. i'll have to put up a post on these later at some point, but for now… let's enjoy this delicious apple tart.

oh, so what did m and my MIL say? they loved it. like absolutely loved it! m said it's the best he's ever had and the only kind of apple tart or pie he'll ever eat! we're for sure adding this to the list of many baked goodies we make during the holidays. he loves the sweet dough tart with the apples. it's like a nice shortbread crust that compliments the apples and almond cream nicely. i told him i could also make it with puff pastry sheets as the pie crust but he said no. the sweet dough tart is perfect and loves the apple tart exactly the way i had made it. so i guess i'll stick with what i have.

below's the recipe if you'd like to make it. seriously, it's the best apple tart ever! :)

Dalloyou's Baked Apple Tart via design. bake. run.
this is really the best apple tart ever. even if you don't like apple pies or tarts, i say you should still give this a try. the almond cream will make you fall in love with it. really.

THE BEST Baked Apple Tart EVER! via design. bake. run.
a close-up shot of a tart slice. seriously, so good. i can't wait until we go to paris again so i can really hit up dalloyau and have an actual slice made from the recipe maker themselves!

Baked Apple Tart via design. bake. run.
as i was taking a shot of this slice, little miss v couldn't help it. she wanted to get a piece (or this piece) of this delicious apple tart!

tarte aux pommes au four
dalloyau's baked apple tart recipe from sabrina ko's blog

ingredients:

the almond cream:
1-1/2 tablespoons (3/4 ounce; 20 grams) unsalted butter, at room temperature
1 tablespoon sugar
1/4 cup (30 grams) ground almonds
1 large egg, preferably at room temperature
2 tablespoons (30 grams) heavy cream
1 tablespoon calvados or apple brandy (or 1 tablespoon pure vanilla extract)

the apples:
6 large apples (2-1/4 pounds; 1 kilo), preferably Fuji or Granny Smith, peeled and cored (note: if you want to skip the grated apples part, you can use 4-5 apples instead)
7 tablespoons (3-1/2 ounces; 100 grams) unsalted butter (note: this can also be reduced without much sacrifice to the taste. i actually halved the butter here and it still came out delicious!)
1/2 cup sugar (75 grams)
2 tablespoons calvados or apple brandy (or 1-1/2 tablespoons pure vanilla extract)

the crust:
1 unbaked 9-inch (24-cm) tart shell made from sweet tart dough (recipe here) or you can use puff pastry (homemade or store-bought)
confectioners’ sugar for dusting

directions:

the apples:
  1. center a rack in the oven and preheat the oven to 350°F (180°c).
  2. cut 4 of the apples in half and slice each half into thirds. grate the remaining 2 apples on the coarse side of a box grater (you can skip the grating if you like – i didn't though).
  3. melt 1 tablespoon of the butter and 1 tablespoon of the sugar in a large skillet over high heat. add the grated apples and cook, stirring, until they are golden brown, about 3 minutes. using a slotted spoon, transfer the apples to a plate (if you skipped the grating, you can skip this step). add the remaining 6 tablespoons (85 grams) butter and the rest of the sugar to the pan and, when the butter is bubbling, toss in the apple slices. cook the apples, stirring frequently, until they are lightly caramelized, 5 to 7 minutes. pour in the calvados, turn off the heat, and carefully touch a match to the liquid. when the flames die down, pull the pan from the stove. (note: if you don't have the calvados, you can just add in the vanilla extract after turning off the heat. no need for lighting up a match or anything like that.)
  4. transfer the apple slices to a baking pan (or keep them in the skillet if it is ovenproof) and bake for 20 minutes, or until they are almost cooked through. cool for 30 minutes.
  5. while the apples are baking, make the almond cream. working in a medium bowl with a whisk, beat the butter and sugar together for a minute or so, until the sugar dissolves and the butter whitens a little. whisk in the almonds, then the egg, beating until the mixture is blended. finally, whisk in the cream and calvados (or vanilla extract). cover the bowl and refrigerate until needed. (the cream can be kept covered in the refrigerator for up to 3 days.)

to assemble the tart:
  1. position a rack in the lower third of the oven and preheat the oven to 350°F (180°C). line a rimmed baking sheet with parchment paper and put the tart shell on the sheet.
  2. spoon the almond cream evenly into the crust. top with the baked apples, arranging them attractively in a single layer. check the grated apples—if they are wet, press them either between your palms or between paper towels. fluff up the grated apples with your fingers or a fork and arrange them over the apple slices, leaving a bare border of an inch (2.5 cm) or so.
  3. bake the tart for 40 to 50 minutes, or until the almond cream has puffed and the apples are beautifully browned. cool the tart on a rack; unmold and serve it when it is either just warm or at room temperature. dust the tart generously with confectioners’ sugar right before bringing it to the table.

notes:
while all of the elements can be prepared ahead, once the tart is assembled, it should be baked immediately, and once it is baked, it should be served soon thereafter.

this tart is perfect on its own or if you prefer, is also delicious with either a bit of crème fraîche or vanilla crème anglaise. but in our household (being the very english people we are! hehe) we have it with evaporated milk and it's delish! of course, a giant scoop of good ol' vanilla ice cream is yummy as well. i do love my vanilla ice cream. :)

makes 8 servings. enjoy!

Thursday, March 21, 2013

york peppermint pattie cookies

York Peppermint Pattie Cookies via design. bake. run.

i'm not a big fan of peppermint patties, but i don't not like it enough to pass up on it. well, my MIL and m are big peppermint patties fan. right after the holidays i picked up a couple bags of york peppermint patties (because being the frugal person i am – i know, it doesn't show here, these were on clearance at half off!) with the intention of using them to make some yummy baked goodies. three months later i finally got around to making something with them.

these york peppermint pattie cookies turned out great. they taste delicious and i love how good they turned out (look-wise). they're like a different version of your classic delicious mint chocolate chip cookie you can say. i love how the minty sweet cream is scattered in various parts of the cookie as you bite into it. oh! and during the baking, some of them melted and crystalized turning into something that's toffee-like when it cooled and hardened. those bites are also delish.

below's the recipe should you want to try and bake some yourself. i say go for it, because these just like all the other chocolate chip cookies (or any cookie recipe really) that i've made are superb. of course, i'm biased here. enjoy! :)

York Peppermint Pattie Cookies Make Perfect Gifts! via design. bake. run.
i gave some of these away as mini gifts to coworkers. oh, and also tested out some hand-lettered packaging.

York Peppermint Pattie Cookies via design. bake. run.
if you're a minty chocolate chip kind of fan, i say this is a must try recipe!

york peppermint pattie cookies

ingredients:
1 stick of butter, room temperature
1 cup granulated sugar
1/2 cup brown sugar
2 eggs
1-3/4 cups + 2 tablespoons all purpose flour
1 teaspoon baking soda
a pinch of salt
1 bag of york peppermint patties (you may not need the whole bag)

directions:
  1. preheat oven to 350° f.
  2. in a medium bowl, sift the flour, salt and baking soda and set aside.
  3. in a separate bowl with a fork (or you can do all of this in a mixer or hand mixer if you like) beat the butter and sugar (both granulated & brown) together until the nice and fluffy.
  4. add in the eggs and mix until everything is combined.
  5. then add in the dry ingredients and mix until everything is incorporated.
  6. now, at this point you'll want to take the peppermint patties out of their individual wrappers (assuming they came individually wrapped because that's what i used). break up each pattie into 3-4 pieces and add it to the cookie dough batter. once you have enough patties (i say about 20-25 or you can use the entire bag) broken up and added, mix the dough until everything is combined.
  7. then using a small cookie scooper (about 1 tablespoon in size) or you can use whatever you like (a spoon is fine too!), spoon about 1 tablespoon of the cookie dough onto a parchment-lined (or silicone mat) baking sheet. make sure each dough tablespoon is at least 2 inches apart.
  8. bake for 9-10 minutes or until the cookies are a light golden brown and outer edges start to harden yet centers are still soft and puffy.
  9. take cookies out of the oven and let them cool on the sheet for 10 minutes before removing them.
  10. enjoy at slightly warm temperature or put them in an airtight container/cookie jar.
makes 30-36 small cookies. enjoy! happy baking and eating. :)

Monday, March 18, 2013

browned butter coconut macarons

Browned Butter Coconut French Macarons via design. bake. run.

last friday was one of my coworkers' last day. she's moving back to nyc to be closer with her family. as a parting gift, i decided to make her some french macarons. when making the browned butter buttercream, we had some leftover coconut milk from m's first go at chicken biryani that we had for dinner so i decided instead of milk or cream, i would add in a little coconut milk. once the buttercream was completed, i could taste the hint of coconut in it. so i guess you can say that's how i got about to the name of this french macaron. i absolutely love coconut and have recently taken a liking to browned butter, so i think i'll be making this again whenever there's coconut milk leftover available.

so, how good is it? one word. scrumptious. below's the recipe should you want to try it. and if you do make some and do feel free to let me know what you think. as always, happy baking and eating!

French Macarons with Browned Butter Coconut Buttercream Filling via design. bake. run.
browned butter buttercream or anything has become a new favorite in my baking. i love how yummy it smells and tastes. the coconut and browned butter combo is perfect for this macaron! delish.

browned butter coconut french macarons

ingredients:

macaron batter:
1 cup powdered sugar
3/4 cup almond meal
2 large egg whites, at room temperature
5 tablespoons granulated sugar

browned butter coconut buttercream filling:
4 tablespoons butter
2-1/2 to 3 cups powdered sugar
2 tablespoons coconut milk
cream or milk, if needed

directions:

to make the macaron batter/shells:
  1. line two baking sheets with parchment paper and have a pastry bag with a plain tip (about 1/2-inch, 2 cm) ready.
  2. sift together the powdered sugar and almond meal so there are no lumps. set aside.
  3. in the bowl of a standing electric mixer (or if you prefer, you can use a bowl and hand mixer), beat the egg whites until they begin to rise and hold their shape. while whipping, beat in the sugar until very stiff and firm, about 2 minutes.
  4. carefully fold the dry ingredients, in two batches, into the beaten egg whites with a flexible rubber spatula. when the mixture is just smooth and there are no streaks of egg white, stop folding and scrape the batter into the pastry bag (standing the bag in a tall glass helps if you’re alone).
  5. pipe the batter on the parchment-lined baking sheets in 1.35-inch circles evenly spaced one-inch apart.
  6. rap the baking sheet a few times firmly on the counter top to flatten the macarons. then let it sit for at least 30-60 minutes depending on humidity before baking them in the oven. about 10-15 minutes before baking, preheat oven to 350 degrees F. bake for 15 minutes.
  7. once macaron shells are out of the oven, let them sit for 30-60 seconds before removing the hot baking sheet underneath. let the macarons cool completely before removing them from the parchment paper.

for browned butter coconut buttercream filling:
  1. brown the butter in a small saucepan over medium heat. i say let the butter melt and hang out until it gets to that nice golden color and your kitchen smells delicious.
  2. turn off the stove and pour the brown butter into a medium size bowl. add in the powdered sugar and the coconut milk and mix the ingredients together on low speed until they're incorporated. then turn the speed to medium and mix for 2-3 more minutes until everything is blended and you've reached the right consistency for buttercream. add in a little milk or cream if the buttercream is too thick or more powdered sugar if it's too thin. once everything looks good it should be ready to use.
to assemble the macaron cookies:
  1. before assembling these cookies, make sure to pair up all the cookie shells so they are as close as possible in size.
  2. using a knife, spread a good amount of the brown butter coconut buttercream on the inside of the macarons then sandwich them together.
  3. let them stand at least one day (keep them refrigerated) before serving (serve at room temperature), to meld the flavors.

store in airtight container for up to 5 days. makes 20-24 macarons. happy eating because these are really, really, good! :)

Friday, March 15, 2013

passionfruit cupcakes with citrus buttercream frosting

Passionfruit Cupcakes with Citrus Buttercream Frosting via design. bake. run.

last friday i brought into work these delicious burnt sugar french macarons. i had made them earlier in the week and was letting them age in the fridge before bringing them to work to share. as it turned out, while the macarons were aging in our refrigerator, we've also been helping ourselves to them. i discovered that m absolutely loves them. come friday, instead of having 28 macarons, we were down to just 16. now, 16 macarons would have been fine, but being the typical me, i didn't think that was enough goodies to go around. so on a whim, last friday morning before work i decided to make some mini cupcakes. and so that explains these delicious passionfruit cupcakes here.

now, i absolutely love passionfruit. it's just unfortunate they aren't readily available here in the bay area like other more tropical and exotic places such as hawaii or australia. sure they do grow some variety of the fruit here in california, i've just yet to get my hands on them (at least not since maui of last year). so for these cupcakes, the juices will do just fine.

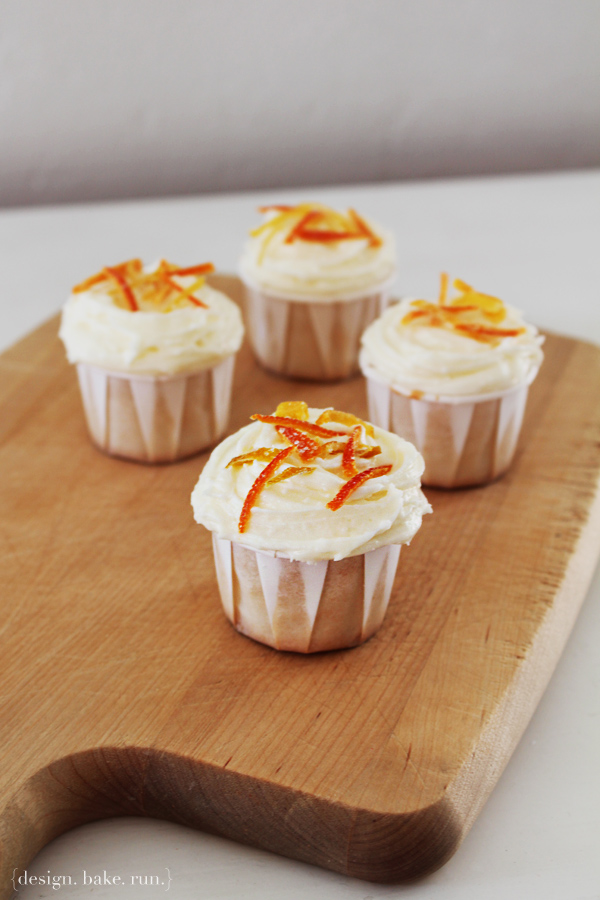
so, how were these cupcakes anyway? pretty awesome. you can still get a hint of the passionfruit in the cake. now, if it was 100% passionfruit (because it's got some pear juice in it – i wouldn't be surprised if it was 49% pear, 51% passionfruit), i say it would be pretty ridiculously delicious. the citrus buttercream really pairs well with the passionfruit. i love the whole combination. oh, and topping it off with some leftover candied citrus peels really elevated the citrus flavor (not that the buttercream didn't have enough of it already).

below's the recipe should you want to try and make these yourself. i based these cupcakes off of the eggless vanilla cupcakes that i often make so they're actually full size (or standard size i should say) cupcakes rather than mini cupcakes. but of course, if you want to bake them in mini cupcake liners, you certainly can. i would shorten the baking time to 15 minutes instead of 18.

okay, let me know if you do make some and how yours turn out. happy baking! :)

Passionfruit Cupcakes with Citrus Buttercream Frosting via design. bake. run.
i love the flavor combination of these cupcakes. passionfruit and citrus together is just delicious.

passionfruit cupcakes with citrus buttercream frosting

ingredients:

cupcakes:
1-1/4 cup all-purpose flour
2/3 cup granulated sugar
1 tsp baking powder
1/4 tsp baking soda
a pinch of salt
1/3 cup passionfruit juice or puree
2/3 cup milk
1 tbsp distilled vinegar (you can use cider too)
1/4 cup oil
1/2 tsp vanilla extract

citrus buttercream:
1/2 cup (1 stick) butter, room temperature
3 to 3-1/2 cups confectioners’ sugar
2 tbsp of orange juice
1 tbsp of lemon juice
some lemon & orange zest

milk or cream, as needed

directions:

for the cupcakes:
  1. preheat oven to 350°f.
  2. in a large bowl, sift together flour, baking powder, baking soda, and salt.
  3. then add in the sugar, oil, milk, passionfruit juice (or puree). mix until relatively smooth.
  4. fill cupcake liners with a scant 3 tablespoons of batter (cups should be just under 2/3 of the way full). bake for 18 minutes (or 15 if making mini cupcakes) or until lightly golden, and toothpick inserted in the center comes out clean. transfer to cooling rack and allow to cool completely.

for frosting:
  1. cream butter in electric mixer for 1-2 minutes until fluffy.
  2. slowly add in the sugar, citrus zest and juices and beat until light and fluffy; and has reached the right consistency; about 3-4 minutes. add cream or more sugar as necessary to achieve proper consistency.
  3. pipe or spread onto cooled cupcakes. optional: you can top it off with some thinly sliced candied citrus peels if you like!

makes 12 cupcakes (or 20-22 mini cupcakes).

enjoy and happy eating! :)

Friday, March 8, 2013

browned butter burnt sugar french macarons

Burnt Sugar French Macarons via design. bake. run.

okay, so i was trying to make that delicious smelling and oh-so-yummy browned butter toffee frosting i made a while back for these macarons. i said i would try it again since it tasted so good last time. well, i did, except for it wasn't quite browned butter toffee. this time, let's just say i didn't let the butter brown enough and the brown sugar sat too long in that saucepan that it was much darker (and tasted a little burnt or more bitter than normal sugar). anyway, i quickly took it off the stove and pour the butter mixture into a mixing bowl to see what i got. sure enough, the brown sugar was definitely so much darker and as the mixture cooled, it began to hardened a bit (just as i'd expected). long story short, i decided to go with this anyway than making a new batch of the browned butter sugar mixture. the end result? quite a delicious buttercream i would say. i love all the crunch from the hardened melted brown sugar. the hint of burnt or bitterness from the sugar and sweetness of the butter makes it quite nice also. it's like this sweet but just a tad bitter butterscotch-y taste. all the flavors actually work very well together. m said it's his favorite macaron flavor to date. he's usually a tough critic when it comes to my baking (and cooking) so i'll take it. as for me? it's pretty awesome, i'll definitely be making this one again.

below's the recipe should you want to try it. these are really good, i can assure you. so make some and let me know what you think. as always, happy baking and eating!

French Macarons with Browned Butter Burnt Sugar Buttercream Filling via design. bake. run.
i am in love with this browned butter burnt sugar buttercream filling. it's a little bitter yet sweet and has this buttersctoch-y taste to it and just taste really, really delicious!

browned butter burnt sugar french macarons

ingredients:

macaron batter:
1 cup powdered sugar
3/4 cup almond meal
2 large egg whites, at room temperature
1/4 cup brown sugar, firmly packed

browned butter burnt sugar buttercream filling:
4 tablespoons butter
3 tablespoons brown sugar
1-1/2 to 2 cups powdered sugar
cream or milk

directions:

to make the macaron batter/shells:
  1. line two baking sheets with parchment paper and have a pastry bag with a plain tip (about 1/2-inch, 2 cm) ready.
  2. sift together the powdered sugar and almond meal so there are no lumps. set aside.
  3. in the bowl of a standing electric mixer (or if you prefer, you can use a bowl and hand mixer), beat the egg whites until they begin to rise and hold their shape. while whipping, beat in the brown sugar until very stiff and firm, about 2 minutes.
  4. carefully fold the dry ingredients, in two batches, into the beaten egg whites with a flexible rubber spatula. when the mixture is just smooth and there are no streaks of egg white, stop folding and scrape the batter into the pastry bag (standing the bag in a tall glass helps if you’re alone).
  5. pipe the batter on the parchment-lined baking sheets in 1.35-inch circles evenly spaced one-inch apart.
  6. rap the baking sheet a few times firmly on the counter top to flatten the macarons. then let it sit for at least 30-60 minutes depending on humidity before baking them in the oven. about 10-15 minutes before baking, preheat oven to 350 degrees F. bake for 15 minutes.
  7. once macaron shells are out of the oven, let them sit for 30-60 seconds before removing the hot baking sheet underneath. let the macarons cool completely before removing them from the parchment paper.

for browned butter burnt sugar buttercream filling:
  1. brown the butter in a small saucepan over medium heat. i say let the butter melt and hang out until it gets to that nice golden color and your kitchen smells delicious.
  2. then add in the brown sugar and stir constantly until the sugar is dissolved. let it come to a boil if it's not already bubbly by now for an extra minute or two until you see the color really getting darker. it should be pretty dark by now. don't let it sit too long or else it will really burn or be too burnt! you want it to reach just burnt, not way over.
  3. turn off the stove and pour the brown butter and sugar mixture into a medium size bowl. stir it a few times with a fork to cool the mixture a little bit.
  4. add in the powdered sugar and with a fork (because that's what i use, but i guess you can use a hand mixer if you like) mix the ingredients together on low speed until they're all blended. you'll notice the sugar component hardening up. i just use the fork and try to break them up into bits. then turn to medium and mix until you've reached the right consistency for buttercream. add in a little cream or milk if it's too thick or more powdered sugar if it's too thin. once everything looks good it should be ready to use.
to assemble the macaron cookies:
  1. before assembling these cookies, make sure to pair up all the cookie shells so they are as close as possible in size.
  2. using a knife, spread a good amount of the brown butter burnt sugar buttercream on the inside of the macarons then sandwich them together.
  3. let them stand at least one day (keep them refrigerated) before serving (serve at room temperature), to meld the flavors.

store in airtight container for up to 5 days. makes 20-24 macarons. happy eating because these are really, really, good! :)

Tuesday, March 5, 2013

tartine's lemon cream tart

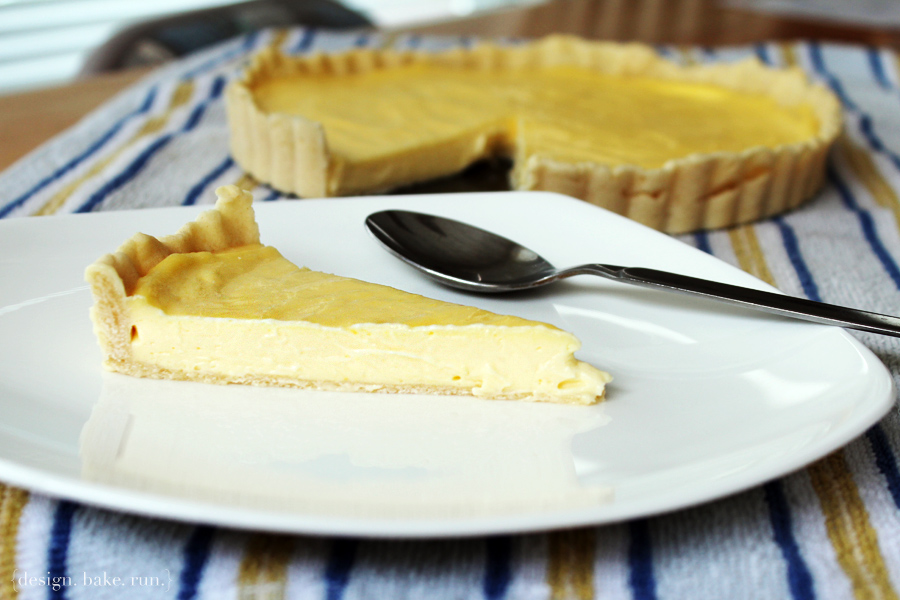
Tartine's Lemon Cream Tart via design. bake. run.

it seems like lemons are popping up everywhere these days. it is definitely lemon season you can say! a couple of weeks ago a friend gave me some meyer lemons from her garden. i knew exactly what i wanted to make with it. for sure some lemon curd and maybe some lemon cake or something lemony anyway. upon researching different lemon curd recipes i discovered tartine's lemon cream tart. i've gone to tartine multiple times, but i've yet to try their lemon tart. i don't know… must be because it's always so crowded there (the lines are ridiculous no matter what time of day – this place is hugely popular here in sf) that i feel a bit overwhelm sometimes even when i know exactly what i want to get (usually a morning bun and/or almond croissant).

okay, so after reading what it would take to make tartine's delicious lemon tart (as attested by many who've tried it and have made it themselves), i decided i too would attempt to make this yummy piece of goodness. so… how did it turn out? absolutely delicious! it is so lemony, creamy… and just so, so, good. even if you're not a fan, i say you fall in love it (and become a fan!?! =/). and if you are, you've got to make this! i love how the sweet dough for the tart gives that perfect amount of sweetness to offset the tartness from the lemon cream. everything just works well together in one scrumptious bite.

below is the recipe should you want to try and make this. it's super easy to make. usually i don't care for pie/tart dough because it's such a pain sometimes, but this one is a piece of cake. and the lemon cream is nothing if you've done plenty of double boiler stuff before. actually, even if you haven't, just follow the recipe and everything will turn out fabulous.

good luck and let me know how yours turn out! happy baking and eating, as always.

Tartine's Lemon Cream Tart via design. bake. run.

Tartine's Lemon Tart via design. bake. run.

sweet tart dough
by tartine (makes 4 9-inch tart shells or twelve 4-inch tartlet shells)

1 cup + 2 tbsp (9 oz/255 grams) unsalted butter, at room temperature
1 cup (7 oz/200 grams) sugar
1/4 tsp salt
2 large eggs, at room temperature
3 1/2 cups (17 1/2 oz/500 grams) all-purpose flour

directions:
  1. using a stand mixer fitted with the paddle attachment, combine the butter, sugar and salt and mix on medium speed until smooth.
  2. mix in 1 egg. add the remaining egg and mix until smooth. stop the mixer and scrape down the sides of the bowl with a rubber spatula.
  3. add the flour all at once and mix on low speed just until incorporated.
  4. on a lightly floured work surface, divide the dough into 4 equal balls and shape each ball into a disk 1/2 inch thick. wrap well in plastic wrap and chill for at least 2 hours or overnight or freeze 3 for future use (this dough will keep for up to 3 weeks).
  5. to line a tart pan, place a dough disk on a lightly floured surface and roll out 1/8 inch thick, rolling from the center toward the edge in all directions. lift and rotate the dough a quarter turn after every few strokes, dusting underneath as necessary to discourage sticking, and work quickly to prevent the dough from becoming warm. cut out a circle 2 inches larger than the pan. if the dough is still cool, carefully transfer the circle to the pan, easing it into the bottom and sides and then pressing gently into place. if the dough has become too soft to work with, put it in the refrigerator for a few minutes to firm up before transferring it to the pan. if the dough develops any tears, just patch with a little extra dough, pressing firmly to adhere. trim the dough level with the top of the pan with a sharp knife. place the pastry shell in the refrigerator or freezer until it is firm, about 15 minutes.
  6. if you are making tartlet shells, roll out the dough in the same way, cut out circles according to the size of your pans, and line the pans. the rest of the dough, including the scraps, can be frozen for future use.
  7. preheat the oven to 325 degrees fahrenheit.
  8. dock (make small holes in) the bottom of the tart shell or tartlet shells with a fork or the tip of a knife, making tiny holes 2 inches apart. place in the oven and bake for 7 to 10 minutes for a partially baked large shell or 5 to 7 minutes for tartlet shells. the pastry should be lightly coloured and look dry and opaque.
  9. let cool completely on wire racks. the pastry shells will keep, well wrapped, in the refrigerator for up to 1 week or in the freezer for up to 2 weeks.

lemon cream
by tartine (about 2.5 cups /625 ml)

1/2 cup + 2 tbsp (5 oz/155 ml) lemon juice
3 large eggs
1 large egg yolk
3/4 cup (6 oz/170 g) sugar
pinch of salt
1 cup (8 oz/225 g) unsalted butter

directions:
  1. pour water to a depth of about 2 inches into a saucepan, place over medium heat, and bring to a simmer.
  2. combine lemon juice, whole eggs, yolk, sugar and salt in a stainless steel bowl on top of double boiler. whisk ingredients constantly for 10-12 minutes until the mixture becomes very thick and registers 180°F on a thermometer.
  3. emote the bowl from over the water and stirring from time to time to release the heat.
  4. meanwhile, cut butter into 1 tbsp-pieces. when the cream is ready, using either a regular blender, or an immersion blender, add 1 piece of butter at a time to lemon mixture, blending after each addition of butter. the cream will be pale opaque yellow, and quite thick.
  5. you can use the cream immediately, or pour it into a storage container with a tight-fitting lid and refrigerate for up to 5 days.

to assemble the tart

have the tart shell ready for filling. pour the lemon cream directly into the cooled tart shell. shake the tart pan gently to smooth out the top of the filling. chill the tart until firm, about 2 hours before serving.

that's it, enjoy!
Related Posts Plugin for WordPress, Blogger...