Showing posts with label holidays. Show all posts

Tuesday, May 12, 2015

fruity cheerios macarons

Fruity Cheerios Cereal Macarons with Fruity Cheerios Buttercream Filling | design. bake. run.

hello again! yes, i know it's been forever since the last time i posted something here. i haven't been baking a whole lot lately just because i'm trying not to eat too much sweets these days. anyway, i did however get around to baking some french macarons for mother's day and actually remember to take some photos. :)

what i have here are fruity cereal french macarons. who says you can't use kiddie cereals as a macaron flavor? of course, the only not so great thing about this is i have no idea if the cereal is gluten-free or not. mostly likely not in my case. of course, if you want to make some cereal flavored macarons, you can always check your cereal to make sure if it's GF, or else keep in mind these macarons may not be so GF friendly.

okay, so these have become my favorite flavor at the moment. i'm not a big cereal fan but i do love my fruity sugary cereal. this is one way to eat it, you can say. actually, it may be one of the best ways to enjoy those colorful sugary cereals. so if you're up for baking up a batch, why not give this a try?! enjoy and happy baking. :)

Fruity Cheerios Cereal Macarons with Fruity Cheerios Buttercream Filling | design. bake. run.
this is my new favorite macaron flavor. who says crunched up colorful kiddie cereal can't make for some good-tasting and looking macarons? in love with these.

fruity cheerios french macarons with fruity cheerios buttercream filling

ingredients:

macaron batter:
1 cup powdered sugar
3/4 cup almond meal
2 large egg whites, at room temperature
5 tablespoons granulated sugar
1/4 tsp gel food coloring (optional – i didn't use any here)
1/4 cup crushed fruity cereal (i used fruity cheerios but i'm sure you can use fruit loops or equivalent), for sprinkling on top of piped macaron batter

fruity cereal buttercream:
1/4 cup crushed fruity cereal
2-4 tbsp milk
1/2 stick of butter, room temperature
1 to 1-1/2 cups of powdered sugar

directions:

to make the macaron batter/shells:
  1. line two baking sheets with parchment paper and have a pastry bag with a plain tip (about 1/2-inch, 2 cm) ready.
  2. sift together the powdered sugar and almond meal so there are no lumps. set aside.
  3. in the bowl of a standing electric mixer (or if you prefer, you can use a bowl and hand mixer – this is my prefer method), beat the egg whites until they begin to rise and hold their shape. while whipping, beat in the sugar until very stiff and firm, about 2 minutes.
  4. optinal: add in the gel food coloring.
  5. carefully fold the dry ingredients, in two batches, into the beaten egg whites with a flexible rubber spatula. when the mixture is just smooth and there are no streaks of egg white and the colors have combined, stop folding and scrape the batter into the pastry bag (standing the bag in a tall glass helps if you're alone).
  6. pipe the batter on the parchment-lined baking sheets in 1.35-inch circles evenly spaced one-inch apart. then sprinkle the piped batter with crushed fruity cereal.
  7. rap the baking sheet a few times firmly on the counter top to flatten the macarons. then let it sit for at least 30-60 minutes depending on humidity before baking them in the oven. about 10-15 minutes before baking, preheat oven to 350 degrees F. bake for 15 minutes.
  8. once macaron shells are out of the oven, let them sit for 30-60 seconds before removing the hot baking sheet underneath. let the macarons cool completely before removing them from the parchment paper.

for the fruity cereal buttercream filling:
  1. in a medium bowl combine the butter and sugar and mix until incorporated. then add in the crushed fruity cereal and mix until combine.
  2. next, add in the milk (1 tablespoon at a time) and mix until combine and you've reached the right consistency for buttercream. if it's too thick, thin it out with a little bit with more milk. if too thin, add in a little more powdered sugar.

to assemble the macaron cookies:
  1. before assembling these cookies, make sure to pair up all the cookie shells so they are as close as possible in size.
  2. using a knife, spread a good amount of the buttercream on the inside of the macarons then sandwich them together. note: you can certainly put the buttercream in a piping bag and pipe the buttercream onto the cookie. it's a lot easier i think and less mess. but i can't be bother to do this so i almost always just spread it with a knife.
  3. let them stand at least one day (keep them refrigerated in an airtight container) before serving (serve at room temperature), to meld the flavors.

store in airtight container for up to 5 days. makes 20-24 macarons. enjoy! :)


Tuesday, April 22, 2014

vanilla cupcakes

Sour Cream Vanilla Cupcakes via design. bake. run.

you know me. okay, maybe not really. but what i was going to say here was, i never like throwing any leftover ingredients out if it's still good and i know that i can make use of it. so as usual... you know, the typical mexican dinner night that calls for sour cream, well, there was a bunch leftover. so, what did i do with it? of course, bake with the leftovers!

what we have here is a super moist, waaaay delicious and perfectly sweetened vanilla cupcake; and nicely decorated for easter sunday (yes, this was our easter meal dessert – of course you can decorate it anyway you like for any occasion). i say you can skip the frosting if you want, because the cake out of the oven is seriously a yummy bite already. the sour cream in this recipe is superb. for sure better than your buttermilk or good ol' milk. the cake comes out perfectly baked and not dry at all. i love that the taste and texture stays true even a couple days later (yeah, sitting out on the counter... and so not in an airtight container! my bad).

this recipe is for sure a keeper in my opinion. if you’d like to see it for yourself, i say go ahead and give it a try. it's super simple to make. you can't mess up. i've made it two times in the last week and loved it every time. the only thing i wasn't too crazy about was that although the cake puffed up (rise) while baking in the oven, once you take it out and it cools, it falls back and dips just a tad. not totally crazy about that, but hey, i guess that's okay when it's so good. not too big of a deal especially if you're going to frost it. you won't be able to tell.

okay, enjoy! :)

Easter Cupcakes! via design. bake. run.

vanilla cupcakes
recipe from here

ingredients:
  • 1-1/2 cups all-purpose flour
  • 1 cup granulated sugar
  • 1-1/2 teaspoons baking powder
  • 1/2 teaspoon salt
  • 8 tablespoons unsalted butter (1 stick), room temperature
  • 1/2 cup sour cream
  • 1 large egg, room temperature
  • 2 large egg yolks, room temperature
  • 1-1/2 teaspoons vanilla extract

directions:
  1. Adjust oven rack to middle position; heat oven to 350 degrees F. Line standard muffin/cupcake tin with paper or foil liners.
  2. Whisk together flour, sugar, baking powder, and salt in bowl of standing mixer fitted with paddle attachment. Add butter, sour cream, egg and egg yolks, and vanilla; beat at medium speed until smooth and satiny, about 30 seconds. Scrape down sides of bowl with rubber spatula and mix by hand until smooth and no flour pockets remain.
  3. Divide batter evenly among cups of prepared tin. Bake until cupcake tops are pale gold and toothpick or skewer inserted into center comes out clean, 20 to 24 minutes. Remove the cupcakes from tin and transfer to wire rack; cool cupcakes to room temperature before frosting. For frosting ideas, you can check out these recipes.

makes 12 standard size cupcakes. enjoy and happy eating. :)

Tuesday, February 25, 2014

mini apple crumbles

Mini Apple Crumbles via design. bake. run.

i was going through my stacks and stacks of magazines sometime last week and ran across a recipe for mini apple crumbles. yes, i've got piles of shape, marie claire, better homes & gardens, 7x7 and ca home & design magazines just to name some that i've left it piled on (and some i have yet to go through them). i guess i'm still one of the few left who appreciates actual printed materials over those ebooks or e-zines. okay, going off topic here. yes, as i was going through one of my shape magazines from a few months back, i noticed a recipe for mini apple crumbles. i think it must have been shape's november 2013 issue. leafing through the pages and seeing that, a lightbulb went in my head. well, hello… we've got a bunch of oatmeal lying around, i could actually put some to use with this recipe! so off i went with it.

okay, i've actually adapted the recipe a bit because i didn't have any maple syrup on hand or couldn't be bothered with the spices that were in it. but overall, the recipe was pretty straight forward. so go ahead and bake some. these make for perfect little one-bite treats and are great for parties or any occasions. :)

One-Bite Mini Apple Crumbles via design. bake. run.
these one-bite mini apple crumbles make for the perfect little party treats and has only 95 calories.

Mini Apple Crumbles via design. bake. run.
this recipe is super simple to make. i love how you get many different kinds of texture, crunch and flavors from just one tiny bite.

mini apple crumbles
recipe from shape magazine's november 2013 issue

crumble topping:
cooking spray
1/2 cup rolled oats
1/2 cup whole-wheat flour
1 teaspoon ground cinnamon
pinch kosher salt
1/3 c maple syrup
2 tablespoons cold, unsalted butter, cut into small pieces

apple filling:
2 firm apples, peeled, cored and diced
2 tablespoons maple syrup

directions:
preheat over to 350°F. lightly coat a 12-cup mini muffing pan with cooking spray and set aside.

to make the crumble topping, combine oats, flour, cinnamon, and salt in medium bowl. stir in maple syrup until well coated. use a fork to smash the butter pieces into the oat mixture until crumbly. Set aside.

to make the apple filling, add apples, maple syrup, and 1/2 cup water to a small saucepan. cook over medium heat, stirring occasionally, for 5 minutes. remove from heat and let cool slightly.

meanwhile, place 1 teaspoon of the oat mixture into the bottom of each muffin cup. see your fingers to gently press down to form  a solid crust. Place 1 tablespoon of the apple  mixture over each and top with remaining crumble distributing evenly among all muffin cups.

bake for 10 to 15 minutes or until golden brown. remove from oven, let cool to room temperature, then use an offset spatula or a butter knife to gently remove from pan. serve at room temperature.

makes 12 mini apple crumbles. enjoy!

nutrition facts: 95 calories; 3 g fat; 18 g carbs; 1 g protein; 1 g fiber; 22 mg sodium; 20 mg calcium

Tuesday, February 11, 2014

chocolate-cinnamon cupcakes with mocha buttercream frosting

Mini Chocolate-Cinnamon Cupcakes with Mocha Buttercream Frosting via design. bake. run.

is it february already? and valentine's day is around the corner?!! alright, i haven't baked cupcakes in like forever. it's only fitting i make some (mini) chocolate cupcakes again, just in time for valentine's day. yes, i made some last year as well, in addition to the super popular (on pinterest) mini creme brulee cupcakes. those are pretty awesome as well.

to change it up a bit, i decided to add a little cinnamon to the usual (eggless) chocolate cupcake recipe. according to m, the cinnamon didn't come through a whole lot. i guess you could sort of tell it's there, but not really because once it's baked the chocolate and coffee flavors overpower the cinnamon? i don't know. so if you really like cinnamon, i say add in another teaspoon or so. otherwise, the recipe the way it is below will do just fine. and if you're a coffee fan, the mocha frosting is perfection. chocolate and coffee? done.

alright, below's the recipe if you'd like to bake some for this upcoming valentine's day or any day. i say it works for any occasion. so go ahead. they're super simple to make and the end results are always stunning... delish! enjoy and as always, happy baking!

The Perfect Valentine's Day Sweet! Chocolate-Cinnamon Cupcakes with Mocha Buttercream Frosting via design. bake. run.
who doesn't want to get some mini chocolate cupcakes this valentine's day? these are the perfect little gifts. we gave some away to c's teacher as an early valentine's day gift.

Chocolate-Cinnamon Cupcakes with Mocha Buttercream Frosting via design. bake. run.
i love how festive and valentine-y the added heart sprinkles are in these mini cupcakes.

chocolate-cinnamon cupcakes with mocha buttercream frosting

chocolate cupcakes:
1-1/2 cups flour
1 cup granulated sugar
1 tsp baking soda
1 tsp salt
1/3 cup cocoa powder
1 tsp instant coffee
2 tsp ground cinnamon
1/2 cup oil
1 cup water
1 tsp vanilla extract
1 tbsp vinegar

mocha buttercream frosting:
1/2 cup (1 stick) butter, room temperature
3 cups powdered sugar
2 tbsp instant coffee
2 tbsp cocoa powder
1/4 cup milk

directions:
for the cake: mix all ingredients together until moist and well blended. put in mini cupcake cups (1/2 full) and bake for 17-18 minutes at 350 degrees F.

for the mocha buttercream frosting: using a handmixer or in a stand mixer, mix all ingredients together until you've reached the right consistency for buttercream. if it's too thick, add in a little bit more milk. if it's too thin, you can add more powdered sugar. once everything looks good, pipe/frost and enjoy!

chocolate cake recipe makes about 16 regular cupcakes (or 45-50 mini cupcakes). buttercream frosting should make enough to frost all cupcakes (well, at least when i did it).

Friday, November 22, 2013

this year's holiday running streak: run 1 mile a day, every day starting on thanksgiving day until new year's

2013 holiday running streak courtesy of runner's world mag

you heard that right. i saw this on my fb feed and decided i would do it too! it's from runner's world mag website and they're pledging to run at least a mile a day every day starting on thanksgiving day and going all the way through until new year's day. it's only a mile, so how bad can that be? what's that? at least 12 minutes of my day on super slow days. but a 12-minute mile is too easy. i can probably nail this down in 10 or less. actually, it would be pretty awesome to see how fast i can run this mile come new year's day. anyway, my running pace at the moment sucks, so who knows. i'd be lucky if i could do it in 12!

okay, so there you have it. if you'd like to pledge to run a mile a day starting thanksgiving day and going up to new year's day... join in on the fun. it can't be that bad. let's see how many days you can do it in a row or if you have to take a rest day, run an extra mile the next day. not too difficult right? i am so looking forward to this. i have been slacking in the running department the last month or two. it's really bad. and we have many holiday festivities coming up, so it should be interesting to see how i will fit in the mile runs (rain or shine, or snow!) and doing everything else. :)

Monday, November 4, 2013

salted caramel french macarons

Salted Caramel French Macarons via design. bake. run.

happy november. we're in november already?!! well, that's a-okay with me. we are getting closer and closer to THE. BEST. TIME. OF. THE. YEAR. you know what that is! christmas. actually, no. thanksgiving and christmas. best holidays ever. or two of the best. ;)

okay, so i had my second wedding baking gig last month and these salted caramel french macarons were one of the four flavors requested. i have to say it was quite the yummy request because these turned out great. the salted caramel buttercream was light and almost fluffy-like. so airy and just perfect with the right amount of salty and sweetness combo. i don't think i've made a better salted caramel buttercream than this one.

below's the recipe for these good-looking french macarons should you want to make some. i say why not?! salted caramel is quite the hit these days. you cannot go wrong with it. and especially with the holidays coming up, these would make for a great holiday gift to anyone and everyone. i know i plan to bake some goodies and give them away this holiday season. you can too! :)

French Macarons with Salted Caramel Buttercream via design. bake. run.
i think i've found the perfect salted caramel buttercream recipe. these cute little french macaron cookies are so good and tastes even better as you age them longer. i say at least 3 full days.

french macarons with salted caramel buttercream

for the macaron shells:
1 cup (100g) powdered sugar
3/4 cup (60g) almond meal
2 large egg whites (60g), at room temperature
5 tablespoons (65g) granulated sugar
1/4 tsp golden yellow or any gel food coloring of your choice
salted caramel buttercream (recipe below)

for the salted caramel buttercream:
1/4 cup salted caramel sauce (recipe here)
1 stick (8 oz) butter, room temperature
1/2 tsp vanilla extract
1 cup powdered sugar

directions:

to make the macaron batter/shells:
  1. line two baking sheets with parchment paper and have a pastry bag with a plain tip (about 1/2-inch, 2 cm) ready.
  2. sift together the powdered sugar and almond meal so there are no lumps. set aside.
  3. in the bowl of a standing electric mixer (or if you prefer, you can use a bowl and hand mixer), beat the egg whites until they begin to rise and hold their shape. while whipping, beat in the sugar until very stiff and firm, about 2 minutes.
  4. add in the gel food coloring. then carefully fold the dry ingredients, in two batches, into the beaten egg whites with a flexible rubber spatula. when the mixture is just smooth and there are no streaks of egg white, stop folding and scrape the batter into the pastry bag (standing the bag in a tall glass helps if you’re alone).
  5. pipe the batter on the parchment-lined baking sheets in 1.35-inch circles evenly spaced one-inch apart.
  6. rap the baking sheet a few times firmly on the counter top to flatten the macarons. then let it sit for at least 30-60 minutes depending on humidity before baking them in the oven (okay, if you can't wait 30-60 minutes, i say at least 15 minutes to let them settle a little. just make sure the humidity isn't ridiculously high or your macarons won't turn out so pretty). about 10-15 minutes before baking, preheat oven to 350°F. bake for 15 minutes.
  7. once the macaron shells are out of the oven, let them sit for 30-60 seconds before removing the hot baking sheet underneath. let the macarons cool completely before removing them from the parchment paper.

to make the salted caramel buttercream:
  1. make the salted caramel sauce according to the recipe and cool to room temperature.
  2. in an electric mixer, beat the butter on medium high, speed until light and fluffy, about 3 minutes. then gradually add in the 1/4 cup salted caramel sauce.
  3. put the mixer on low and add the powdered sugar and vanilla. then increase the speed to medium and beat until fully incorporated.
  4. your buttercream should be good and ready for use!

to assemble the macaron cookies:
  1. before assembling these cookies, make sure to pair up all the cookie shells so they are as close as possible in size.
  2. using a knife, spread a good amount of the salted caramel buttercream on the inside of the macarons then sandwich them together. you can also put the buttercream in a piping bag and pipe the filling onto the cookie if you like. i do that sometimes, but most time i just spread it on.
  3. let them stand at least one day (keep them refrigerated) before serving (serve at room temperature), to meld the flavors. note: i say 3 days is the magic number. they taste so good after 3 days.

store in airtight container for up to 5 days. makes 20-24 macarons. happy eating because these are really, really, good! :)

Wednesday, October 9, 2013

pumpkin spice macarons

Pumpkin Spice French Macarons | design. bake. run.

i made my first pumpkin spice bread ever a couple of weeks ago. to make it, i had to open a giant can of pumpkin puree. okay, maybe not so giant, it was the 28 oz can though, but pretty big enough anyway. i had some leftover puree and didn't know what to do with it so i decided on making a pumpkin spice buttercream. now, what to do with the buttercream? okay, sure... why not some french macarons, just because.

so, here you have it! french macarons with pumpkin spice buttercream. what's not more fall or october than pumpkin?! okay, maybe apple pies or something (that's more fall?!). but pumpkin spice is pretty close too.

if you're a pumpkin spice lover (i'm slowly getting there, i think), you'll for sure love these cute little french cookies. as always, you must age your macarons for the best testing bite yet. i say wait at least a day or two before digging in. i typically let mine sit in the fridge for 2-3 days before consuming (of course, you gotta make sure you let them get to room temperature before eating). i love how light the texture of these macarons are. and when you bite into it, mmmm... it's perfectly chewy and soft and not mushy at all. oh, you must make sure you fill your macarons pretty good. definitely don't skimp on the buttercream. at least a 1:1 ratio of filling to cookie or 2:1 filling to cookie.

so, what do you say? go ahead and bake yourself a batch of these delicious goodies. or if macarons aren't your thing, you can just make the pumpkin spice buttercream and use it on some tasty cupcakes instead. but really, you should try the whole thing. it's yum. of course, i'm bias because i am i sucker for macarons or anything sweet (at least lately anyway). enjoy and happy baking! :)

Pumpkin Spice French Macarons | design. bake. run.
in an ode to autumn, what's more perfect than pumpkin spice?! these macarons are for sure the ideal little treats for this time of the year.

Pumpkin Spice French Macarons | design. bake. run.
these pumpkin spice macarons are great for fall gift-giving, especially to those pumpkin spice lovers out there. ;)

pumpkin spice french macarons with pumpkin spice buttercream

ingredients:

macaron batter:
1 cup powdered sugar
3/4 cup almond meal
1 teaspoon pumpkin spice
2 large egg whites, at room temperature
1/4 cup granulated sugar
1/4 teaspoon gel or powder food color (optional)

pumpkin spice buttercream:
1-1/2 to 2 cups powdered sugar
1/4 cup softened butter
2 tablespoons pumpkin puree
1/2 teaspoon cinnamon
1/4 teaspoon nutmeg
pinch of ground cloves
pinch of salt
milk or cream (if needed)

directions:

to make the macaron batter/shells:
  1. line two baking sheets with parchment paper and have a pastry bag with a plain tip (about 1/2-inch, 2 cm) ready.
  2. sift together the powdered sugar and almond meal so there are no lumps. add in the pumpkin spice and stir it to make sure it's fully incorporated with the sugar and almond meal mixture. set aside.
  3. in the bowl of a standing electric mixer (or if you prefer, you can use a bowl and hand mixer), beat the egg whites until they begin to rise and hold their shape. while whipping, beat in the sugar until very stiff and firm, about 2 minutes.
  4. carefully fold the dry ingredients, in two batches, into the beaten egg whites with a flexible rubber spatula. if you want to color your macarons, this is when you'd want to add in your gel or powdered food coloring. the more color you add, the darker the batter or finished cookie color it will be. i typically just do 1/4 teaspoon of gel food coloring, sometimes 1/2. you could do more or less depending on your desire shade. when the mixture is just smooth and there are no streaks of egg white, stop folding and scrape the batter into the pastry bag (standing the bag in a tall glass helps if you're alone).
  5. pipe the batter on the parchment-lined baking sheets in 1.35-inch circles evenly spaced one-inch apart.
  6. rap the baking sheet a few times firmly on the counter top to flatten the macarons. then let it sit for at least 30-60 minutes depending on humidity before baking them in the oven. about 10-15 minutes before baking, preheat oven to 350 degrees F. bake for 15 minutes.
  7. once macaron shells are out of the oven, let them sit for 30-60 seconds before removing the hot baking sheet underneath. let the macarons cool completely before removing them from the parchment paper.

for the pumpkin spice buttercream:
  1. cream butter and sugar together until well blended.
  2. then add in the pumpkin puree and spices. mix until everything is incorporated and you get the right consistency for buttercream. if the frosting is too thin, add more powdered sugar. if it's too thick, add a little bit of milk or cream (about 1 teaspoon at a time) to thin it out until you reach your desired consistency.

to assemble the macaron cookies:
  1. before assembling these cookies, make sure to pair up all the cookie shells so they are as close as possible in size.
  2. using a knife, spread a good amount of the pumpkin spice buttercream on the inside of the macarons then sandwich them together. note: you can certainly put the buttercream in a piping bag and pipe the buttercream onto the cookie. it's a lot easier i think and less messy. but i can't be bother to do this so i almost always just spread it with a knife.
  3. let them stand at least one day (keep them refrigerated) before serving (serve at room temperature), to meld the flavors.

store in airtight container for up to 5 days. makes 20-24 macarons. happy eating!

Thursday, February 14, 2013

happy valentine's day!

Valentine's Day Mini Cupcakes via design. bake. run.

Valentine's Day Sweet Treats via design. bake. run.

i've never really been a fan of valentine's day, but for some odd reason over the last few years i've slowly grown into maybe recognizing it. not a whole lot, just a teeny tiny bit. my thing is, i don't need any fancy flowers or box(es) of chocolates. just say happy valentine's day and that you love me and cannot picture your life without me because i am so awesome and things just wouldn't be as awesome if i wasn't part of it. hahahahaha.. yeah, sure, something like that.

so did my person recognize today's over-commercialized holiday? yup! he got me a nice box of see's candies (i've grown to liking them bit by bit these days as i'm usually the one giving those out during holidays) and some yummy peppered jerky. yes, i love my beef jerky. i say this year's v-day is so far, so good. no complaints here.

well, it's not too late if you haven't done anything today. the day is still young! hey, you can even bake these yummy mini cupcakes and give them away as little gifts or have them at your dinner (party or not) tonight (or any other time is fine too). you can find the recipe for these mini chocolate cupcakes with ganache here. i just topped them off with the ever-so-festive valentine sprinkles. :)

recipe: mini chocolate cupcakes with chocolate ganache frosting

Friday, January 4, 2013

chocolate yule log

Chocolate Yule Log via design. bake. run.

i mentioned in one of my last post that every new year's eve we make a yule log to celebrate the new year (okay, more like the hubby who makes the yule log). instead of going out and partying with everyone on new year's eve, we actually prefer to stay in with a movie playing in the background and baking this away. we've done it for the past several years now that it's sort of become a tradition. so why a yule log for new year's eve instead of christmas? well, it's just that with all the baking going on during thanksgiving and christmas, there's just too much goodies and we know we'll never get around to eating it! and we'd really like to eat it because it's THAT good! you can't go wrong with a nice fluffy and soft sponge cake with that sweet creamy mocha whipped filling and the chocolatey mocha frosting on top. it's very good.

below's the recipe should you like to make one yourself come the holidays again. actually, who says you can't have this anytime of the year?! go ahead and make one and let me know how it turns out! happy baking and eating. :)

Chocolate Yule Log via design. bake. run.
our annual new year's eve tradition. bake a yule log instead of partyin' it up. ;)

chocolate yule log
recipe from taste of home

ingredients:

sponge cake:
5 eggs, separated
1 cup sugar, divided
1/2 cup cake flour
1/4 cup baking cocoa
1/4 teaspoon salt
1/2 teaspoon cream of tartar

mocha cream filling:
1 cup heavy whipping cream
1/2 cup confectioners' sugar
1-1/2 teaspoons instant coffee granules

mocha buttercream frosting:
1/3 cup butter, softened
1/3 cup baking cocoa
2 cups confectioners sugar
1-1/2 teaspoons vanilla extract
1 tablespoon brewed coffee
2 to 3 tablespoons 2% milk

directions:
  1. Line a 15-in. x 10-in. x 1-in. baking pan with parchment paper; grease the paper. Place egg whites in a small bowl; let stand at room temperature for 30 minutes.
  2. In a large bowl, beat egg yolks on high until light and fluffy. Gradually add 1/2 cup sugar, beating until thick and lemon-colored. Combine the flour, cocoa and salt; gradually add to egg yolk mixture until blended.
  3. Beat egg whites on medium until foamy. Add cream of tartar; beat until soft peaks form. Gradually add remaining sugar, 1 tablespoon at a time, beating on high until stiff peaks form. Stir a fourth into chocolate mixture. Fold in remaining egg whites until no streaks remain.
  4. Spread batter evenly in prepared pan. Bake at 350° for 12-15 minutes or until cake springs back (do not overbake). Cool for 5 minutes; invert onto a linen towel dusted with confectioners' sugar. Peel off parchment paper. Roll up in the towel, starting with a short side. Cool on a wire rack.
  5. In a large bowl, beat cream until it begins to thicken. Add sugar and coffee granules. Beat until stiff peaks form; chill. Unroll cooled cake; spread filling to within 1/2 in. of edges. Roll up again. Place on serving platter; chill.
  6. In a large bowl, beat frosting ingredients until smooth. Frost cake. Using a fork, make lines resembling tree bark. Makes 12 servings.

nutrition facts: 1 serving (1 slice) equals 341 calories, 15 g fat (8 g saturated fat), 130 mg cholesterol, 136 mg sodium, 49 g carbohydrate, 1 g fiber, 4 g protein.

Thursday, December 27, 2012

old-fashioned pecan pie

Old-Fashioned Pecan Pie via design. bake. run.

i absolutely love the holiday season and this pie here is one of those reasons as to why. i never thought i'd be a pie lover, but somehow over the years i've acquired the taste for these sweet treats. now, savory pie? ummm... let's not go there, because i'm nowhere near any of that (at least not yet). i've yet to try the ever so popular chicken pot pie or while in england, their famous pork pies. yeah, it's just not for me.

okay, now let's get back on track to sweet pies. yes, this pecan pie recipe is so good. i've tried many pecan pie recipes in the past and i think this one is my favorite by far. it has just the right amount of sugar/sweetness. it's not terribly sweet and for sure, nothing short of not enough sugar. it is sweet, but not one of those sugar overload kind of sweet. i think i prefer the dark corn syrup over the white as well. for some reason, it just makes a better looking pie. plus, the recipe is so easy and simple, i feel like i can really do it in my sleep. i love how it calls for vanilla extract, but i've made it many times in the past and omitted it by mistake and it still came out okay.

below's the recipe for this delicious holiday pie should you want to make it. yes, i know the big holiday rush is over, but who's to say you still can't make one? why not have a pecan pie to ring in the new year. every new year's eve we make a yule log to ring in the new year. that's because there's too much going on before and during christmas time that we figure we'll save one sweet treat til after christmas. it's definitely something sweet to look forward to. if i get a chance to take pics, i'll be sure to post the recipe for that sometime next week. for now, enjoy the recipe below! :)

Old-Fashioned Pecan Pie via design. bake. run.
this pecan pie recipe makes the perfect pie, every time! it is my favorite pie recipe by far.

old-fashioned pecan pie
recipe from good housekeeping

ingredients:

for pie filling:
3/4 cup(s) dark corn syrup
1/2 cup(s) dark brown sugar
3 tablespoon(s) butter or margarine, melted
1 teaspoon(s) vanilla extract
1 pinch(s) salt
3 large eggs
1 1/2 cup(s) pecan halves, toasted
1 9-inch baked pie shell (recipe below)

directions:
  1. Prepare 9-Inch Baked Pie Shell as recipe directs. Cool pie shell on wire rack at least 10 minutes. Reset oven control to 350 degrees.
  2. In large bowl, with wire whisk, mix corn syrup, sugar, butter, vanilla, salt, and eggs until blended. With spoon, stir in pecans.
  3. Pour filling into pie shell. Bake 43 to 45 minutes or until filling is set around edge but center jiggles slightly. Cool on wire rack at least 3 hours for easier slicing. Refrigerate leftovers up to 1 week.

9-inch baked pie shell
recipe from good housekeeping

ingredients:
1 1/3 cup(s) all-purpose flour
1/4 teaspoon(s) salt
5 tablespoon(s) cold butter or margarine, cut up
3 tablespoon(s) vegetable shortening
5 tablespoon(s) ice water

directions:
  1. In food processor with knife blade attached, blend flour and salt. Add butter and shortening, and pulse until mixture resembles coarse crumbs. Sprinkle in ice water, 1 tablespoon at a time, pulsing after each addition, until large moist crumbs just begin to form.
  2. Shape dough into disk; wrap in plastic wrap and refrigerate 30 minutes or overnight. (If chilled overnight, let dough stand 30 minutes at room temperature before rolling.)
  3. Preheat oven to 425 degrees. On lightly floured surface, with floured rolling pin, roll dough into 12-inch round. Ease dough round into 9-inch glass or ceramic pie plate. Gently press dough against bottom and up sides of plate without stretching. Trim dough edge, leaving 1-inch overhang. Fold overhang under; pinch to form stand-up edge, then make decorative edge. Freeze pie shell 15 minutes.
  4. Line pie shell with foil or parchment, and fill with pie weights, dried beans, or uncooked rice. Bake 10 to 12 minutes or until beginning to set. Remove foil with weights, and bake 13 to 15 minutes longer or until golden. If shell puffs up during baking, gently press it down with back of spoon. Cool on wire rack until ready to fill.
  5. To make Deep-Dish Baked Pie Shell: Prepare 9-Inch Baked Pie Shell as above, but increase all-purpose flour to 1 1/2 cups and vegetable shortening to 1/4 cup. Ease dough into 9 1/2-inch deep-dish pie plate.


Tuesday, December 18, 2012

12 days of christmas baking - day 12: holiday biscottis

Biscottis via design. bake. run.

on this very last day of my 12 days of christmas baking i am ending with these delicious chocolate drizzled biscottis. i don't make biscottis very often and when i do, it's usually around this time of year. i love how you can make these ahead of time and have them ready for any occasion. these are great for gift-giving, especially if you have to mail them off somewhere. for sure they will not spoil because of their low-moisture content. that is always a plus when you know it'll be a while before they get eaten.

well, below's the recipe should you want to make some yourself. again, these are simple and easy to make. this have been my go-to recipe for many many christmases. the things i put in varies though. sometimes it's with cranberries and pistachio (like here), others it's with chocolate chips or raisins and walnuts. you can pick whatever you like. and to add that festive feel, you can follow the recipe below as is or create your own. i just went with a chocolate drizzle instead. enjoy! :)
Biscottis via design. bake. run.
i love making biscottis. they're simple and easy to make and you can make a bunch ahead of time! plus, they are delicious as well. :)

Biscottis via design. bake. run.
eat up! :)

holiday biscottis
recipe from giada @ the food network

ingredients:
2 cups all-purpose flour
1 1/2 teaspoons baking powder
3/4 cup sugar
1/2 cup (1 stick) unsalted butter, room temperature
1 teaspoon grated lemon zest
1/4 teaspoon salt
2 large eggs
3/4 cup pistachios, coarsely chopped
2/3 cup dried cranberries
12 ounces good-quality white chocolate, chopped
Red and green sugar crystals, for garnish

directions:
Preheat the oven to 350 degrees F.

Line a heavy large baking sheet with parchment paper. Whisk the flour and baking powder in a medium bowl to blend. Using an electric mixer, beat the sugar, butter, lemon zest, and salt in a large bowl to blend. Beat in the eggs 1 at a time. Add the flour mixture and beat just until blended. Stir in the pistachios and cranberries.

Form the dough into a 13-inch long, 3-inch wide log on the prepared baking sheet. Bake until light golden, about 40 minutes. Cool for 30 minutes.

Place the log on the cutting board. Using a sharp serrated knife, cut the log on a diagonal into 1/2 to 3/4-inch-thick slices. Arrange the biscotti, cut side down, on the baking sheet. Bake the biscotti until they are pale golden, about 15 minutes. Transfer the biscotti to a rack and cool completely.

Stir the chocolate in a bowl set over a saucepan of simmering water until the chocolate melts. Dip half of the biscotti into the melted chocolate. Gently shake off the excess chocolate. Place the biscotti on the baking sheet for the chocolate to set. Sprinkle with the sugar crystals. Refrigerate until the chocolate is firm, about 35 minutes.

Note: The biscotti can be made ahead. Store them in an airtight container up to 4 days, or wrap them in foil and freeze in resealable plastic bags up to 3 weeks.

Monday, December 17, 2012

12 days of christmas baking - day 11: peppermint bark

Milk Chocolate and White Chocolate Peppermint Bark via design. bake. run.

i was short on time this morning so for the 11th day of my christmas baking, i went with a no-bake holiday classic. yes, the ever so popular peppermint bark. typically you could just use white chocolate but today i decided that i'd do some milk chocolate version as well. i guess i could have combined both all in one so you get a little bit of each, but instead i did them separately. these are so good especially if you're a chocolate lover. the peppermint adds that nice christmas-y and festive feel to these chocolates. they really are delish! plus, it's so easy to make, you cannot pass up making these this holiday season.

below's the recipe should you be interested. i say go ahead and make some yourself! enjoy. :)

Black & White Peppermint Bark via design. bake. run.
we love peppermint bark. this classic christmas candy is perfect for any day of the week or gift-giving... and they're so easy to make too!

Chocolate & White Chocolate Peppermint Bark via design. bake. run.
here's another shot of these delicious peppermint bark :)

black & white peppermint bark
recipe adapted from all recipes

ingredients:
8 ounces high-quality semisweet chocolate, broken into pieces
2 teaspoons canola oil, divided
1/2 teaspoon peppermint extract, divided
8 ounces high-quality white chocolate, broken into pieces
25 peppermint candies or 6 candy canes, crushed

directions:
  1. Lightly grease a 2 9x9 inch pan and line with waxed paper, smoothing out wrinkles; set aside.
  2. Place the semisweet chocolate and 1 teaspoon of the canola oil in the top of a double boiler over just barely simmering water, stirring frequently and scraping down the sides with a rubber spatula to avoid scorching. When the chocolate is melted, stir in 1/4 teaspoon of the peppermint extract. Pour the melted chocolate into the prepared pan, and spread evenly over the bottom of the pan. Sprinkle half of the crushed peppermints over the chocolate layer. Refrigerate until completely hardened, about 1 hour.
  3. Repeat the steps above for the white chocolate portion.

note: if you want to make them all in the same pan (similar to ghirardelli's), then instead of prepping 2 pans, use just one and pour the white chocolate mixture on top of the semisweet one (just make sure you cool the semisweet mixture completely first). then wait until they're set before breaking them. enjoy! :)

Friday, December 14, 2012

12 days of christmas baking - day 10: chocolate chip cookies with nutella & sea salt

Chocolate Chip Cookies with Nutella & Sea Salt via design. bake. run.

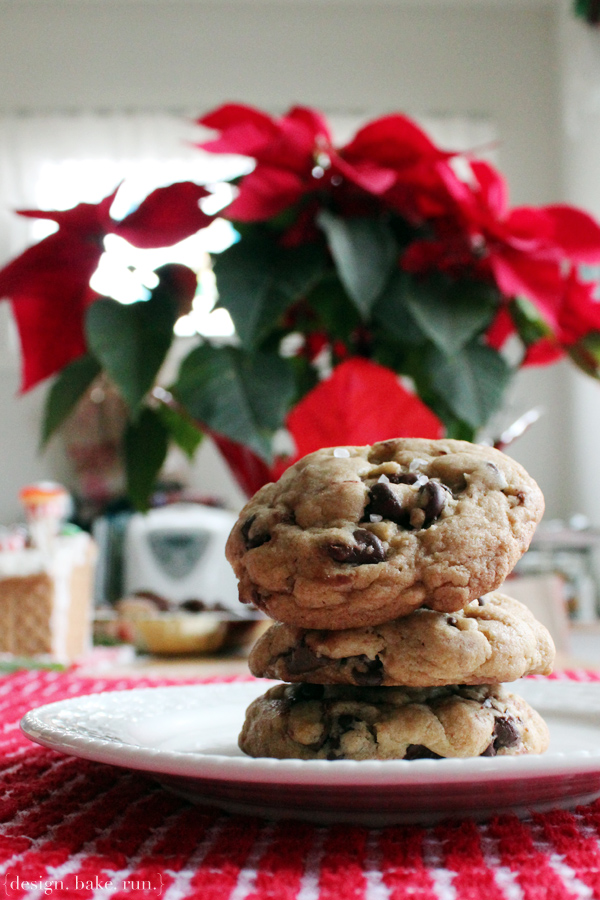
last night we went and watched the nutcracker ballet. it's a traditional annual christmas thing with us. since we got home late and i didn't have time to make something time-consuming or intricate, i decided on your classic chocolate chip cookies, but with a slight twist. instead of the typical, i added in a dab of nutella inside the cookies and sprinkled sea salt on top before putting them in the oven. i have to say the added ingredients add a nice touch to the classic cookie. below's my favorite (so far!) chocolate chip recipe, with the two new ingredients added. feel free to try and make some yourself and let me know how they turn out! happy baking. :)

Chocolate Chip Cookies with Nutella & Sea Salt via design. bake. run.
i love the added nutella and sea salt in these chocolate chip cookies. so good!

Chocolate Chip Cookies with Nutella & Sea Salt via design. bake. run.
mmmm... yum. these cookies with a nice glass of milk is just perfect!

chocolate chip cookies with nutella & sea salt
recipe adapted from cook's illustrated

ingredients:
2-1/8 cups bleached all-purpose flour (about 10 1/2 ounces)
1/2 tsp table salt
1/2 tsp baking soda
12 tbsp unsalted butter (1 1/2 sticks), melted and cooled slightly
1 cup brown sugar (light or dark), 7 ounces
1/2 cup granulated sugar (3 1/2 ounces)
1 large egg
1 large egg yolk
2 tsp vanilla extract
1-2 cups chocolate chips or chunks (semi or bittersweet)
1 jar of nutella (you won't need the whole jar, just some)
sea salt

directions:
  1. Heat oven to 325 degrees. Adjust oven racks to upper- and lower-middle positions. Mix flour, salt, and baking soda together in medium bowl; set aside.
  2. Either by hand or with electric mixer, mix butter and sugars until thoroughly blended. Mix in egg, yolk, and vanilla. Add dry ingredients; mix until just combined. Stir in chips.
  3. Form scant 1/4 cup dough into ball. Using finger or thumb, make an indentation and scoop 1/2 tsp of Nutella and put it in. Then close up the dough (roll it back into a ball again). Place formed dough onto one of two parchment paper-lined 20-by-14-inch lipless cookie sheets, about nine dough balls per sheet. Lightly press down on the cookie dough and sprinkle sea salt over it. Smaller cookie sheets can be used, but fewer cookies can be baked at one time and baking time may need to be adjusted.
  4. Bake, reversing cookie sheets’ positions halfway through baking, until cookies are light golden brown and outer edges start to harden yet centers are still soft and puffy, 15 to 18 minutes (start checking at 13 minutes). Cool cookies on cookie sheets. Serve or store in airtight container.
Makes 18-20 large (3-inch) cookies. Enjoy!

Note: To ensure a chewy texture, leave the cookies on the cookie sheet to cool.

Thursday, December 13, 2012

12 days of christmas baking - day 9: chocolate-almond saltine toffee

Chocolate-Almond Saltine Toffee via design. bake. run.

this is another great recipe and i'm definitely doing this again next year or whenever i feel like making toffee. actually, i'll be making them again in the next few days to send out to people in my yearly christmas baked goodies sent-outs. yes, every year i send random people my baked goods. i think these will do just fine during the delivery process (or so i hope).

this recipe is fantastic i say. i love how the saltine adds an extra crunch and the salty-ness of the cracker is definitely welcome. i love anything with a nice hint of salt. okay, below's the recipe should you be interested. they're pretty easy to make and took no time at all. enjoy!

Chocolate-Almond Saltine Toffee via design. bake. run.
these salted caramel chocolate pecan bars really hit the spot. so. good.

Chocolate-Almond Saltine Toffee via design. bake. run.
another shot of these delicious bars

Chocolate-Almond Saltine Toffee via design. bake. run.
the saltine really adds a little something to your typical toffee. very good!

chocolate-almond saltine toffee
recipe from food & wine

ingredients:
1 1/2 cups sliced almonds (6 ounces)
approximately 60 saltine crackers (not low-sodium)
1 1/2 cups sugar
3 sticks (3/4 pound) unsalted butter
2 tablespoons light corn syrup
1/2 pound bittersweet chocolate, chopped into 1/2-inch pieces

directions:
Preheat the oven to 350°. Spread the almonds on a baking sheet and toast for about 6 minutes, until golden.

Line a 12-by-17-inch rimmed baking sheet with a silicone mat or lightly buttered parchment paper. Arrange the saltine crackers on the baking sheet in a single layer, patching any holes with cracker bits; slight gaps are okay.

In a medium saucepan, combine the sugar, butter and corn syrup and cook over low heat until the sugar is melted. Brush the side of the pan with a moistened pastry brush to wash down any sugar crystals. Cook the syrup over moderate heat without stirring until it starts to brown around the edge, about 5 minutes. Insert a candy thermometer into the syrup and simmer, stirring with a wooden spoon, until honey-colored caramel forms and the temperature reaches 300°, about 6 minutes longer.

Slowly and carefully pour the caramel over the crackers, being sure to cover most of them evenly. Using an offset spatula, spread the caramel to cover any gaps. Let cool for 3 minutes, then sprinkle the chopped chocolate evenly on top. Let stand until the chocolate is melted, about 3 minutes, then spread the chocolate evenly over the toffee. Spread the almonds evenly over the chocolate. Freeze the toffee until set, about 15 minutes.

Invert the toffee onto a work surface and peel off the mat or paper. Invert again, break into large shards and serve.

MAKE AHEAD The chocolate-almond saltine toffee can be refrigerated for up to 2 weeks in an airtight container.

makes 2-1/2 pounds. happy eating. :)

Wednesday, December 12, 2012

12 days of christmas baking - day 8: salted caramel chocolate pecan bars

Salted Caramel Chocolate Pecan Bars via design. bake. run.

i have to say these are one of the best and easiest pecan bars i've ever made! actually, it's my first ever pecan bars i've ever made. ;) but that's besides the point. the point here is, these are so good, you must make some yourself! the salted caramel is just delish! and that added chocolate on top? yummy! everything about this bar is simply tummy-satisfying good. plus, it's so easy and simple to make with such few ingredients, why not?! so i say go ahead and make some today.

below's the recipe. do say you'll make some and let me know if you agree or disagree? i found this recipe on pinterest, and i'm so glad i did, because it is officially now a christmas/holiday keeper! actually, i may just make some throughout the year too. we'll see! enjoy. :)

Salted Caramel Chocolate Pecan Bars via design. bake. run.
these salted caramel chocolate pecan bars really hit the spot. so. good.

Salted Caramel Chocolate Pecan Bars via design. bake. run.
another shot of these delicious bars

Salted Caramel Chocolate Pecan Bars via design. bake. run.
i think i may have to make another batch of these before christmas!

salted caramel chocolate pecan bars
recipe adapted from southern living

ingredients:
1 cup chopped pecans
12 whole graham crackers
1 cup firmly packed brown sugar
1/2 cup butter
2 tablespoons whipping cream
1 teaspoon vanilla extract
1/4 teaspoon kosher salt
1 cup chocolate chips

directions:
  1. Preheat oven to 350°. Bake pecans in a single layer in a shallow pan 10 to 12 minutes or until toasted and fragrant, stirring halfway through.
  2. Line a 15- x 10-inch jelly-roll pan with aluminum foil; lightly grease foil. Arrange graham crackers in a single layer in prepared pan, slightly overlapping edges.
  3. Combine sugar, butter, and cream in a medium-size heavy saucepan; bring to a boil over medium heat, stirring occasionally. Remove from heat, and stir in vanilla and pecans. Pour butter mixture over crackers, spreading to coat.
  4. Bake at 350° for 10 to 11 minutes or until lightly browned and bubbly.
  5. Immediately top warm bars with the chocolate chips. Let stand 3 minutes, and spread chocolate over bars. Then sprinkle with salt, and slide foil from pan onto a wire rack. Cool completely (about 30 minutes). Then chill for 20 minutes before breaking into bars and serving.

makes 4 dozen. happy eating. :)

Tuesday, December 11, 2012

12 days of christmas baking - day 7: peppermint & coffee nutella french macarons

Peppermint & Coffee Nutella French Macarons via design. bake. run.

who doesn't love french macarons? yes, i've finally made some again since that last giant batch of macarons i made for a wedding. i can't believe i haven't made any since then. to go with the whole christmas theme, i decided on the peppermint flavor macarons, sprinkled with peppermint candy on the side. and to add to that, since i personally like to have more than one flavor of macarons whenever i'm making/eating them, i went with (almost) everyone's favorite, the coffee nutella.

i know, i haven't gotten my recipe up for these macarons yet, but again, i promise i will write a blog post soon and post the recipe here as soon as i have it written out. in the meantime, you can browse through these previous posts and get david lebovitz's recipe from one of these posts.

enjoy and happy baking! :)

***UPDATE 12/18/12***

i've finally got the recipe written up. scroll below for the peppermint recipe. for the coffee nutella macaron recipe, please click here. enjoy and let me know how yours turn out if you make them! :)

Peppermint Macarons via design. bake. run.
i love how festive and flavorful these peppermint french macarons are!

Peppermint & Coffee Nutella Macarons via design. bake. run.
these peppermint and coffee nutella macarons really turned out great. so yummy and just the perfect treat for a cold day with warm coffee/tea.

Peppermint & Coffee Nutella French Macarons via design. bake. run.
i absolutely love making and eating french macarons. i really can eat all of these delicious peppermint and coffee nutella macarons. ;)

Peppermint Macarons via design. bake. run.
another shot of the peppermint macarons. yum!

peppermint macarons

ingredients:

macaron batter:

1 cup (100 gr) powdered sugar

3/4 cup almond meal (about 3 ounces or 75 grams)

red gel food coloring (optional)

2 large egg whites, at room temperature

5 tablespoons (65 gr) granulated sugar

peppermint buttercream filling:
1 stick of butter, softened
2 cups powdered sugar
1/2 tbsp peppermint extract
up to 2 tbsp heavy cream or milk
3 candy canes, crushed (optional)

peppermint candy decorations:
6 candy canes, crushed

directions:
to make the macaron shells: Preheat oven to 350º F (180º C).

Line two baking sheets with parchment paper and have a pastry bag with a plain tip (about 1/2-inch, 2 cm) ready.

Sift together the powdered sugar, almond meal and 2 tablespoons of espresso so there are no lumps (usually I just use a fork to break any large lumps). If your almond meal isn't so fine, you can put the ingredients into a blender or food processor to make it finer. Personally, I'd just use the sifter and dump out any remaining crumbs that didn't make it through the sifting process.

In the bowl of a standing electric mixer (or if you prefer, you can use a bowl and hand mixer), beat the egg whites until they begin to rise and hold their shape. While whipping, beat in the granulated sugar until very stiff and firm, about 2 minutes.

Carefully fold the dry ingredients, in two batches, into the beaten egg whites with a flexible rubber spatula. If you want your macaron shells to be red, this is where you'd to add in the food coloring (with the dry ingredients), otherwise, you can just skip it and use the food coloring as paint to paint it on once the cookies are assembled (like I did!). When the mixture is just smooth and there are no streaks of egg white, stop folding and scrape the batter into the pastry bag (standing the bag in a tall glass helps if you’re alone).

Pipe the batter on the parchment-lined baking sheets in 1.35-inch (3.5 cm) circles evenly spaced one-inch (3 cm) apart. Quickly after it's piped, sprinkle a few espresso powder over each shell (this step is optional, personally I do it because I like how they macarons look once they're baked).

Rap the baking sheet a few times firmly on the counter top to flatten the macarons. Then it let sit for at 30-60 minutes (okay, I've done it with just 15 minutes before and they turn out fine, but whatever you do, do not skip this step; even at just 15 minutes) before baking them in the oven, 15-17 minutes. Let cool completely then remove from baking sheet.

to make the peppermint buttercream frosting filling: beat butter for a few minutes with a mixer with the paddle attachment on medium speed (or you can use a hand mixer). add the 2 cups of powdered sugar and turn your mixer on the lowest speed (so the sugar doesn’t blow everywhere) until the sugar has been incorporated with the butter. increase mixer speed to medium and add peppermint extract, and 1 tablespoon of milk/cream and beat for 3 minutes. if your frosting needs a more stiff consistency, add a little more sugar. if your frosting needs to be thinned out, add remaining tablespoon of milk, a little at a time. once you've gotten the right consistency and the buttercream is complete, add in the crushed peppermint candy cane pieces and mix until incorporated. of course, this last part here is optional, you can skip it if you like. i personally like the added crunch when biting into my peppermint macaron, so i do this last step. :)

to assemble: Before assembling these cookies, make sure to pair up all the cookie shells so they are as close as possible in size. Then using a knife, spread a good amount of the peppermint filling on the inside of the macarons then sandwich them together. Sprinkle the crushed peppermint candy cane pieces over the filling portion of the assembled macaron. Or you can roll the cookie on the candy pieces. This last step adds a nice decorated touch to these peppermint macarons. They are so cute and delicious!

Let them stand at least one day (keep them refrigerated) before serving (serve at room temperature), to meld the flavors. Or if you can't wait to dig in and eat, I say wait a few hours, at least! (Shhhh, I've eaten them newly assembled too, and they taste just as yummy! hahahaha). But really, for the best optimal flavor and taste, you must wait at least one day. They really are THAT good and worth the wait!

Store in an airtight container for up to 5 days.

Makes about 16-20 cookies. Enjoy and happy eating! :)

Note: I typically just bake mine for 15 minutes and they turn out fine. But yours may be different as all oven temperatures vary so letting them bake the full 17 minutes may be fine. I say set your timer for 15 minutes and add on from there.

Friday, December 7, 2012

12 days of christmas baking - day 5: mrs. jew's crispy cookies

Mrs. Jew's Crispy Cookies via design. bake. run.

for this fifth day of christmas baking i decided to try out a new recipe. i had pinned this from earlier in the week onto my holidays pinterest board. i'm just surprised i made it. actually, i'm very happy i made it because these are really good. no wonder it's one of brandon jew, chef of bar agricole (in sf)'s favorite holiday cookie recipe. of course, the name of the cookie sounds familiar (a family recipe maybe?!). but anyway, that's besides the point. the point here is, you should definitely make these cookies. the recipe's simple enough and the added Kellogg's Rice Krispies cereal adds a delicious unexpected in a good way crunch when you bit into it. i love it! below's the recipe should you want to make some tonight or any time! really, it's a little different from you typical chocolate chip cookie, but in a very good way. i made mine without the raisins because i don't care for raisins a whole lot. you can do the same or make the recipe as is. enjoy!

Mrs. Jew's Crispy Cookies via design. bake. run.

Mrs. Jew's Crispy Cookies via design. bake. run.

mrs. jew's crispy cookies
by brandon jew, chef, bar agricole
recipe from refinery29 sf

ingredients:
1 1/4 cup flour
1/2 tsp baking soda
1/4 tsp salt
1/2 cup softened butter
1 cup sugar
1 egg
1 tsp vanilla extract
2 cups Kellogg's Rice Krispies
1 cup raisins
6 oz package of semi-sweet chocolate morsels (optional)

directions:
  1. Preheat oven to 350 degrees. In a small bowl, combine the flour, baking soda, and salt. Set aside.
  2. In large bowl, combine the butter and sugar and beat until creamy. Add the egg and vanilla extract and mix well.
  3. Blend in the flour mixture.
  4. Stir in the Rice Krispies, chocolate chips, and raisins.
  5. Drop level tablespoons full of mixture onto cookie sheet. Bake at 350 degrees for 12 to 15 minutes.

makes 3-1/2 dozen cookies. enjoy!

note: i baked my cookies for only 9 minutes. but of course, you know your oven best. still, i say you should side on baking them at the lesser time amount (12 mins) than the full 15 mins and checking to make sure the cookies are done, rather than over baking these cookies. :)

Thursday, December 6, 2012

12 days of christmas baking - day 4: cranberry apple crumb bars

Cranberry Apple Crumb Bars via design. bake. run.

cranberries are so festive this time of year. what's not to love about them?! nothing! since i had some left over cranberry from my cranberry apple breads i made sometime last week, i decided to make these cranberry apple bars. these are so delicious!

you can check out my blackberry crumb bars post for the recipe. basically, just substitute the blackberries for the cranberry and apples. i used 1 cup cranberries and 2 medium sized baking apples. of course, you can use whatever fruit you like for these as well. peach for one is a great fruit. the last time i made this recipe using peaches, oh man... they were soooooo good. no, really, like that good. the kind of good you wish you can replicate, but can't or not always. i have yet to make the peach kind again. i'm not sure it'll taste as good as that time. hmmm... maybe i'll have to consider it for some other time. :) enjoy the photos!

Cranberry Apple Crumb Bars via design. bake. run.

Cranberry Apple Crumb Bars via design. bake. run.

Cranberry Apple Crumb Bars via design. bake. run.

Related Posts Plugin for WordPress, Blogger...