Thursday, December 27, 2012

old-fashioned pecan pie

Old-Fashioned Pecan Pie via design. bake. run.

i absolutely love the holiday season and this pie here is one of those reasons as to why. i never thought i'd be a pie lover, but somehow over the years i've acquired the taste for these sweet treats. now, savory pie? ummm... let's not go there, because i'm nowhere near any of that (at least not yet). i've yet to try the ever so popular chicken pot pie or while in england, their famous pork pies. yeah, it's just not for me.

okay, now let's get back on track to sweet pies. yes, this pecan pie recipe is so good. i've tried many pecan pie recipes in the past and i think this one is my favorite by far. it has just the right amount of sugar/sweetness. it's not terribly sweet and for sure, nothing short of not enough sugar. it is sweet, but not one of those sugar overload kind of sweet. i think i prefer the dark corn syrup over the white as well. for some reason, it just makes a better looking pie. plus, the recipe is so easy and simple, i feel like i can really do it in my sleep. i love how it calls for vanilla extract, but i've made it many times in the past and omitted it by mistake and it still came out okay.

below's the recipe for this delicious holiday pie should you want to make it. yes, i know the big holiday rush is over, but who's to say you still can't make one? why not have a pecan pie to ring in the new year. every new year's eve we make a yule log to ring in the new year. that's because there's too much going on before and during christmas time that we figure we'll save one sweet treat til after christmas. it's definitely something sweet to look forward to. if i get a chance to take pics, i'll be sure to post the recipe for that sometime next week. for now, enjoy the recipe below! :)

Old-Fashioned Pecan Pie via design. bake. run.
this pecan pie recipe makes the perfect pie, every time! it is my favorite pie recipe by far.

old-fashioned pecan pie
recipe from good housekeeping

ingredients:

for pie filling:
3/4 cup(s) dark corn syrup
1/2 cup(s) dark brown sugar
3 tablespoon(s) butter or margarine, melted
1 teaspoon(s) vanilla extract
1 pinch(s) salt
3 large eggs
1 1/2 cup(s) pecan halves, toasted
1 9-inch baked pie shell (recipe below)

directions:
  1. Prepare 9-Inch Baked Pie Shell as recipe directs. Cool pie shell on wire rack at least 10 minutes. Reset oven control to 350 degrees.
  2. In large bowl, with wire whisk, mix corn syrup, sugar, butter, vanilla, salt, and eggs until blended. With spoon, stir in pecans.
  3. Pour filling into pie shell. Bake 43 to 45 minutes or until filling is set around edge but center jiggles slightly. Cool on wire rack at least 3 hours for easier slicing. Refrigerate leftovers up to 1 week.

9-inch baked pie shell
recipe from good housekeeping

ingredients:
1 1/3 cup(s) all-purpose flour
1/4 teaspoon(s) salt
5 tablespoon(s) cold butter or margarine, cut up
3 tablespoon(s) vegetable shortening
5 tablespoon(s) ice water

directions:
  1. In food processor with knife blade attached, blend flour and salt. Add butter and shortening, and pulse until mixture resembles coarse crumbs. Sprinkle in ice water, 1 tablespoon at a time, pulsing after each addition, until large moist crumbs just begin to form.
  2. Shape dough into disk; wrap in plastic wrap and refrigerate 30 minutes or overnight. (If chilled overnight, let dough stand 30 minutes at room temperature before rolling.)
  3. Preheat oven to 425 degrees. On lightly floured surface, with floured rolling pin, roll dough into 12-inch round. Ease dough round into 9-inch glass or ceramic pie plate. Gently press dough against bottom and up sides of plate without stretching. Trim dough edge, leaving 1-inch overhang. Fold overhang under; pinch to form stand-up edge, then make decorative edge. Freeze pie shell 15 minutes.
  4. Line pie shell with foil or parchment, and fill with pie weights, dried beans, or uncooked rice. Bake 10 to 12 minutes or until beginning to set. Remove foil with weights, and bake 13 to 15 minutes longer or until golden. If shell puffs up during baking, gently press it down with back of spoon. Cool on wire rack until ready to fill.
  5. To make Deep-Dish Baked Pie Shell: Prepare 9-Inch Baked Pie Shell as above, but increase all-purpose flour to 1 1/2 cups and vegetable shortening to 1/4 cup. Ease dough into 9 1/2-inch deep-dish pie plate.


Tuesday, December 18, 2012

12 days of christmas baking - day 12: holiday biscottis

Biscottis via design. bake. run.

on this very last day of my 12 days of christmas baking i am ending with these delicious chocolate drizzled biscottis. i don't make biscottis very often and when i do, it's usually around this time of year. i love how you can make these ahead of time and have them ready for any occasion. these are great for gift-giving, especially if you have to mail them off somewhere. for sure they will not spoil because of their low-moisture content. that is always a plus when you know it'll be a while before they get eaten.

well, below's the recipe should you want to make some yourself. again, these are simple and easy to make. this have been my go-to recipe for many many christmases. the things i put in varies though. sometimes it's with cranberries and pistachio (like here), others it's with chocolate chips or raisins and walnuts. you can pick whatever you like. and to add that festive feel, you can follow the recipe below as is or create your own. i just went with a chocolate drizzle instead. enjoy! :)

Biscottis via design. bake. run.
i love making biscottis. they're simple and easy to make and you can make a bunch ahead of time! plus, they are delicious as well. :)

Biscottis via design. bake. run.
eat up! :)

holiday biscottis
recipe from giada @ the food network

ingredients:
2 cups all-purpose flour
1 1/2 teaspoons baking powder
3/4 cup sugar
1/2 cup (1 stick) unsalted butter, room temperature
1 teaspoon grated lemon zest
1/4 teaspoon salt
2 large eggs
3/4 cup pistachios, coarsely chopped
2/3 cup dried cranberries
12 ounces good-quality white chocolate, chopped
Red and green sugar crystals, for garnish

directions:
Preheat the oven to 350 degrees F.

Line a heavy large baking sheet with parchment paper. Whisk the flour and baking powder in a medium bowl to blend. Using an electric mixer, beat the sugar, butter, lemon zest, and salt in a large bowl to blend. Beat in the eggs 1 at a time. Add the flour mixture and beat just until blended. Stir in the pistachios and cranberries.

Form the dough into a 13-inch long, 3-inch wide log on the prepared baking sheet. Bake until light golden, about 40 minutes. Cool for 30 minutes.

Place the log on the cutting board. Using a sharp serrated knife, cut the log on a diagonal into 1/2 to 3/4-inch-thick slices. Arrange the biscotti, cut side down, on the baking sheet. Bake the biscotti until they are pale golden, about 15 minutes. Transfer the biscotti to a rack and cool completely.

Stir the chocolate in a bowl set over a saucepan of simmering water until the chocolate melts. Dip half of the biscotti into the melted chocolate. Gently shake off the excess chocolate. Place the biscotti on the baking sheet for the chocolate to set. Sprinkle with the sugar crystals. Refrigerate until the chocolate is firm, about 35 minutes.

Note: The biscotti can be made ahead. Store them in an airtight container up to 4 days, or wrap them in foil and freeze in resealable plastic bags up to 3 weeks.

Monday, December 17, 2012

12 days of christmas baking - day 11: peppermint bark

Milk Chocolate and White Chocolate Peppermint Bark via design. bake. run.

i was short on time this morning so for the 11th day of my christmas baking, i went with a no-bake holiday classic. yes, the ever so popular peppermint bark. typically you could just use white chocolate but today i decided that i'd do some milk chocolate version as well. i guess i could have combined both all in one so you get a little bit of each, but instead i did them separately. these are so good especially if you're a chocolate lover. the peppermint adds that nice christmas-y and festive feel to these chocolates. they really are delish! plus, it's so easy to make, you cannot pass up making these this holiday season.

below's the recipe should you be interested. i say go ahead and make some yourself! enjoy. :)

Black & White Peppermint Bark via design. bake. run.
we love peppermint bark. this classic christmas candy is perfect for any day of the week or gift-giving... and they're so easy to make too!

Chocolate & White Chocolate Peppermint Bark via design. bake. run.
here's another shot of these delicious peppermint bark :)

black & white peppermint bark
recipe adapted from all recipes

ingredients:
8 ounces high-quality semisweet chocolate, broken into pieces
2 teaspoons canola oil, divided
1/2 teaspoon peppermint extract, divided
8 ounces high-quality white chocolate, broken into pieces
25 peppermint candies or 6 candy canes, crushed

directions:
  1. Lightly grease a 2 9x9 inch pan and line with waxed paper, smoothing out wrinkles; set aside.
  2. Place the semisweet chocolate and 1 teaspoon of the canola oil in the top of a double boiler over just barely simmering water, stirring frequently and scraping down the sides with a rubber spatula to avoid scorching. When the chocolate is melted, stir in 1/4 teaspoon of the peppermint extract. Pour the melted chocolate into the prepared pan, and spread evenly over the bottom of the pan. Sprinkle half of the crushed peppermints over the chocolate layer. Refrigerate until completely hardened, about 1 hour.
  3. Repeat the steps above for the white chocolate portion.

note: if you want to make them all in the same pan (similar to ghirardelli's), then instead of prepping 2 pans, use just one and pour the white chocolate mixture on top of the semisweet one (just make sure you cool the semisweet mixture completely first). then wait until they're set before breaking them. enjoy! :)

Friday, December 14, 2012

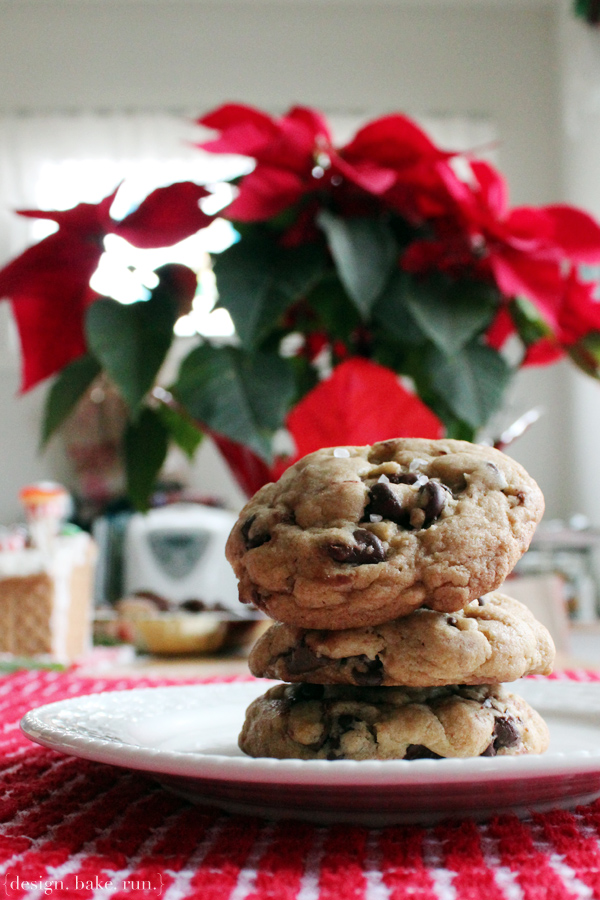
12 days of christmas baking - day 10: chocolate chip cookies with nutella & sea salt

Chocolate Chip Cookies with Nutella & Sea Salt via design. bake. run.

last night we went and watched the nutcracker ballet. it's a traditional annual christmas thing with us. since we got home late and i didn't have time to make something time-consuming or intricate, i decided on your classic chocolate chip cookies, but with a slight twist. instead of the typical, i added in a dab of nutella inside the cookies and sprinkled sea salt on top before putting them in the oven. i have to say the added ingredients add a nice touch to the classic cookie. below's my favorite (so far!) chocolate chip recipe, with the two new ingredients added. feel free to try and make some yourself and let me know how they turn out! happy baking. :)

Chocolate Chip Cookies with Nutella & Sea Salt via design. bake. run.
i love the added nutella and sea salt in these chocolate chip cookies. so good!

Chocolate Chip Cookies with Nutella & Sea Salt via design. bake. run.
mmmm... yum. these cookies with a nice glass of milk is just perfect!

chocolate chip cookies with nutella & sea salt
recipe adapted from cook's illustrated

ingredients:
2-1/8 cups bleached all-purpose flour (about 10 1/2 ounces)
1/2 tsp table salt
1/2 tsp baking soda
12 tbsp unsalted butter (1 1/2 sticks), melted and cooled slightly
1 cup brown sugar (light or dark), 7 ounces
1/2 cup granulated sugar (3 1/2 ounces)
1 large egg
1 large egg yolk
2 tsp vanilla extract
1-2 cups chocolate chips or chunks (semi or bittersweet)
1 jar of nutella (you won't need the whole jar, just some)
sea salt

directions:
  1. Heat oven to 325 degrees. Adjust oven racks to upper- and lower-middle positions. Mix flour, salt, and baking soda together in medium bowl; set aside.
  2. Either by hand or with electric mixer, mix butter and sugars until thoroughly blended. Mix in egg, yolk, and vanilla. Add dry ingredients; mix until just combined. Stir in chips.
  3. Form scant 1/4 cup dough into ball. Using finger or thumb, make an indentation and scoop 1/2 tsp of Nutella and put it in. Then close up the dough (roll it back into a ball again). Place formed dough onto one of two parchment paper-lined 20-by-14-inch lipless cookie sheets, about nine dough balls per sheet. Lightly press down on the cookie dough and sprinkle sea salt over it. Smaller cookie sheets can be used, but fewer cookies can be baked at one time and baking time may need to be adjusted.
  4. Bake, reversing cookie sheets’ positions halfway through baking, until cookies are light golden brown and outer edges start to harden yet centers are still soft and puffy, 15 to 18 minutes (start checking at 13 minutes). Cool cookies on cookie sheets. Serve or store in airtight container.
Makes 18-20 large (3-inch) cookies. Enjoy!

Note: To ensure a chewy texture, leave the cookies on the cookie sheet to cool.

Thursday, December 13, 2012

12 days of christmas baking - day 9: chocolate-almond saltine toffee

Chocolate-Almond Saltine Toffee via design. bake. run.

this is another great recipe and i'm definitely doing this again next year or whenever i feel like making toffee. actually, i'll be making them again in the next few days to send out to people in my yearly christmas baked goodies sent-outs. yes, every year i send random people my baked goods. i think these will do just fine during the delivery process (or so i hope).

this recipe is fantastic i say. i love how the saltine adds an extra crunch and the salty-ness of the cracker is definitely welcome. i love anything with a nice hint of salt. okay, below's the recipe should you be interested. they're pretty easy to make and took no time at all. enjoy!

Chocolate-Almond Saltine Toffee via design. bake. run.
these salted caramel chocolate pecan bars really hit the spot. so. good.

Chocolate-Almond Saltine Toffee via design. bake. run.
another shot of these delicious bars

Chocolate-Almond Saltine Toffee via design. bake. run.
the saltine really adds a little something to your typical toffee. very good!

chocolate-almond saltine toffee
recipe from food & wine

ingredients:
1 1/2 cups sliced almonds (6 ounces)
approximately 60 saltine crackers (not low-sodium)
1 1/2 cups sugar
3 sticks (3/4 pound) unsalted butter
2 tablespoons light corn syrup
1/2 pound bittersweet chocolate, chopped into 1/2-inch pieces

directions:
Preheat the oven to 350°. Spread the almonds on a baking sheet and toast for about 6 minutes, until golden.

Line a 12-by-17-inch rimmed baking sheet with a silicone mat or lightly buttered parchment paper. Arrange the saltine crackers on the baking sheet in a single layer, patching any holes with cracker bits; slight gaps are okay.

In a medium saucepan, combine the sugar, butter and corn syrup and cook over low heat until the sugar is melted. Brush the side of the pan with a moistened pastry brush to wash down any sugar crystals. Cook the syrup over moderate heat without stirring until it starts to brown around the edge, about 5 minutes. Insert a candy thermometer into the syrup and simmer, stirring with a wooden spoon, until honey-colored caramel forms and the temperature reaches 300°, about 6 minutes longer.

Slowly and carefully pour the caramel over the crackers, being sure to cover most of them evenly. Using an offset spatula, spread the caramel to cover any gaps. Let cool for 3 minutes, then sprinkle the chopped chocolate evenly on top. Let stand until the chocolate is melted, about 3 minutes, then spread the chocolate evenly over the toffee. Spread the almonds evenly over the chocolate. Freeze the toffee until set, about 15 minutes.

Invert the toffee onto a work surface and peel off the mat or paper. Invert again, break into large shards and serve.

MAKE AHEAD The chocolate-almond saltine toffee can be refrigerated for up to 2 weeks in an airtight container.

makes 2-1/2 pounds. happy eating. :)

Wednesday, December 12, 2012

12 days of christmas baking - day 8: salted caramel chocolate pecan bars

Salted Caramel Chocolate Pecan Bars via design. bake. run.

i have to say these are one of the best and easiest pecan bars i've ever made! actually, it's my first ever pecan bars i've ever made. ;) but that's besides the point. the point here is, these are so good, you must make some yourself! the salted caramel is just delish! and that added chocolate on top? yummy! everything about this bar is simply tummy-satisfying good. plus, it's so easy and simple to make with such few ingredients, why not?! so i say go ahead and make some today.

below's the recipe. do say you'll make some and let me know if you agree or disagree? i found this recipe on pinterest, and i'm so glad i did, because it is officially now a christmas/holiday keeper! actually, i may just make some throughout the year too. we'll see! enjoy. :)

Salted Caramel Chocolate Pecan Bars via design. bake. run.
these salted caramel chocolate pecan bars really hit the spot. so. good.

Salted Caramel Chocolate Pecan Bars via design. bake. run.
another shot of these delicious bars

Salted Caramel Chocolate Pecan Bars via design. bake. run.
i think i may have to make another batch of these before christmas!

salted caramel chocolate pecan bars
recipe adapted from southern living

ingredients:
1 cup chopped pecans
12 whole graham crackers
1 cup firmly packed brown sugar
1/2 cup butter
2 tablespoons whipping cream
1 teaspoon vanilla extract
1/4 teaspoon kosher salt
1 cup chocolate chips

directions:
  1. Preheat oven to 350°. Bake pecans in a single layer in a shallow pan 10 to 12 minutes or until toasted and fragrant, stirring halfway through.
  2. Line a 15- x 10-inch jelly-roll pan with aluminum foil; lightly grease foil. Arrange graham crackers in a single layer in prepared pan, slightly overlapping edges.
  3. Combine sugar, butter, and cream in a medium-size heavy saucepan; bring to a boil over medium heat, stirring occasionally. Remove from heat, and stir in vanilla and pecans. Pour butter mixture over crackers, spreading to coat.
  4. Bake at 350° for 10 to 11 minutes or until lightly browned and bubbly.
  5. Immediately top warm bars with the chocolate chips. Let stand 3 minutes, and spread chocolate over bars. Then sprinkle with salt, and slide foil from pan onto a wire rack. Cool completely (about 30 minutes). Then chill for 20 minutes before breaking into bars and serving.

makes 4 dozen. happy eating. :)

Tuesday, December 11, 2012

12 days of christmas baking - day 7: peppermint & coffee nutella french macarons

Peppermint & Coffee Nutella French Macarons via design. bake. run.

who doesn't love french macarons? yes, i've finally made some again since that last giant batch of macarons i made for a wedding. i can't believe i haven't made any since then. to go with the whole christmas theme, i decided on the peppermint flavor macarons, sprinkled with peppermint candy on the side. and to add to that, since i personally like to have more than one flavor of macarons whenever i'm making/eating them, i went with (almost) everyone's favorite, the coffee nutella.

i know, i haven't gotten my recipe up for these macarons yet, but again, i promise i will write a blog post soon and post the recipe here as soon as i have it written out. in the meantime, you can browse through these previous posts and get david lebovitz's recipe from one of these posts.

enjoy and happy baking! :)

***UPDATE 12/18/12***

i've finally got the recipe written up. scroll below for the peppermint recipe. for the coffee nutella macaron recipe, please click here. enjoy and let me know how yours turn out if you make them! :)

Peppermint Macarons via design. bake. run.
i love how festive and flavorful these peppermint french macarons are!

Peppermint & Coffee Nutella Macarons via design. bake. run.
these peppermint and coffee nutella macarons really turned out great. so yummy and just the perfect treat for a cold day with warm coffee/tea.

Peppermint & Coffee Nutella French Macarons via design. bake. run.
i absolutely love making and eating french macarons. i really can eat all of these delicious peppermint and coffee nutella macarons. ;)

Peppermint Macarons via design. bake. run.
another shot of the peppermint macarons. yum!

peppermint macarons

ingredients:

macaron batter:

1 cup (100 gr) powdered sugar

3/4 cup almond meal (about 3 ounces or 75 grams)

red gel food coloring (optional)

2 large egg whites, at room temperature

5 tablespoons (65 gr) granulated sugar

peppermint buttercream filling:
1 stick of butter, softened
2 cups powdered sugar
1/2 tbsp peppermint extract
up to 2 tbsp heavy cream or milk
3 candy canes, crushed (optional)

peppermint candy decorations:
6 candy canes, crushed

directions:
to make the macaron shells: Preheat oven to 350º F (180º C).

Line two baking sheets with parchment paper and have a pastry bag with a plain tip (about 1/2-inch, 2 cm) ready.

Sift together the powdered sugar, almond meal and 2 tablespoons of espresso so there are no lumps (usually I just use a fork to break any large lumps). If your almond meal isn't so fine, you can put the ingredients into a blender or food processor to make it finer. Personally, I'd just use the sifter and dump out any remaining crumbs that didn't make it through the sifting process.

In the bowl of a standing electric mixer (or if you prefer, you can use a bowl and hand mixer), beat the egg whites until they begin to rise and hold their shape. While whipping, beat in the granulated sugar until very stiff and firm, about 2 minutes.

Carefully fold the dry ingredients, in two batches, into the beaten egg whites with a flexible rubber spatula. If you want your macaron shells to be red, this is where you'd to add in the food coloring (with the dry ingredients), otherwise, you can just skip it and use the food coloring as paint to paint it on once the cookies are assembled (like I did!). When the mixture is just smooth and there are no streaks of egg white, stop folding and scrape the batter into the pastry bag (standing the bag in a tall glass helps if you’re alone).

Pipe the batter on the parchment-lined baking sheets in 1.35-inch (3.5 cm) circles evenly spaced one-inch (3 cm) apart. Quickly after it's piped, sprinkle a few espresso powder over each shell (this step is optional, personally I do it because I like how they macarons look once they're baked).

Rap the baking sheet a few times firmly on the counter top to flatten the macarons. Then it let sit for at 30-60 minutes (okay, I've done it with just 15 minutes before and they turn out fine, but whatever you do, do not skip this step; even at just 15 minutes) before baking them in the oven, 15-17 minutes. Let cool completely then remove from baking sheet.

to make the peppermint buttercream frosting filling: beat butter for a few minutes with a mixer with the paddle attachment on medium speed (or you can use a hand mixer). add the 2 cups of powdered sugar and turn your mixer on the lowest speed (so the sugar doesn’t blow everywhere) until the sugar has been incorporated with the butter. increase mixer speed to medium and add peppermint extract, and 1 tablespoon of milk/cream and beat for 3 minutes. if your frosting needs a more stiff consistency, add a little more sugar. if your frosting needs to be thinned out, add remaining tablespoon of milk, a little at a time. once you've gotten the right consistency and the buttercream is complete, add in the crushed peppermint candy cane pieces and mix until incorporated. of course, this last part here is optional, you can skip it if you like. i personally like the added crunch when biting into my peppermint macaron, so i do this last step. :)

to assemble: Before assembling these cookies, make sure to pair up all the cookie shells so they are as close as possible in size. Then using a knife, spread a good amount of the peppermint filling on the inside of the macarons then sandwich them together. Sprinkle the crushed peppermint candy cane pieces over the filling portion of the assembled macaron. Or you can roll the cookie on the candy pieces. This last step adds a nice decorated touch to these peppermint macarons. They are so cute and delicious!

Let them stand at least one day (keep them refrigerated) before serving (serve at room temperature), to meld the flavors. Or if you can't wait to dig in and eat, I say wait a few hours, at least! (Shhhh, I've eaten them newly assembled too, and they taste just as yummy! hahahaha). But really, for the best optimal flavor and taste, you must wait at least one day. They really are THAT good and worth the wait!

Store in an airtight container for up to 5 days.

Makes about 16-20 cookies. Enjoy and happy eating! :)

Note: I typically just bake mine for 15 minutes and they turn out fine. But yours may be different as all oven temperatures vary so letting them bake the full 17 minutes may be fine. I say set your timer for 15 minutes and add on from there.
Related Posts Plugin for WordPress, Blogger...