Tuesday, March 5, 2013

tartine's lemon cream tart

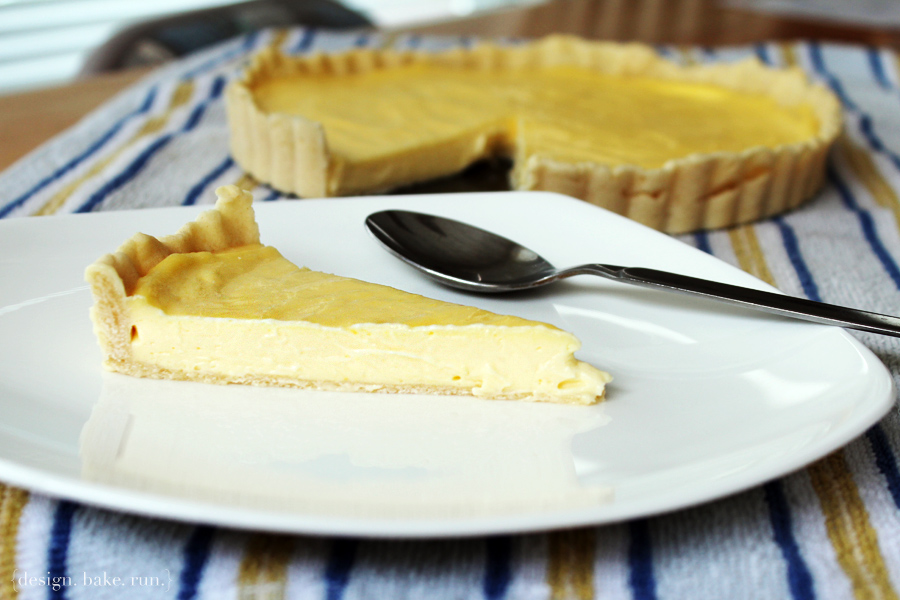
Tartine's Lemon Cream Tart via design. bake. run.

it seems like lemons are popping up everywhere these days. it is definitely lemon season you can say! a couple of weeks ago a friend gave me some meyer lemons from her garden. i knew exactly what i wanted to make with it. for sure some lemon curd and maybe some lemon cake or something lemony anyway. upon researching different lemon curd recipes i discovered tartine's lemon cream tart. i've gone to tartine multiple times, but i've yet to try their lemon tart. i don't know… must be because it's always so crowded there (the lines are ridiculous no matter what time of day – this place is hugely popular here in sf) that i feel a bit overwhelm sometimes even when i know exactly what i want to get (usually a morning bun and/or almond croissant).

okay, so after reading what it would take to make tartine's delicious lemon tart (as attested by many who've tried it and have made it themselves), i decided i too would attempt to make this yummy piece of goodness. so… how did it turn out? absolutely delicious! it is so lemony, creamy… and just so, so, good. even if you're not a fan, i say you fall in love it (and become a fan!?! =/). and if you are, you've got to make this! i love how the sweet dough for the tart gives that perfect amount of sweetness to offset the tartness from the lemon cream. everything just works well together in one scrumptious bite.

below is the recipe should you want to try and make this. it's super easy to make. usually i don't care for pie/tart dough because it's such a pain sometimes, but this one is a piece of cake. and the lemon cream is nothing if you've done plenty of double boiler stuff before. actually, even if you haven't, just follow the recipe and everything will turn out fabulous.

good luck and let me know how yours turn out! happy baking and eating, as always.
Tartine's Lemon Cream Tart via design. bake. run.

Tartine's Lemon Tart via design. bake. run.

sweet tart dough
by tartine (makes 4 9-inch tart shells or twelve 4-inch tartlet shells)

1 cup + 2 tbsp (9 oz/255 grams) unsalted butter, at room temperature
1 cup (7 oz/200 grams) sugar
1/4 tsp salt
2 large eggs, at room temperature
3 1/2 cups (17 1/2 oz/500 grams) all-purpose flour

directions:
  1. using a stand mixer fitted with the paddle attachment, combine the butter, sugar and salt and mix on medium speed until smooth.
  2. mix in 1 egg. add the remaining egg and mix until smooth. stop the mixer and scrape down the sides of the bowl with a rubber spatula.
  3. add the flour all at once and mix on low speed just until incorporated.
  4. on a lightly floured work surface, divide the dough into 4 equal balls and shape each ball into a disk 1/2 inch thick. wrap well in plastic wrap and chill for at least 2 hours or overnight or freeze 3 for future use (this dough will keep for up to 3 weeks).
  5. to line a tart pan, place a dough disk on a lightly floured surface and roll out 1/8 inch thick, rolling from the center toward the edge in all directions. lift and rotate the dough a quarter turn after every few strokes, dusting underneath as necessary to discourage sticking, and work quickly to prevent the dough from becoming warm. cut out a circle 2 inches larger than the pan. if the dough is still cool, carefully transfer the circle to the pan, easing it into the bottom and sides and then pressing gently into place. if the dough has become too soft to work with, put it in the refrigerator for a few minutes to firm up before transferring it to the pan. if the dough develops any tears, just patch with a little extra dough, pressing firmly to adhere. trim the dough level with the top of the pan with a sharp knife. place the pastry shell in the refrigerator or freezer until it is firm, about 15 minutes.
  6. if you are making tartlet shells, roll out the dough in the same way, cut out circles according to the size of your pans, and line the pans. the rest of the dough, including the scraps, can be frozen for future use.
  7. preheat the oven to 325 degrees fahrenheit.
  8. dock (make small holes in) the bottom of the tart shell or tartlet shells with a fork or the tip of a knife, making tiny holes 2 inches apart. place in the oven and bake for 7 to 10 minutes for a partially baked large shell or 5 to 7 minutes for tartlet shells. the pastry should be lightly coloured and look dry and opaque.
  9. let cool completely on wire racks. the pastry shells will keep, well wrapped, in the refrigerator for up to 1 week or in the freezer for up to 2 weeks.

lemon cream
by tartine (about 2.5 cups /625 ml)

1/2 cup + 2 tbsp (5 oz/155 ml) lemon juice
3 large eggs
1 large egg yolk
3/4 cup (6 oz/170 g) sugar
pinch of salt
1 cup (8 oz/225 g) unsalted butter

directions:
  1. pour water to a depth of about 2 inches into a saucepan, place over medium heat, and bring to a simmer.
  2. combine lemon juice, whole eggs, yolk, sugar and salt in a stainless steel bowl on top of double boiler. whisk ingredients constantly for 10-12 minutes until the mixture becomes very thick and registers 180°F on a thermometer.
  3. emote the bowl from over the water and stirring from time to time to release the heat.
  4. meanwhile, cut butter into 1 tbsp-pieces. when the cream is ready, using either a regular blender, or an immersion blender, add 1 piece of butter at a time to lemon mixture, blending after each addition of butter. the cream will be pale opaque yellow, and quite thick.
  5. you can use the cream immediately, or pour it into a storage container with a tight-fitting lid and refrigerate for up to 5 days.

to assemble the tart

have the tart shell ready for filling. pour the lemon cream directly into the cooled tart shell. shake the tart pan gently to smooth out the top of the filling. chill the tart until firm, about 2 hours before serving.

that's it, enjoy!

Wednesday, February 27, 2013

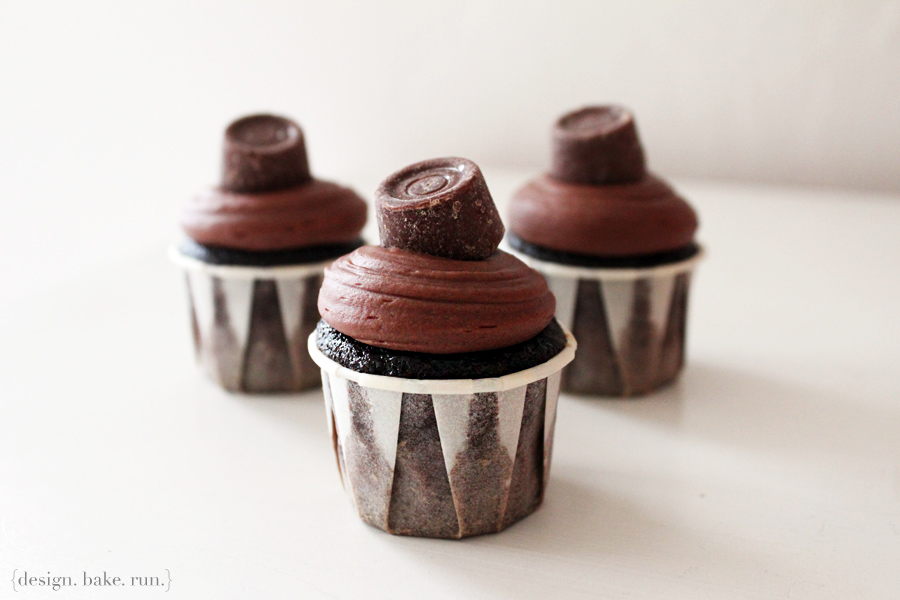
caramel-filled mini cupcakes inspired by rolo chocolate

Rolo Chocolate-Inspired Cupcakes via design. bake. run.

a while back i had some rolo chocolates for the first time ever. i know, right? i have to say, they were quite good and it gave me this idea to make some mini cupcakes with caramel filling. i figure since i do have some caramel bits lying around and the chocolate cupcake recipe i've been making lately is super simple to make, why not. i have to say these cupcakes turned out great! the melted caramel in the middle makes the cake extra moist and that much better, as if it wasn't good on its own already.

below's the recipe should you want to try making some yourself. enjoy and happy eating! :)

Rolo Chocolate-Inspired Cupcakes via design. bake. run.
i absolutely love the caramel filling in these mini cupcakes. it makes for one delicious bite!

Rolo Chocolate-Inspired Mini Cupcakes via design. bake. run.
these are so so good. the cake is nice and moist with the caramel filling. it's a must try if you're a chocolate or caramel (or none of the two even) lover! ;)

rolo chocolate-inspired mini cupcakes

ingredients:

chocolate cupcakes:
1-1/2 cups flour
1 cup granulated sugar
1 tsp baking soda
1 tsp salt
1/3 cup cocoa powder
1/2 cup oil
1 cup water
1 tsp vanilla extract
1 tbsp vinegar

caramel filling:
1/2 bag of kraft caramel bits
2 tablespoons of water

chocolate ganache:
12 oz chocolate, chopped into small pieces
1 cup heavy cream

directions:

for the cake: mix all ingredients together until moist and well blended. put in mini cupcake cups and bake for 15 minutes at 350 degrees F. let cupcakes cool completely before coring the center for the caramel. please core first before pouring in caramel filling.

for the caramel: place the caramel bits with 2 tablespoons of water in a microwaveable bowl and heat it in the microwave for 30-60 seconds at medium power. you can heat it longer if the bits are quite melted after 60 seconds. once it looks like they are melted, stir the caramel quickly until smooth. use immediately. if at any point the caramel looks like it's thickening up, you can reheat it in the microwave for a few seconds to soften it again.

for the ganache: place chocolate pieces in a large bowl. heat heavy cream on medium high until it comes to a boil. remove from heat and immediately pour cream over chocolate and stir until completely mixed and glossy. allow ganache to completely cool and set up. when you are able to spoon the ganache and it can hold its texture, it is ready for piping. pipe/frost and enjoy!

to assemble: pour a generous portion of the caramel filling into the cored cupcakes. top with chocolate ganache frosting. that's it! happy eating! :)

chocolate cake recipe makes 50 mini cupcakes (or 16 regular ones). ganache recipe makes 1-1/2 cups. you can half all of these if you want to make less. i've done it many times halving the recipe.

Monday, February 25, 2013

passionfruit pudding

Passionfruit Pudding via design. bake. run.

i still have a good portion of passionfruit juice leftover from last week. so to get more use out of it this past weekend i decided on this pudding (the UK kind, not the US kind like the Jell-O pudding). i saw a citrus pudding recipe on pinterest the other day and the photo looked so delicious i knew i had to try and make it one of these days. well, i haven't made that recipe just yet, but i did make one similar to it (this one here). i have to say it turned out pretty well. i wasn't sure how strong of a passionfruit flavor i would get (because the passionfruit juice container i got isn't quite 100% passionfruit juice… it's got some pear juice in it). anyway, i could tell it was passionfruit. but maybe that was probably because i knew it was passionfruit/pear juice i put in there?! i'm not sure if anyone else will be able to tell the flavor. nevertheless i will say that this pudding is quite delicious. i say you can probably substitute any fruit juice you like and it will still turn out scrumptious.

below's the recipe should you want to try it. let me know what you think! :)

Delicious Passionfruit Pudding via design. bake. run.

passionfruit pudding

ingredients:
6 tablespoons butter, melted
1-1/2 cup sugar
1-1/2 cup milk
2 eggs
1/2 cup passionfruit juice
1/2 cup all-purpose flour
1 teaspoon baking powder
confectioner’s sugar, for dusting

directions:
  1. preheat oven to 350°F.
  2. place the melted butter, sugar, milk, eggs, passionfruit juice, flour, baking powder and orange rind in a medium-size bowl and mix until everything is incorporated/combined.
  3. pour mixture into a lightly greased ovenproof dish and bake for 1 hour or until golden.
  4. dust with confectioners' sugar to serve.

serves 6. enjoy and happy eating! :)

Thursday, February 21, 2013

chocolate profiteroles with chocolate passionfruit cream

Chocolate Profiteroles with Chocolate Passionfruit Pastry Cream via design. bake. run.

a few weeks ago one of my coworkers gave me a quart (or carton?!) of passionfruit juice she brought back from berkeley bowl. she remembered me looking for some passionfruit whether it was in the form of the fruit itself or in juices, pulps, anything! anyway, since have this juice i figure i try and make something yummy out of it. and here you have it, these delicious chocolate profiteroles (the french's fancy way of saying cream puffs) with chocolate passionfruit pastry cream. :)

so, how did they turn out? pretty good i say. the passionfruit and chocolate definitely go together. only one unfortunate thing is that the passionfruit juice isn't passionfruity-enough in that it gets a little lost with the chocolate. unfortunately chocolate is one of those very powerful flavors. in this case it overpowered the passionfruit. although, i do feel that had i had actual passionfruit pulp or juices from the fruit itself (100% passionfruit) maybe you'd taste the fruit flavor a little more, even with the chocolate? all in all these cream puffs or profiteroles still turned out fantastic!

below's the recipe for these delicious chocolate profiteroles should you like to try them out yourself. enjoy!

Chocolate Profiteroles with Chocolate Passionfruit Pastry Cream via design. bake. run.
these chocolate cream puffs are so good. usually i prefer my simple vanilla pastry cream or whipped cream filling, but the chocolate in this -- delish!

Chocolate Profiteroles with Chocolate Passionfruit Cream via design. bake. run.
yup, that's a lot of chocolate profiteroles! :)

chocolate profiteroles with chocolate passionfruit pastry cream

ingredients

for the pastry cream:
1 cup half-and-half
1 cup whole milk
1/2 cup sugar
Pinch salt
6 large egg yolks
3 tablespoons cornstarch
1/2 cup passionfruit juice
6 oz dark chocolate chips
1/4 cup cream

for the pâte à choux:
1 cup all purpose flour
2 tablespoons unsweetened cocoa powder
1 teaspoon sugar
1/4 teaspoon salt
1/2 cup (1 stick) unsalted butter, cut into pieces
1 cup water
4 large eggs, lightly beaten

for the chocolate ganache glaze:
4 oz chocolate, chopped into small pieces
1/3 cup heavy cream

directions

to make the pastry cream: heat the half-and-half and milk, 6 tablespoons of the sugar, and the salt in a saucepan over medium-high heat until simmering, stirring occasionally to dissolve the sugar. meanwhile, combine the egg yolks and remaining 2 tablespoons sugar in a medium bowl and whisk until the sugar has begun to dissolve and the mixture is creamy, about 15 seconds. whisk in the cornstarch until combined and the mixture is pale yellow and thick, about 30 seconds.

also, while waiting for the milk mixture to simmer, heat the 1/4 cup cream in the microwave for 30-45 seconds until it comes to a boil (really, you want it hot enough to melt the chocolate). then pour it over the chocolate chips in a decent size bowl. mix the chocolate and cream together until the ganache is form. set the chocolate aside.

now, when the half-and-half and milk mixture has reached a simmer, slowly add it to the egg yolk mixture to temper, whisking constantly. return the mixture to the saucepan, scraping the bowl with a rubber spatula. return the mixture to a simmer over medium heat, whisking constantly, until a few bubbles burst on the surface and the mixture is thickened and glossy, about 30 seconds. off the heat, whisk in the melted chocolate and passionfruit juice. mix until everything is incorporated. strain the pastry cream through a fine mesh sieve set over a medium bowl. press plastic wrap directly on the surface to prevent a skin from forming and refrigerate until cold and set, at least 3 hours and up to 2 days.

to make the choux pastry: preheat oven to 400°F (200°C) and place rack in center of oven. line a baking sheet with parchment paper or lightly butter or spray the pan with a nonstick vegetable spray.

in a bowl sift or whisk together the flour, sugar and salt.

place the butter and water in a heavy saucepan over medium high heat and bring to a boil. (make sure that the butter melts before the water boils to reduce the amount of evaporation.) remove from heat and, with a wooden spoon, add the flour mixture, all at once, and stir until combined. return saucepan to the heat and stir constantly until the dough comes away from the sides of the pan and forms a thick smooth ball (about 1-2 minutes). transfer the dough to your electric mixer, or use a hand mixer, and beat on low speed to release the steam from the dough (about a minute) &ndash actually, i just do everything in the saucepan, beat the dough, adding the eggs, etc. once the dough is lukewarm start adding the lightly beaten eggs (dough will separate and then come together) and continue to mix until you have a smooth thick paste (dough will fall from a spoon in a thick ribbon). spoon or pipe small mounds of dough onto the baking sheet, spacing about 2 inches (5 cm) apart. optional: you can gently brush the tops of the dough with a lightly beaten egg if you like. i usually don't.

bake for 15 minutes and then reduce the oven temperature to 350°F (180°C). continue to bake for a further 30 minutes or until the shells are a nice amber color and when split, are almost dry inside. turn the oven off, poke a couple of holes in each puff and, with the oven door slightly ajar, let the shells completely cool (and dry out).

to fill the puffs: use the tip of a paring knife to make a small cut perpendicular to the first, creating an X in the side of each puff. fill a pastry bag fitted with a 1/4-inch plain tip with the pastry cream. pipe some of the pastry cream through the X into the side of each puff until it starts to ooze back out. repeat to fill all the puffs.

to make the chocolate ganache glaze: place chocolate and cream in a microwave-safe bowl, cover with plastic wrap, and microwave for 20 seconds at a time, until the mixture just begins to steam. whisk together thoroughly until completely mixed and glossy. allow ganache to cool slightly before dipping the tops of the cream puffs. set the puffs on a rack to let the chocolate glaze set completely. if you don't care for the chocolate ganache glaze, you can sprinkle confectioner's sugar on top of the filled cream puffs. i personally prefer dipping them in the ganache because it tastes yummier that way. serve within a few hours.

makes 40 decent size profiteroles. happy eating! :)

Wednesday, February 20, 2013

earl grey mini cupcakes with lemon buttercream frosting

Earl Grey Mini Cupcakes with Lemon Buttercream Frosting via design. bake. run.

a while ago i made some mini cupcakes. well, i made these as well. i have to say i love earl grey and lemon as a combination. it is the perfect little bite in your mouth. like a cute cup of lemony tea (although i must admit, i don't like and don't drink tea). mmmm... nevertheless, still delish!

below's the recipe for these cute little cupcakes should you be interested in making some. i say they work great for that next tea party or any occasion. so bake away and let me know what you think! :)

Earl Grey Mini Cupcakes with Lemon Buttercream Frosting via design. bake. run.
i'm not a big tea person, but i have to say, i love this lemon and earl grey tea combination. so good, the perfect little bite in your mouth for that afternoon sweet. :)

earl grey mini cupcakes with lemon buttercream frosting

ingredients:

mini cupcakes:

1-1/4 cup all-purpose flour
1/2 cup granulated sugar
1/4 cup brown sugar
1 tsp baking powder
1/4 tsp baking soda
1 earl grey tea bag

pinch of salt
1 cup buttermilk (you can use milk + 1 tbsp distilled vinegar)

1/4 cup oil

lemon buttercream:

 1/2 cup (1 stick) butter, room temperature

 3-3 1/2 cups confectioners’ sugar

 2-4 tablespoons of lemon juice
milk or cream, as needed

directions:

for the mini cupcakes:
  1. preheat oven to 350°f
  2. if using milk + vinegar as substitute buttermilk, combine milk and vinegar and stir to combine. set aside for 5 minutes. mixture will curdle. otherwise, if you're using buttermilk you can skip this step.
  3. in a large bowl, sift together flour, baking powder, baking soda, and salt. add in the earl grey tea bag and stir until combined.
  4. whisk sugar, oil and vinegar into buttermilk (or curdled milk mixture). make a well in the center of the dry ingredients and pour in the wet ingredients. mix until relatively smooth.
  5. fill mini cupcake liners with a scant tablespoon of batter (cups should be just under 2/3 of the way full). bake for 15 minutes or until lightly golden, and toothpick inserted in the center comes out clean.
  6. transfer to cooling rack and allow to cool completely.

for the frosting:
  1. cream butter in electric mixer for 1-2 minutes until fluffy.
  2. slowly add 1 cup sugar and beat until smooth. add in the lemon juice, a little bit at a time and mix until combined.
  3. add remaining confectioners’ sugar, 1/2 cup at a time, and beat until well incorporated. mix at medium-high speed until light and fluffy (2-3 minutes).
  4. add cream or more sugar as necessary to achieve proper consistency. pipe or spread onto cooled cupcakes.

makes 36 mini cupcakes (or 16 regular ones). enjoy and happy eating! :)

Thursday, February 14, 2013

happy valentine's day!

Valentine's Day Mini Cupcakes via design. bake. run.

Valentine's Day Sweet Treats via design. bake. run.

i've never really been a fan of valentine's day, but for some odd reason over the last few years i've slowly grown into maybe recognizing it. not a whole lot, just a teeny tiny bit. my thing is, i don't need any fancy flowers or box(es) of chocolates. just say happy valentine's day and that you love me and cannot picture your life without me because i am so awesome and things just wouldn't be as awesome if i wasn't part of it. hahahahaha.. yeah, sure, something like that.

so did my person recognize today's over-commercialized holiday? yup! he got me a nice box of see's candies (i've grown to liking them bit by bit these days as i'm usually the one giving those out during holidays) and some yummy peppered jerky. yes, i love my beef jerky. i say this year's v-day is so far, so good. no complaints here.

well, it's not too late if you haven't done anything today. the day is still young! hey, you can even bake these yummy mini cupcakes and give them away as little gifts or have them at your dinner (party or not) tonight (or any other time is fine too). you can find the recipe for these mini chocolate cupcakes with ganache here. i just topped them off with the ever-so-festive valentine sprinkles. :)

recipe: mini chocolate cupcakes with chocolate ganache frosting

Wednesday, February 13, 2013

mini creme brulee cupcakes

Mini Creme Brulee Cupcakes via design. bake. run.

sometime last week i saw a creme brulee cupcake pinned on my pinterest feed. i've never attempted making creme brulee before because i couldn't be bothered to make the custard on the stovetop, then bake it in a hot water bath. but creme brulee as a filling in a cupcake? i thought, sure… why not. that must be a whole lot easier than making actual creme brulee! and i tell you, it was because making the custard is easy peasy. i've done a bunch of pastry cream before, this is just like it, minus an ingredient or two.

i have to say, these mini creme brulee cupcakes turned out fabulous and they taste so good! i didn't have a blow torch so i stuck these babies in the broiler for a minute (although next time i might try less, more like 45 seconds) to brown before serving. so yes, i don't have a blow torch currently, although i have a feeling i may be getting one very soon in the near future as the hubby did ask me if i had one and would i like one – haha! i told him, of course you know i don't have one and sure, i could use one so we can have more of these yummy custard desserts! blow torch or not, you can still make them!

below's the recipe should you want to make them. i modified my eggless vanilla recipe for these cupcakes with a little bit of brown sugar. i say the brown sugar really adds something extra to the cake, because the custard and cake together is just divine! try it, you won't be disappointed. happy baking (and eating)!

Mini Creme Brulee Cupcakes via design. bake. run.
yes, that's a lot of mini creme brulee cupcakes! but that's okay, because they are so good. :)

Mini Creme Brulee Cupcakes via design. bake. run.
i think this is my new favorite cupcake! a must-try, for sure.

creme brulee mini cupcakes

ingredients:

cupcakes:
1-1/4 cup all-purpose flour
1/2 cup granulated sugar
1/4 cup brown sugar
1 teaspoon baking powder
1/4 teaspoon baking soda

pinch of salt
1 cup milk (if using buttermilk, skip vinegar)
1 tablespoon cider vinegar

1/4 cup oil
1/2 teaspoon vanilla extract

creme brulee:
4 egg yolks
3 tablespoons sugar
2 cups heavy cream
1/2 teaspoon vanilla extract
1/4 cup brown sugar

directions:

mini cupcakes:
  1. preheat oven to 350°f.
  2. combine milk and vinegar and stir to combine. set aside for 5 minutes. mixture will curdle. if using buttermilk, skip this.
  3. in a large bowl, sift together flour, baking powder, baking soda, and salt.
  4. whisk sugar, oil, vanilla extract into curdled milk mixture (or buttermilk). make a well in the center of the dry ingredients and pour in the wet ingredients. mix until relatively smooth.
  5. fill mini cupcake liners with a scant tablespoon of batter (cups should be just under 2/3 of the way full).
  6. bake for 14-15 minutes or until lightly golden, and toothpick inserted in the center comes out clean. transfer to cooling rack and allow to cool completely.
  7. once cooled, core out the middle, enough to fill it with the creme brulee mixture. this step is important to do before moving on to the creme brulee mixture as you'll want to pour the mixture into the cupcakes as soon as it's complete.

creme brulee:
  1. beat egg yolks in medium bowl with electric mixer on high speed (or you can use a hand mixer if you like, or do it by hand with a whisk or fork), 5 minutes or until thick and light yellow. gradually beat in sugar.
  2. heat cream in medium saucepan over medium heat until just hot to the touch. stir in vanilla.
  3. a little at a time, so the eggs do not curdle, stir half of the cream into the egg yolk mixture.
  4. then stir all the egg yolk and cream mixture into the remaining cream in the saucepan. cook, stirring continuously, over low heat, 5 to 8 minutes, until mixture thickens; do not boil.
  5. remove from heat and use immediately to fill your cored mini cupcakes.

assembly:
  1. using a small spoon, spoon a generous portion of the custard to fill the cupcakes.
  2. let the cupcakes sit at room temperature for at least 30 minutes before refrigerating. refrigerate the mini cupcakes at least 2 hours before serving.
  3. before serving, sprinkle with brown sugar and place under preheated oven broiler (45-60 seconds, no more than 60 seconds unless you really like burnt sugar). or if you have a blow torch, torch the top of the cupcakes to get it to brown (like shown in the pictures above).
  4. serve immediately. enjoy!

makes 36 mini creme brulee-filled cupcakes (or about 16 regular ones). happy baking and eating! :) oh, if you don't want to eat them all right away (although i don't know why you wouldn't because they're so good! hehe), you can keep them in an airtight container, in the refrigerator for up to 2 days. anything after that, i'm not sure how good the cake or custard will be.

Related Posts Plugin for WordPress, Blogger...