Showing posts with label biscuits. Show all posts

Thursday, August 29, 2013

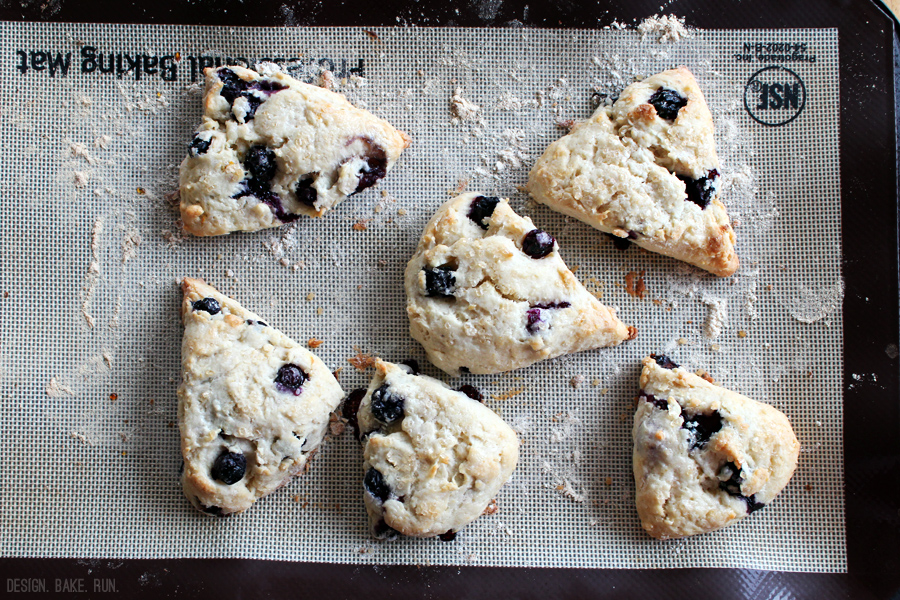
blueberry cream scones

Blueberry Cream Scones via design. bake. run.

since that first time i baked some scones, i've been a fan of it. i love how it's not too sweet and so if you're not a sweet tooth-kind of person you can have it as is, with a dab of butter or not. or if you've got a sweet tooth (i do most of the time), you can add on some jam and cream. oh it is really good, especially when it's nice and warm soon after it's come out of the oven.

i had some fresh blueberries in the fridge and decided i would finally make some blueberry scones. having a bunch of heavy whipping cream still on hand and very few eggs available, i opted for the cream scones instead because it uses no eggs or butter. the outcome like i've mentioned above is delicious. absolutely the perfect breakfast or afternoon treat. i actually had mine for breakfast. i prepared the scones the night before and had them sit in the fridge overnight. in the morning i preheated my oven and baked these delicious goodies. the house smelled wonderful the other morning when these were in the oven.

if you'd like to have a delicious smelling warm oven in the morning or any time of day, i say why not make some of these scones. again, it uses no eggs or butter so it's perfect for anyone who has an egg allergy. below's the recipe should you be interested. enjoy and as always, happy baking and eating. :)
Blueberry Cream Scones via design. bake. run.
i love how this recipe uses no eggs or butter. it's super easy to make and comes out perfect every time.

Blueberry Cream Scones via design. bake. run.
scones are perfect for any time of day really. i could eat them for breakfast, snack, lunch or yes... even dinner! ;)

blueberry cream scones
recipe adapted from food & wine

ingredients:
  • 2-1/4 cups all-purpose flour
  • 1/4 cup granulated sugar
  • 1 tablespoon baking powder
  • 2 teaspoons finely grated lemon zest
  • 1/2 teaspoon salt
  • 1-1/2 cups heavy cream, plus 2 tablespoons for brushing
  • 2 tablespoons fresh lemon juice
  • 5-6 oz blueberries (i used fresh blueberries, but you can use frozen ones too)
  • raw sugar, for sprinkling

directions:
  1. preheat the oven to 375°f and line a baking sheet with parchment paper (or you can use a silpat like i did).
  2. in a bowl, whisk the flour with the granulated sugar, baking powder, lemon zest and salt. using a wooden spoon, stir in the cream and 2 tablespoons of the lemon juice; fold in the blueberries.
  3. on a lightly floured work surface, gently knead the dough just until it comes together. pat into a 9-inch round, a scant 1/2 inch thick. cut the dough into 8 wedges and arrange them 1 inch apart on the prepared baking sheet.
  4. brush the scones with heavy cream (or you can use milk) and sprinkle it with some raw sugar.
  5. bake the scones for 20 to 25 minutes, until slightly firm and lightly browned on the bottom, pale on top.
  6. let cool for 5 minutes, then transfer to a rack to cool completely.

makes 8. of course, more or less depending on how you cut it. ;)

note: i don't quite agree with the cooling completely part unless you don't plan to eat it right away. generally scones are best eaten warm. they're delicious as is, but you can add butter and/or jam (or clotted cream as they do in england and i swear it's the best thing ever), if you like. to reheat room-temperature scones, place on a baking sheet, tent lightly with foil, and warm in a preheated 350°f oven for about 10 minutes.

Wednesday, June 5, 2013

traditional english scones with clotted cream and jam

Traditional English Scones via design. bake. run.

over the weekend during one of my grocery shopping outings i came upon some clotted cream. i know, clotted cream in an american grocery store!?!! i mean seriously, i have never ever seen or even knew what one of those things look like. i've shopped in mini british shops where they usually have british goodies (typically your jams, candies, chocolates, etc) or the international aisle in grocery stores, but had never came across any clotted cream until this weekend. sure, i've heard plenty about them in my household, but had never had the opportunity to taste them – i know! even after being in england last year and the time before that as well down in cornwall (yes, i was in cornwall and i didn't even get to eat scones with clotted cream!). anyway, long story short, i bought one jar of clotted cream right off the bat. of course, i actually put two in my basket then decided i would only need one and if i needed more, i could come back for more. sadly, i went back the next night and they all disappeared. i was so disappointed. i swore i saw at least 6-8 jars of them still on the shelf. really, who came and bought them all? i mean, within a 24-hour time span? seriously!!?! i couldn't believe my eyes when i went back and discovered they were all gone. i didn't bother asking the store about them because i knew they wouldn't have any left. if it was gone, it was gone. boo hoo. i know i will be very sad when all the clotted cream is gone or when we have to throw it out (because it's only good for 5 days once you've opened it) because i don't know when i'll get to have it again, especially here in the states. ahhh! that just mean we have to plan a trip to england. hehe ;)

now, that very night i got the clotted cream i came home and baked up a batch of your traditional english scones. yes, the ones where there aren't any eggs in them. actually, there are so many scone recipes out there, some with eggs, some without, some with no butter and just cream and some with butter but no cream (milk instead)… lots! i did a quick search online and came across one on bbc good food website. this one sounds simple enough and i had all the ingredients needed so i went ahead and made some. i have to say, the scones right out of the oven, still hot or okay, maybe warm after it'd cooled a little bit with some raspberry jam and clotted cream spread on was just the perfect late night snack. hahaha, yes, late night because by the time i finished baking, it was about 10pm! and yes, i couldn't wait, i had to have one right away. it was so good. so, what does clotted cream taste like? i think it's sort of like a thick heavy whipping cream. like super thick and very, very creamy. you could almost substitute whipping cream for it, but then again, it's not quite the same. but i think for the most part, it will do the job – it'd just be a tad lighter since it won't be as thick. i have to say, the combination of the jam and clotted cream in the scone was just delicious. if you've never had clotted cream before, i say it's a must try anytime you get a chance to have it. so. good. i know i will make sure i eat plenty of scones with jam and clotted cream the next time i'm in england.

below's the recipe should you want to make some scones for that late night snack (okay, afternoon tea or morning brunch/breakfast?!). this recipe's pretty simple so you can whip it up quickly. i've converted everything to american measurements so it's easier for us americans. i say use the cups measurements if you're making it, it's a whole lot easier. of course, if you want the actual UK measurements, i've included that as well. so make some and let me know what you think. enjoy and happy baking. :)

Traditional English Scones via design. bake. run.
i love how these traditional english scones turned out. they're sort of like an american biscuit but with a hint of sweetness. and of course, nice and buttery – and perfect with clotted cream and jam!

Traditional English Scones via design. bake. run.
jam and clotted cream with these english scones are just the perfect treat for any time of day. i, of course, had it for breakfast today, yesterday and the day before that. yum!

traditional english scones
recipe from bbcgoodfood

ingredients:
  • 2 cups (225g) all-purpose flour
  • 2 teaspoons baking powder
  • 1/2 teaspoon salt
  • 3 tablespoons (30g) caster sugar
  • 4 tablespoons (55g) butter
  • 1/3 cup (55g) raisins or sultanas (optional)
  • 2/3 cup (150ml) milk
  • milk or egg wash*, for brushing

directions:
  1. Heat the oven to 350° F (200C/fan 180C/gas 6). Mix the flour, baking powder, salt and caster sugar in a bowl, then rub in the butter with your fingertips until the mixture looks like breadcrumbs. Stir in the raisins or sultanas, if using.
  2. Bit by bit, add 150ml milk until you have a firm dough. Turn out onto a floured work surface. Pat the dough into a circle about 1/2 in (1 1/2 cm) thick and cut out the scones (I used 2-1/2 in biscuit cutters). optional: if you like, you can put your scones in the freezer for 15 minutes to let them set before putting them in the oven. i hear it's supposed to harden the butter so when you bake it, it actually makes your scones a bit more flaky and yummy. i personally couldn't be bother to do that for this recipe here because i didn't have the patience or time to.
  3. Put onto a non-stick baking sheet and brush the tops with milk or egg wash. Bake for 12-15 minutes. Serve with butter, or jam and cream.

*random note: i think i prefer egg wash over milk. having made this recipe twice in the last two days, the egg wash definitely helps the scones come out of the oven looking more brown or like it's been baked than the milk. the first time i made it i just brushed the scones with milk and they came out looking all pasty like it wasn't ready (baked) when really it was. so i say use egg wash and make your scones look scrumptious! :)

enjoy! makes about 8 scones. happy eating! :)

Tuesday, May 14, 2013

cranberry scones

Cranberry Scones via design. bake. run.

i know i haven't posted too many new entries lately, regardless if it was food related or exercise or whatever. this last week has been really tough. i think i averaged about 4-5 hours of sleep each night. yeah, pretty brutal. i'm not sure how i made it through though, but somehow i managed.

almost two weeks ago one of my uncles passed away. in doing my part or pitching in, i volunteered to bake some goodies for the funeral service this past weekend. my volunteering to make some cookies as snacks to pass out throughout the day during the weekend service turned into baking enough goodies for one morning breakfast (there are 3 mornings, i ended up with one morning). not knowing how many people i would be serving, i just knew there would be a lot of people. i asked my mom how many cakes and other goodies i should make and she said at least 10 breakfast cakes. and so with that number i spent literally the entire friday last week (from 11am to 11pm) baking a bunch of lemon loaves, fruit cakes (apple, strawberry, raspberry, lemon), and banana breads. in all, i think i had about 11 or 12 different cake-like goodies. in addition to all the cakes there were also a bunch of cranberry and raisin scones for the non-sweet eaters, blueberry muffins for the muffin fans and over 100 chocolate chip cookies. i think there was about 125 cookies or more in all. i lost count after so many dozens. in all, there were probably about at least 300-400 pieces of baked goods once all the cakes and loaves were sliced/cut. by friday evening i think my entire family was annoyed at me for being in the kitchen all day and taking up every counter space in the house, plus the dining room table. but i am glad and very pleased to say that m was so impressed with all my goodies that next morning (saturday) when i served all the goodies at the funeral service. he couldn't stop eating the toffee apple cake and rosemary lemon cake i made. he's such a tough critic, i couldn't believe he loved them. i will have to make those two again, take some pics and write a blog about it.

i have to say, that 12-hour baking marathon last friday in addition to the previous two nights of baking for the event was so worth it. it felt really good knowing i could contribute/give something to my uncle who has passed. everyone in my family: mom, dad, brothers and sisters, aunts and uncles and cousins all wanted to make sure we gave my uncle the best send off we possibly could, especially since he never had a family of his own. he lived a tough life, but i'm sure in a way it was a very happy life. i know everyone loved him and will miss him dearly.

i'm terrible at taking pictures and i was so tired after all the baking i couldn't be bothered to take pictures of most of the goodies. what i did manage to take was the cranberry scones and banana bread. as for the others, i only took a few and those i posted them onto my instagram. below are the pictures and recipes for the cranberry scones if you'd like to make some for your next event or just because. i say these scones were quite the hit and i love how flaky they turned out. yummy! :)

baking away here -- photo via mzrichee on instagram
this was only part of the kitchen that was captured on instagram. the dining table was a giant mess as well with baked goodies cooling, cakes waiting to be bake, ingredients and lots of miscellaneous baking items.

blueberry muffins -- photo via mzrichee on instagram
i never got to try these blueberry muffins or the strawberry cakes in the background. but from what i gathered on saturday, everyone liked it. i hope to make it again one of these days and actually eat one myself.

cranberry and raisin scones -- photo via mzrichee on instagram
my instagram photo of the scones

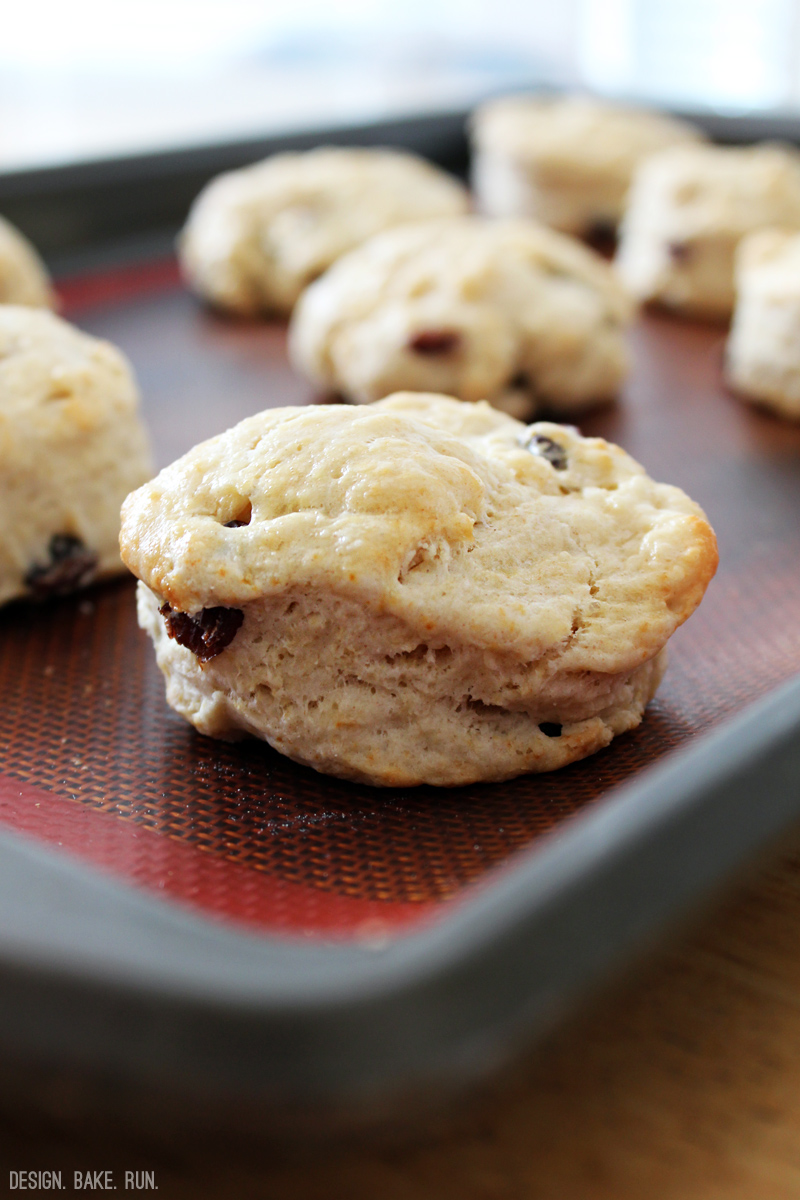
Cranberry Scones via design. bake. run.
this is only my second attempt at making scones and i have to say i've fallen in love with these delicious english biscuit-like treat. they are buttery and perfectly flaky when done right. add some butter or jam on them and you've got quite a treat for tea time or any time of day!

Classic Cranberry Scones via design. bake. run.
noticed all those layers in the scones? omg! so flaky and good.

Cranberry Scones via design. bake. run.
i can't wait to make this recipe again. i know that from now on when i make scones, i will think of my 12-hour baking marathon for my uncle's funeral; and how special that feeling felt knowing i was part of the celebration of his life.

cranberry scones
adapted from cooking light

ingredients:
  • 2 cups all-purpose flour (about 9 ounces)
  • 3 tablespoons granulated sugar
  • 1-1/2 teaspoons baking powder
  • 1/2 teaspoon salt
  • 5 tablespoons chilled butter, cut into small pieces
  • 1/2 cup milk
  • 1/4 teaspoon vanilla extract
  • 1 large egg white
  • 1/3 cup dried cranberries
  • 2 teaspoons milk
  • 2 teaspoons turbinado or granulated sugar

directions:
  1. preheat oven to 425°F.
  2. lightly spoon flour into dry measuring cups; level with a knife. combine flour, 3 tablespoons granulated sugar, baking powder, and salt in a bowl; stir with a whisk.
  3. cut in butter with a pastry blender or 2 knives until mixture resembles coarse meal.
  4. combine 1/2 cup milk, vanilla, and egg white in a bowl. add milk mixture to flour mixture, stirring just until moist (dough will be soft).
  5. turn dough out onto a lightly floured surface. sprinkle surface of dough with dried cranberries. with floured hands, knead 4 times or just until the cranberries are incorporated.
  6. pat dough into an 8-inch circle on a baking sheet lined with parchment paper. cut dough into 12 wedges, cutting into, but not through, dough. note: at this point, i like to chill my shaped dough in the freezer for at least 30 minutes (okay, 15 minutes if you can't really wait the whole 30). see tip notes as to why below.
  7. just before baking, brush 2 teaspoons milk over surface of dough; sprinkle with 2 teaspoons turbinado sugar. bake at 425°F for 17 minutes or until golden.
  8. serve warm, or cool on a wire rack. optional: if you like you can even dip the slightly cooled scones with some icing glaze (i like my glaze w/ a hint of lemon so i add a little bit of lemon juice to mine for a lemon glaze to dip them in) or drizzle the glaze over the scones for an added touch of sweetness. oh so good!

makes 8-12 wedges depending on how you cut your dough. enjoy! :)

tips to making and eating delicious scones:
  • freezing scone dough for 30 minutes in the freezer relaxes the gluten in the flour, which makes the scones more tender and allows them to rise higher. it also chills the fat, which will make the scones a bit flakier.
  • scones are best served warm. they're delicious as is, but add butter and/or jam (or clotted cream as they do in england), if you like. to reheat room-temperature scones, place on a baking sheet, tent lightly with foil, and warm in a preheated 350°F oven for about 10 minutes.
Monday, October 22, 2012

one-bite mini sliders

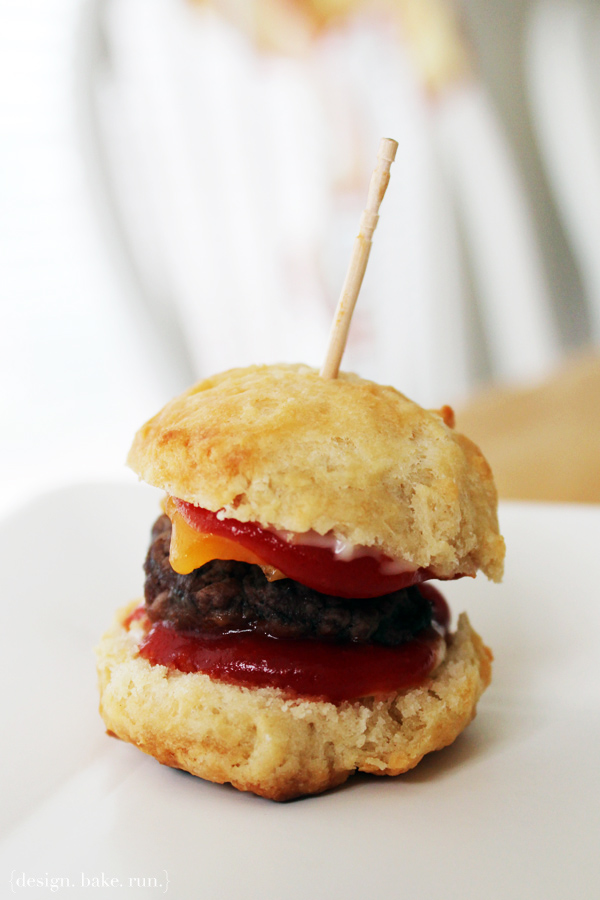
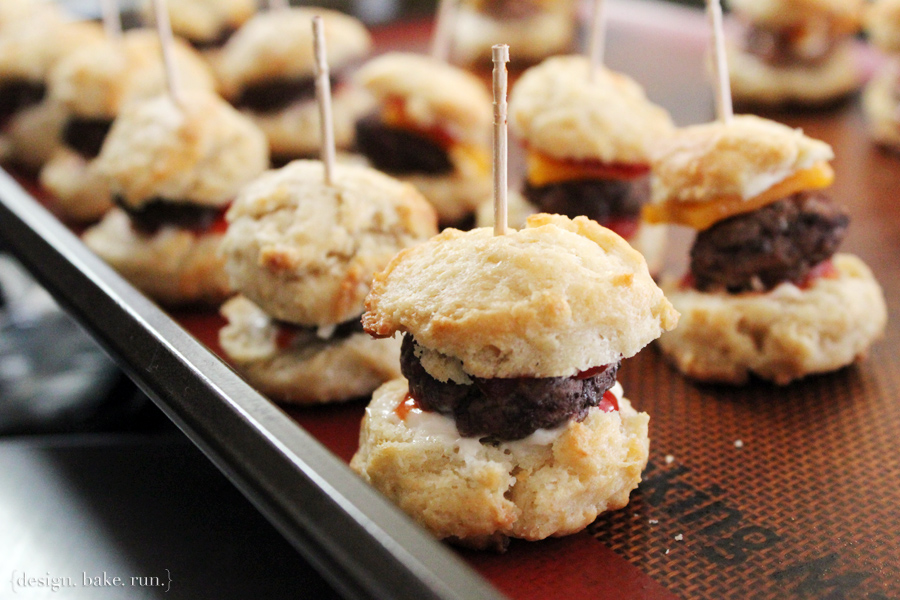
One-Bite Mini Burger Sliders via design. bake. run.

over the weekend we had another birthday party again (it was our third birthday party, three weekends in a row). to change up the food from weekend to weekend i went ahead and did these mini burger sliders. i knew i wanted to do little sliders, but wanted something different for the bun. you can say i didn't really want to shell out $5 for 12 or 24 dinner rolls. plus, those would be too big for what i was trying to do anyway. so what did i do instead? make my own buns? umm.. yeah, you can say that. now, these buns are not your typical bready buns. i have yet to bake a single loaf of bread in my life (i believe it'll happen some day, just not this past weekend, or today, or anytime soon).

for these one-bite mini burger sliders i actually used a drop biscuit recipe. the recipe came from cook's illustrated's website. i say it's pretty good. no, make it excellent! especially if you eat it warm. the biscuit was just delicious and the small size was great, making it the perfect little bite in one mouthful.

below's the recipe for the biscuit should you want to make your own drop biscuits. for these mini slider buns, i actually used a tiny circle cutter and shaped them to get the biscuits to the right shape and size (about 1 tbsp or 1-inch in size). of course you can do what i did if you're going the mini bun route or just leave them as is (drop biscuits). both variations will be just fine.

One-Bite Mini Burger Sliders via design. bake. run.
these one bite burger mini sliders turned out fantastic!

Drop Biscuits as Mini Slider Buns via design. bake. run.
don't they just look so good?

One Bite Mini Cheeseburger Sliders via design. bake. run.
this drop biscuit recipe makes for the perfect alternative to typical burger buns

One Bite Mini Cheeseburger Slider via design. bake. run.
these biscuits are really good, especially right out of the oven when they're still nice and warm

best drop biscuits
recipe from cook's illustrated

INGREDIENTS:
2 cups unbleached all-purpose flour (10 ounces)
2 tsp baking powder
1/2 tsp baking soda
1 tsp sugar
3/4 tsp table salt
1 cup buttermilk (cold)
8 tbsp unsalted butter , melted and cooled slightly (about 5 minutes), plus 2 tbsp melted butter for brushing biscuits

DIRECTIONS:
  1. Adjust oven rack to middle position and heat oven to 475 degrees F. Whisk flour, baking powder, baking soda, sugar, and salt in large bowl. Combine buttermilk and 8 tablespoons melted butter in medium bowl, stirring until butter forms small clumps (see tip).
  2. Add buttermilk mixture to dry ingredients and stir with rubber spatula until just incorporated and batter pulls away from sides of bowl. Using greased 1/4-cup dry measure, scoop level amount of batter and drop onto parchment-lined rimmed baking sheet (biscuits should measure about 2 1/4 inches in diameter and 1 1/4 inches high). Repeat with remaining batter, spacing biscuits about 1 1/2 inches apart. Bake until tops are golden brown and crisp, 12 to 14 minutes.
  3. Brush biscuit tops with remaining 2 tablespoons melted butter. Transfer to wire rack and let cool 5 minutes before serving.
Makes 12 biscuits. Enjoy!

Tip: When you stir slightly cooled melted butter into cold buttermilk, the butter will clump. Although this might look like a mistake, it's one of the secrets to this recipe. The clumps of butter are similar to the small bits of cold butter in biscuits prepared according to the traditional method and help guarantee a light and fluffy interior.

Wednesday, September 26, 2012

vanilla biscotti teething biscuits for the little one

teething biscuits -- vanilla biscotti via design. bake. run.

so my last teething biscuits for v didn't turn out the way i thought it would. like i mentioned in that blog post, the texture of the biscuit itself was unexpected and not in the (good) way i had hope. i expected it to be more of a crumbly cookie-like texture, but instead it was very doughy. i decided i try a different recipe and see how those turn out.

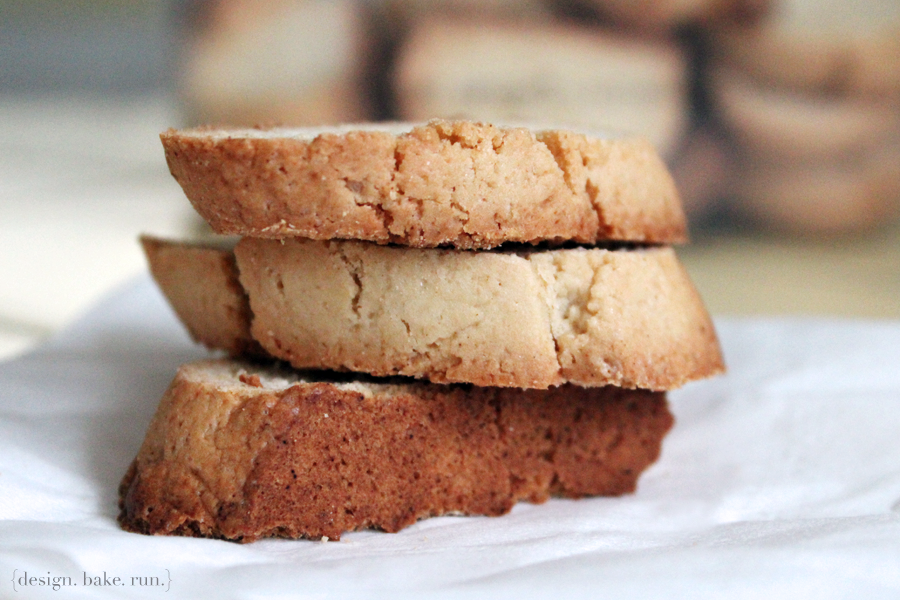
well, let me tell you, these vanilla biscottis turned out great! they are exactly like the regular kind the big kids can eat, firm but crumbly when gnawed, except that they're not as sweet. of course if you'd like to add more sugar in your version, go ahead. i'm sure you can even substitute whole wheat pastry flour for the all purpose flour if you want. i didn't substitute the flour because i didn't have any whole wheat handy or added a whole lot of sugar because i figure this is for my little one, a little hint of sweetness will do just fine. plus, the small amount of butter is giving this cookie that yummy buttery taste. i hope my little one will enjoy them as much as i'd enjoy making them for her.

below's the recipe should you be interested.

teething biscuits -- vanilla biscotti via design. bake. run.
these homemade cookies are great for the little ones and so easy to make

vanilla biscotti teething biscuits via design. bake. run.
a side view of these goodies

vanilla biscotti teething biscuits for the little ones via design. bake. run.
this recipe sure makes plenty! i know v will be so happy to see something else different for a change ;)

teething vanilla biscotti
recipe adapted from here

ingredients:
1/4 cup sugar
1-1/2 tbsp butter
1 egg
1/2 tsp baking powder
a pinch salt
1 tsp vanilla extract
1 cup flour, 1/4 cup extra if needed

directions:
Preheat the oven to 350°F.

Cream the sugar with the butter and beat in the egg. Add the vanilla extract, 1 cup of the flour, baking powder and salt and mix the dough well. It should be fairly sticky, but you should be able to gently mould it with your hands. If it's too sticky, add the extra 1/4 cup of flour. Form the dough into a long "log" shape (around 8-10 inches long) and bake for 20 minutes on a greased baking sheet/cookie sheet.

Allow to cool, then carefully cut into 1/2 in slices with a sharp knife. You should get around 16-24 slices. Place each slice, cut side down, on a baking/cookie sheet, then bake for another 15-20 mins, turning the Biscotti over half way through the cooking time. If they still feel soft, lower the heat and cook for an extra 5 to 10 minutes.

Remove from the oven and cool completely - they get harder as they cool. Store in airtight container. Should keep for 2-3 days.

Monday, September 10, 2012

teething baby biscuits for the little one

design. bake. run. -- homemade teething baby biscuits

heart-shaped banana baby biscuits

baby teething biscuits

design. bake. run. -- homemade teething biscuits


i finally got around to making these teething baby biscuits for our little one. i have no idea what homemade teething biscuits are like, so i don't really know what to say about these. i guess i've always kind of imagined them sort of like a shortbread cookie, but these are nothing like that. they're a bit doughy. but that could be because of the ingredients used. it is a very simple recipe. please feel free to chime in if you know what they're supposed to taste like because i really have no idea.

below's the recipe should you like to try them for your little one(s). overall, i think this is a good starter recipe. you can adjust the ingredients to your liking. i personally like it because it's very simple and uses no added sugar. you can substitute regular flour for whole wheat or rice flour (gluten-free friendly). actually, you can even use barley or oat flour. your pick. ;)

Banana Teething Biscuits
recipe from here

- 1 cup whole wheat, all-purpose, rice, barley or oat flour
- 1 cup dry infant rice or oat cereal
- 1 very ripe banana, mashed until smooth
- 2 Tbsp. canola or olive oil

Preheat oven to 375°F. 
In a medium bowl, stir together the flour and cereal. In a small bowl, stir together the banana, oil and about 2 Tbsp. water; add to the dry ingredients and stir until you have a soft dough, adding a bit more water or flour as needed until the dough comes together and is not too sticky. (It will depend largely on the size of the banana, and how juicy it is.)

On a lightly floured surface, roll the dough out about 1/4-inch thick and cut into smooth shapes. i had a heart-shaped play dough cutter on hand so i used that. you can of course do circles or sticks (without pointy edges – squish them a bit with your fingers). Bake on an ungreased cookie sheet for 10-15 minutes, or until golden. Cool completely and store extras in an airtight container.

Note: Instead of the infant cereal, these can also be made with oats, ground in the food processor to a coarse flour.
Related Posts Plugin for WordPress, Blogger...