Showing posts with label berries. Show all posts

Wednesday, January 28, 2015

baked goodies perfect for a tea party!

Tea Party Goodies via design. bake. run.

ummm... so, i sort of hosted a mini tea party at work this week. any excuse to bake some yummy baked goods, right? i'm not big on tea or anything, but i'll take all the goodies that come with it. :)

for our initial afternoon tea party kick-off, i settled on some coffee nutella macarons as well as some lemon cream cheese macarons (thanks to all the lemons in my garden), some mini lemon cupcakes with lemon icing, multi-berries scones, jam thumbprints and what better way to top it off then your not-so-typical savory bites, spam musubi. yup, you heard that right. we didn't have cute little tea sandwiches. we opted for spam musubi instead and those were delish! spam musubi is quite a hit with my coworkers and me. we'll take it any time of day, any day of the week, just as we'll take any of the other baked goodies.

anyway, the recipes are below if you'd like to bake any for your tea party or any party or just because. yeah, when you think about it, who needs an excuse to bake? i sometimes just bake because i wanted to. okay, enjoy and happy baking! :)

Mini Lemon Cakes and Multi-Berries Scones via design. bake. run.

multi-berries scones
recipe adapted from smells like home's blueberry scones

ingredients:
  • 8 tbsp (1 stick) unsalted butter, frozen whole
  • 1-1/2 cups fresh or frozen berries (i used a mix of blueberries, blackberries and raspberries)
  • 1/2 cup milk
  • 1/2 cup sour cream
  • 2 cups all-purpose flour, plus more for dusting the work surface
  • 1/2 cup sugar, plus extra for sprinkling
  • 2 tsp baking powder
  • 1/4 tsp baking soda
  • 1/2 tsp salt
  • 1 tsp finely grated lemon zest
  • 1 egg, for egg wash


directions:
  1. adjust an oven rack to middle position and preheat to 425° F. grate the frozen butter on the holes of a large box grater. if using fresh berries, place the berries in the freezer until needed. whisk together the milk and sour cream in a medium bowl; refrigerate until needed. combine the flour, 1/2 cup sugar, baking powder, baking soda, salt and lemon zest in a medium mixing bowl. whisk to combine. add the grated butter to the flour mixture and toss with fingers until thoroughly coated.
  2. add the milk mixture to the dry ingredients and fold with a spatula just until combined. transfer the dough to a generously floured work surface. dust the top of the dough with flour, and knead with well floured hands, 6-8 times, just until the dough holds together in a ragged ball. add small amounts of flour as needed to prevent sticking.
  3. roll the dough into a 12-inch square. fold the dough into thirds like a business letter (a dough scraper really helps with these steps). fold the short ends of the dough into the center in thirds, to form an approximate 4-inch square. transfer the dough to a plate lightly dusted with flour and chill in the freezer for 5 minutes.
  4. return the dough to the floured work surface and roll into an approximately 12-inch square again. sprinkle the berries evenly over the surface of the dough, and gently press down so that they are slightly embedded in the dough surface. using a dough scraper, roll the dough up to form a tight log. lay the log seam side down and press the the log into a 12 by 4-inch rectangle. using a sharp, floured knife, cut the rectangle crosswise into 4 equal rectangles. cut each rectangle diagonally to form 2 triangles. transfer to a parchment lined baking sheet.
  5. brush the tops of the scones with the egg wash and sprinkle lightly with sugar. if freezing ahead of time, flash freeze on the baking sheet for 20 minutes, then wrap individually and store in a freezer bag until needed. bake until the tops and bottoms are golden brown, 18-25 minutes. transfer to a wire rack and let cool at least 10 minutes before serving.


makes 12 scones (or however big/small you cut it)


Baked goodies perfect for any (tea) party! via design. bake. run.

mini eggless lemon cupcakes
recipe adapted from yum'e'licious

ingredients:

for the cupcakes
  • 1/2 cup butter
  • 1/2 cup sugar
  • 1 cup all purpose flour
  • 1 cup buttermilk (or do what i do; add 1 tbsp lemon juice to 1 cup of milk, stir, and let it sit for 5 minutes before using)
  • 1 tsp baking powder
  • 1/2 tsp baking soda
  • 1 tbsp lemon juice
  • zest of 1 medium sized lemon
  • few drops of yellow color, optional


for the lemon icing drizzle
  • 1/4 cup powdered sugar
  • 2 tbsp lemon juice


directions:
  1. if you don't have buttermilk, this is when you mix the lemon juice and milk together and set it aside while you do everything else.
  2. preheat oven to 350°F. then sift the flour, baking powder and the baking soda in a good size bowl and set that aside.
  3. in another bowl, cream the butter and sugar until light and fluffy. then add in 1/3 cup buttermilk and beat again until fluffy. repeat again with another 1/3 cup. then add the lemon zest and lemon juice and mix well. now, if you want to use some yellow food coloring, this is where i add it in.
  4. now add in the dry ingredients and mix well before adding in the remaining buttermilk; mix again until incorporated.
  5. fill the mini cupcake cups to 2/3 full (makes about 20-24) and bake it in the oven for 14-15 minutes. or if you'd rather do a loaf cake instead, pour the batter into a greased loaf tin (9"x5") and bake it for 20-25 minutes or until a toothpick comes out clean.
  6. let the mini cupcakes (or loaf) cool completely before drizzling the icing over. to make the icing, just mix the powdered sugar and lemon juice together. if it's too runny, just add more powdered sugar; and if too thick, add more lemon juice.


makes about 20-24 mini cupcakes or one loaf


French macarons, mini cupcakes, scones, jam thumbprints and spam musubi... perfect treats for any party via design. bake. run.

other goodies you can find recipes for:

Friday, December 27, 2013

12 days of christmas baking - day 12: berries pie

12 Days of Christmas Baking - Day 12: Four-Berries Pie via design. bake. run.

i'm way slow in posting this final recipe for my 12 days of christmas baking. the last few days with christmas eve, shopping and everything else has been pretty busy and hectic here. well, here is the recipe, finally. yes, a four different kinds of berries pie. every thanksgiving and christmas i make a berry pie. sometimes just your usual raspberry or blackberry. but for this christmas, i decided to throw in all the berries. you know, the usual – strawberry, blackberry, blueberry and raspberry. the end result? hahaha, a very berry delicious pie it was. we're not big apple pie people at my house, so anything other than apple pie is always a bonus. we've become quite the pecan pie lover and i made that recipe as well this christmas. you really can't go wrong with having too much sweet stuff around the house this holiday season (or any time of year really).

below's the recipe. i've done it with just one kind of berry, or all kinds of berries. so feel free to give it a try if you like. it's pretty simple and straight forward. oh, it's even easier too if you use a store-bought pie dough, already rolled out and ready to go. yeah, that would save you some time. otherwise, you can make your own. enjoy!

12 Days of Christmas Baking - Day 12: Four-Berries Pie via design. bake. run.
we love berry pies at our house. this recipe is so easy to make, especially with already made pie dough.

12 Days of Christmas Baking - Day 12: Four-Berries Pie via design. bake. run.
here's the pie all brushed with eggwash and ready for the oven.

12 Days of Christmas Baking - Day 12: Four-Berries Pie via design. bake. run.
the pie out of the oven, cooling.

12 Days of Christmas Baking - Day 12: Four-Berries Pie via design. bake. run.
nothing finishes a nice slice of berry pie like ice cream. yummy!

four-berries pie

ingredients:
  • 1 bag (16 oz) of frozen berries (any will do) or 4-5 cups fresh or frozen berries
  • 1 cup sugar
  • 3 tablespoons cornstarch
  • 1 tablespoon of lemon juice
  • 1 tablespoon butter
  • 2 store-bought pie dough (or make your own)

directions:
  1. preheat oven to 375°F.
  2. prepare pie dough according to pie dough directions if you're making your own. or take the store-bought dough out of the refrigerator and let it get to room temperature, about 15 minutes. then transfer the dough to pie plate; trim even with edge.
  3. in a medium bowl, combine the berries, sugar, cornstarch, and lemon juice. stir to combine all the ingredients. then add in the berries filling; and dot with butter (i usally cut the 1 tbsp butter up into tiny chunks).
  4. cover the filled pie with the second rolled out pie dough. note: if you want a lattice look, you can cut the rolled dough into long pieces and thread them to make it look like a lattice. i can't be bother with this so i just do the easy and simple way, cover it up.
  5. once the pie is all assembled, you can brush it with milk and sprinkle some sugar on top. or, if you prefer, you can brush it with a little egg wash. bake at 375°F for 50-55 minutes. if you want to stop the browning of the pie edges, you can first cover it up with foil, then remove the foil after 25 minutes.

makes one 9-inch pie. enjoy! :)

last year's day 12 recipe: holiday biscottis

Friday, October 18, 2013

one berry-licious birthday cake

Lemon-Blueberry Birthday Cake with Lemon Curd Filling + Whipped Cream + Fresh Berries Toppings via design. bake. run.

i've been on a buttermilk fruity cake spree the last month or so. you know, i am in love with that lemon-blueberry cake i made a while back. for our little v's birthday earlier this month i decided that we should celebrate with that exact cake. the recipe only makes one 8-inch cake so i doubled it and turned it into a 2-layer cake with homemade lemon curd filling, all topped with some yummy home whipped cream and farmer's market fresh berries. yes, you can still find berries even this late in the season. i know we are already in fall, but being in SF, october is like our summer and those berries are still around. i'm not complaining.

anyway, the cake was delicious. the whipped cream and berries on top with the tart lemon curd filling (because i like my lemon curd more tart than sweet) were all just perfect. i think i had dessert (cake) first before eating my dinner that night we celebrated her birthday. i mean, c'mon... when you have something this good-looking? plus, i tend to eat my desserts first before a proper meal. i know, so awful, but that's the only way i have room for dessert! hehehe ;)

below are all the links to the recipes used to make this very pretty berry birthday cake. you can adjust any of the recipes to your liking. enjoy and happy baking! :)

Lemon-Blueberry Cake with Lemon Curd Filling, topped with Whipped Cream + Fresh Berries via design. bake. run.

Lemon-Blueberry Cake with Lemon Curd Filling + Whipped Cream + Fresh Berries Toppings via design. bake. run.

berry-licious birthday cake

ingredients:
  • 2 lots of this lemon-blueberry buttermilk cake recipe
  • 1 lot of this meyer lemon curd recipe
  • 1 lot of this whipped cream recipe (actually, you could probably get away with just half if you like)
  • fresh berries for topping (i used blackberries, raspberries and strawberries... of course, you can use any fruit of choice)

directions:
prepare all recipes per their instructions. once all of that is done, assemble the cake and topped with the whipped cream and fresh berries (or fruit, whichever) and enjoy! happy eating. :)

makes one 2-layer 8-inch cake.

Monday, September 23, 2013

summer berries custards

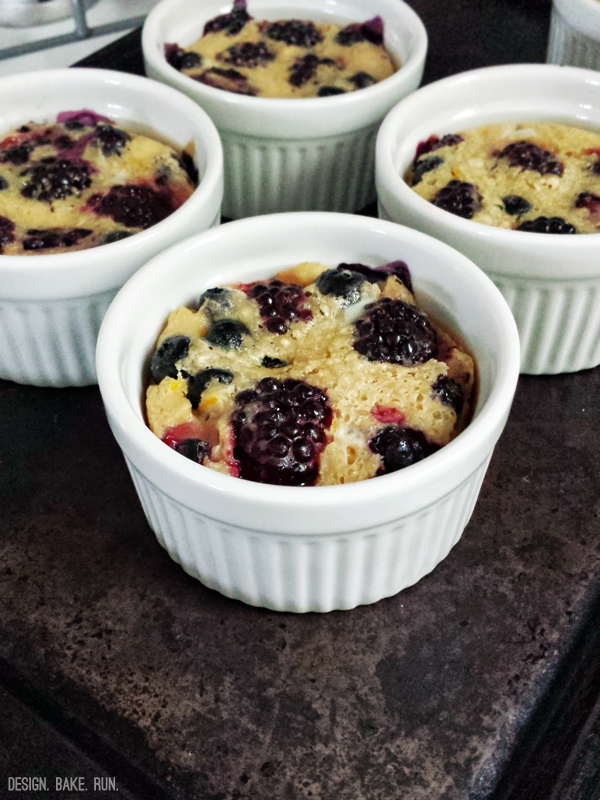
Summer Berries Custards via design. bake. run.

i've been hitting the farmer's market lately these past several weeks. during one of the outings i bought some blackberries. typically i'd just eat them all in one go, but i was strong enough to not inhaled the entire basket, but instead make something delicious out of them. and these good tasting, eat them warm right out of the oven summer berries custards was what i made with the blackberries. i actually had some blueberries on hand too so i used both. actually, you can even use raspberries or pitted cherries too.

the end result? i didn't really know what to expect. i thought since it was called a custard, i'd expected to be more custardy. but instead it was more like a pudding cake. it's not super sweet so i think you can even add some powdered sugar on top for a little extra if you like. but overall, a good cake. and of course, pudding cakes are big in my household, so we ate it up like that. actually, i think hogged most of the 6 ramekins that i made. but that was because m said he wasn't taking in any processed or added sugar. he hasn't been eating my baked goods since who knows when. maybe 6 weeks going on more? i can't remember.

ok, if you're interested in this recipe, i say why not make some. go out to your local farmer's market or grocery store and grab some of those summer berries before they're really gone for good. i know fall is here already and all those pumpkin baking recipes are popping up everywhere. so bake these for a last summer hurrah or just because. enjoy! :)

Summer Berries Pudding Cake via design. bake. run.
this custard is more like a pudding cake. i love how you get a little bit of the berries in every bite. yum!

summer blackberry custards
recipe from food & wine

ingredients:
  • 6 cups blackberries (2 pounds)
  • 1-1/2 cups whole milk
  • 1/2 cup heavy cream
  • 2 large eggs
  • 3/4 cup packed dark brown sugar
  • 1/2 cup all-purpose flour
  • 1 teaspoon pure vanilla extract
  • 1 tablespoon fresh lemon juice
  • 1/2 teaspoon grated orange zest


directions:
  1. preheat the oven to 450°F. spread 1/2 cup of the blackberries in each of twelve 4-ounce gratin dishes. arrange the gratin dishes on 2 baking sheets.
  2. in a bowl, whisk the milk with the cream, eggs, brown sugar, flour, vanilla, lemon juice and orange zest until smooth. ladle 1/4 cup of the custard into each dish; bake for about 15 minutes, until the centers are set. transfer the custards to wire racks and let stand for 30 minutes. serve.

makes 12. or you can half the recipe (which is what i did) and make just 6. enjoy! :)

Friday, July 19, 2013

blue bottle coffee's zachte belgium waffles

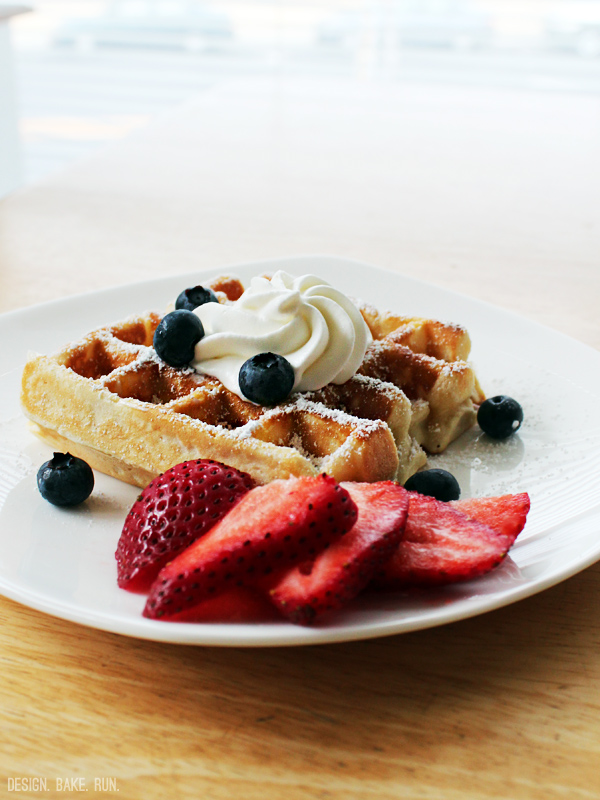
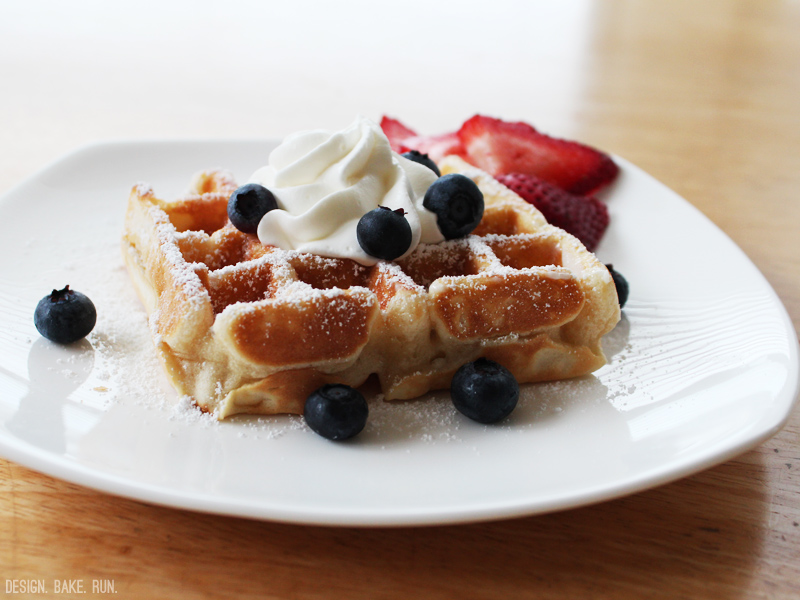
Blue Bottle Coffee's Zachte Belgium Waffle via design. bake. run.

last saturday morning m and i were downtown (sf) and i really wanted him to try blue bottle coffee's drip coffee. i'm not a big coffee drinker (only started drinking it occasionally since the birth of v), but i do drink it sometimes and mostly just your typical starbucks; and occasionally blue bottle coffee. anyway, i wanted him to try blue bottle's so we headed out to their location at mint plaza. we ordered two drip coffees along with the zachte belgium waffle. i've had their other waffle before (the liege waffle) at the ferry building location. i have to say both waffles were great. the zachte is almost similar to your buttermilk waffle in that it finishes with a nice slather of butter, topped with maple syrup and powdered sugar and optional whipped cream and fresh fruits. we just opted for the maple syrup and powdered sugar with the butter. oh my, the waffle was delicious with just the right amount of sweetness. i was a little worried the maple syrup and powdered sugar may be too much, but no, not at all. i love how soft the waffle was on the inside but nice and crisp on the outside. cutting into it and taking those first few bites felt like you were in some kind of breakfast or food heaven. we really had to slow down and enjoy the waffle because we didn't want to rush through such a good thing. that and the coffee was the perfect saturday morning breakfast combination. you really can't complain.

this morning, craving that exact waffle from last saturday, i decided to whip up my own homemade version. i didn't have any maple syrup on hand so i decided to skip that and just topped mine with powdered sugar and whipped cream with fresh fruits. it was still delicious.

below's the recipe should you want to make some. it's very easy and unlike the liege waffles, there's no yeast so no waiting for the dough to rise! make some and let me know what you think. pretty awesome tasting waffles, isn't it? i say so. now, next time you're in san francisco or at a blue bottle coffee shop elsewhere in the us, order the real thing and do tell me it's one of the best tasting waffles ever. so worth that $8-9 price. :)

Blue Bottle Coffee's Belgium Waffle + Coffee -- photo by mzrichee on instagram
this was a photo i took with instagram last weekend. now, seriously, it's one good-looking waffle. delicious!

Blue Bottle Coffee's Zachte Belgium Waffle via design. bake. run.
i love how soft and tender this belgium waffle is; with a perfect crispy exterior and topped off with just the right amount of maple syrup and powdered sugar. a nice cup of coffee completes a delicious breakfast beautifully any day of the week.

blue bottle coffee's zachte belgium waffles
recipe from blue bottle coffee

ingredients:
  • 2-1/2 cups (12.3 oz / 350 g) all-purpose flour
  • 1/2 cup (3.5 oz / 100 g) sugar
  • 2 teaspoons baking powder
  • 1/2 teaspoon kosher salt
  • 2 eggs (3.5 oz / 100 g), at room temperature
  • 2 cups (475 ml / 484 g) half-and-half
  • 1/2 vanilla bean (or 1/2 teaspoon vanilla extract)
  • 7 tablespoons (3.5 oz / 100 g) unsalted butter, melted, plus softened butter for serving
  • maple syrup, for serving
  • powdered sugar, for serving (optional)

directions:
  1. in a large bowl, combine the flour, sugar, baking powder, and salt and mix well.
  2. in a medium bowl, combine the eggs and half-and-half and whisk vigorously until well blended. split the vanilla bean, scrape the pulp into the egg mixture, and whisk until the vanilla seeds are evenly distributed. add to the flour mixture and stir just until evenly combined. gently stir in the melted butter.
  3. preheat a waffle iron to medium-high heat. cook each waffle until the indicator light goes off or until browned and crisp. serve immediately with softened butter and maple syrup. waffles are the most delicious, and have the crispiest exterior, when eaten hot from the iron. if eating with a group, the waffles can be held in a 200°F (93°C) oven until all of the waffles are finished, but the exterior won't be as perfectly crisp.
  4. any leftovers can be cooled completely, stored in a zippered freezer bag, and frozen for up to 1 month. reheat them in the toaster for an easy weekday breakfast.

makes 6-7 waffles and takes about 30 minutes to make from start to finish. enjoy! :)

Monday, April 29, 2013

angel food cake cupcakes with strawberries & cream

Angel Food Cake Cupcakes with Sliced Strawberries & Whipped Cream via design. bake. run.

i'm loving the spring season at the moment. i can't complain about it, especially not here in san francisco. the last few weeks we've been so fortunate with mother nature giving us gorgeous sunshine and almost no-jacket/sweater weather. seriously, today was about 80 degrees in the city! i went out for my daily lunch walks earlier today not needing to bring a coat. you don't get this too often here in the city. but lately, it's been fabulous. i can't complain. i just hope this weather trend stays like this for several more days, weeks even! too bad it doesn't usually last very long. but in the mean time, i'll take it.

alright, so with spring comes all the amazing spring fruits such as strawberries. over the last few weeks i've been eating strawberries nonstop. i couldn't help it. it's everywhere in the grocery stores, farmer's market… wherever. so what better way to use up some of the strawberries than your classic angel food cake for a little of that delicious berries and cream combo?! oh boy, this strawberry angel food cake dessert is to die for. it is so perfect; nice and light with that fresh taste of strawberries and the sweetened freshly whipped cream. mmmm… delish!

so there's a backstory to this angel food cake dessert. you see i've never ever attempted to make angel food cake before. yes, like ever! a year or so back when i asked for requests from my coworkers as to what kind of baked goods to bring them, one of them asked if i could make an angel food cake. i told him, no way, not in a million years. i would have to like him a whole lot, like a lot LOT or somehow be bored out of my mind to make one. i'll make anything else but angel food cake. so yes, for some odd reason, i've just never cared or be bothered to make angel food cake. i guess you could say, and i will admit this here that i was a bit intimidated by all those egg whites! yes, there are so many egg whites you have to whip up just to make one angel food cake. even in this first attempt, i didn't even make the full recipe. actually, i didn't even use your typical angel food cake pan mold. i made mine as cupcakes instead. even mini ones! but yes, i was intimidated by the egg whites. looking at the recipe i'm thinking, "what?! i have to whip all those egg whites? what am i going to do with all the yolks. there are so many egg yolks!" -- hahaha, silly i know. but these days, i have ways to use up those egg yolks. yeah, i still have those yolks sitting in the fridge. they'll probably either (a) end up in the garbage, (b) turned into some delicious pastry cream for cream puffs or whatever, or (c) it's about time i make some lemon curd with all those lemons in our backyard (yes, we have an itty bitty meyer lemon tree out back that actually has some lemon on it! i know, it's pretty incredible considering how tiny it is and the fact that there's hardly ever any fruits in all the years we've had it!)

mmm… so there you have it. i'm not sure what happened, but i guess i did sort of make some form of angel food cake. yes, not the real thing, but close enough. you can say it was because of all the fresh strawberries and sunshine that inspired me to finally attempt to make this cake. will i make it again and am i intimidated by all those egg whites now that i've done it once? nah, no way. blah. easy peasy. i can do it in my sleep! hehe jk i'll probably make this cake batter again, and yes, one day in the proper form and all. the cake is lovely and turned out fantastic. yeah, it's the diet dessert -- actually, not! no dessert is a diet dessert. but i have to say, it is seriously super light (at least it tastes like it, minus the sugar?! haha) and delicious.

below's the recipe i used to make the cupcake form of angel food cake. feel free to make some and let me know what you think. so, what do you say? pretty good eh?! i'm in love with these and they taste absolutely amazing -- fresh and sweet just like the perfect spring weather we are enjoying right now! enjoy and happy baking! :)

we love SF -- instagram photo by mzrichee
the weather here in san francisco has really been that awesome. for sure beach-worthy.

angel food cake cupcake treat for sfkaos -- instagram photo by mzrichee
an instagram photo of this yummy treat a lucky few received one day at work last week.

Angel Food Cake Cupcakes with Fresh Strawberries & Cream via design. bake. run.
i am in love with this angel food cake cupcake. it is such a refreshing spring treat with the fresh strawberries!

angel food cake cupcakes with strawberries & cream
recipe adapted from the baker upstairs

ingredients:

cupcakes:
  • 1/2 cup + 2 tablespoons flour
  • 1/2 cup powdered sugar
  • 1/2 cup granulated sugar
  • 6 egg whites
  • 3/4 teaspoon cream of tartar
  • 1 teaspoon vanilla
  • 1/8 teaspoon salt

strawberries & cream filling:
  • 12 strawberries, washed (you can use more or less strawberries depending on your preference, i used a strawberry per cupcake)
  • 1 cup heavy whipping cream
  • 3 tablespoons granulated sugar

directions:
  1. preheat your oven to 350° F and prepare a cupcake pan (12-count) with paper liners.
  2. in a small bowl, combine the flour and sugars, set aside.
  3. in the bowl of your stand mixer whip the egg whites for one minute, until frothy. add the cream of tartar, vanilla and salt, and whip for 5-6 minutes until stiff peaks form.
  4. then sprinkle 1/4 cup of the flour mixture over the egg mixture and fold in gently, repeating until all the flour is incorporated.
  5. spoon the batter into the paper liners and bake for 15-17 minutes, until lightly golden and springy to the touch.
  6. remove from the oven and cool completely in the pans.
  7. while cupcakes are cooling, make the whipped cream and slice the berries.
  8. for the whipped cream: add the heavy whipping cream and sugar to a medium size bowl and whip for 3-4 minutes, until light and airy. refrigerate the whipped cream in the refrigerator while you slice the berries.
  9. to assemble the cupcakes: take the paper liners off the cupcakes very carefully. slice the cake in half and top the bottom half with a very good spoonful of whipped cream. then add the slices of fresh strawberries before topping it off with another spoonful of whipped cream. put the top half of the cake back on to finish. if the cupcake looks like it's falling apart you can use a toothpick to hold it in place. of course, remove the toothpick before consuming. serve immediately or keep refrigerated until ready to eat.

makes 12 cupcakes. enjoy and happy eating! :)
Related Posts Plugin for WordPress, Blogger...