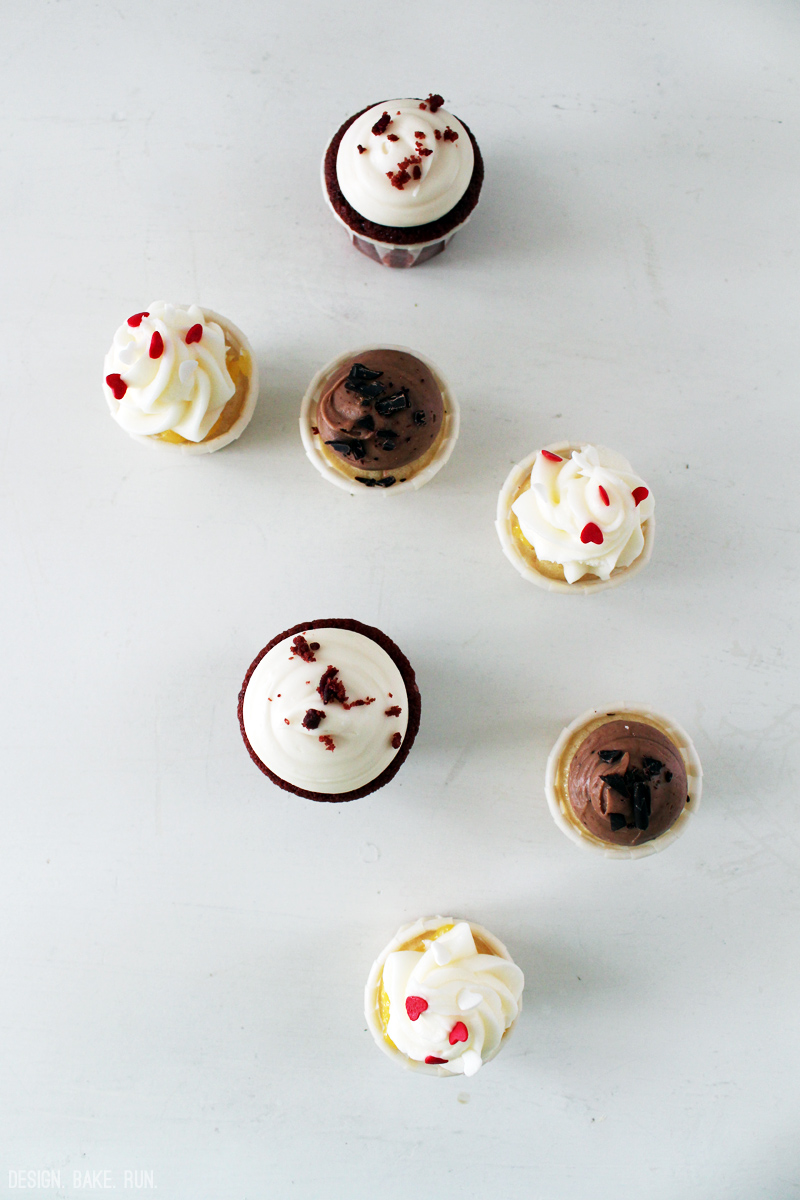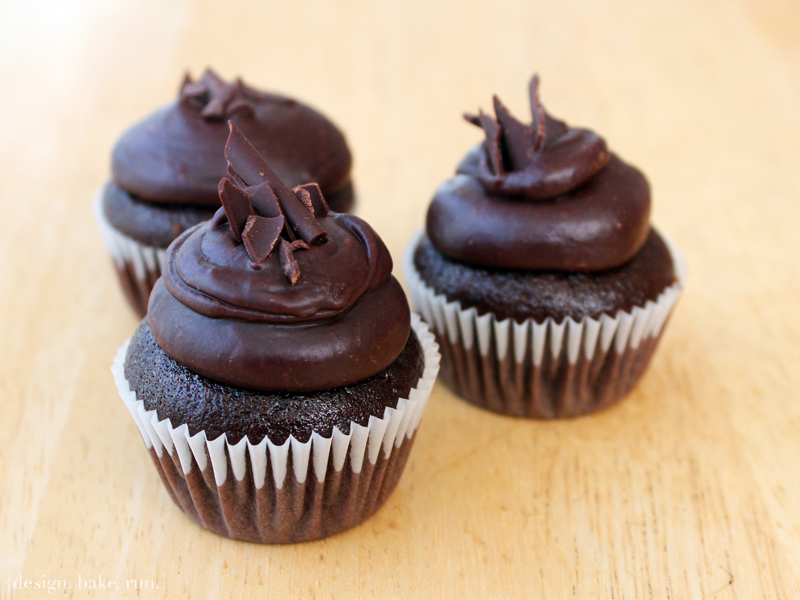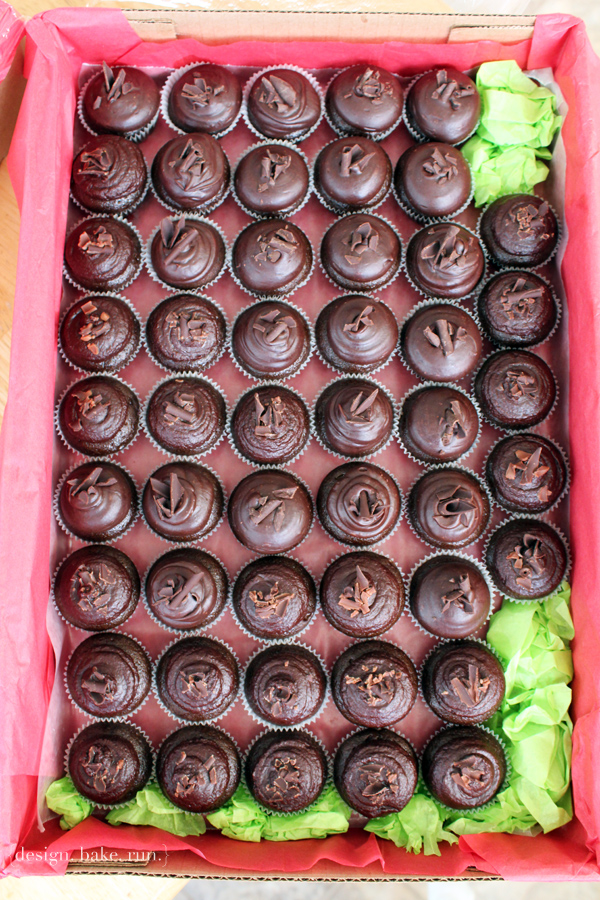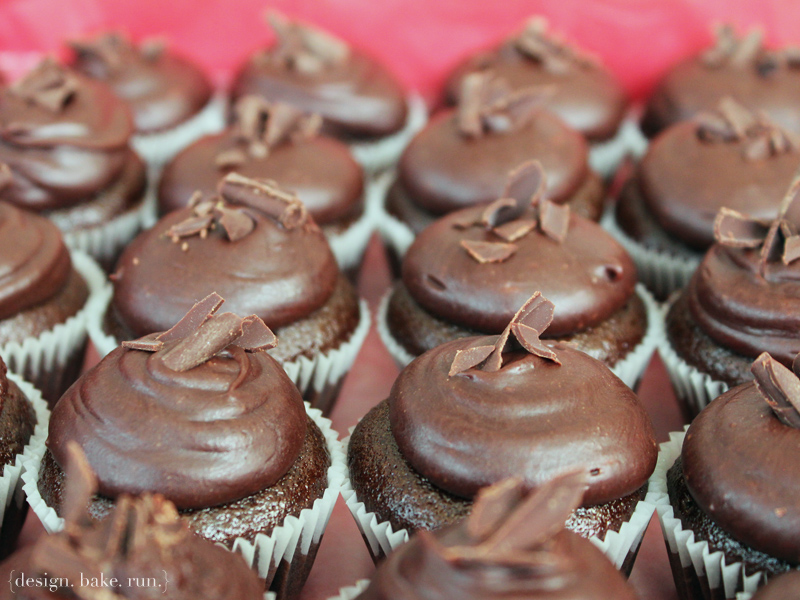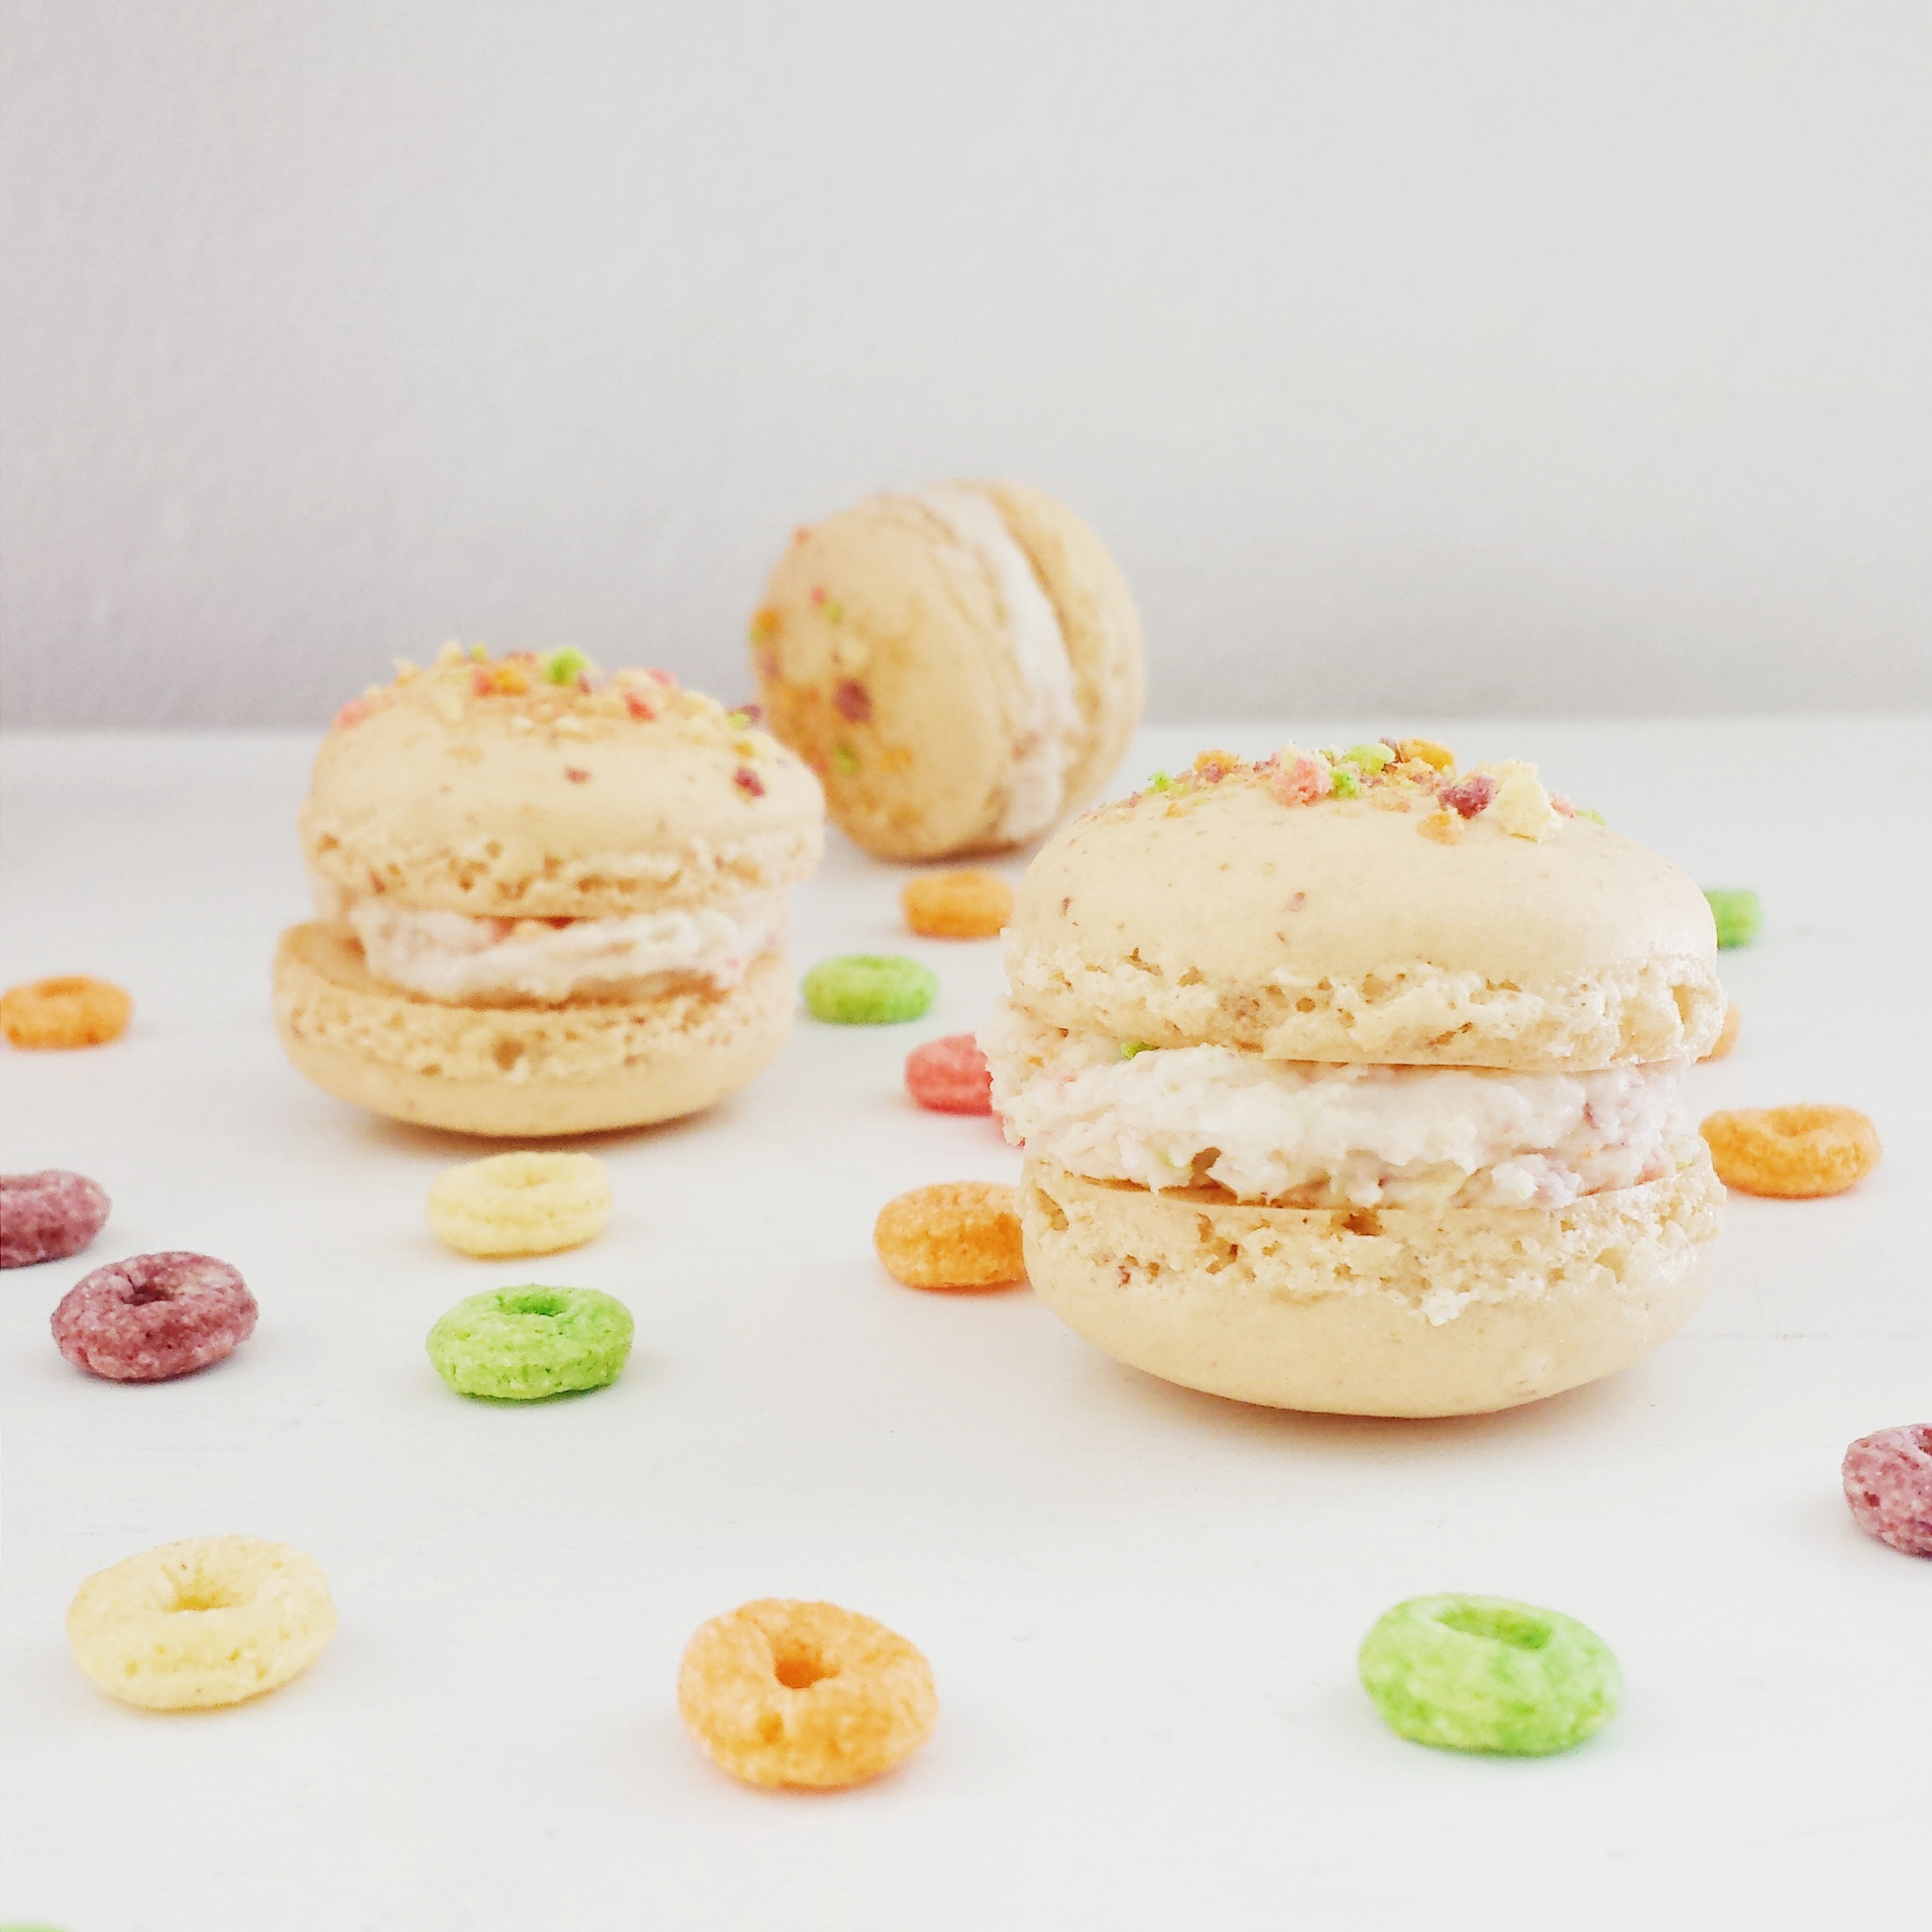
Showing posts with label dessert table. Show all posts

Tuesday, May 12, 2015

fruity cheerios macarons

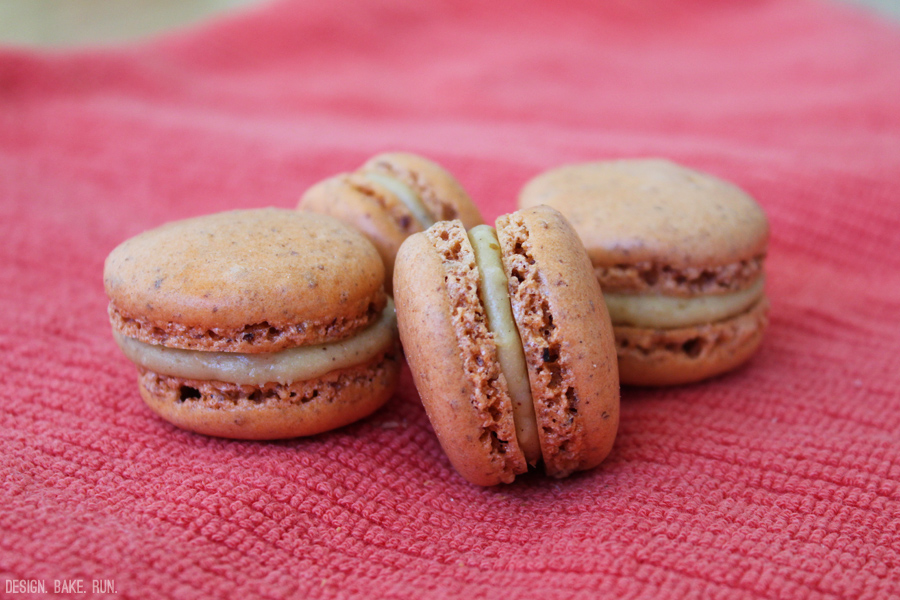
Fruity Cheerios Cereal Macarons with Fruity Cheerios Buttercream Filling | design. bake. run.

hello again! yes, i know it's been forever since the last time i posted something here. i haven't been baking a whole lot lately just because i'm trying not to eat too much sweets these days. anyway, i did however get around to baking some french macarons for mother's day and actually remember to take some photos. :)

what i have here are fruity cereal french macarons. who says you can't use kiddie cereals as a macaron flavor? of course, the only not so great thing about this is i have no idea if the cereal is gluten-free or not. mostly likely not in my case. of course, if you want to make some cereal flavored macarons, you can always check your cereal to make sure if it's GF, or else keep in mind these macarons may not be so GF friendly.

okay, so these have become my favorite flavor at the moment. i'm not a big cereal fan but i do love my fruity sugary cereal. this is one way to eat it, you can say. actually, it may be one of the best ways to enjoy those colorful sugary cereals. so if you're up for baking up a batch, why not give this a try?! enjoy and happy baking. :)

Fruity Cheerios Cereal Macarons with Fruity Cheerios Buttercream Filling | design. bake. run.
this is my new favorite macaron flavor. who says crunched up colorful kiddie cereal can't make for some good-tasting and looking macarons? in love with these.

fruity cheerios french macarons with fruity cheerios buttercream filling

ingredients:

macaron batter:
1 cup powdered sugar
3/4 cup almond meal
2 large egg whites, at room temperature
5 tablespoons granulated sugar
1/4 tsp gel food coloring (optional – i didn't use any here)
1/4 cup crushed fruity cereal (i used fruity cheerios but i'm sure you can use fruit loops or equivalent), for sprinkling on top of piped macaron batter

fruity cereal buttercream:
1/4 cup crushed fruity cereal
2-4 tbsp milk
1/2 stick of butter, room temperature
1 to 1-1/2 cups of powdered sugar

directions:

to make the macaron batter/shells:
  1. line two baking sheets with parchment paper and have a pastry bag with a plain tip (about 1/2-inch, 2 cm) ready.
  2. sift together the powdered sugar and almond meal so there are no lumps. set aside.
  3. in the bowl of a standing electric mixer (or if you prefer, you can use a bowl and hand mixer – this is my prefer method), beat the egg whites until they begin to rise and hold their shape. while whipping, beat in the sugar until very stiff and firm, about 2 minutes.
  4. optinal: add in the gel food coloring.
  5. carefully fold the dry ingredients, in two batches, into the beaten egg whites with a flexible rubber spatula. when the mixture is just smooth and there are no streaks of egg white and the colors have combined, stop folding and scrape the batter into the pastry bag (standing the bag in a tall glass helps if you're alone).
  6. pipe the batter on the parchment-lined baking sheets in 1.35-inch circles evenly spaced one-inch apart. then sprinkle the piped batter with crushed fruity cereal.
  7. rap the baking sheet a few times firmly on the counter top to flatten the macarons. then let it sit for at least 30-60 minutes depending on humidity before baking them in the oven. about 10-15 minutes before baking, preheat oven to 350 degrees F. bake for 15 minutes.
  8. once macaron shells are out of the oven, let them sit for 30-60 seconds before removing the hot baking sheet underneath. let the macarons cool completely before removing them from the parchment paper.

for the fruity cereal buttercream filling:
  1. in a medium bowl combine the butter and sugar and mix until incorporated. then add in the crushed fruity cereal and mix until combine.
  2. next, add in the milk (1 tablespoon at a time) and mix until combine and you've reached the right consistency for buttercream. if it's too thick, thin it out with a little bit with more milk. if too thin, add in a little more powdered sugar.

to assemble the macaron cookies:
  1. before assembling these cookies, make sure to pair up all the cookie shells so they are as close as possible in size.
  2. using a knife, spread a good amount of the buttercream on the inside of the macarons then sandwich them together. note: you can certainly put the buttercream in a piping bag and pipe the buttercream onto the cookie. it's a lot easier i think and less mess. but i can't be bother to do this so i almost always just spread it with a knife.
  3. let them stand at least one day (keep them refrigerated in an airtight container) before serving (serve at room temperature), to meld the flavors.

store in airtight container for up to 5 days. makes 20-24 macarons. enjoy! :)


Friday, February 28, 2014

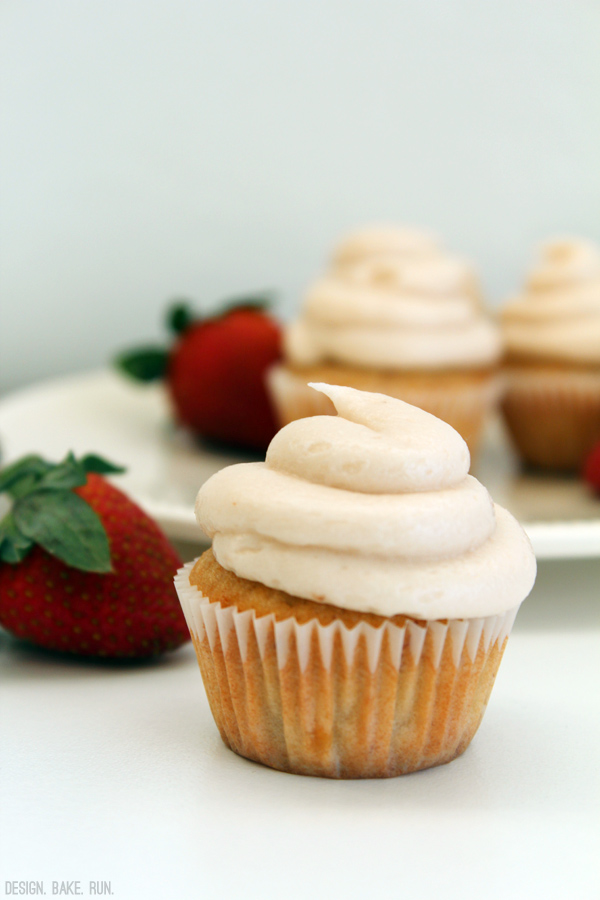
strawberry-banana cupcakes with strawberry buttercream frosting inspired by sprinkles cupcakes

Sprinkles-inspired Strawberry-Banana Cupcakes with Strawberry Buttercream Frosting via design. bake. run.

happy last day of february!

to close out the month, here are some (mini) strawberry-banana cupcakes with strawberry frosting. sometime last week we had a lone banana going brown. instead of making some banana muffins again or something else with banana i decided to do a take on a strawberry cupcake. i mean, add banana to it. a quick google search later, i landed on good old martha stewart's website. sprinkles strawberry cupcakes recipe, to be exact.

so here you have it. a take on their recipe, but with the pureed strawberries out for strawberry jam and some mashed bananas in, all topped off with a super simple strawberry buttercream frosting. you can't get any easier than this. no fancy blender required! this is my kind of recipe when it comes to using very minimal equipments. ;)

below's the recipe should you want to make some. it's quite good, i should say. you get both the strawberry and banana flavor in the cake. and the added strawberry buttercream frosting on top? that just makes it even better. i know the photos don't show much since you lose out the color once you mix the frosting together, etc... but the flavor is definitely there. i guess you can top it off with some strawberry and/or banana slices if you like. i personally couldn't be bothered to. so go ahead and make yourself some. enjoy and happy baking! :)

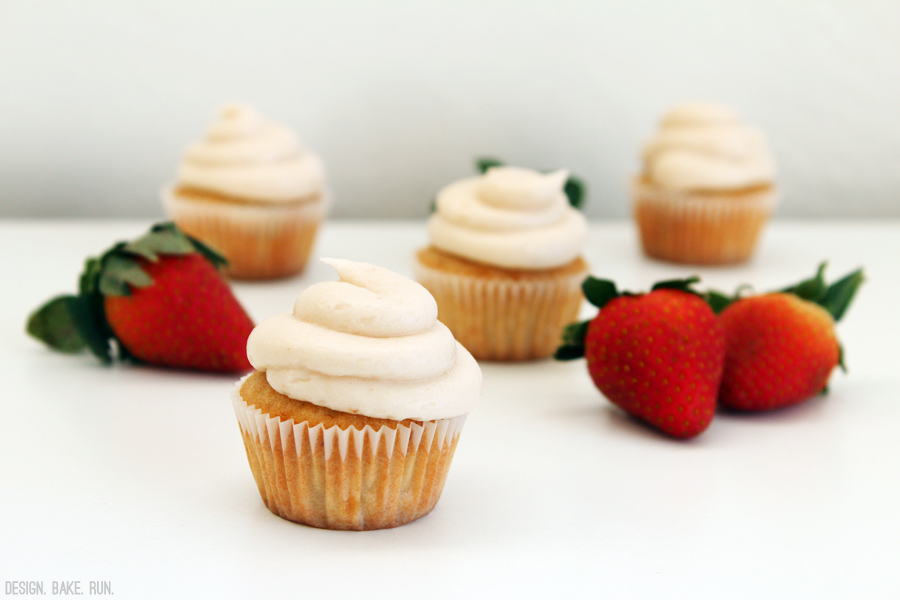
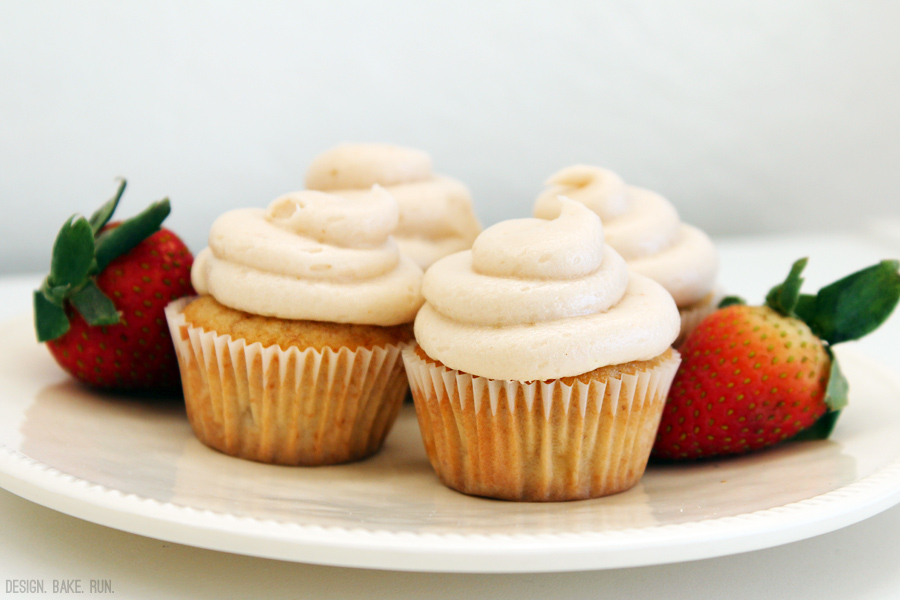
Strawberry-Banana Mini Cupcakes with Strawberry Frosting via design. bake. run.
strawberry and banana are two fruits that pair well together. the strawberry frosting really balances out the strong banana flavor in the cake and makes for one sweet bite.

Strawberry-Banana Cupcakes with Strawberry Buttercream Frosting via design. bake. run.
i love making one-bite cupcakes. these mini versions of a full-size cupcake gives you the same yummy taste and satisfaction of a standard size one, but for way less the calories.

strawberry banana cupcakes with strawberry buttercream frosting
inspired by sprinkles' strawberry cupcakes

ingredients

cupcake batter:
  • 1 medium banana, mashed
  • 2 tablespoons strawberry jam or preserves
  • 1 1/2 cups all-purpose flour, sifted
  • 1 teaspoon baking powder
  • 1/4 teaspoon coarse salt
  • 1/4 cup whole milk, room temperature
  • 1 teaspoon pure vanilla extract
  • 1/2 cup (1 stick) unsalted butter, room temperature
  • 1 cup sugar
  • 1 large egg
  • 2 large egg whites

strawberry frosting:
  • 1/2 cup (1 stick) unsalted butter, room temperature
  • 3 cups powdered sugar
  • 2 tablespoons strawberry jam or preserves
  • milk or cream as needed

directions

for the cupcake batter:
  1. preheat oven to 350 degrees. line a 12-cup muffin tin with cupcake liners; set aside.
  2. in a medium bowl, whisk together flour, baking powder, and salt; set aside. in a small bowl, mix together milk, vanilla, mashed bananas and strawberry jam; set aside.
  3. in the bowl of an electric mixer fitted with the paddle attachment, cream butter on medium-high speed, until light and fluffy. gradually add sugar and continue to beat until well combined and fluffy. reduce the mixer speed to medium and slowly add egg and egg whites until just blended.
  4. with the mixer on low, slowly add half the flour mixture; mix until just blended. add the milk mixture; mix until just blended. slowly add remaining flour mixture, scraping down sides of the bowl with a spatula, as necessary, until just blended.
  5. divide batter evenly among prepared muffin cups. transfer muffin tin to oven and bake until tops are just dry to the touch, 22 to 25 minutes (or 15-16 minutes if making mini cupcakes). transfer muffin tin to a wire rack and let cupcakes cool completely in tin before frosting.

for the strawberry buttercream frosting:
  1. in a good size bowl, cream together the butter and powdered sugar until somewhat combined.
  2. then add in the strawberry jam and mix until fully incorporated and resemble the right buttercream consistency. if it's too thick, add a tablespoon of milk to the mixture at a time and blend it some more until you've reach the right consistency. if it's too thin, add in more powdered sugar.
  3. frost the cupcakes and enjoy! :)


makes 12 regular size cupcakes or about 45 mini cupcakes.

Tuesday, February 25, 2014

mini apple crumbles

Mini Apple Crumbles via design. bake. run.

i was going through my stacks and stacks of magazines sometime last week and ran across a recipe for mini apple crumbles. yes, i've got piles of shape, marie claire, better homes & gardens, 7x7 and ca home & design magazines just to name some that i've left it piled on (and some i have yet to go through them). i guess i'm still one of the few left who appreciates actual printed materials over those ebooks or e-zines. okay, going off topic here. yes, as i was going through one of my shape magazines from a few months back, i noticed a recipe for mini apple crumbles. i think it must have been shape's november 2013 issue. leafing through the pages and seeing that, a lightbulb went in my head. well, hello… we've got a bunch of oatmeal lying around, i could actually put some to use with this recipe! so off i went with it.

okay, i've actually adapted the recipe a bit because i didn't have any maple syrup on hand or couldn't be bothered with the spices that were in it. but overall, the recipe was pretty straight forward. so go ahead and bake some. these make for perfect little one-bite treats and are great for parties or any occasions. :)

One-Bite Mini Apple Crumbles via design. bake. run.
these one-bite mini apple crumbles make for the perfect little party treats and has only 95 calories.

Mini Apple Crumbles via design. bake. run.
this recipe is super simple to make. i love how you get many different kinds of texture, crunch and flavors from just one tiny bite.

mini apple crumbles
recipe from shape magazine's november 2013 issue

crumble topping:
cooking spray
1/2 cup rolled oats
1/2 cup whole-wheat flour
1 teaspoon ground cinnamon
pinch kosher salt
1/3 c maple syrup
2 tablespoons cold, unsalted butter, cut into small pieces

apple filling:
2 firm apples, peeled, cored and diced
2 tablespoons maple syrup

directions:
preheat over to 350°F. lightly coat a 12-cup mini muffing pan with cooking spray and set aside.

to make the crumble topping, combine oats, flour, cinnamon, and salt in medium bowl. stir in maple syrup until well coated. use a fork to smash the butter pieces into the oat mixture until crumbly. Set aside.

to make the apple filling, add apples, maple syrup, and 1/2 cup water to a small saucepan. cook over medium heat, stirring occasionally, for 5 minutes. remove from heat and let cool slightly.

meanwhile, place 1 teaspoon of the oat mixture into the bottom of each muffin cup. see your fingers to gently press down to form  a solid crust. Place 1 tablespoon of the apple  mixture over each and top with remaining crumble distributing evenly among all muffin cups.

bake for 10 to 15 minutes or until golden brown. remove from oven, let cool to room temperature, then use an offset spatula or a butter knife to gently remove from pan. serve at room temperature.

makes 12 mini apple crumbles. enjoy!

nutrition facts: 95 calories; 3 g fat; 18 g carbs; 1 g protein; 1 g fiber; 22 mg sodium; 20 mg calcium

Tuesday, February 11, 2014

chocolate-cinnamon cupcakes with mocha buttercream frosting

Mini Chocolate-Cinnamon Cupcakes with Mocha Buttercream Frosting via design. bake. run.

is it february already? and valentine's day is around the corner?!! alright, i haven't baked cupcakes in like forever. it's only fitting i make some (mini) chocolate cupcakes again, just in time for valentine's day. yes, i made some last year as well, in addition to the super popular (on pinterest) mini creme brulee cupcakes. those are pretty awesome as well.

to change it up a bit, i decided to add a little cinnamon to the usual (eggless) chocolate cupcake recipe. according to m, the cinnamon didn't come through a whole lot. i guess you could sort of tell it's there, but not really because once it's baked the chocolate and coffee flavors overpower the cinnamon? i don't know. so if you really like cinnamon, i say add in another teaspoon or so. otherwise, the recipe the way it is below will do just fine. and if you're a coffee fan, the mocha frosting is perfection. chocolate and coffee? done.

alright, below's the recipe if you'd like to bake some for this upcoming valentine's day or any day. i say it works for any occasion. so go ahead. they're super simple to make and the end results are always stunning... delish! enjoy and as always, happy baking!

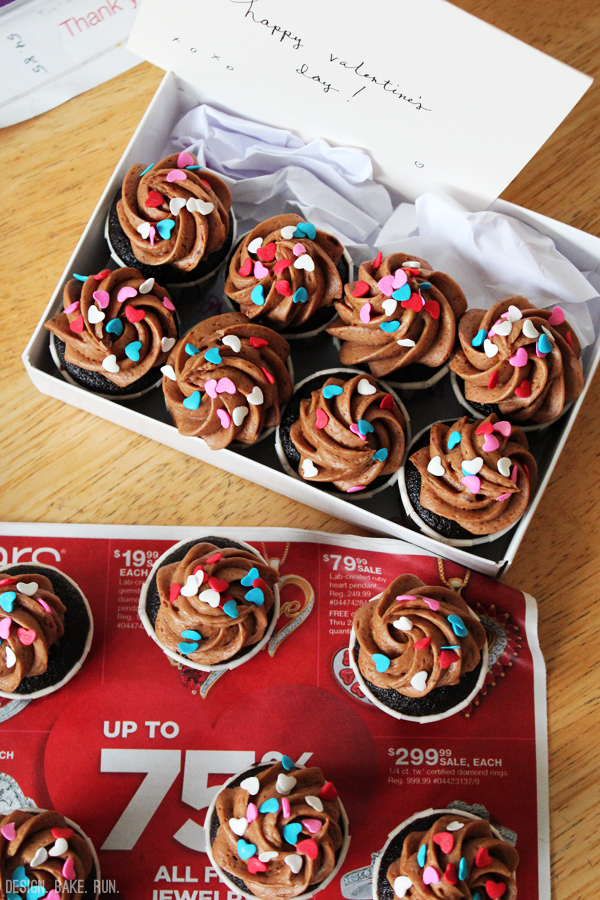
The Perfect Valentine's Day Sweet! Chocolate-Cinnamon Cupcakes with Mocha Buttercream Frosting via design. bake. run.
who doesn't want to get some mini chocolate cupcakes this valentine's day? these are the perfect little gifts. we gave some away to c's teacher as an early valentine's day gift.

Chocolate-Cinnamon Cupcakes with Mocha Buttercream Frosting via design. bake. run.
i love how festive and valentine-y the added heart sprinkles are in these mini cupcakes.

chocolate-cinnamon cupcakes with mocha buttercream frosting

chocolate cupcakes:
1-1/2 cups flour
1 cup granulated sugar
1 tsp baking soda
1 tsp salt
1/3 cup cocoa powder
1 tsp instant coffee
2 tsp ground cinnamon
1/2 cup oil
1 cup water
1 tsp vanilla extract
1 tbsp vinegar

mocha buttercream frosting:
1/2 cup (1 stick) butter, room temperature
3 cups powdered sugar
2 tbsp instant coffee
2 tbsp cocoa powder
1/4 cup milk

directions:
for the cake: mix all ingredients together until moist and well blended. put in mini cupcake cups (1/2 full) and bake for 17-18 minutes at 350 degrees F.

for the mocha buttercream frosting: using a handmixer or in a stand mixer, mix all ingredients together until you've reached the right consistency for buttercream. if it's too thick, add in a little bit more milk. if it's too thin, you can add more powdered sugar. once everything looks good, pipe/frost and enjoy!

chocolate cake recipe makes about 16 regular cupcakes (or 45-50 mini cupcakes). buttercream frosting should make enough to frost all cupcakes (well, at least when i did it).

Monday, February 3, 2014

coral french macarons with citrus buttercream filling

Coral Macarons with Citrus Buttercream Filling via design. bake. run.

okay, i finally got around to posting the recipe for these coral shell french macarons with citrust buttercream. yeah, as mentioned before... i've just been busy with life in general. ;)

a few weeks ago i test baked some coral color macarons for a friend's baby shower (that's the link for the awesome photos she took of the baby shower) she was hosting. i haven't made any in that particular color before so i wanted to make sure i got the color right before doing the real thing. well… the test macarons turn out fantastic! the coral color was spot on and super vibrant. the shells were baked perfectly and the whole cookie flavor combination was pretty good (i only say pretty good because i'm not that fond of citrus buttercream or citrus baked goods too much). if only the ones i delivered was just like these test versions, i wouldn't have had to bake 3 consecutive nights just to get them to par. yeah, it sucked the first two nights getting hollow cookie shells after hollow cookie shells. on the surface they look perfect… yeah, until you break into them and all you see is an empty shell. boo. so yeah, i tried correcting them as much as i could and finally was able to get some decent ones. just sucked it took so long and so many batches. a lot of macaron shells ended up in the garbage. some, i did save and kept them as is (without filling) to have them available for a sweet treat.

alright, here's the recipe. now, just don't over whip the egg whites or fold too much okay? that way your shells will come out perfect and not crazy hollow or spread like crazy and have no feet. good luck and enjoy! :)
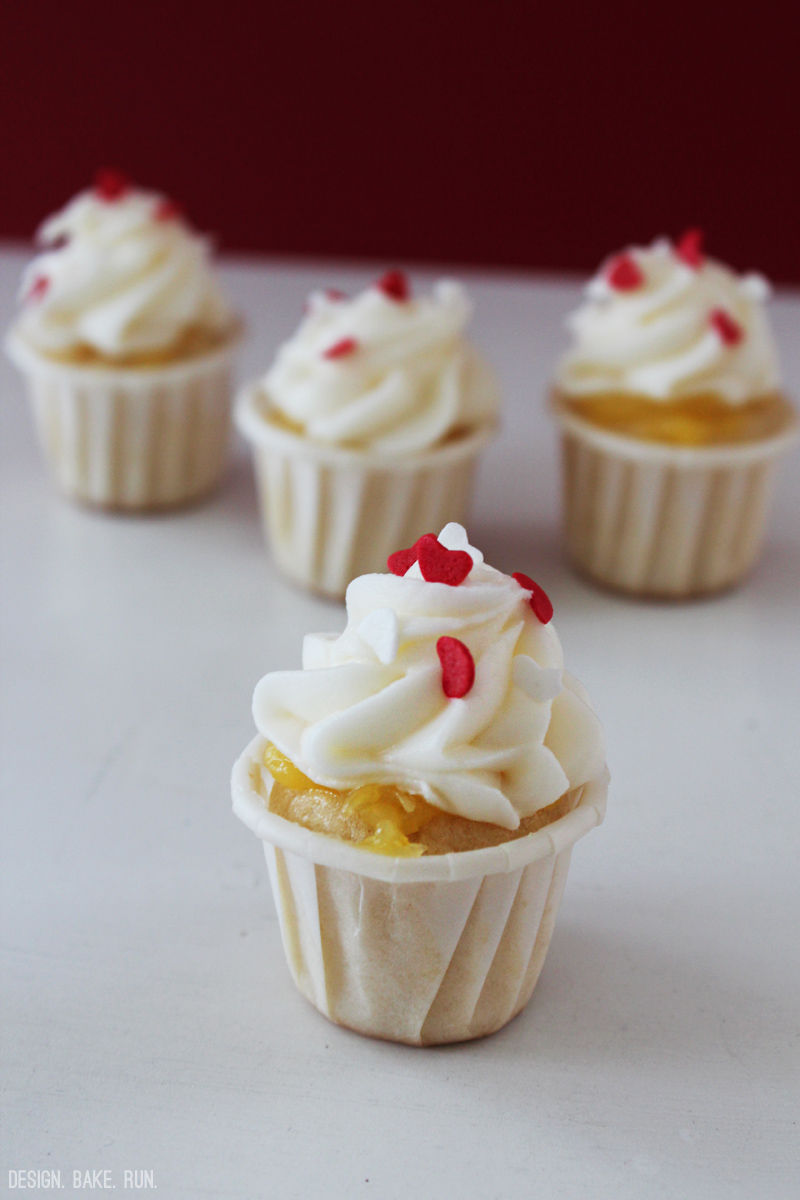
Coral Macarons with Citrus Buttercream Filling via design. bake. run.
for any citrus flavor fan, these should hit the spot. try adding in some marmalade and it's even better. the ones i delivered for the baby shower had a little spread of kumquat marmalade on top of the buttercream.

Coral and aqua shell macarons for Hot Air Balloon-Themed Baby Shower -- photo via Sabrina Ko Photography
here's a photo of the macarons (vanilla, mint-chocolate and citrus) i made for the baby shower. notice how the coral color isn't as vibrant as the test ones above? yeah, i did try! photo via sabrina ko.

Coffee Nutella French Macarons -- photo via Sabrina Ko Photography
here's a shot of the coffee nutella french macarons. these are always a hit. photo via sabrina ko.

coral macarons with citrus buttercream filling

ingredients:

macaron batter:
1 cup powdered sugar
3/4 cup almond meal
1/8 tsp pink and 1/4 tsp orange gel food coloring (or any food coloring of your choice)
1 tbsp citrus (orange, lime & lemon) zest
2 large egg whites, at room temperature
5 tablespoons granulated sugar

citrus buttercream:
1 tbsp citrus zest
2-4 tbsp citrus juice
1/2 stick of butter, room temperature
2 cups of powdered sugar

directions:

to make the macaron batter/shells:
  1. line two baking sheets with parchment paper and have a pastry bag with a plain tip (about 1/2-inch, 2 cm) ready.
  2. sift together the powdered sugar and almond meal so there are no lumps. add in the citrus zest and stir it to make sure it's fully incorporated with the sugar and almond meal mixture. set aside.
  3. in the bowl of a standing electric mixer (or if you prefer, you can use a bowl and hand mixer), beat the egg whites until they begin to rise and hold their shape. while whipping, beat in the sugar until very stiff and firm, about 2 minutes.
  4. add in the gel food coloring.
  5. carefully fold the dry ingredients, in two batches, into the beaten egg whites with a flexible rubber spatula. when the mixture is just smooth and there are no streaks of egg white and the colors have combined, stop folding and scrape the batter into the pastry bag (standing the bag in a tall glass helps if you’re alone).
  6. pipe the batter on the parchment-lined baking sheets in 1.35-inch circles evenly spaced one-inch apart.
  7. rap the baking sheet a few times firmly on the counter top to flatten the macarons. then let it sit for at least 30-60 minutes depending on humidity before baking them in the oven. about 10-15 minutes before baking, preheat oven to 350 degrees F. bake for 15 minutes.
  8. once macaron shells are out of the oven, let them sit for 30-60 seconds before removing the hot baking sheet underneath. let the macarons cool completely before removing them from the parchment paper.

for the citrus buttercream filling:
  1. in a medium bowl combine the butter and sugar and mix until incorporated.
  2. then add in the citrus juice (1 tablespoon at a time) and zest and mix until combine and you've reached the right consistency for buttercream. if it's too thick, thin it out with a little bit with more juice or milk or cream. if too thin, add in a little more powdered sugar.

to assemble the macaron cookies:
  1. before assembling these cookies, make sure to pair up all the cookie shells so they are as close as possible in size.
  2. using a knife, spread a good amount of the buttercream on the inside of the macarons then sandwich them together. note: you can certainly put the buttercream in a piping bag and pipe the buttercream onto the cookie. it's a lot easier i think and less mess. but i can't be bother to do this so i almost always just spread it with a knife.
  3. let them stand at least one day (keep them refrigerated) before serving (serve at room temperature), to meld the flavors.

store in airtight container for up to 5 days. makes 20-24 macarons.


Wednesday, January 29, 2014

caramel popcorn

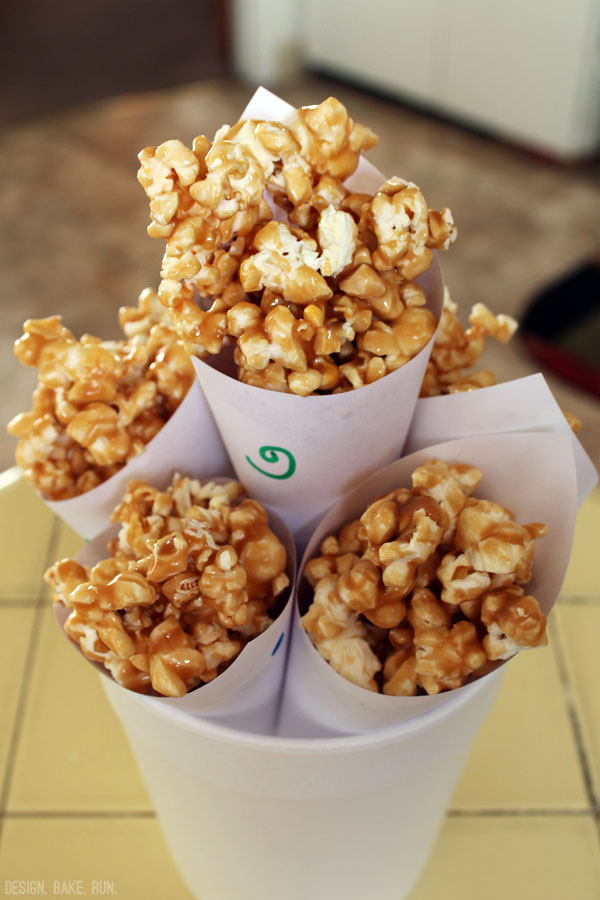
Caramel Popcorn via design. bake. run.

i have been eyeing homemade caramel popcorn for the longest time. i think i've had these down for the little kiddies birthday party 2 years ago but never really got around to it. well, i finally made some a couple of weeks ago for m's birthday party. and i have to say, they are so easy to make! why have i not just done it then? i don't know... but what i do know is, once you've got the caramel made (you'll need a candy thermometer for this), the rest is easy peasy. and besides, who says you have to use the popcorn kernels and not regular microwavable popcorn? i just went ahead with the classic microwavable bags of popcorn (because you can't beat an easy cleanup) and these sweet treats still turned out delicious. plus, doing the whole popcorn kernel thing with oil in a pot is just too much work! oh, and this recipe uses apple juice so it's even better. it gives you a nice hint of apple flavor which you cannot beat. and for sure a great way to use up those half gallons or whatever size of apple juice bottle that's been sitting in our fridge for days and days (maybe weeks even?) – because we can't drink it all!

alright, the recipe for this caramel popcorn is below if you'd like to make some yourself. i say go ahead because it's really that good. you'll literally eat half of it in one sitting if you don't stop yourself already. hahaha... that's what m and i did the night i made these. we had to remove ourselves away from the sheet pan while these goodies rest.

okay, enjoy! :)

Caramel Popcorn via design. bake. run.
this recipe is super easy to make. i never thought it was this simple!

Caramel Popcorn via design. bake. run.
simply made paper cones are a great way to distribute these sticky but super yummy treats. who says you can't have a bouquet of caramel popcorn?

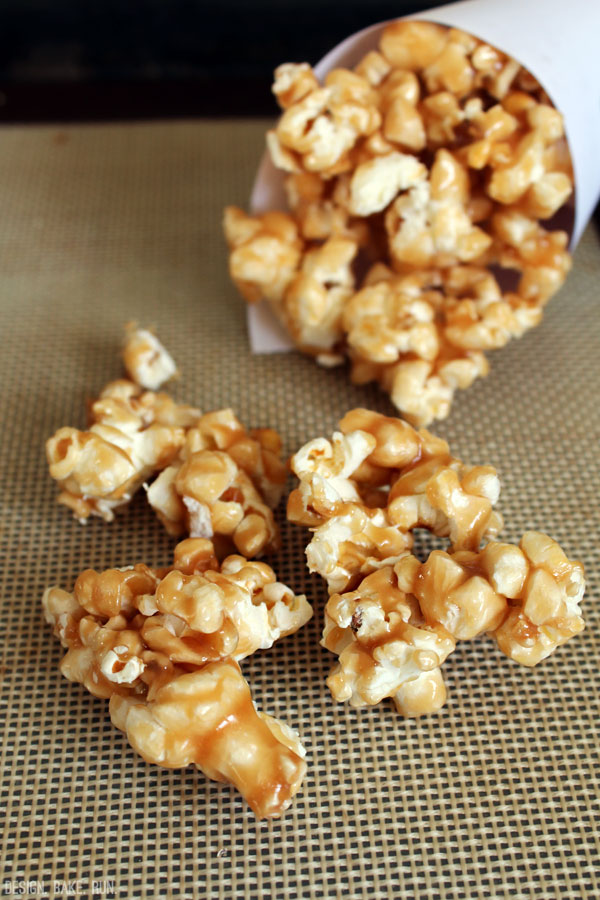
Caramel Popcorn via design. bake. run.
make these sweet stuff for your next birthday party or any occasion. they'll sure to be a hit. these definitely were for m's birthday party.

caramel popcorn
recipe adapted from the food network

ingredients:
  • 2 tablespoons vegetable oil
  • 2/3 cup popcorn kernels (or you can use two bags of microwave popcorn and omit the oil above)
  • 2 cups apple juice
  • 2 cups packed light brown sugar
  • 1/4 cup light corn syrup
  • 12 tablespoons (1 1/2 sticks) unsalted butter, cut into pieces
  • kosher salt

directions:
  1. line 2 baking sheets with parchment paper (or a silpat will do too). if using popcorn kernels, heat the vegetable oil in a pot over medium-high heat. add the popcorn kernels; cover and cook, shaking the pan, until the popping subsides. remove from the heat and let any remaining kernels pop for 30 more seconds. if using microwave popcorn bags, follow the directions on the package. once popcorns are popped, divide the popcorn between the prepared baking sheets, discarding any unpopped kernels.
  2. make the caramel: bring the apple juice, brown sugar and corn syrup to a boil in a large heavy-bottomed saucepan over medium-high heat. cook without stirring until the mixture is deep amber and a candy thermometer registers 280 degrees F, about 30 minutes (the caramel will bubble vigorously toward the end of the cooking time).
  3. stir the butter into the caramel until melted. add 2 teaspoons salt and cook for another minute. remove from the heat. pour the hot caramel over the popcorn mixture and carefully toss with two rubber spatulas. let cool slightly, then separate the mixture into clusters while still warm. let cool completely.

note: i actually pour all my popcorn into a large bowl instead of putting them on the baking sheets. once the caramel was made, i pour those over the popcorn and tossed them while still in the bowl (kind of like making rice krispy treats). but the above method works too. i guess you can pick whichever is easiest. :)

Wednesday, October 9, 2013

pumpkin spice macarons

Pumpkin Spice French Macarons | design. bake. run.

i made my first pumpkin spice bread ever a couple of weeks ago. to make it, i had to open a giant can of pumpkin puree. okay, maybe not so giant, it was the 28 oz can though, but pretty big enough anyway. i had some leftover puree and didn't know what to do with it so i decided on making a pumpkin spice buttercream. now, what to do with the buttercream? okay, sure... why not some french macarons, just because.

so, here you have it! french macarons with pumpkin spice buttercream. what's not more fall or october than pumpkin?! okay, maybe apple pies or something (that's more fall?!). but pumpkin spice is pretty close too.

if you're a pumpkin spice lover (i'm slowly getting there, i think), you'll for sure love these cute little french cookies. as always, you must age your macarons for the best testing bite yet. i say wait at least a day or two before digging in. i typically let mine sit in the fridge for 2-3 days before consuming (of course, you gotta make sure you let them get to room temperature before eating). i love how light the texture of these macarons are. and when you bite into it, mmmm... it's perfectly chewy and soft and not mushy at all. oh, you must make sure you fill your macarons pretty good. definitely don't skimp on the buttercream. at least a 1:1 ratio of filling to cookie or 2:1 filling to cookie.

so, what do you say? go ahead and bake yourself a batch of these delicious goodies. or if macarons aren't your thing, you can just make the pumpkin spice buttercream and use it on some tasty cupcakes instead. but really, you should try the whole thing. it's yum. of course, i'm bias because i am i sucker for macarons or anything sweet (at least lately anyway). enjoy and happy baking! :)

Pumpkin Spice French Macarons | design. bake. run.
in an ode to autumn, what's more perfect than pumpkin spice?! these macarons are for sure the ideal little treats for this time of the year.

Pumpkin Spice French Macarons | design. bake. run.
these pumpkin spice macarons are great for fall gift-giving, especially to those pumpkin spice lovers out there. ;)

pumpkin spice french macarons with pumpkin spice buttercream

ingredients:

macaron batter:
1 cup powdered sugar
3/4 cup almond meal
1 teaspoon pumpkin spice
2 large egg whites, at room temperature
1/4 cup granulated sugar
1/4 teaspoon gel or powder food color (optional)

pumpkin spice buttercream:
1-1/2 to 2 cups powdered sugar
1/4 cup softened butter
2 tablespoons pumpkin puree
1/2 teaspoon cinnamon
1/4 teaspoon nutmeg
pinch of ground cloves
pinch of salt
milk or cream (if needed)

directions:

to make the macaron batter/shells:
  1. line two baking sheets with parchment paper and have a pastry bag with a plain tip (about 1/2-inch, 2 cm) ready.
  2. sift together the powdered sugar and almond meal so there are no lumps. add in the pumpkin spice and stir it to make sure it's fully incorporated with the sugar and almond meal mixture. set aside.
  3. in the bowl of a standing electric mixer (or if you prefer, you can use a bowl and hand mixer), beat the egg whites until they begin to rise and hold their shape. while whipping, beat in the sugar until very stiff and firm, about 2 minutes.
  4. carefully fold the dry ingredients, in two batches, into the beaten egg whites with a flexible rubber spatula. if you want to color your macarons, this is when you'd want to add in your gel or powdered food coloring. the more color you add, the darker the batter or finished cookie color it will be. i typically just do 1/4 teaspoon of gel food coloring, sometimes 1/2. you could do more or less depending on your desire shade. when the mixture is just smooth and there are no streaks of egg white, stop folding and scrape the batter into the pastry bag (standing the bag in a tall glass helps if you're alone).
  5. pipe the batter on the parchment-lined baking sheets in 1.35-inch circles evenly spaced one-inch apart.
  6. rap the baking sheet a few times firmly on the counter top to flatten the macarons. then let it sit for at least 30-60 minutes depending on humidity before baking them in the oven. about 10-15 minutes before baking, preheat oven to 350 degrees F. bake for 15 minutes.
  7. once macaron shells are out of the oven, let them sit for 30-60 seconds before removing the hot baking sheet underneath. let the macarons cool completely before removing them from the parchment paper.

for the pumpkin spice buttercream:
  1. cream butter and sugar together until well blended.
  2. then add in the pumpkin puree and spices. mix until everything is incorporated and you get the right consistency for buttercream. if the frosting is too thin, add more powdered sugar. if it's too thick, add a little bit of milk or cream (about 1 teaspoon at a time) to thin it out until you reach your desired consistency.

to assemble the macaron cookies:
  1. before assembling these cookies, make sure to pair up all the cookie shells so they are as close as possible in size.
  2. using a knife, spread a good amount of the pumpkin spice buttercream on the inside of the macarons then sandwich them together. note: you can certainly put the buttercream in a piping bag and pipe the buttercream onto the cookie. it's a lot easier i think and less messy. but i can't be bother to do this so i almost always just spread it with a knife.
  3. let them stand at least one day (keep them refrigerated) before serving (serve at room temperature), to meld the flavors.

store in airtight container for up to 5 days. makes 20-24 macarons. happy eating!

Wednesday, September 11, 2013

salted caramel & fig mini tarts

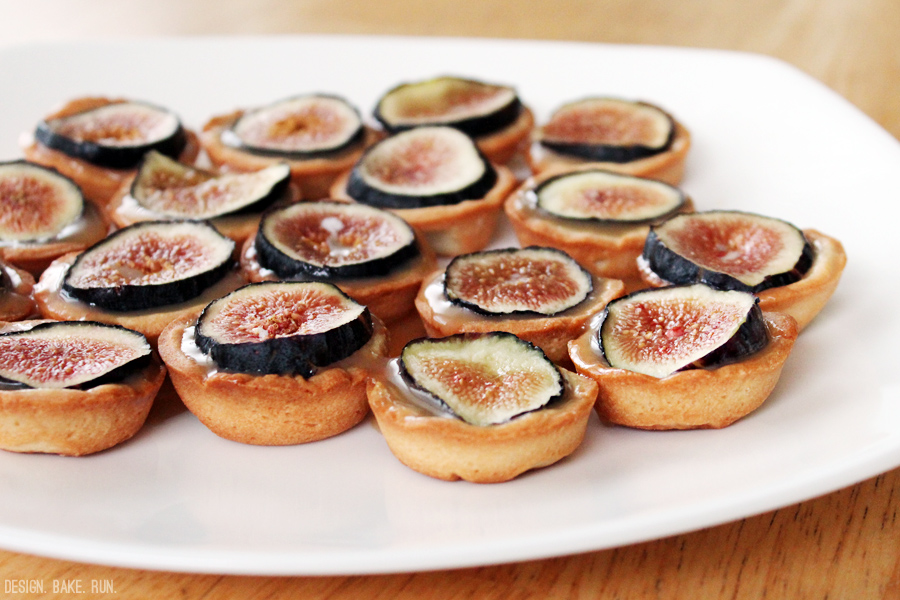
Salted Caramel & Fig Mini Tarts via design. bake. run.

if you haven't noticed already, in my last few posts i mentioned about having extra heavy whipping cream in the fridge that needed upswing up. i used some of it and made a salted caramel sauce. the recipe made about 1-1/2 cup of caramel sauce and was just sitting in the fridge because i couldn't think of what to use it for. actually, i did end up using some of it as a drizzle for some cream puffs i made. those were so good. you really cannot go wrong with delicious cream puffs with whipped cream filling topped with salted caramel sauce. those were a big hit when i brought them into work to share with everyone. i know i ate 3 of them right off the bat after i assembled them the night before. yes, it's delicious and you can make some yourself if you like. the recipe is here.

so what do you do when you still have about a cup or more of the salted caramel sauce left? ummmm... make some mini tarts with leftover cookie dough. yeah, you can grab any sugar cookie dough and cut them into circles, then stick them in your mini cupcake pans to make your mini tart crust. that's what i did with the one leftover tartine lemon cream tart crust recipe. i still have one left (sitting in the freezer) and finally decided it was about time i put it to use.

and here you have it. these good-looking and very tasty mini salted caramel with fig topping mini tarts. so good. it's like sweetness on top of sweetness on top of sweetness. you can't complain about that. a little sugar overload? sure?! but the caramel gives you just the right amount and hint of salt to make this a truly delicious and sweet bite. i love it!

Salted Caramel & Fig Mini Tarts via design. bake. run.
the sweet tart dough makes the perfect crust for these mini tarts. perfectly sweet and buttery and tastes delicious with everything as a whole.

Salted Caramel & Fresh Fig Mini Tarts via design. bake. run.
you can never go wrong with salted caramel. i love how the salt from the caramel really balanced out all that sugar.

salted caramel & fig mini tarts

ingredients:

directions:
  1. prepare the salted caramel sauce and sweet tart dough mini crusts according to their recipes.
  2. once the salted caramel and mini crusts are ready, you're ready to assemble. pour about a teaspoon of the sauce into each cooled mini tart crust. if you need more caramel, add more caramel until it's close to the top. then top it off with a slice of fresh figs. you can even add a dollop of freshly whipped cream too if you like.
  3. that's it. enjoy and happy eating!

makes 24 mini tarts. :)

Monday, August 26, 2013

cream puffs with whipped cream and salted caramel drizzle

Cream Puffs with Whipped Cream + Salted Caramel Drizzle via design. bake. run.

what do you do when you have a quart of heavy whipping cream in the fridge? well, you make everything and anything you can possibly think of that uses whipping cream! okay, i only made two things with it – actually, three things. i used some of them for, what else other than what it's intended for – whipped cream. i also made some salted caramel sauce and used a little bit for a coffee-spiked chocolate ganache filling for some macarons (you can check out my instagram photo of me holding a half-bitten macaron).

so yes, with all that whipping cream, i made up some salted caramel sauce the other night and let it sit in the fridge. i couldn't decide on what else to make until finally opting for some good old cream puffs. you cannot go wrong with cream puffs with whipped cream. i decided i would drizzle some salted caramel sauce on top to touch it up instead of your typical powdered sugar or chocolate ganache glaze/drizzle.

how was it? o.m.g. the best thing ever. i don't care what anyone says, but it is. everything with caramel is just better. it's so good and sticky and light and fluffy and i cannot stop eating it. yes, so. so. good. you have got to make these and you'll know what i'm talking about.

below are the recipes to making your very own delicious cream puffs with whipped cream and salted caramel sauce drizzle. if you prefer pastry cream over whipped cream as the filling, you can certainly make some using this vanilla pastry cream recipe here. seriously, cream puffs are like best thing ever, right?! i think so. yummmmmmmy! :)

Cream Puffs with Whipped Cream + Salted Caramel Drizzle via design. bake. run.
i love making and eating cream puffs. i can seriously eat the whole thing in one sitting. okay, maybe not in one sitting, but you know what i mean. it's really that good.

Cream Puffs with Whipped Cream + Salted Caramel Drizzle via design. bake. run.
the salted caramel drizzle on top brings this cream puff to another level altogether. the sweet and salty sticky drizzle is seriously a yummy added bonus.

cream puffs with whipped cream and salted caramel drizzle

for the pâte à choux pastry:
  • 1/2 cup all purpose flour
  • 1/2 tsp sugar
  • 1/4 tsp salt
  • 1/4 cup (4 tbsp) unsalted butter, cut into pieces
  • 1/2 cup water
  • 2 large eggs, lightly beaten

for the whipped cream filling:
  • 1-1/2 cups heavy whipping cream
  • 1/3 cup sugar

for the salted caramel sauce drizzle:
  • 2/3 cup heavy cream
  • 1/2 teaspoon vanilla extract
  • 1-1/4 cup sugar
  • 1/4 cup water
  • 2 teaspoons sea salt
  • 4 tablespoons unsalted butter

directions:

to make the choux pastry
  1. preheat oven to 400°f (200°c) and place rack in center of oven. line a baking sheet with parchment paper or lightly butter or spray the pan with a nonstick vegetable spray (or use a silpat nonstick baking sheet like i did).
  2. in a bowl sift or whisk together the flour, sugar and salt.
  3. place the butter and water in a heavy saucepan over medium high heat and bring to a boil. (make sure that the butter melts before the water boils to reduce the amount of evaporation.) remove from heat and, with a wooden spoon, add the flour mixture, all at once, and stir until combined. return saucepan to the heat and stir constantly until the dough comes away from the sides of the pan and forms a thick smooth ball (about 1-2 minutes).
  4. transfer the dough to your electric mixer, or use a hand mixer, and beat on low speed to release the steam from the dough (about a minute) – actually, i just do everything in the saucepan, beat the dough, adding the eggs, etc. once the dough is lukewarm start adding the lightly beaten eggs (dough will separate and then come together) and continue to mix until you have a smooth thick paste (dough will fall from a spoon in a thick ribbon).
  5. spoon or pipe 12 small mounds of dough onto the baking sheet, spacing about 2 inches (5 cm) apart. optional: you can gently brush the tops of the dough with a lightly beaten egg if you like. i usually don't.
  6. bake for 15 minutes and then reduce the oven temperature to 350°f (180°c). continue to bake for a further 30 minutes or until the shells are a nice amber color and when split, are almost dry inside. turn the oven off, poke a couple of holes in each puff and, with the oven door slightly ajar, let the shells completely cool (and dry out).

to make the whipped cream filling
  1. combine heavy whipping cream and sugar in a medium bowl.
  2. whip mixture to medium peaks.
  3. this should make enough whipped cream to fill up the puffs

to make the caramel sauce
  1. pour the cream into a small, heavy saucepan. then add in the 1/2 teaspoon vanilla extract. place over medium-high heat and bring to just under a boil, stirring occasionally. reduce the heat to low to keep the cream warm.
  2. in a medium, heavy saucepan, combine the sugar, water, and sea salt. bring to a boil over medium heat, stirring to dissolve the sugar and sea salt. then cook, without stirring, until the mixture is amber colored, 5 to 8 minutes. remove from the heat.
  3. the mixture will continue to cook off the heat and become darker, so make sure to have your cream close by. carefully and slowly add the cream to the sugar syrup. the mixture will boil vigorously at first. let the mixture simmer down, and then whisk until smooth. let cool for about 10 minutes. note: if when you add in the cream and find that not all the sea salt dissolved, don't worry. you can just omit these undissolved pieces (leave them at the bottom of the saucepan) when storing your sauce away.
  4. cut the butter into 1-inch chunks and add them to the caramel one at a time, whisking constantly after each addition. then whisk the caramel periodically as it continues to cool. note: this caramel is a little runny. if you like it thicker, you can 1-2 tablespoons of butter to thicken it up a little bit more.
  5. the caramel will keep in an airtight container in the refrigerator for up to one month.
  6. makes 1-1/2 cups.

*note: use a good-sized pan when preparing this caramel. when the hot cream is added, the caramel will boil furiously at first, increasing dramatically in volume. have ice water nearby in case of burns.

to asssemble/fill the puffs
  1. use the tip of a paring knife to make a small cut perpendicular to the first, creating an X in the side of each puff.
  2. fill a pastry bag fitted with a 1/4-inch plain tip with the whipped cream.
  3. pipe some of the cream through the X into the side of each puff until it starts to ooze back out. repeat to fill all the puffs.
  4. once all the puffs are filled, drizzle some salted caramel sauce over each cream puff. make sure you have your cream puffs sitting on a wire rack with a baking sheet underneath to catch the overflowing caramel sauce.
  5. that's it. enjoy and happy eating! :)

note: if you don't want to use a pastry bag and pipe the cream filling, you can just cut the puffs in half and spoon in the whipped cream. i use this method a lot because i can't be bothered with pastry bags and cleaning up.

Friday, July 12, 2013

vanilla cupcakes with salted caramel buttercream

Mini Vanilla Cupcakes with Salted Caramel Buttercream Frosting via design. bake. run.

i have another wedding baking gig upcoming up sometime this october thanks to one of my coworkers' friend who is getting married. last october i baked a bunch of goodies for the friend who is getting married now's sister. this time around, this sister is asking for the same red velvet cupcakes with cream cheese frosting and vanilla cupcakes with salted caramel buttercream; in addition to a bunch of french macarons as well. those macaron flavors are still to be decided.

anyway, i mentioned i could make all these cupcakes with these flavors. well, as it turns out, i'd never really made salted caramel buttercream frosting before! hehehe oops, i know. but i have made caramel and salted caramel (from scratch) before. so to make sure i could actually do it, i did a test bake last night after my one of two strength training workouts for the week. i used my go-to vanilla cupcake recipe these days and still had some leftover caramel sauce in the fridge i had made not too long ago. long story short, my first attempt of salted caramel buttercream was somewhat successful. why only somewhat? because i'm not sure how much salt you can taste in the "salted" part of the salted caramel buttercream/sauce. i forgot to put the salt in my sauce when i was melting it and threw it in at the last minute while making the buttercream. regardless, i'll make the sauce again and remember to actually put some sea salt in it before making the actual buttercream.

below's the recipe for the salted caramel buttercream. it's quite intensive if you make everything from scratch but if you already have certain items lying around, it's not so bad. actually, it's not that bad. you can do it. i say salted caramel buttercream goes well with any chocolate or vanilla cupcake. so bake yourself some cupcakes today and top it off with this delicious frosting. trust me, it'll be quite the hit. ;)

Mini Vanilla Cupcakes with Salted Caramel Buttercream Frosting via design. bake. run.
i think this salted caramel buttercream is a keeper and goes so well with any cupcakes.

salted caramel buttercream frosting **updated 10/28/13**

ingredients:
  • 1/4 cup salted caramel sauce (recipe below), more for cupcake drizzling if you like
  • 1 stick butter, room temperature
  • 3-4 cups confectioners' sugar
  • milk or cream

directions:
  1. using a hand mixer or a stand mixer, cream together the butter and salted caramel sauce in a good size bowl until incorporated.
  2. then add in the confectioners' sugar and mix until you have the right consistency. if it looks like it's a little thick, add in some milk or cream to thin it out. if it's too thin, you can add in more sugar.
  3. once you have the right buttercream consistency, fill your piping bag and frost away.
  4. makes enough to frost 24-26 mini cupcakes. you can double the recipe if you like for frosting more cupcakes.

**note: i updated the buttercream frosting a tad because i found a better way of making it. of course, adding the caramel with the butter before adding in the sugar was a no-brainer. i don't know why i didn't think of that before. and using more butter to start off so it's more buttery and just delicious all around. :)

salted caramel sauce
adapted from tartine

ingredients:
  • 2/3 cup heavy cream
  • 1/2 teaspoon vanilla extract
  • 1-1/4 cup sugar
  • 1/4 cup water
  • 2 teaspoons sea salt or regular salt
  • 2 tablespoons light corn syrup
  • 3/4 teaspoon lemon juice
  • 4 tablespoons unsalted butter

directions for salted caramel sauce:
  1. Pour the cream into a small, heavy saucepan. Then add in the 1/2 teaspoon vanilla extract. Place over medium-high heat and bring to just under a boil, stirring occasionally. Reduce the heat to low to keep the cream warm.
  2. In a medium, heavy saucepan, combine the sugar, water, sea salt and corn syrup. Bring to a boil over medium heat, stirring to dissolve the sugar. Then cook, without stirring, until the mixture is amber colored, 5 to 8 minutes. Remove from the heat.
  3. The mixture will continue to cook off the heat and become darker, so make sure to have your cream close by. Carefully and slowly add the cream to the sugar syrup. The mixture will boil vigorously at first. Let the mixture simmer down, and then whisk until smooth. Add the lemon juice. Let cool for about 10 minutes.
  4. Cut the butter into 1-inch chunks and add them to the caramel one at a time, whisking constantly after each addition. Then whisk the caramel periodically as it continues to cool.
  5. The caramel will keep in an airtight container in the refrigerator for up to one month.
  6. Makes 1-1/2 cups.

*note: Use a good-sized pan when preparing this caramel. When the hot cream is added, the caramel will boil furiously at first, increasing dramatically in volume. Have ice water nearby in case of burns.

cupcake recipe used: egg-less vanilla cupcakes

Monday, June 3, 2013

mini vanilla cupcakes with lemon curd + vanilla buttercream

Mini Vanilla Cupcakes with Lemon Curd + Vanilla Buttercream via design. bake. run.

so far this year we've had 3 people leave us at my work place. and this most recent one will be missed a whole lot. let's just say lunches aren't quite the same without him or the overall vibe isn't quite the same without him. he's fun and has quite the personality anyone would love to have around. so as a little farewell whatever-you-call-it, i made him some mini cupcakes. i asked him what he'd like but he couldn't decide and said for me to bake whatever. and cupcakes it was.

below's the recipe for one of the cupcakes i made. i've always been a fan of amy sedaris's vanilla cupcake recipe so i took her recipe and adapted it a little bit for my little take on her vanilla cupcakes. the overall result? the mini cupcakes turned out great. very nice and moist and with the lemon curd and buttercream combo, they were scrumptious. oh, and yes, i made others as well. you'll see there are mini red velvets with cream cheese frosting and another vanilla with chocolate coffee frosting. but these mini vanilla cupcakes with lemon curd and vanilla buttercream toppings are getting the feature in this post. they really are good. i absolutely love that hit of tartness from the lemon curd as you plop that one-bite mini cupcake in your mouth. seriously, the combination of sweet and sour is just perfect.

so go ahead and make some. you can even make your own lemon curd or use store-bought ones. hey, even a favorite jam could work too. but i say the whole lemon and vanilla combo is the way to go if you're up to making the whole cupcake from scratch. give it a try and let me know what you think! enjoy and happy baking. :)

Mini Vanilla Cupcakes with Lemon Curd + Vanilla Buttercream Frosting via design. bake. run.
these mini vanilla cupcakes are delicious. i absolutely love amy sedaris's vanilla cupcake recipe and the lemon curd pairs perfectly with it.

Mini Red Velvets and Vanilla Cupcakes via design. bake. run.
everyone at work enjoyed these goodies. who doesn't like one-bite mini cupcakes?! :)
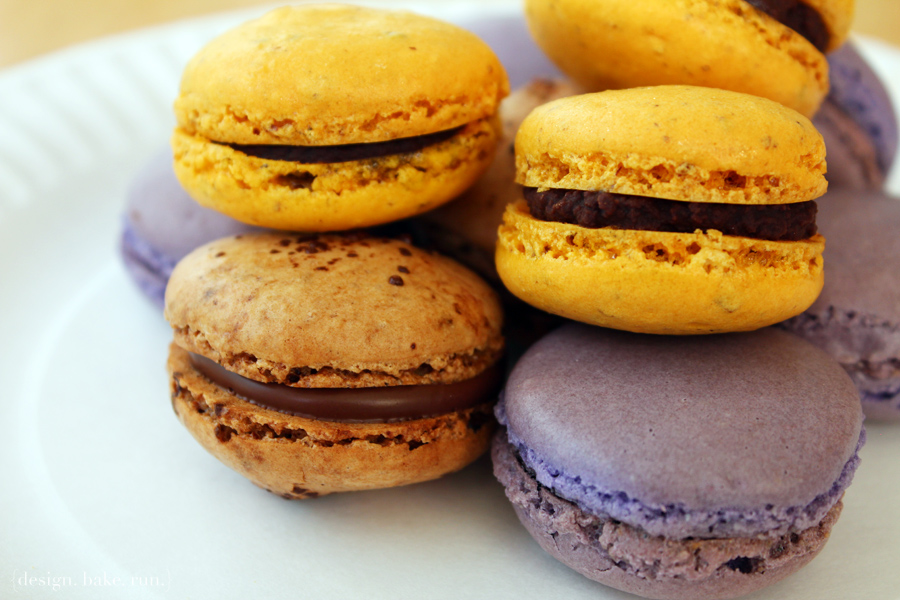
Mini Red Velvets and Vanilla Cupcakes via design. bake. run.
mini red velvets w/ cream cheese frosting + vanilla w/ chocolate coffee frosting + vanilla w/ lemon curd + vanilla frosting: these were some tasty cupcakes and they made the perfect mini going away gifts.

going away gifts for @sfkaos -- photo via mzrichee on instagram
yes, i instagram everything and lately it's been a lot of food photos. this was my instagram shot of the goodies i gave to my going away coworker.

mini vanilla cupcakes with lemon curd & vanilla buttercream frosting
cupcake recipe adapted from amy sedaris

cupcakes:
  • 1/2 stick unsalted butter, room temperature
  • 1/2 cup sugar
  • 1 egg
  • 1 teaspoon pure vanilla extract
  • 3/4 cup + 1 tablespoon all-purpose flour
  • 3/4 teaspoon baking powder
  • a pinch of salt
  • 2/3 cup buttermilk

vanilla buttercream frosting:
  • 1/2 stick unsalted butter, room temperature
  • 2 cups powdered sugar
  • 1 teaspoon pure vanilla extract
  • cream or milk

directions for cupcakes:
  1. preheat oven on to 375°F.
  2. in a medium bowl, sift together the flour, baking powder and salt and set aside.
  3. put butter in mixer and beat at medium speed until somewhat smooth.
  4. pour in sugar and beat well. add in the egg and mix well.
  5. then add: vanilla, the dry ingredients and buttermilk. beat until it looks like it is supposed to and pour into individual baking cups, until they are about 2/3 full.
  6. bake for 13-15 minutes or until golden brown.
  7. let cakes cool completely before topping it off with the lemon curd and frosting.
  8. makes 20-24 mini one-bite (or two?) cupcakes. or 6-8 regular ones (i can't guarantee the exact amount though because i only made mini ones).

directions for vanilla buttercream frosting:
  1. cream butter in electric mixer for 1-2 minutes until fluffy.
  2. slowly add in the sugar, vanilla extract and beat until light and fluffy; and has reached the right consistency; about 3-4 minutes. add cream or more sugar as necessary to achieve proper consistency.

enjoy! these mini cupcakes are best enjoyed within a day or two. happy eating! :)

you can check out these recipes as well:

Thursday, February 21, 2013

chocolate profiteroles with chocolate passionfruit cream

Chocolate Profiteroles with Chocolate Passionfruit Pastry Cream via design. bake. run.

a few weeks ago one of my coworkers gave me a quart (or carton?!) of passionfruit juice she brought back from berkeley bowl. she remembered me looking for some passionfruit whether it was in the form of the fruit itself or in juices, pulps, anything! anyway, since have this juice i figure i try and make something yummy out of it. and here you have it, these delicious chocolate profiteroles (the french's fancy way of saying cream puffs) with chocolate passionfruit pastry cream. :)

so, how did they turn out? pretty good i say. the passionfruit and chocolate definitely go together. only one unfortunate thing is that the passionfruit juice isn't passionfruity-enough in that it gets a little lost with the chocolate. unfortunately chocolate is one of those very powerful flavors. in this case it overpowered the passionfruit. although, i do feel that had i had actual passionfruit pulp or juices from the fruit itself (100% passionfruit) maybe you'd taste the fruit flavor a little more, even with the chocolate? all in all these cream puffs or profiteroles still turned out fantastic!

below's the recipe for these delicious chocolate profiteroles should you like to try them out yourself. enjoy!

Chocolate Profiteroles with Chocolate Passionfruit Pastry Cream via design. bake. run.
these chocolate cream puffs are so good. usually i prefer my simple vanilla pastry cream or whipped cream filling, but the chocolate in this -- delish!

Chocolate Profiteroles with Chocolate Passionfruit Cream via design. bake. run.
yup, that's a lot of chocolate profiteroles! :)

chocolate profiteroles with chocolate passionfruit pastry cream

ingredients

for the pastry cream:
1 cup half-and-half
1 cup whole milk
1/2 cup sugar
Pinch salt
6 large egg yolks
3 tablespoons cornstarch
1/2 cup passionfruit juice
6 oz dark chocolate chips
1/4 cup cream

for the pâte à choux:
1 cup all purpose flour
2 tablespoons unsweetened cocoa powder
1 teaspoon sugar
1/4 teaspoon salt
1/2 cup (1 stick) unsalted butter, cut into pieces
1 cup water
4 large eggs, lightly beaten

for the chocolate ganache glaze:
4 oz chocolate, chopped into small pieces
1/3 cup heavy cream

directions

to make the pastry cream: heat the half-and-half and milk, 6 tablespoons of the sugar, and the salt in a saucepan over medium-high heat until simmering, stirring occasionally to dissolve the sugar. meanwhile, combine the egg yolks and remaining 2 tablespoons sugar in a medium bowl and whisk until the sugar has begun to dissolve and the mixture is creamy, about 15 seconds. whisk in the cornstarch until combined and the mixture is pale yellow and thick, about 30 seconds.

also, while waiting for the milk mixture to simmer, heat the 1/4 cup cream in the microwave for 30-45 seconds until it comes to a boil (really, you want it hot enough to melt the chocolate). then pour it over the chocolate chips in a decent size bowl. mix the chocolate and cream together until the ganache is form. set the chocolate aside.

now, when the half-and-half and milk mixture has reached a simmer, slowly add it to the egg yolk mixture to temper, whisking constantly. return the mixture to the saucepan, scraping the bowl with a rubber spatula. return the mixture to a simmer over medium heat, whisking constantly, until a few bubbles burst on the surface and the mixture is thickened and glossy, about 30 seconds. off the heat, whisk in the melted chocolate and passionfruit juice. mix until everything is incorporated. strain the pastry cream through a fine mesh sieve set over a medium bowl. press plastic wrap directly on the surface to prevent a skin from forming and refrigerate until cold and set, at least 3 hours and up to 2 days.

to make the choux pastry: preheat oven to 400°F (200°C) and place rack in center of oven. line a baking sheet with parchment paper or lightly butter or spray the pan with a nonstick vegetable spray.

in a bowl sift or whisk together the flour, sugar and salt.

place the butter and water in a heavy saucepan over medium high heat and bring to a boil. (make sure that the butter melts before the water boils to reduce the amount of evaporation.) remove from heat and, with a wooden spoon, add the flour mixture, all at once, and stir until combined. return saucepan to the heat and stir constantly until the dough comes away from the sides of the pan and forms a thick smooth ball (about 1-2 minutes). transfer the dough to your electric mixer, or use a hand mixer, and beat on low speed to release the steam from the dough (about a minute) &ndash actually, i just do everything in the saucepan, beat the dough, adding the eggs, etc. once the dough is lukewarm start adding the lightly beaten eggs (dough will separate and then come together) and continue to mix until you have a smooth thick paste (dough will fall from a spoon in a thick ribbon). spoon or pipe small mounds of dough onto the baking sheet, spacing about 2 inches (5 cm) apart. optional: you can gently brush the tops of the dough with a lightly beaten egg if you like. i usually don't.

bake for 15 minutes and then reduce the oven temperature to 350°F (180°C). continue to bake for a further 30 minutes or until the shells are a nice amber color and when split, are almost dry inside. turn the oven off, poke a couple of holes in each puff and, with the oven door slightly ajar, let the shells completely cool (and dry out).

to fill the puffs: use the tip of a paring knife to make a small cut perpendicular to the first, creating an X in the side of each puff. fill a pastry bag fitted with a 1/4-inch plain tip with the pastry cream. pipe some of the pastry cream through the X into the side of each puff until it starts to ooze back out. repeat to fill all the puffs.

to make the chocolate ganache glaze: place chocolate and cream in a microwave-safe bowl, cover with plastic wrap, and microwave for 20 seconds at a time, until the mixture just begins to steam. whisk together thoroughly until completely mixed and glossy. allow ganache to cool slightly before dipping the tops of the cream puffs. set the puffs on a rack to let the chocolate glaze set completely. if you don't care for the chocolate ganache glaze, you can sprinkle confectioner's sugar on top of the filled cream puffs. i personally prefer dipping them in the ganache because it tastes yummier that way. serve within a few hours.

makes 40 decent size profiteroles. happy eating! :)

Wednesday, November 14, 2012

now that's a lot of macarons!

That's A LOT of Macarons via design. bake. run.

as mentioned in a previous post, yes, i did make 120 macarons (40 of each: coffee nutella, raspberry and chocolate ganache -- that's the one with the gold sparkly macaron shells) for a wedding a few weeks back. here are the photos of them and oh, they look scrumptious. i haven't baked any macarons since and now looking at them, it makes me want to bake some. hmmmm... one day soon, i'm sure. maybe i'll experiment with some holiday christmas-y flavor or something. you can't go wrong with a peppermint candy and eggnog or i don't know, something with marshmallow and hot cocoa. we'll see what i come up with the next time i bake these babies again. :)

alright, enjoy the photos! of course, if you'd like to make some macarons yourself, i do apologize that i don't have my recipe up yet. but when i do, i will certainly share it on here. in the meantime, you can browse through these previous posts and get david lebovitz's recipe from one of these posts.

Delicious French Macarons via design. bake. run.

Sparkly Gold French Macarons with Chocolate Ganache via design. bake. run.

Chocolate Ganache French Macarons via design. bake. run.

Homemade French Macarons via design. bake. run.

Coffee Nutella French Macarons via design. bake. run.

Coffee Nutella and Raspberry French Macarons via design. bake. run.

Wednesday, November 7, 2012

mini chocolate cupcakes with chocolate ganache

Mini Eggless Chocolate Cupcakes with Chocolate Ganache via design. bake. run.

a couple of weeks ago i had the honor and pleasure of baking 100 mini cupcakes (50 chocolate & 50 red velvets) and 120 macarons (these photos to come later in another post when i have time) for one of my coworker's friend's wedding reception. the friend wanted to have a dessert table and have these goodies there. so with that said, i got baking a couple of days leading up to the big day. of course, not these cupcakes. these babies were made the night before/morning of the reception. i have to say they turned out beautifully and tasted yum!

below's the recipe should you be interested in making some yourself. i absolutely love this recipe. it has been my go-to chocolate cupcake recipe ever since i discovered it within the last year. it's also an egg-free recipe so it's perfect for anyone who's got an egg allergy. definitely cannot beat that. enjoy! oh, and if you do make some, please feel free to share your thoughts on it and how they turn out! ;)

Mini Chocolate Cupcakes with Chocolate Ganache Frosting via design. bake. run.
now, that's A LOT of chocolate cupcakes eh? and did i mention, they're eggless?! yup, so eat up! :)

Mini Chocolate Cupcakes with Chocolate Ganache Frosting via design. bake. run.
a closer shot of these yummy one bite (or two!) cupcakes

Mini Chocolate Cupcakes with Chocolate Ganache Frosting via design. bake. run.
i absolutely love this cake recipe. they turn out perfect every time and the chocolate ganache is just delish, especially for chocolate lovers.

mini chocolate cupcakes with chocolate ganache
cake recipe from here and ganache recipe from sweet savory life

chocolate cupcakes:
1-1/2 cups flour
1 cup granulated sugar
1 tsp baking soda
1 tsp salt
1/3 cup cocoa powder
1/2 cup oil
1 cup water
1 tsp vanilla extract
1 tbsp vinegar

chocolate ganache:
12 oz chocolate, chopped into small pieces
1 cup heavy cream
directions:
for the cake: mix all ingredients together until moist and well blended. put in mini cupcake cups and bake for 17-18 minutes at 350 degrees F.

for the ganache: place chocolate pieces in a large bowl. heat heavy cream on medium high until it comes to a boil. remove from heat and immediately pour cream over chocolate and stir until completely mixed and glossy. allow ganache to completely cool and set up. when you are able to spoon the ganache and it can hold its texture, it is ready for piping. pipe/frost and enjoy!

chocolate cake recipe makes 50 mini cupcakes (or 16 regular ones). ganache recipe makes 1-1/2 cups.

Monday, October 8, 2012

dessert table for a first birthday party

Dessert Table via design. bake. run.

i just wanted to share a photo i took with instagram. i really think my first attempt at a dessert table this past weekend turned out beautifully. you can't really go wrong with mini cupcakes and macarons; oh, and of course, the full birthday cake. everything was lovely and cute as can be for a little girl having her first ever birthday (party).

so how was the party and goodies? a big successful! ;)

for the (similar) recipes shown in the pictures above, you can access them here:

- eggless vanilla (and chocolate) mini cupcakes
- coconut and raspberry macarons (coconut macaron recipe to come – no recipe posted yet. but you can get other macarons recipes here)
- martha stewart one-bowl chocolate cupcakes

enjoy!

------------------------------------

UPDATE: a few more photos from the party ;)

Eggless Vanilla & Chocolate Mini Cupcakes with Vanilla Buttercream via design. bake. run.
not only are these mini vanilla and chocolate cupcakes so cute and adorable, they're egg-free and perfect for any no-egg diet!

Coconut and Raspberry French Macarons via design. bake. run.
i had been meaning to make these coconut macarons and i think they turned out great! so yummy, and the raspberry ones are just as good.

Yummy Birthday Dessert Table via design. bake. run.
so here's a (similar to my instagram) photo of the dessert table (this one was taken with my canon). i love how cute this dessert table turned out!

Related Posts Plugin for WordPress, Blogger...