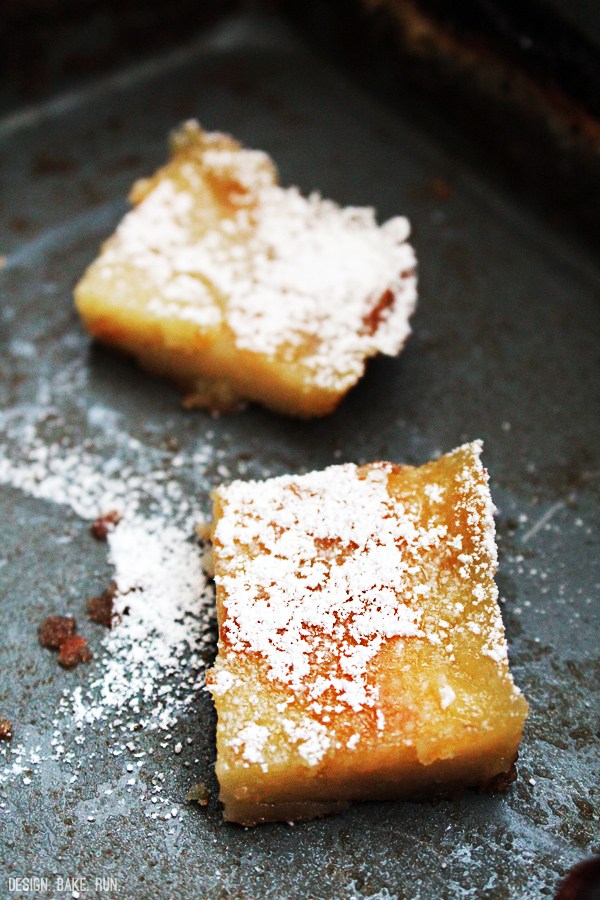
ummm... so, i sort of hosted a mini tea party at work this week. any excuse to bake some yummy baked goods, right? i'm not big on tea or anything, but i'll take all the goodies that come with it. :)
for our initial afternoon tea party kick-off, i settled on some coffee nutella macarons as well as some lemon cream cheese macarons (thanks to all the lemons in my garden), some mini lemon cupcakes with lemon icing, multi-berries scones, jam thumbprints and what better way to top it off then your not-so-typical savory bites, spam musubi. yup, you heard that right. we didn't have cute little tea sandwiches. we opted for spam musubi instead and those were delish! spam musubi is quite a hit with my coworkers and me. we'll take it any time of day, any day of the week, just as we'll take any of the other baked goodies.
anyway, the recipes are below if you'd like to bake any for your tea party or any party or just because. yeah, when you think about it, who needs an excuse to bake? i sometimes just bake because i wanted to. okay, enjoy and happy baking! :)

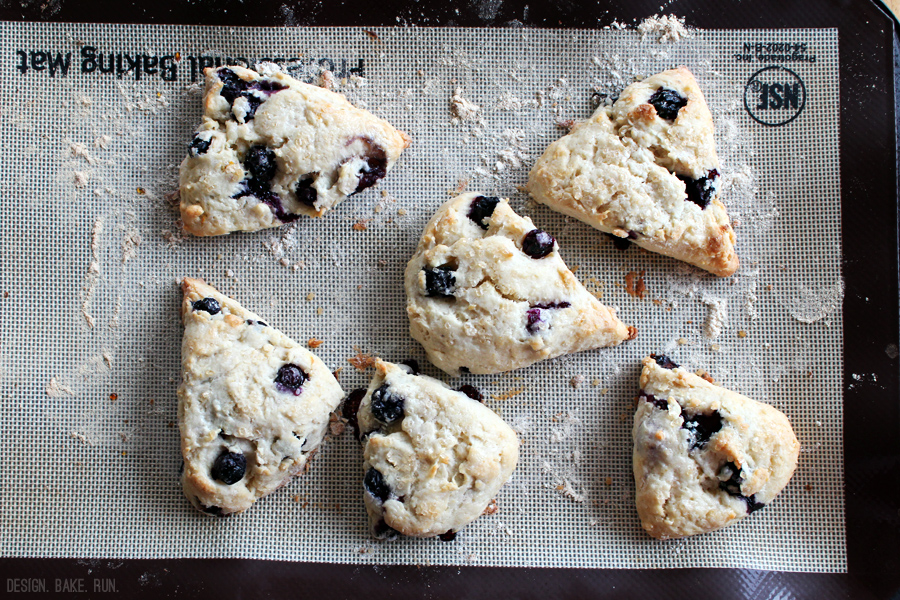
multi-berries scones
recipe adapted from smells like home's blueberry scones
ingredients:
- 8 tbsp (1 stick) unsalted butter, frozen whole
- 1-1/2 cups fresh or frozen berries (i used a mix of blueberries, blackberries and raspberries)
- 1/2 cup milk
- 1/2 cup sour cream
- 2 cups all-purpose flour, plus more for dusting the work surface
- 1/2 cup sugar, plus extra for sprinkling
- 2 tsp baking powder
- 1/4 tsp baking soda
- 1/2 tsp salt
- 1 tsp finely grated lemon zest
- 1 egg, for egg wash
directions:
- adjust an oven rack to middle position and preheat to 425° F. grate the frozen butter on the holes of a large box grater. if using fresh berries, place the berries in the freezer until needed. whisk together the milk and sour cream in a medium bowl; refrigerate until needed. combine the flour, 1/2 cup sugar, baking powder, baking soda, salt and lemon zest in a medium mixing bowl. whisk to combine. add the grated butter to the flour mixture and toss with fingers until thoroughly coated.
- add the milk mixture to the dry ingredients and fold with a spatula just until combined. transfer the dough to a generously floured work surface. dust the top of the dough with flour, and knead with well floured hands, 6-8 times, just until the dough holds together in a ragged ball. add small amounts of flour as needed to prevent sticking.
- roll the dough into a 12-inch square. fold the dough into thirds like a business letter (a dough scraper really helps with these steps). fold the short ends of the dough into the center in thirds, to form an approximate 4-inch square. transfer the dough to a plate lightly dusted with flour and chill in the freezer for 5 minutes.
- return the dough to the floured work surface and roll into an approximately 12-inch square again. sprinkle the berries evenly over the surface of the dough, and gently press down so that they are slightly embedded in the dough surface. using a dough scraper, roll the dough up to form a tight log. lay the log seam side down and press the the log into a 12 by 4-inch rectangle. using a sharp, floured knife, cut the rectangle crosswise into 4 equal rectangles. cut each rectangle diagonally to form 2 triangles. transfer to a parchment lined baking sheet.
- brush the tops of the scones with the egg wash and sprinkle lightly with sugar. if freezing ahead of time, flash freeze on the baking sheet for 20 minutes, then wrap individually and store in a freezer bag until needed. bake until the tops and bottoms are golden brown, 18-25 minutes. transfer to a wire rack and let cool at least 10 minutes before serving.
makes 12 scones (or however big/small you cut it)

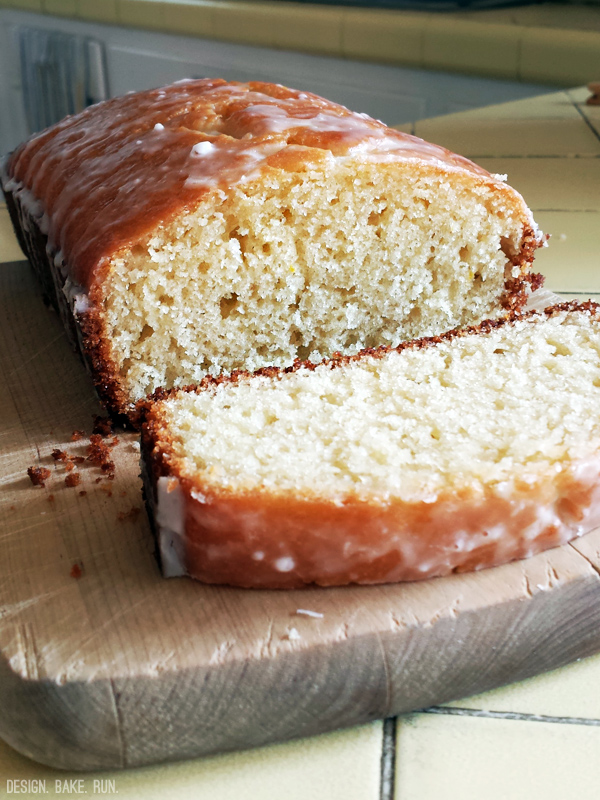
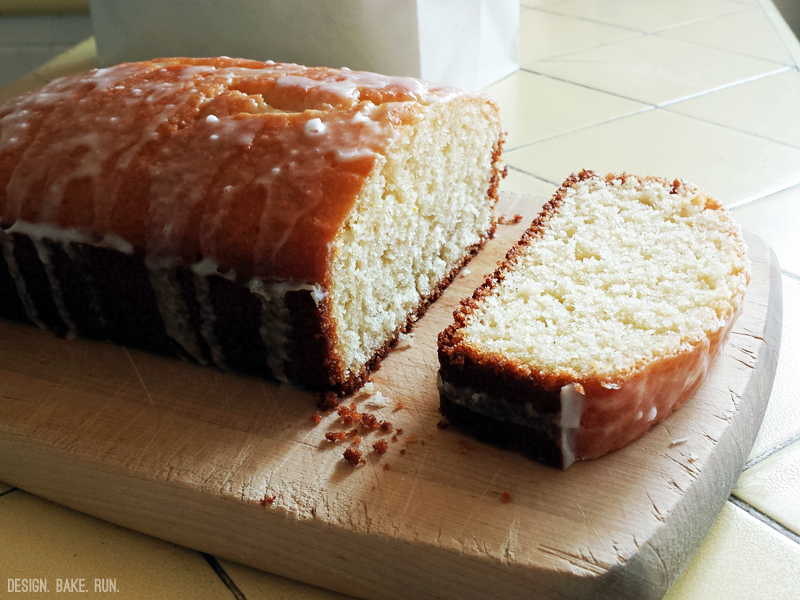
mini eggless lemon cupcakes
recipe adapted from yum'e'licious
ingredients:
for the cupcakes
- 1/2 cup butter
- 1/2 cup sugar
- 1 cup all purpose flour
- 1 cup buttermilk (or do what i do; add 1 tbsp lemon juice to 1 cup of milk, stir, and let it sit for 5 minutes before using)
- 1 tsp baking powder
- 1/2 tsp baking soda
- 1 tbsp lemon juice
- zest of 1 medium sized lemon
- few drops of yellow color, optional
for the lemon icing drizzle
- 1/4 cup powdered sugar
- 2 tbsp lemon juice
directions:
- if you don't have buttermilk, this is when you mix the lemon juice and milk together and set it aside while you do everything else.
- preheat oven to 350°F. then sift the flour, baking powder and the baking soda in a good size bowl and set that aside.
- in another bowl, cream the butter and sugar until light and fluffy. then add in 1/3 cup buttermilk and beat again until fluffy. repeat again with another 1/3 cup. then add the lemon zest and lemon juice and mix well. now, if you want to use some yellow food coloring, this is where i add it in.
- now add in the dry ingredients and mix well before adding in the remaining buttermilk; mix again until incorporated.
- fill the mini cupcake cups to 2/3 full (makes about 20-24) and bake it in the oven for 14-15 minutes. or if you'd rather do a loaf cake instead, pour the batter into a greased loaf tin (9"x5") and bake it for 20-25 minutes or until a toothpick comes out clean.
- let the mini cupcakes (or loaf) cool completely before drizzling the icing over. to make the icing, just mix the powdered sugar and lemon juice together. if it's too runny, just add more powdered sugar; and if too thick, add more lemon juice.
makes about 20-24 mini cupcakes or one loaf

other goodies you can find recipes for:
- coffee nutella macarons
- brown sugar salted caramel macarons
- coral french macarons with citrust buttercream filling
- jam thumbprints
- blood orange cranberry scones
- blueberry cream scones
- traditional english scones
- cranberry scones
- white chocolate biscottis