Showing posts with label 12 days of christmas baking. Show all posts

Thursday, December 18, 2014

mini pecan tarts

Mini Pecan Tarts via design. bake. run.

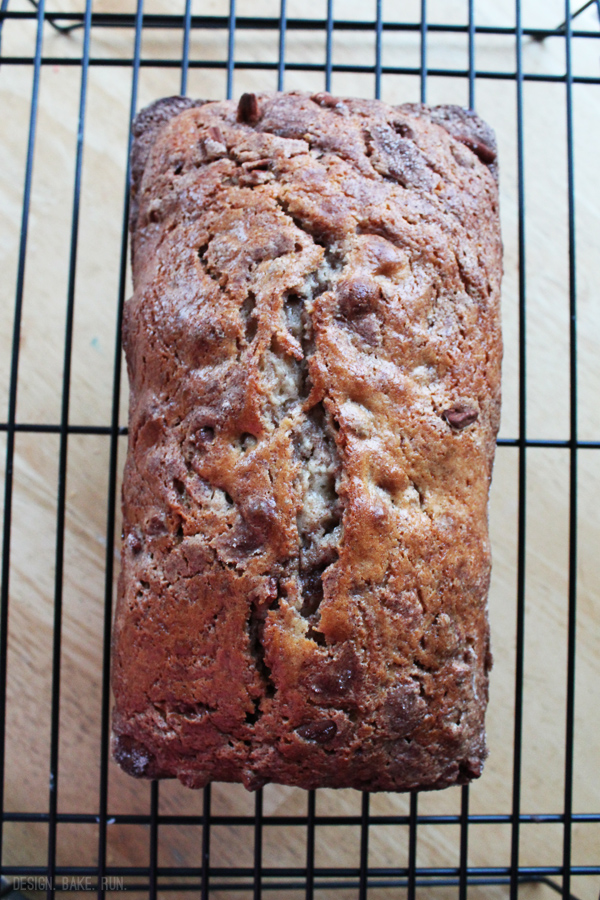
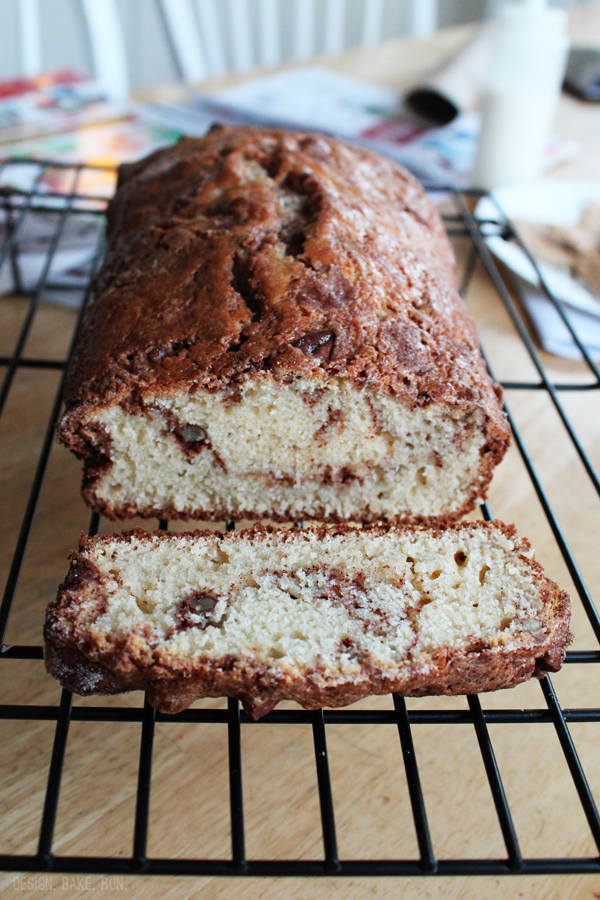
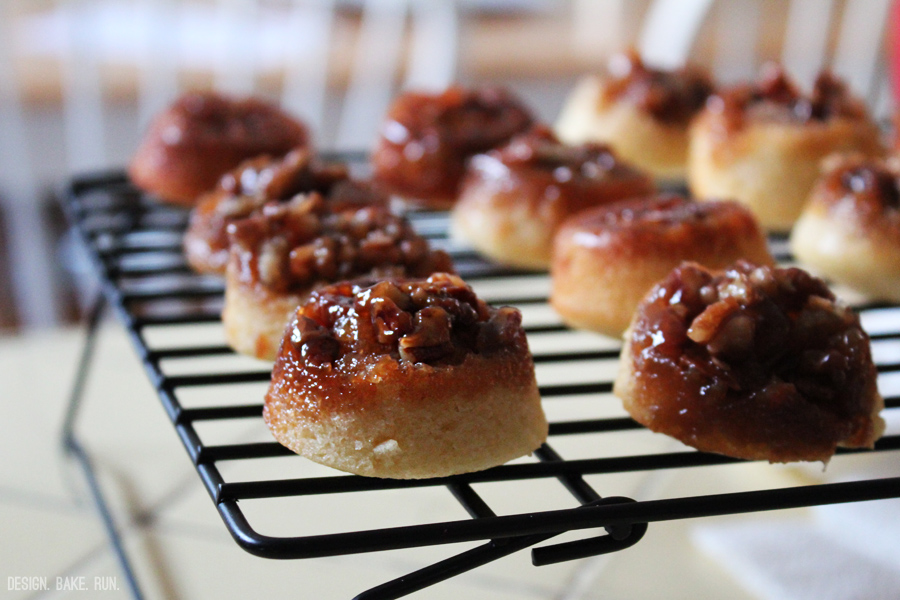
it’s been a while, i know. months and months. well, i'm sort of back, at least for one post. it's the happiest most wonderful time of the year again! and i love it. and i’ve been baking like crazy (but too lazy to post them here). well... here’s one i'll share because i actually have a photo for it. this has become one of my favorite holiday treat and will for sure be a regular come this time of the year. it is so good and that's probably because i’m a pecan pie fan.

so if you're up to some baking this weekend, feel free to make these. you never know, these may become one of your favorites too, if not already! enjoy and happy baking! :)

mini pecan tarts
recipe adapted from better homes & garden

ingredients:

cream cheese pastry:
  • 1/2 (1 stick) unsalted butter, at room temperature
  • 3 oz cream cheese, at room temperature
  • 1 cup all-purpose flour


pecan filling:
  • 1 large egg
  • 3/4 cup brown sugar
  • 2 tbsp corn syrup
  • 1 tbsp butter, melted
  • pinch of salt
  • 2/3 cup coarsely chopped pecans


directions:

  1. preheat oven to 325 degrees F. for pastry, in a mixing bowl beat the 1/2 cup butter and cream cheese until combined. stir in the flour. press a rounded teaspoon of pastry evenly into the bottom and up the sides of 24 ungreased 1 3/4-inch muffin cups.
  2. for pecan filling, in a bowl beat egg, brown sugar, corn syrup, and the 1 tablespoon melted butter until combined. stir in pecans. spoon about 1 heaping teaspoon of filling into each pastry-lined muffin cup. bake for 25 to 30 minutes or until pastry is golden and filling is puffed. cool slightly in pan. carefully transfer to a wire rack and let cool.


makes 24 cookies.

Friday, December 27, 2013

12 days of christmas baking - day 12: berries pie

12 Days of Christmas Baking - Day 12: Four-Berries Pie via design. bake. run.

i'm way slow in posting this final recipe for my 12 days of christmas baking. the last few days with christmas eve, shopping and everything else has been pretty busy and hectic here. well, here is the recipe, finally. yes, a four different kinds of berries pie. every thanksgiving and christmas i make a berry pie. sometimes just your usual raspberry or blackberry. but for this christmas, i decided to throw in all the berries. you know, the usual – strawberry, blackberry, blueberry and raspberry. the end result? hahaha, a very berry delicious pie it was. we're not big apple pie people at my house, so anything other than apple pie is always a bonus. we've become quite the pecan pie lover and i made that recipe as well this christmas. you really can't go wrong with having too much sweet stuff around the house this holiday season (or any time of year really).

below's the recipe. i've done it with just one kind of berry, or all kinds of berries. so feel free to give it a try if you like. it's pretty simple and straight forward. oh, it's even easier too if you use a store-bought pie dough, already rolled out and ready to go. yeah, that would save you some time. otherwise, you can make your own. enjoy!

12 Days of Christmas Baking - Day 12: Four-Berries Pie via design. bake. run.
we love berry pies at our house. this recipe is so easy to make, especially with already made pie dough.

12 Days of Christmas Baking - Day 12: Four-Berries Pie via design. bake. run.
here's the pie all brushed with eggwash and ready for the oven.

12 Days of Christmas Baking - Day 12: Four-Berries Pie via design. bake. run.
the pie out of the oven, cooling.

12 Days of Christmas Baking - Day 12: Four-Berries Pie via design. bake. run.
nothing finishes a nice slice of berry pie like ice cream. yummy!

four-berries pie

ingredients:
  • 1 bag (16 oz) of frozen berries (any will do) or 4-5 cups fresh or frozen berries
  • 1 cup sugar
  • 3 tablespoons cornstarch
  • 1 tablespoon of lemon juice
  • 1 tablespoon butter
  • 2 store-bought pie dough (or make your own)

directions:
  1. preheat oven to 375°F.
  2. prepare pie dough according to pie dough directions if you're making your own. or take the store-bought dough out of the refrigerator and let it get to room temperature, about 15 minutes. then transfer the dough to pie plate; trim even with edge.
  3. in a medium bowl, combine the berries, sugar, cornstarch, and lemon juice. stir to combine all the ingredients. then add in the berries filling; and dot with butter (i usally cut the 1 tbsp butter up into tiny chunks).
  4. cover the filled pie with the second rolled out pie dough. note: if you want a lattice look, you can cut the rolled dough into long pieces and thread them to make it look like a lattice. i can't be bother with this so i just do the easy and simple way, cover it up.
  5. once the pie is all assembled, you can brush it with milk and sprinkle some sugar on top. or, if you prefer, you can brush it with a little egg wash. bake at 375°F for 50-55 minutes. if you want to stop the browning of the pie edges, you can first cover it up with foil, then remove the foil after 25 minutes.

makes one 9-inch pie. enjoy! :)

last year's day 12 recipe: holiday biscottis

Monday, December 23, 2013

12 days of christmas baking - day 11: bourbon-sea salt caramels

12 Days of Christmas Baking - Day 11: Bourbon Sea Salt Caramels via design. bake. run.

i saw this recipe in the holiday issue (i think?) of bon appetit magazine sometime last month. it sounded easy enough so i took a snapshot of the recipe thinking i would make it this holiday season. well, sure enough, i did make it. and the result? some very sweet and tasty treats. instead of your usual heavy cream in caramel, this recipe calls for a can of condensed milk. and yes, it's very sweet. the added sea salt on top really balances out the sweetness and makes it a tad more interesting.

the recipe is pretty straight forward and simple. of course, the thing is, you just gotta make sure you have a candy thermometer handy. you really do need it for these kind of things. they're so worth it, i'm so glad we have one. :) oh, these guys are somewhat soft so i wouldn't let them sit at room temperature too long if you're not eating them all right away. i say you should keep them chill in the fridge and help yourself whenever you want one. or if you're making it for a party or whatever, then sure serve them at room temperature, just keep in mind it would get a little soft and sticky.

below's the recipe should you be interested in making these yourselves. they're really good and you definitely get that hint of bourbon. of course, you can make it alcohol-free too. just use good old vanilla extract in place of the bourbon. enjoy! :)

12 Days of Christmas Baking - Day 11: Bourbon Sea Salt Caramels via design. bake. run.
i love the added bourbon in this caramel recipe. it gives you just the perfect hint of the bourbon and the added sea salt really balances out all that sugar. yum!

bourbon-sea salt caramels
recipe from bon appetit magazine

ingredients:
  • nonstick vegetable oil spray
  • 2 cups sugar
  • 1/2 cup light corn syrup
  • 1 14-oz. can sweetened condensed milk
  • 1/2 cup (1 stick) unsalted butter, cut into small pieces
  • 2 tablespoons bourbon
  • 1/2 teaspoon kosher salt
  • flaky sea salt (such as maldon)

directions:
  1. Lightly coat an 8x8" baking pan with nonstick spray and line with parchment paper, leaving a 2" overhang on 2 sides; spray parchment.
  2. Bring sugar, corn syrup, and 1/4 cup water to a boil in a medium saucepan over medium-high heat, stirring to dissolve sugar. Cook, swirling pan occasionally, until mixture turns a deep amber color, 8–10 minutes.
  3. Remove pan from heat and whisk in sweetened condensed milk and butter (mixture will bubble vigorously) until smooth. Fit pan with candy thermometer and return to medium-low heat. Cook, whisking constantly, until thermometer registers 240°F. Remove from heat and whisk in bourbon and kosher salt. Pour into prepared pan; let cool. Sprinkle caramel with sea salt, cut into 3/4" pieces, and wrap individually in parchment paper.

DO AHEAD: Caramels can be made 2 weeks ahead. Store wrapped tightly in plastic in airtight container at room temperature. Or you can keep it chill in the fridge like me. :)

makes a bunch depending on how you cut it. enjoy. :)

check out last year's day 11 recipe: peppermint bark

Sunday, December 22, 2013

12 days of christmas baking - day 10: eggnog cinnamon-nut bread

12 Days of Christmas Baking - Day 10: Eggnog Cinnamon-Nut Bread via design. bake. run.

i couldn't help it but crave some kind of cakey bread. so this afternoon i decided that i would make some. with some eggnog in the fridge i wanted to experiment a little bit and decided on an eggnog bread. well, the end result wasn't exactly what i was hoping. you couldn't quite taste the eggnog once the bread is baked. so to even add a tiny hint of the eggnog, i drizzled it with a little eggnog glaze (unpictured, unfortunately). that did the trick a bit. the bread itself is very good, with or without the eggnog glaze.

below's the recipe should you want to try it. i love baked cakey breads. they are so good toasted with a little spread of butter. mmmm... yum! :)

12 Days of Christmas Baking - Day 10: Eggnog Cinnamon-Nut Bread via design. bake. run.
the eggnog in this recipe doesn't really come out a whole lot so you can always drizzle it with an eggnog glaze. that's what i did after i took these photos, to bring out the eggnog flavor a little more.

12 Days of Christmas Baking - Day 10: Eggnog Cinnamon-Nut Bread via design. bake. run.
the cinnamon and nut in this recipe gives you the nicest aroma when the bread is baking in the oven. smells so yummy and it really is yummy!

12 Days of Christmas Baking - Day 10: Eggnog Cinnamon-Nut Bread via design. bake. run.
all sliced and ready to eat!

eggnog cinnamon-nut bread
recipe adapted from better homes & garden

ingredients:
  • 1-1/3 cups sugar, divided
  • 1/2 cup finely chopped toasted pecans or walnuts
  • 2 teaspoons ground cinnamon
  • 2 cups all-purpose flour
  • 1 teaspoon baking powder
  • 1/2 teaspoon salt
  • 1 egg, lightly beaten
  • 2/3 cup eggnog
  • 1/3 cup milk
  • 1/3 cup vegetable oil

eggnog glaze (optional):
  • 1-2 tablespoons eggnog
  • 1/4 cup powdered sugar

directions:
  1. Preheat oven to 350 degrees F. Grease and flour the bottoms and 1/2 inch up the sides of three 5 3/4x3x2-inch loaf pans or a 9x5x3-inch loaf pan; set aside. In a small bowl, stir together 1/3 cup of the sugar, the nuts, and cinnamon; set aside.
  2. In a large bowl, stir together the remaining 1 cup sugar, flour, baking powder, and salt. Make a well in center of flour mixture. In a medium bowl, combine egg, eggnog, milk, and oil. Add egg mixture all at once to flour mixture. Stir just until moistened (batter should be lumpy).
  3. Spoon half of the batter into the prepared pans. Sprinkle with half of the nut mixture. Top with the remaining batter and the remaining nut mixture. Using a narrow metal spatula or table knife, cut down through batter and pull up in a circular motion to marble.
  4. Bake in the preheated oven for 45 to 50 minutes for 5 3/4-inch pans (55 to 60 minutes for 9-inch pan) or until a toothpick inserted near centers comes out clean. Cool in pans on wire racks for 10 minutes. Remove from pans; cool completely on racks.
  5. If you want to add the eggnog glaze, mix the two ingredients together and drizzle it on top (use less eggnog if you want a thicker glaze). Then wrap and store overnight before slicing. Or if you're like me and can't wait, then just wait until the glaze set before slicing. Enjoy! :)

makes one loaf, about 12-14 servings depending on how you slice it.

check out last year's day 10 recipe: chocolate chip cookies with nutella & sea salt

Saturday, December 21, 2013

12 days of christmas baking - day 9: peppermint toffee butter crunch

12 Days of Christmas Baking - Day 9: Peppermint Toffee Butter Crunch via design. bake. run.

happy day 9! here's day 9's recipe. i've been quite busy with some holiday festivities, so this one requires no baking. it's super easy to make and takes very little time (minus the chilling). again, nothing fancy, but your good ol' toffee. seriously, you cannot go wrong with toffee. to add a little festive feel to it, i decided that along with the crunched almonds on top, why not add some crushed peppermint candy? it gives you a nice pepperminty taste to the chocolate and toffee. and for sure, you cannot go wrong with even more added crunch.

toffees are one of my favorite things to make this time of the year. and this recipe is super easy to make. i've made it many holiday seasons in the past and again this year. give it a shot and you never know, you may just have found a new favorite yourself. enjoy! :)

12 Days of Christmas Baking - Day 9: Toffee Butter Crunch with Crushed Peppermint Candies via design. bake. run.
you can never go wrong with toffee during this time of the year. to add a little festive feel to it, top it off with any topping of your choice.

12 Days of Christmas Baking - Day 9: Peppermint Toffee Butter Crunch via design. bake. run.
this toffee recipe is so easy to make and they make great holiday gifts.

peppermint toffee butter crunch
recipe from better homes & garden

ingredients:
  • 1/2 cup coarsely chopped almonds or pecans, toasted
  • 1 cup butter
  • 1 cup sugar
  • 3 tablespoons water
  • 1 tablespoon light-colored corn syrup
  • 3/4 cup semisweet chocolate pieces
  • 1/2 cup finely chopped almonds or pecans, toasted
  • crushed peppermint candies (optional)

directions:
  1. Line a 13x9x2-inch baking pan with foil, extending foil over edges of pan. Sprinkle the 1/2 cup coarsely chopped nuts in pan. Set pan aside.
  2. Butter sides of a heavy 2-quart saucepan. In saucepan melt butter. Add sugar, water, and corn syrup. Cook and stir over medium-high heat until mixture boils. Clip a candy thermometer to side of pan. Reduce heat to medium; continue boiling at a moderate, steady rate, stirring frequently, till thermometer registers 290 degree F, soft-crack stage (about 15 minutes). Watch carefully after 280 degree F to prevent scorching. Remove saucepan from heat; remove thermometer. Pour candy into the prepared pan.
  3. Let candy stand about 5 minutes or till firm; sprinkle with chocolate. Let stand 1 to 2 minutes. When chocolate has softened, spread over candy. Sprinkle with the 1/2 cup finely chopped nuts and crushed peppermint candies or any other topping (if you desire). Chill until firm. When candy is firm, use foil to lift it out of pan; break into pieces. Store tightly covered.

makes about 1-1/2 pounds (48 servings).

check out last year's day 9 recipe: chocolate-almond saltine toffee

Friday, December 20, 2013

12 days of christmas baking - day 8: cranberry apple walnut cake

12 Days of Christmas Baking - Day 8: Cranberry Apple Walnut Cake via design. bake. run.

i had been wanting to make this cranberry apple walnut cake since i tasted it for the first time a couple of months ago. one of my coworkers made this cake and brought it in for our company potluck. it was so good, i had to ask him for the recipe. i knew i would make it around this time of year and sure enough, i got around to baking it.

so, how was the recipe? ummm… the one he made tasted delicious. this one however, i think it was just okay. i've only had one tiny slice so far, so i don't know yet. but i can say it sounds like a great recipe and if it turns out right, it would be delicious! plus, i'm not sure if it was just me or what it is. but when i was making the batter, it was very cookie-batter-like and no cake-like at all. it was too dry. like there wasn't enough liquid ingredients in this. i looked at the person's photos and looked at mine and my batter did not look like hers. long story short, i improvised and added a couple tablespoons of water to my batter to make it more sticky or so that it would resemble a cake batter. that may have saved the cake, because it didn't come out too bad. now, if you're going to make this recipe, just be aware of that.

below's the recipe if you'd like to try it. i say go ahead, why not. cranberries, apples and walnuts are great combos for these kinds of cake. plus, it fits right in with the holiday season. so be merry and bake away! :)

12 Days of Christmas Baking - Day 8: Cranberry Apple Walnut Cake via design. bake. run.
i made these and gave them out as mini gifts.

12 Days of Christmas Baking - Day 8: Cranberry Apple Walnut Cake via design. bake. run.
another apple cranberry cake to add to the mix. these guys are great as bars too!

cranberry apple walnut cake
recipe from the bad girl's kitchen

ingredients:
  • 1-3/4 cups light brown sugar OR 1 cup honey plus 2 tablespoons orange juice concentrate
  • 1/2 cup vegetable oil
  • 2 cups flour
  • 1 teaspoon baking soda
  • 1 teaspoon cinnamon
  • 1/2 teaspoon nutmeg
  • 1 teaspoon salt
  • 2 eggs
  • 1 teaspoon vanilla
  • 2 cups sliced cooking apples (i used granny smith)
  • 1/2 cup walnut pieces
  • 1/2 cup fresh, whole raw cranberries

directions:
  1. preheat oven to 350°F and grease a 9x13 pan very well, set aside.
  2. in a medium bowl, sift together the flour and dry ingredients, also set that aside.
  3. then cream together oil and sugar. add eggs and vanilla and beat well.
  4. once that's incorporated, add in the dry ingredients and stir until thoroughly combined. then stir in apples, cranberries and nuts.
  5. bake for 45-50 minutes. let it cool, then cut into squares or whatever serving size you like and enjoy!

makes one 9x13 pan size cake. enjoy! :)

check out last year's day 8 recipe: salted caramel chocolate pecan bars

Thursday, December 19, 2013

12 days of christmas baking - day 7: caramel-filled chocolate cookies

12 Days of Christmas Baking - Day 7: Caramel-Filled Chocolate Cookies via design. bake. run.

i have been wanting to bake some chocolate cookies with caramel filling after stumbling upon some crazy good-looking photos of these cookies on pinterest. so, finally, here is my take on it! i didn't have any soft caramels lying around the house and didn't feel up to making my own from scratch so i used some kraft caramel bits and heated it in the microwave with a little bit of water to water it down so that it would be soft enough for a filling (but not too liquify like a sauce). the end result? some tasty chocolate cookies, for sure.

so below's the recipe should you want to bake a batch yourself. these cookies are best eaten warm. you definitely cannot pass up warm baked cookies this time of year, especially when they're filled with oozing caramel. yummmm-y! :)

12 Days of Christmas Baking - Day 7: Caramel-Filled Chocolate Cookies via design. bake. run.
these chocolate cookies with caramel filling are best enjoy warm. make sure you only cool the cookies slightly so that the caramel is still oozing out of them when you break into it.

12 Days of Christmas Baking - Day 7: Caramel-Filled Chocolate Cookies via design. bake. run.
soft caramels produce the best results in these caramel-filled chocolate chip cookies.

12 Days of Christmas Baking - Day 7: Caramel-Filled Chocolate Cookies via design. bake. run.
any chocolate and caramel lover would not be able to resist this tasty treat. so go ahead and bake a bunch and give it away as a mini gift this holiday season!

chocolate cookies with caramel filing

ingredients:
  • 1 cup all-purpose flour
  • 1/3 cup cocoa powder
  • 3/4 cup sugar
  • 1/4 cup brown sugar
  • 1/2 tsp baking powder
  • a pinch of salt
  • 1 egg
  • 1/4 cup (1/2 stick) butter, room temperature
  • 12 soft caramels
  • some sea salt (for sprinkling, optional)

directions:
  1. preheat oven to 350°f. line a baking sheet with parchment paper or a silicone mat.
  2. sift the flour, cocoa powder, and baking powder into a medium bowl.
  3. in the bowl of a stand mixer fitted with the paddle attachment (or you can use a medium-size bowl with a handmixer like i do), beat the butter on low speed until smooth, 1 to 2 minutes. add the sugar and mix on low speed until well combined. then mix on medium speed until the mixture gets lighter in color and texture becomes fluffier, about 5 minutes.
  4. with the mixer on medium speed, add the egg and mix until well-incorporated and very smooth, about 30 seconds. then mix on medium speed for 30 more seconds. feel free to scrape down the sides to get all the mixture in.
  5. then add the flour mixture. mix on low speed just until uniform in texture. mix on low until everything is combined.
  6. using a cookie scoop (about 1 tablespoon in size), scoop out 1-1/2 tablespoons and form into a ball. place them on the baking sheet, spacing them at least 2 inches apart. then using your finger or thumb, make an indentation in the center and put in your soft caramel (or you can just lightly squash in the caramel). at this point, you can sprinkle a little bit of sea salt on top of the caramel if you like and cover it up with a little bit of dough to seal it. make sure the caramel isn't visible so that when it bakes it will be contained until you break into it.
  7. bake for 10-12 minutes, until the cookies are slightly firm to the touch and the surface is no longer glossy, rotating the pan halfway through the baking time.
  8. let the cookies cool on the pan for a few minutes before removing. then eat and enjoy! best enjoy warm. of course, you can store them in an airtight container at room temperature for 3 days. or if you don't want to use all the dough at once, the dough can be stored in an airtight container in the refrigerator for up to 5 days.
makes a dozen 3-inch cookies.

check out last year's day 7 recipe: peppermint and coffee nutella french macarons

Wednesday, December 18, 2013

12 days of christmas baking - day 6: earl grey tea macarons

12 Days of Christmas Baking - Day 6: Earl Grey Tea Macarons with Earl Grey Tea Buttercream via design. bake. run.

well hello there! and welcome to day 6 of my not so crazy christmas baking. i say not so crazy because this year i'm taking it slow. of course now that christmas is almost here, i'm not sure if that's quite so true now. i've worked it out and let's just say i'll be posting a new recipe every day up until christmas eve. i think that's right. we'll see. regardless, there will be 12 recipes in all. :)

today's recipe calls for earl grey tea french macarons. i'm a giant fan of macarons so it's no surprise. tea in it itself is another story (i'm not quite a tea fan, just because i've yet to acquire the taste for it). but i don't mind it in some of my baked goods. this cookie is actually quite good because i feel like you only get hints of the tea. so it's not crazy infused or anything.

as usual, if you'd like to give this recipe a try, i say go for it. enjoy and happy baking! :)

12 Days of Christmas Baking - Day 6: Earl Grey Tea Macarons with Earl Grey Tea Buttercream via design. bake. run.
for any tea lover or macaron fan, these earl grey tea flavored macarons are spot on. i love the hint of the earl grey tea and the crispy and chewiness combo.

earl grey tea macarons with earl grey tea buttercream filling

ingredients:

macaron batter:
1 cup powdered sugar
3/4 cup almond meal
1 packet earl grey tea leaves (or 1/2 teaspoon of loose leaves), plus more for sprinkling on top
2 large egg whites, at room temperature
5 tablespoons granulated sugar

earl grey tea buttercream:
1 packet of earl grey tea leaves (or 1/2 teaspoon of loose leaves)
1 stick of butter, room temperature
2 cups of powdered sugar
milk or cream, if needed

directions:

to make the macaron batter/shells:
  1. line two baking sheets with parchment paper and have a pastry bag with a plain tip (about 1/2-inch, 2 cm) ready.
  2. sift together the powdered sugar and almond meal so there are no lumps. add in the earl grey tea leaves and stir it to make sure it's fully incorporated with the sugar and almond meal mixture. set aside.
  3. in the bowl of a standing electric mixer (or if you prefer, you can use a bowl and hand mixer), beat the egg whites until they begin to rise and hold their shape. while whipping, beat in the sugar until very stiff and firm, about 2 minutes.
  4. carefully fold the dry ingredients, in two batches, into the beaten egg whites with a flexible rubber spatula. when the mixture is just smooth and there are no streaks of egg white, stop folding and scrape the batter into the pastry bag (standing the bag in a tall glass helps if you’re alone).
  5. pipe the batter on the parchment-lined baking sheets in 1.35-inch circles evenly spaced one-inch apart.
  6. rap the baking sheet a few times firmly on the counter top to flatten the macarons. then let it sit for at least 30-60 minutes depending on humidity before baking them in the oven. about 10-15 minutes before baking, preheat oven to 350 degrees F. bake for 15 minutes.
  7. once macaron shells are out of the oven, let them sit for 30-60 seconds before removing the hot baking sheet underneath. let the macarons cool completely before removing them from the parchment paper.

for the earl grey tea buttercream filling:
  1. in a medium bowl combine the butter and sugar and mix until incorporated.
  2. then add in the packet of earl grey tea leaves and mix until combine and you've reached the right consistency for buttercream. if it's too thick, thin it out with a little bit with milk or cream. if too thin, add in a little more powdered sugar.

to assemble the macaron cookies:
  1. before assembling these cookies, make sure to pair up all the cookie shells so they are as close as possible in size.
  2. using a knife, spread a good amount of the buttercream on the inside of the macarons then sandwich them together. note: you can certainly put the buttercream in a piping bag and pipe the buttercream onto the cookie. it's a lot easier i think and less mess. but i can't be bother to do this so i almost always just spread it with a knife.
  3. let them stand at least one day (keep them refrigerated) before serving (serve at room temperature), to meld the flavors.

store in airtight container for up to 5 days. makes 20-24 macarons. happy eating because these are really, really, good! :)


check out last year's day 6 recipe: chocolate cream cheese cupcakes

Tuesday, December 17, 2013

12 days of christmas baking - day 5: jam thumbprints

12 Days of Christmas Baking - Day 5: Jam Thumbprints via design. bake. run.

hello there! here is day 5's recipe – jam thumbprints. i have to say they are for sure some of my favorite things this time of year. i went through the entire holiday season last year without making these goodies because there were so many other recipes i wanted to try last time. but this year, i'm not skipping out on these guys again. they are so, so good. i love how buttery the cookies are and those coconut flakes/pieces gives you that nice added crunch.

this particular jam thumbprint recipe is near and dear to my heart. it was one of the first cookie recipes i ever baked when i started baking several years back. after having c and being home during the holidays, i watched so many food network cooking shows, ina garten's barefoot contessa to be more precise. i couldn't help it but pick up my mother-in-law's hand mixer and try ina's jam thumbprint recipe out. and i'm so glad i did because this recipe is for sure my favorite by far of all jam thumbprint recipes. i've tried others since, but have always gone back to this one. i think it must be the added coconut or something that does it. or maybe that it's more like a shortbread. whatever it is, it's very good.

so below's the recipe if you'd like to give these a try. i'm sure you'll fall in love with it just like i did. enjoy and happy baking this holiday season! :)

12 Days of Christmas Baking - Day 5: Jam Thumbprints via design. bake. run.
these jam thumbprints are so, so good. it's like a buttery shortbread cookie with toasted coconut flakes.

12 Days of Christmas Baking - Day 5: Jam Thumbprints via design. bake. run.
these thumbprint cookies are just some of my favorite things this time of year.

jam thumbprints
recipe from ina garten of the food network

ingredients:
  • 3/4 pound (3 sticks) unsalted butter, at room temperature
  • 1 cup sugar
  • 1 teaspoon pure vanilla extract
  • 3 1/2 cups all-purpose flour
  • 1/4 teaspoon kosher salt
  • 1 egg beaten with 1 tablespoon water, for egg wash
  • 7 ounces sweetened flaked coconut
  • Raspberry and/or apricot jam (you can use any jam you have around, i used blackberry and apricot)

directions:
  1. Preheat the oven to 350 degrees F.
  2. In an electric mixer fitted with the paddle attachment, cream together the butter and sugar until they are just combined and then add the vanilla. Separately, sift together the flour and salt. With the mixer on low speed, add the flour mixture to the creamed butter and sugar. Mix until the dough starts to come together. Dump on a floured board and roll together into a flat disk. Wrap in plastic and chill for 30 minutes.
  3. Roll the dough into 1 1/4-inch balls. (If you have a scale they should each weigh 1 ounce.) Dip each ball into the egg wash and then roll it in coconut. Place the balls on an ungreased cookie sheet and press a light indentation into the top of each with your finger. Drop 1/4 teaspoon of jam into each indentation. Bake for 20 to 25 minutes, until the coconut is a golden brown. Cool and serve.

makes about 4 dozen cookies.

check out last year's day 5 recipe: mrs. jew's crispy cookies

Monday, December 16, 2013

12 days of christmas baking - day 4: apple cake with buttery caramel sauce

Apple Pecan Cake with Buttery Caramel Sauce via design. bake. run.

okay, here's day 4. again, very late in posting up these holiday recipes this year. i will try very hard this week to post up more recipes as christmas is literally right around the corner. and now that m is back from his 3-week hiatus (actually, more like 2-1/2 weeks because we did meet up with him last week in nyc), i can get in the christmas spirit like i do every year and bake away. you know, things just aren't the same when the usual people aren't around.

alright, enough said. below's the recipe for day 4's christmas baking. it's an apple cake with buttery caramel sauce. i have been in love with simple cakes these last several months so it's no surprise that i also love this recipe. i like how the little chunks of apple gives you a different texture when eating the cake. and that gooey buttery caramel sauce gives you a nice extra sweetness since the cake itself isn't super sweet.

so go ahead and bake yourself a cake today! enjoy and happy baking and eating! :)

Apple Cake via design. bake. run.
i think if you prefer the cake without the buttery caramel sauce, you can definitely omit it. but i personally wouldn't because i love caramel sauce.

Apple Cake with Buttery Caramel Sauce via design. bake. run.
this apple cake is perfect for this time of year. i love the added apple chunks and pecans. and the caramel sauce on top gives you that extra bit of sweetness. delish!

apple cake with buttery caramel sauce
recipe from better homes & garden

ingredients:
  • 2 cups  all-purpose flour
  • 1 teaspoon  baking powder
  • 1/2 teaspoon  salt
  • 1/2 teaspoon  ground nutmeg
  • 1/2 teaspoon  ground cinnamon
  • 1/4 teaspoon  baking soda
  • 1/2 cup  butter, softened
  • 2 cups  sugar
  • 2 eggs
  • 6 cups  coarsely chopped unpeeled cooking apples (about 5 to 6 medium apples)
  • 1 cup  chopped walnuts (i used pecans instead)
  • 1 recipe Buttery Caramel Sauce (recipe below)

directions
  1. Preheat oven to 350 degrees F. Grease a 13x9x2-inch baking pan; set pan aside. In a medium bowl stir together the flour, baking powder, salt, nutmeg, cinnamon, and baking soda; set aside.
  2. In a very large mixing bowl beat butter with an electric mixer on medium to high speed for 30 seconds. Gradually add sugar, about 1/4 cup at a time, beating on medium speed until well combined. Scrape sides of bowl; beat for 2 minutes more. Add eggs one at a time, beating well after each addition. Add flour mixture to butter mixture, beating on low speed just until combined. Fold in apples and walnuts. (Batter will be thick.) Spread batter in prepared baking pan.
  3. Bake in the preheated oven for 45 to 50 minutes or until a toothpick inserted near the center comes out clean. Cool in pan on a wire rack for 45 minutes. Serve warm with Buttery Caramel Sauce. Makes 16 servings.

Notes: Cool cake; cover cake pan with foil and freeze for up to 1 month. Thaw covered cake in the refrigerator overnight. Reheat cake, covered, in a 325 degrees F oven about 30 minutes or until warm. Sauce can be covered and refrigerated for up to 1 week. Reheat in a saucepan over medium heat.

buttery caramel sauce

ingredients:
  • 1/3 cup  butter
  • 1/3 cup  granulated sugar
  • 1/3 cup  packed brown sugar
  • 1/3 cup  whipping cream
  • 1/2 teaspoon  vanilla

directions
In a small saucepan melt butter over medium heat. Stir in sugars and cream. Bring to boiling, stirring constantly. Remove from heat; stir in vanilla. Serve warm. Makes about 1-1/4 cups.

check out last year's day 4 recipe: cranberry apple crumb bars

Monday, December 9, 2013

12 days of christmas baking - day 3: sticky pecan upside-down baby cakes

12 Days of Christmas Baking - Day 3: Sticky Pecan Upside-Down Baby Cakes via design. bake. run.

hello there! here's day 3. again, not so great this year with posting up the new recipes, but i do have to say, i really really love today's recipe. it's super easy to make and the sticky pecan addition is to die for. it's sweet and crunchy and gives you just the right amount of sugar to your (cup)cake ratio.

so, what are you waiting for? go right ahead and make yourself some of this delicious sticky pecan upside-down baby cakes. i literally turned them into baby cakes and used mini cupcake pans to bake these (if you do this, cut down the baking time and only bake them for 15-17 mins). it made a whole bunch, and was perfect as mini one-bite goodies. the mini size would be perfect to make for holiday parties (again, because it makes a bunch) or as is in the jumbo muffin size and give out as gifts this holiday season. whichever you choose, you'll be delighted to find that the outcome will be just as delicious. although i do recommend making a little more (1.5x or 2x the amount) of the pecan topping because you may have more batter to pecan mixture. either that or i wasn't very good at distributing my ingredients because towards the end i found that i had more batter than nuts and those last few weren't so crunchy or sweet tasting.

12 Days of Christmas Baking - Day 3: Sticky Pecan Upside-Down Baby Cakes via design. bake. run.
these sticky pecan upside-down baby cakes look so scrumptious and are the perfect little bite-size treats at any (holiday) party or as gifts.

sticky pecan upside-down baby cakes
recipe from better homes and garden

Ingredients:
  • Nonstick spray for baking
  • 2/3 cup packed brown sugar
  • 1/2 cup butter
  • 1/3 cup honey
  • 1-1/2 cups coarsely chopped pecans
  • 1 teaspoon finely shredded orange peel
  • 2-1/2 cups all-purpose flour
  • 1 teaspoon baking powder
  • 1/2 teaspoon baking soda
  • 1/2 teaspoon salt
  • 3 eggs
  • 2 cups granulated sugar
  • 1 cup cooking oil
  • 1 8 ounce carton dairy sour cream
  • 2 teaspoons vanilla
  • Orange peel curls (optional)

Directions:
  1. Preheat oven to 350 degrees F. Lightly coat twelve 3-1/2-inch (jumbo) muffin cups with nonstick spray for baking; set aside.
  2. In a medium saucepan, combine brown sugar, butter, and honey. Cook and stir over medium heat about 2 minutes or until smooth. Remove from heat. Stir in pecans and the finely shredded orange peel; set aside.
  3. In a medium bowl, stir together flour, baking powder, baking soda, and salt; set aside.
  4. In a large bowl, combine eggs and granulated sugar. Beat with an electric mixer on medium to high speed about 3 minutes or until mixture is thick and lemon-colored. Add oil, sour cream, and vanilla; beat until combined. Gradually add flour mixture, beating on low speed until smooth.
  5. Place 2 tablespoons of the pecan mixture in the bottom of each muffin cup. Spoon a heaping 1/3 cup of the batter into each cup. Place muffin pans on a foil-lined large baking sheet.
  6. Bake for 25 to 30 minutes or until a toothpick inserted into the centers comes out clean. Cool in muffin pans on wire racks for 5 minutes. Using a sharp knife or narrow metal spatula, loosen edges of cakes from sides of muffin cups. Invert cakes onto wire racks. Spoon any pecan mixture remaining in the muffin cups onto cakes. Serve warm or cool. If desired, garnish with orange peel curls.

Makes 12 cakes. Or A LOT of mini cupcakes... like about 6 dozens?!

Note: If you're making mini cupcakes, cut down the baking time by 8-10 minutes (and use about 1 tablespoon of batter, maybe a little less – just to 2/3 or 3/4 full). To store, cooled cakes in a tightly covered container at room temperature for up to 2 days. To reheat: Place cakes on a foil-lined baking sheet. Cover loosely with foil. Bake in a 350 degrees F oven for 15 to 18 minutes or until warm.

check out last year's day 3 recipe: madeleine cookies

Friday, December 6, 2013

12 days of christmas baking - day 2: snickerdoodles

12 Days of Christmas Baking - Day 2: Snickerdoodles via design. bake. run.

okay, i'm a little slow posting day 2's recipe here. but here it is. i decided on snickerdoodles. and i have to admit, i've never really had a snickerdoodle cookie before until i finally tried blue bottle coffee's vanilla-saffron snickerdoodle a few months back. some people say why did they even put saffron in their cookie, because it totally ruins the classic taste. i'm like, does it matter? it tastes fine to me!

my mother-in-law is a big fan of snickerdoodles. she said they're super simple to make (which they are) and for some reason, if you're a sweet tooth, the sugar really comes out in this recipe. so it's like this extra sweet goodie, without too much sugar really. i mean, chocolate chip cookies use way more (or slightly more) sugar.

anyway, below's the recipe for these yummy looking cookies. it's slightly adapted from blue bottle coffee's recipe. i took out the vanilla bean and saffron because i didn't have those ingredients on hand. oh, and i added the cinnamon sugar coating to give it a more festive taste, being that it's the holidays and all. so if you'd like to try and make some, i say go ahead. enjoy and happy baking! :)

snickerdoodles
recipe adapted from blue bottle craft of coffee cookbook

ingredients:
  • 2 cups (9.9 oz / 280 g) all-purpose flour
  • 1 teaspoon baking soda
  • 1/2 cup (4 oz / 113 g) unsalted butter, at room temperature
  • 1/2 cup (3.5 oz / 100 g) granulated sugar
  • 1/2 cup (3.8 oz / 109 g) packed light brown sugar
  • 1 teaspoon kosher salt
  • 1 egg (1.8 oz / 50 g), at room temperature
  • 2 tablespoons milk
  • 1 teaspoon vanilla extract

optional (to coat the dough before baking):
  • 1/4 cup sugar
  • 2 tablespoons ground cinnamon

directions:
  1. Preheat oven to 350°F (175°C).
  2. Sift the flour and baking soda into a medium bowl.
  3. In the bowl of a stand mixer fitted with the paddle attachment, beat the butter on low speed until smooth, 1 to 2 minutes. Add the granulated sugar, brown sugar, and salt and mix on low speed until well combined. Scrape down the sides of the bowl, then mix on medium speed until light and fluffy, 4 to 5 minutes.
  4. In a medium bowl, combine the egg, milk, and vanilla extract and whisk vigorously until well blended. With the mixer on medium speed, add the egg mixture very slowly, in a steady stream, and mix until well-incorporated and very smooth, about 30 seconds. Scrape down the sides of the bowl, then mix on medium speed for 30 more seconds. Scrape down the sides of the bowl, then add the flour mixture. Mix on low speed just until uniform in texture.
  5. Line a baking sheet with parchment paper or a silicone mat. Roll 1 tablespoon portions of the dough into balls (and if you want to roll them in the cinnamon sugar mix, this is when you do it). Then place them on the baking sheet, spacing them at least 2 inches (5 cm) apart. Bake for about 10 minutes, until golden but not too dark, rotating the pan midway through the baking time. Ideally, the baked cookies will be tall and slightly undercooked in the center, and will buckle shortly after coming out of the oven. If the cookies don't buckle, don't worry; they'll still be delicious. Let the cookies cool on the pan for 10 minutes before removing. These cookies are best when eaten warm, shortly after they come out of the oven. However, they can be stored in an airtight container at room temperature for up to 2 days. Alternatively, the dough can stored in an airtight container in the refrigerator for up to 5 days, so consider baking only as many cookies as needed and saving the rest of the dough to bake another day.

makes about 4 dozen small cookies or 9 large cookies (1/4-cup dough balls, bake for 16 mins).

check out last year's day 2 recipe: chocolate snowcap cookies

Monday, December 2, 2013

12 days of christmas baking - day 1: soft chocolate chip cookies

12 Days of Christmas Baking - Day 1: Soft Chocolate Chip Cookies via design. bake. run.

happy december! is it really december, already?! well, that's okay... because this is THE best time of the year. i do love the holidays; it's the perfect excuse of all that baking. ;)

last december i decided i would chronicle my 12 days of christmas baking. i've done it the the past, just never wrote about it. last year's was quite a success in my eyes because i had plenty of eaters to gobble up all the goodies. but not just that, i actually baked all those days in a row, or close to it anyway. this year, i'm not so sure. but regardless, i will go ahead and do my 12 days of christmas baking again. i have new recipes i'd like to try this year. this first one here was one i stumbled upon on pinterest. i have to say the cream cheese as the secret ingredient in this chocolate chip cookies recipe was a surprising but pleasant and effective ingredient. it actually yields softer cookies. and they're not as sweet so if you aren't the so-sweet kind of person, then this is the one for you. i love how soft these cookies stayed even a day or two later. it's unlike any of the chocolate chip cookies i've tried in the past. now, is it the best ever chocolate chip cookies i've baked or eaten? ummm... that's a toughy. i wouldn't say it's the best ever, but it's one that i'd probably make again when i feel like it and have cream cheese lying around.

below's the recipe should you like to make some. it's pretty easy, so why not?! chocolate chip cookies are a classic and they do make for the perfect gift this holiday season. :)

Soft Chocolate Chip Cookies via design. bake. run.
cream cheese is the secret ingredient in these chocolate chip cookies. it produces a less sweeter cookie, soft and delicious in every bite.

12 Days of Christmas Baking - Day 1: Secret Ingredient Chocolate Chip Cookies via design. bake. run.
i love how these cookies stay soft even days later. just make sure you keep it in an airtight container.

secret ingredient chocolate chip cookies
recipe from just a taste

ingredients:
  • 2 1/4 cups all-purpose flour
  • 1 teaspoon baking soda
  • 1 teaspoon salt
  • 3/4 cup (1 1/2 sticks) unsalted butter, at room temp
  • 1/4 cup cream cheese, at room temp
  • 1/2 cup sugar
  • 1 cup packed light brown sugar
  • 1 1/4 teaspoons vanilla extract
  • 2 large eggs
  • 2 cups semi-sweet chocolate chips

directions:
  1. in a medium bowl, whisk together the flour, baking soda and salt.
  2. n the bowl of a stand mixer fitted with the paddle attachment, cream together the butter, cream cheese, sugar, light brown sugar and vanilla extract until light and fluffy, about 2 minutes, scraping down the sides as needed. add the eggs, one at a time, beating well after each addition. add the flour mixture, beating to combine, then stir in the chocolate chips.
  3. cover the bowl with plastic wrap and refrigerate the dough for a minimum of 2 hours and up to 3 days.
  4. when ready to bake, preheat the oven to 375°F and line two baking sheets with parchment paper or silpats.
  5. drop 2- to 3-tablespoon mounds of dough onto the baking sheets, spacing the mounds at least 2 inches apart.
  6. bake the cookies for 9 to 11 minutes, or until golden brown. cool the cookies on the baking sheets for 2 minutes then transfer them to a wire rack to cool completely.

makes a good amount depending on how big your dough mounds are. mine were about a tablespoon or two and i got about 3-4 dozen (2-3 inches) cookies. enjoy and happy baking and eating!

notes: measure 1/4 cup cream cheese by spooning/scraping it into a dry measuring cup and leveling it off.

Tuesday, December 18, 2012

12 days of christmas baking - day 12: holiday biscottis

Biscottis via design. bake. run.

on this very last day of my 12 days of christmas baking i am ending with these delicious chocolate drizzled biscottis. i don't make biscottis very often and when i do, it's usually around this time of year. i love how you can make these ahead of time and have them ready for any occasion. these are great for gift-giving, especially if you have to mail them off somewhere. for sure they will not spoil because of their low-moisture content. that is always a plus when you know it'll be a while before they get eaten.

well, below's the recipe should you want to make some yourself. again, these are simple and easy to make. this have been my go-to recipe for many many christmases. the things i put in varies though. sometimes it's with cranberries and pistachio (like here), others it's with chocolate chips or raisins and walnuts. you can pick whatever you like. and to add that festive feel, you can follow the recipe below as is or create your own. i just went with a chocolate drizzle instead. enjoy! :)

Biscottis via design. bake. run.
i love making biscottis. they're simple and easy to make and you can make a bunch ahead of time! plus, they are delicious as well. :)

Biscottis via design. bake. run.
eat up! :)

holiday biscottis
recipe from giada @ the food network

ingredients:
2 cups all-purpose flour
1 1/2 teaspoons baking powder
3/4 cup sugar
1/2 cup (1 stick) unsalted butter, room temperature
1 teaspoon grated lemon zest
1/4 teaspoon salt
2 large eggs
3/4 cup pistachios, coarsely chopped
2/3 cup dried cranberries
12 ounces good-quality white chocolate, chopped
Red and green sugar crystals, for garnish

directions:
Preheat the oven to 350 degrees F.

Line a heavy large baking sheet with parchment paper. Whisk the flour and baking powder in a medium bowl to blend. Using an electric mixer, beat the sugar, butter, lemon zest, and salt in a large bowl to blend. Beat in the eggs 1 at a time. Add the flour mixture and beat just until blended. Stir in the pistachios and cranberries.

Form the dough into a 13-inch long, 3-inch wide log on the prepared baking sheet. Bake until light golden, about 40 minutes. Cool for 30 minutes.

Place the log on the cutting board. Using a sharp serrated knife, cut the log on a diagonal into 1/2 to 3/4-inch-thick slices. Arrange the biscotti, cut side down, on the baking sheet. Bake the biscotti until they are pale golden, about 15 minutes. Transfer the biscotti to a rack and cool completely.

Stir the chocolate in a bowl set over a saucepan of simmering water until the chocolate melts. Dip half of the biscotti into the melted chocolate. Gently shake off the excess chocolate. Place the biscotti on the baking sheet for the chocolate to set. Sprinkle with the sugar crystals. Refrigerate until the chocolate is firm, about 35 minutes.

Note: The biscotti can be made ahead. Store them in an airtight container up to 4 days, or wrap them in foil and freeze in resealable plastic bags up to 3 weeks.

Monday, December 17, 2012

12 days of christmas baking - day 11: peppermint bark

Milk Chocolate and White Chocolate Peppermint Bark via design. bake. run.

i was short on time this morning so for the 11th day of my christmas baking, i went with a no-bake holiday classic. yes, the ever so popular peppermint bark. typically you could just use white chocolate but today i decided that i'd do some milk chocolate version as well. i guess i could have combined both all in one so you get a little bit of each, but instead i did them separately. these are so good especially if you're a chocolate lover. the peppermint adds that nice christmas-y and festive feel to these chocolates. they really are delish! plus, it's so easy to make, you cannot pass up making these this holiday season.

below's the recipe should you be interested. i say go ahead and make some yourself! enjoy. :)

Black & White Peppermint Bark via design. bake. run.
we love peppermint bark. this classic christmas candy is perfect for any day of the week or gift-giving... and they're so easy to make too!

Chocolate & White Chocolate Peppermint Bark via design. bake. run.
here's another shot of these delicious peppermint bark :)

black & white peppermint bark
recipe adapted from all recipes

ingredients:
8 ounces high-quality semisweet chocolate, broken into pieces
2 teaspoons canola oil, divided
1/2 teaspoon peppermint extract, divided
8 ounces high-quality white chocolate, broken into pieces
25 peppermint candies or 6 candy canes, crushed

directions:
  1. Lightly grease a 2 9x9 inch pan and line with waxed paper, smoothing out wrinkles; set aside.
  2. Place the semisweet chocolate and 1 teaspoon of the canola oil in the top of a double boiler over just barely simmering water, stirring frequently and scraping down the sides with a rubber spatula to avoid scorching. When the chocolate is melted, stir in 1/4 teaspoon of the peppermint extract. Pour the melted chocolate into the prepared pan, and spread evenly over the bottom of the pan. Sprinkle half of the crushed peppermints over the chocolate layer. Refrigerate until completely hardened, about 1 hour.
  3. Repeat the steps above for the white chocolate portion.

note: if you want to make them all in the same pan (similar to ghirardelli's), then instead of prepping 2 pans, use just one and pour the white chocolate mixture on top of the semisweet one (just make sure you cool the semisweet mixture completely first). then wait until they're set before breaking them. enjoy! :)

Friday, December 14, 2012

12 days of christmas baking - day 10: chocolate chip cookies with nutella & sea salt

Chocolate Chip Cookies with Nutella & Sea Salt via design. bake. run.

last night we went and watched the nutcracker ballet. it's a traditional annual christmas thing with us. since we got home late and i didn't have time to make something time-consuming or intricate, i decided on your classic chocolate chip cookies, but with a slight twist. instead of the typical, i added in a dab of nutella inside the cookies and sprinkled sea salt on top before putting them in the oven. i have to say the added ingredients add a nice touch to the classic cookie. below's my favorite (so far!) chocolate chip recipe, with the two new ingredients added. feel free to try and make some yourself and let me know how they turn out! happy baking. :)

Chocolate Chip Cookies with Nutella & Sea Salt via design. bake. run.
i love the added nutella and sea salt in these chocolate chip cookies. so good!

Chocolate Chip Cookies with Nutella & Sea Salt via design. bake. run.
mmmm... yum. these cookies with a nice glass of milk is just perfect!

chocolate chip cookies with nutella & sea salt
recipe adapted from cook's illustrated

ingredients:
2-1/8 cups bleached all-purpose flour (about 10 1/2 ounces)
1/2 tsp table salt
1/2 tsp baking soda
12 tbsp unsalted butter (1 1/2 sticks), melted and cooled slightly
1 cup brown sugar (light or dark), 7 ounces
1/2 cup granulated sugar (3 1/2 ounces)
1 large egg
1 large egg yolk
2 tsp vanilla extract
1-2 cups chocolate chips or chunks (semi or bittersweet)
1 jar of nutella (you won't need the whole jar, just some)
sea salt

directions:
  1. Heat oven to 325 degrees. Adjust oven racks to upper- and lower-middle positions. Mix flour, salt, and baking soda together in medium bowl; set aside.
  2. Either by hand or with electric mixer, mix butter and sugars until thoroughly blended. Mix in egg, yolk, and vanilla. Add dry ingredients; mix until just combined. Stir in chips.
  3. Form scant 1/4 cup dough into ball. Using finger or thumb, make an indentation and scoop 1/2 tsp of Nutella and put it in. Then close up the dough (roll it back into a ball again). Place formed dough onto one of two parchment paper-lined 20-by-14-inch lipless cookie sheets, about nine dough balls per sheet. Lightly press down on the cookie dough and sprinkle sea salt over it. Smaller cookie sheets can be used, but fewer cookies can be baked at one time and baking time may need to be adjusted.
  4. Bake, reversing cookie sheets’ positions halfway through baking, until cookies are light golden brown and outer edges start to harden yet centers are still soft and puffy, 15 to 18 minutes (start checking at 13 minutes). Cool cookies on cookie sheets. Serve or store in airtight container.
Makes 18-20 large (3-inch) cookies. Enjoy!

Note: To ensure a chewy texture, leave the cookies on the cookie sheet to cool.

Thursday, December 13, 2012

12 days of christmas baking - day 9: chocolate-almond saltine toffee

Chocolate-Almond Saltine Toffee via design. bake. run.

this is another great recipe and i'm definitely doing this again next year or whenever i feel like making toffee. actually, i'll be making them again in the next few days to send out to people in my yearly christmas baked goodies sent-outs. yes, every year i send random people my baked goods. i think these will do just fine during the delivery process (or so i hope).

this recipe is fantastic i say. i love how the saltine adds an extra crunch and the salty-ness of the cracker is definitely welcome. i love anything with a nice hint of salt. okay, below's the recipe should you be interested. they're pretty easy to make and took no time at all. enjoy!

Chocolate-Almond Saltine Toffee via design. bake. run.
these salted caramel chocolate pecan bars really hit the spot. so. good.

Chocolate-Almond Saltine Toffee via design. bake. run.
another shot of these delicious bars

Chocolate-Almond Saltine Toffee via design. bake. run.
the saltine really adds a little something to your typical toffee. very good!

chocolate-almond saltine toffee
recipe from food & wine

ingredients:
1 1/2 cups sliced almonds (6 ounces)
approximately 60 saltine crackers (not low-sodium)
1 1/2 cups sugar
3 sticks (3/4 pound) unsalted butter
2 tablespoons light corn syrup
1/2 pound bittersweet chocolate, chopped into 1/2-inch pieces

directions:
Preheat the oven to 350°. Spread the almonds on a baking sheet and toast for about 6 minutes, until golden.

Line a 12-by-17-inch rimmed baking sheet with a silicone mat or lightly buttered parchment paper. Arrange the saltine crackers on the baking sheet in a single layer, patching any holes with cracker bits; slight gaps are okay.

In a medium saucepan, combine the sugar, butter and corn syrup and cook over low heat until the sugar is melted. Brush the side of the pan with a moistened pastry brush to wash down any sugar crystals. Cook the syrup over moderate heat without stirring until it starts to brown around the edge, about 5 minutes. Insert a candy thermometer into the syrup and simmer, stirring with a wooden spoon, until honey-colored caramel forms and the temperature reaches 300°, about 6 minutes longer.

Slowly and carefully pour the caramel over the crackers, being sure to cover most of them evenly. Using an offset spatula, spread the caramel to cover any gaps. Let cool for 3 minutes, then sprinkle the chopped chocolate evenly on top. Let stand until the chocolate is melted, about 3 minutes, then spread the chocolate evenly over the toffee. Spread the almonds evenly over the chocolate. Freeze the toffee until set, about 15 minutes.

Invert the toffee onto a work surface and peel off the mat or paper. Invert again, break into large shards and serve.

MAKE AHEAD The chocolate-almond saltine toffee can be refrigerated for up to 2 weeks in an airtight container.

makes 2-1/2 pounds. happy eating. :)

Wednesday, December 12, 2012

12 days of christmas baking - day 8: salted caramel chocolate pecan bars

Salted Caramel Chocolate Pecan Bars via design. bake. run.

i have to say these are one of the best and easiest pecan bars i've ever made! actually, it's my first ever pecan bars i've ever made. ;) but that's besides the point. the point here is, these are so good, you must make some yourself! the salted caramel is just delish! and that added chocolate on top? yummy! everything about this bar is simply tummy-satisfying good. plus, it's so easy and simple to make with such few ingredients, why not?! so i say go ahead and make some today.

below's the recipe. do say you'll make some and let me know if you agree or disagree? i found this recipe on pinterest, and i'm so glad i did, because it is officially now a christmas/holiday keeper! actually, i may just make some throughout the year too. we'll see! enjoy. :)

Salted Caramel Chocolate Pecan Bars via design. bake. run.
these salted caramel chocolate pecan bars really hit the spot. so. good.

Salted Caramel Chocolate Pecan Bars via design. bake. run.
another shot of these delicious bars

Salted Caramel Chocolate Pecan Bars via design. bake. run.
i think i may have to make another batch of these before christmas!

salted caramel chocolate pecan bars
recipe adapted from southern living

ingredients:
1 cup chopped pecans
12 whole graham crackers
1 cup firmly packed brown sugar
1/2 cup butter
2 tablespoons whipping cream
1 teaspoon vanilla extract
1/4 teaspoon kosher salt
1 cup chocolate chips

directions:
  1. Preheat oven to 350°. Bake pecans in a single layer in a shallow pan 10 to 12 minutes or until toasted and fragrant, stirring halfway through.
  2. Line a 15- x 10-inch jelly-roll pan with aluminum foil; lightly grease foil. Arrange graham crackers in a single layer in prepared pan, slightly overlapping edges.
  3. Combine sugar, butter, and cream in a medium-size heavy saucepan; bring to a boil over medium heat, stirring occasionally. Remove from heat, and stir in vanilla and pecans. Pour butter mixture over crackers, spreading to coat.
  4. Bake at 350° for 10 to 11 minutes or until lightly browned and bubbly.
  5. Immediately top warm bars with the chocolate chips. Let stand 3 minutes, and spread chocolate over bars. Then sprinkle with salt, and slide foil from pan onto a wire rack. Cool completely (about 30 minutes). Then chill for 20 minutes before breaking into bars and serving.

makes 4 dozen. happy eating. :)
Related Posts Plugin for WordPress, Blogger...