whooo hooo! so here's my first post of 2015. it only took me 25 days into the new year, so that's not too bad considering i haven't posted any recipes lately, or more like months with the exception of those mini pecan tarts last month.
okay, so i was inspired by miss martha stewart after watching one of her episodes of martha bakes, featuring citrus baked goodies. you see we are in the winter season and winter is known for its abundance of citrus fruits. we have a small lemon tree growing out back in our garden and it's bursting with lots and lots of lemons! i've never seen this many lemons on our tree before, it's incredible. i mean... i'm so excited because the endless possibility of anything lemon is amazing. of course, i just need to muster enough energy to bake or create delicious yummy looking and tasting things. we'll see where that takes me. but for now, yes... i've made these perfect little lemony and creamy squares. they are perfectly sweet and creamy with the condense milk, but yet at the same time the tartness in the lemons come through. it is just amazing. it's like a nice burst of goodness in your mouth.
below's the recipe should you want to make some yourself. i did a mini hybrid of two recipes in one. i couldn't be bothered to make the shortbread crust and opted for a graham cracker crust instead. i've made the shortbread a bunch of times, so the graham cracker crust with the lemon squares is a new thing. i'd say it's not too bad, just a tad crumbly when you eat it, but still delicious. i ate every little bit of it, to the last crumb even! ;)
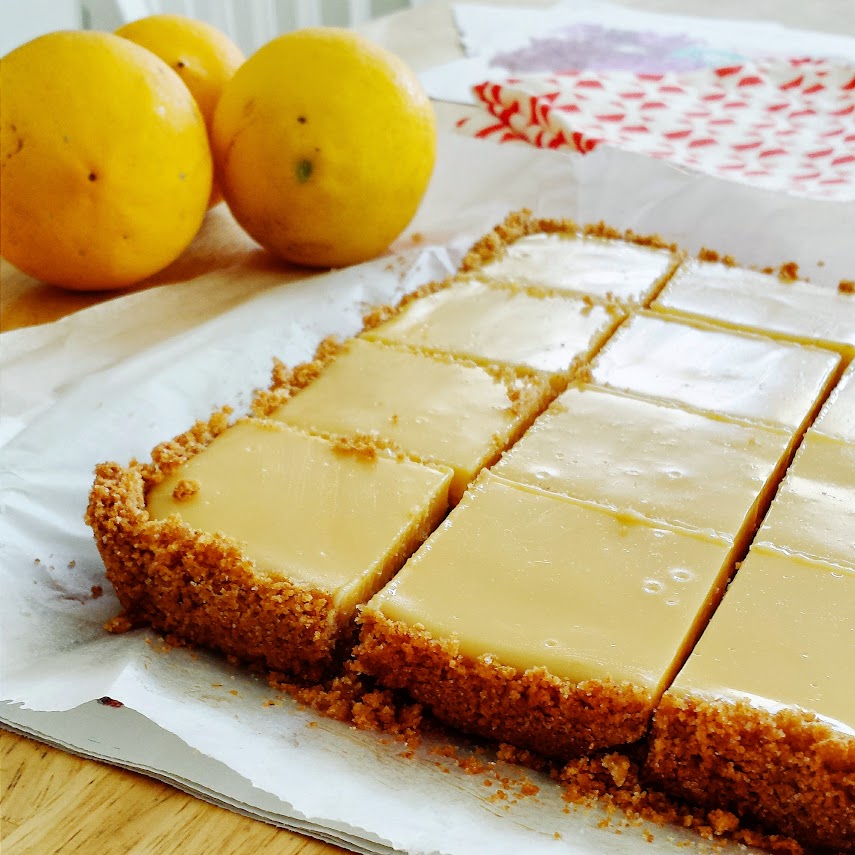
creamy lemon squares
recipe adapted from martha stewart's lime squares recipes
ingredients:
for the crust
- 4 tablespoons (1/2 stick) unsalted butter, melted and cooled, plus more for pan
- 1-1/2 cup (about 24 squares) graham-cracker crumbs
- 1/4 cup sugar
for the filling
- 2 large egg yolks
- 1 can (14 ounces) sweetened condensed milk
- 1/2 cup fresh lemon juice (i used 3 lemons)
directions:
- Preheat oven to 350 degrees. Brush an 8-inch square baking dish with melted butter. Line bottom with parchment paper, leaving a 2-inch overhang on two sides.
- In a food processor, finely grind the graham-cracker squares. Then add in sugar and butter and blend to mix. Press mixture into bottom and 1 inch up sides of prepared pan. Bake until lightly browned, 8 to 12 minutes. Cool crust, 30 minutes.
- To make the filling: In a large bowl, whisk together egg yolks and condensed milk. Add lemon juice; whisk until smooth. Pour filling into cooled crust; carefully spread to edges.
- Bake until set, about 15 minutes. Cool in pan on rack; then chill at least 1 hour before serving. Using parchment paper overhang, lift out of pan, and transfer to a cutting board. With a serrated knife, cut into 16 squares, wiping knife with a damp kitchen towel between each cut.
makes 16 squares. enjoy! :)