Showing posts with label cookies. Show all posts

Friday, April 25, 2014

martha stewart's outrageous chocolate cookies

Martha Stewart's Outrageous Chocolate Cookies via design. bake. run.

i'm always a fan of a good cookie (recipe). this one here is for sure a keeper. plus, it comes from good old martha, which is a major plus. and on top of that, it's chocolate! what i love most about this recipe though is the fact that i don't need any fancy ingredients. everything you see here are items you pretty should have in stock already (assuming you are the occasional baker). or even if you don't, you can get these items easily with a quick trip to the grocery store.

these chocolate cookies are great. i love how soft and chewy they are. it's almost like eating a brownie, but in a cookie form. they make for great gifts as well. i actually made these for a girls night in event and we all loved it. well, i know i did. ;)

so if you're craving for some chocolates, or (chocolate) cookies.. why not give this a try? you won't be disappointed. :)

Martha Stewart's Outrageous Chocolate Cookies via design. bake. run.

Martha Stewart's Outrageous Chocolate Cookies via design. bake. run.

martha stewart's outrageous chocolate cookies
recipe from here

ingredients:
  • 8 ounces semisweet chocolate, roughly chopped
  • 4 tablespoons unsalted butter
  • 2/3 cup all-purpose flour
  • 1/2 teaspoon baking powder
  • 1/2 teaspoon salt
  • 2 large eggs
  • 3/4 cup packed light-brown sugar
  • 1 teaspoon pure vanilla extract
  • 1 package (12 ounces) semisweet chocolate chunks

directions:
  1. preheat the oven to 350 degrees.
  2. heat chopped chocolate and butter in a microwave-safe bowl in 20-second increments, stirring between each, until almost melted; do not overheat.
  3. in another bowl, whisk together flour, baking powder, and salt.
  4. in a mixing bowl, beat eggs, brown sugar, and vanilla on high speed until light and fluffy. reduce speed to low; beat in melted chocolate. mix in flour mixture until just combined. stir in chocolate chunks.
  5. drop heaping tablespoons of dough 2 to 3 inches apart onto baking sheets.
  6. bake, rotating sheets halfway through, until cookies are shiny and crackly yet soft in centers, 12 to 15 minutes. cool on baking sheets 10 minutes; transfer to a wire rack to cool completely. or if you prefer (which is what i do) you can eat them after they've cooled a little bit. typically that's a few minutes out of the oven. they taste best warm, i think.

note: don't worry if the batter seems thin. it should look more like a brownie batter than a cookie dough. oh, and do not bake the cookies to a crisp; they are meant to be soft and chewy.

Thursday, March 6, 2014

white chocolate biscotti

White Chocolate Biscotti via design. bake. run.

lent started yesterday. my MIL is giving up cookies for lent. as a little cookie send-off, i baked her some of her favorite cookies, biscotti, monday night and finished it tuesday morning; so she could eat the entire batch to her heart's content. hehehe ;)

i don't make biscottis very often. i've only made it a few times and always with the same recipe. but this time around i decided i'd try a different recipe. after a quick search online and going through multiple recipes, i settled on one from myrecipes. theirs seemed simple enough (and it was!).

as i said above, i've only made biscotti with one recipe in the past. this one from myrecipe was slightly different and uses no butter. i have never made biscotti without butter before (never even knew that traditional biscottis were made without butter!). anyway, these biscotti are so, so good. must be because they contain no butter, the way they should be made. this recipe produces the most super crunchy biscottis ever, especially if you eat it soon after they've cooled. i absolutely love the white chocolate-vanilla combo because it is like the perfect little bite of sweetness in your mouth. and the added lemon zest is a wonderful little surprise too. it's like a hint of freshness, refreshing and delicious.

so what are you waiting for? if you're a fan of biscotti, why not bake some today?!! and if you're not, you'll instantly become a fan. m doesn't care for biscotti, but he absolutely loves these. :)

White Chocolate Biscotti via design. bake. run.
this biscotti recipe is so simple to make and produces the most crunchiest biscotti ever.

White Chocolate Biscotti via design. bake. run.
these are insanely good. i've never thought i'd love biscottis this much. i seriously ate 3 in a row.

White Chocolate Biscotti via design. bake. run.
i absolutely love how these contain only 55 calories in one serving. i could have 2 biscottis and not feel guilty at all!

white chocolate biscotti
recipe adapted from myrecipes.

ingredients:
  • 3/4 cup sugar
  • 2 teaspoons grated lemon rind
  • 1 teaspoon vanilla extract
  • 2 large eggs
  • 1 2/3 cups all-purpose flour
  • 1/2 teaspoon baking soda
  • 1/4 teaspoon salt
  • 1 1/4 cups (6-ounce) bar premium white chocolate, chopped or 1/2 bag of white chocolate baking chips

directions:
  1. preheat oven to 300°F.
  2. place first 4 ingredients in a large bowl; beat with a mixer at medium speed until well blended. lightly spoon flour into dry measuring cups; level with a knife. combine flour, baking soda, and salt; gradually add to sugar mixture, beating until well blended. stir in chocolate.
  3. turn dough out onto a baking sheet coated with cooking spray. shape dough into 2 (12-inch-long) rolls; pat to 2 1/2-inch width.
  4. bake at 300° for 35 minutes. remove rolls from baking sheet; cool 10 minutes on a wire rack.
  5. cut rolls diagonally into 24 (1/2-inch) slices. place, cut sides down, on baking sheet. bake at 300° for 10 to 12 minutes. turn cookies over; bake an additional 10 minutes (cookies will be slightly soft in center but will harden as they cool). remove from baking sheet; cool completely on wire rack.


makes 24 (or however many depending on how thick/thin you slice it). these taste most delicious on the day they're baked, but will keep in an air-tight container for a few days.

55 calories per serving.

Tuesday, February 18, 2014

oatmeal-raisin cookies

Oatmeal-Raisin Cookies via design. bake. run.

what do you do when you have a bunch of rolled oats around? umm... like A LOT!?! well, you make oatmeal cookies, of course. what else? okay, maybe a lot more other stuff… but oatmeal cookies will do for now.

i'm actually not a fan of oatmeal cookies because traditionally it's got raisins and cinnamon in it. both things i don't always care for when combined together. but m loves the classic oatmeal cookie so i went ahead and made some anyway. actually, i divided the dough and threw in some butterscotch chips for half the lot and kept the other half classic.

the recipe is super simple to make and makes a ton if you drop them by the teaspoon or tablespoon size. so if you've got some rolled oats or even quick-cooking oatmeal around, why not bake some today?! :)

The Classic Oatmeal Raisin Cookies via design. bake. run.
this recipe makes a lot and are perfect for gift-giving or sharing with others.

Classic Oatmeal-Raisin Cookies via design. bake. run.
i'm not a big fan of raisins, but this recipe is a classic for any oatmeal-raisin cookie fan and super versatile with different stir-in options (i also used butterscotch chips). m loves the classic taste, but is also a big fan of the other butterscotch version.

oatmeal cookies
recipe from better homes & gardens

ingredients:
1 cup butter, softened
1 1/2 cups packed brown sugar
1 teaspoon baking soda
1 teaspoon ground cinnamon
1/2 teaspoon salt
2 eggs
1 teaspoon vanilla
1 1/2 cups all-purpose flour
3 cups regular or quick-cooking rolled oats
1 cup raisins*

directions:
Preheat oven to 350 degrees F. In a large bowl beat butter with an electric mixer on medium to high speed for 30 seconds. Add brown sugar, baking soda, cinnamon, and salt. Beat until combined, scraping sides of bowl occasionally. Beat in eggs and vanilla until combined. Beat in as much of the flour as you can with the mixer. Stir in any remaining flour. Stir in oats and raisins.

Drop dough by rounded teaspoons or tablespoons 2 inches apart onto ungreased cookie sheets. Or drop dough using a cookie scoop or 1/4-cup measure 3 inches apart onto ungreased cookie sheets.

Bake in the preheated oven about 8 minutes for spoon-size portions (bake about 12 minutes for cookie-scoop or 1/4-cup portions) or until edges are light brown and centers appear set. Cool on cookie sheet for 2 minutes. Transfer to a wire rack; cool completely.

to store:
Layer cookies between sheets of waxed paper in an airtight container; cover. Store at room temperature for up to 3 days or freeze for up to 3 months.

*note: if you're not a big fan of raisins, you can certainly substitute a different stir-in option here. chocolate chips is one option, or butterscotch chips (like i did) or even nuts, dried fruits or coconut flakes. whatever your little heart desires. i'm thinking white chocolate chips with some coconut flakes would be perfect. i'll have to make this again with that variation. just keep in mind that whatever you do, you keep the substitute ingredient(s) to 1 cup.

Monday, January 20, 2014

salted caramel chocolate chip cookies

Bourbon Sea Salt Caramel-Filled Chocolate Chip Cookies via design. bake. run.

happy new year! yes, it took a whole 20 days after the new year for this post. i've been busy and lazy (yes, both at the same time) therefore that's why i haven't posted any new recipes or any entries here. plus, i haven't been baking a whole lot. haven't had the effort or energy to since the holidays. and also the fact that i've been trying to cut down on my sweets intake. decided that if i didn't bake, i wouldn't have any around. the only things i've made so far are some macaron cookie samples (testing out shell colors for a baby shower – post and recipe to come later) and your classic, chocolate chip cookies. i made some a few weeks ago. anyway, i've made some again, except for this time i decided i would try to use up those bourbon-sea salt caramels i made during the holidays. yeah, we didn't really eat all that caramel. it was a lot. plus, they didn't quite hold at room temperature. maybe i took them off the heat too quickly or who knows what. but anyway, i still got some pretty tasty caramels out of it.

alright, below's the recipe for these delicious-looking chocolate chip cookies. i made these goodies over the weekend for m's birthday party. and yes, it was a hit with all the cookie and non-cookie lovers. i've been limiting my sweets intake and i couldn't help it. i ate at least 1-1/2 cookies in one sitting. i had to stop myself. so if you're up to baking some cookies or changing up that good ol' chocolate chip cookie recipe a bit, add in some of these bourbon-sea salt caramels (or any soft caramels) to that recipe for a brand new cookie!

Salted Caramel Chocolate Chip Cookies via design. bake. run.
how can you not dig in and eat at least one, if not two, or three or four of these deliciously caramel filled cookies in one sitting? they are ooey gooey good, especially right out of the oven and cooled slightly.

Salted Caramel Chocolate Chip Cookies via design. bake. run.
i love how the caramel makes an appearance once they're baked. depending on how you cover up the caramel with the cookie dough, you'll get some like this and some all covered up. you won't see the caramel until you break into it, a really nice surprise.

bourbon-sea salt caramel-filled chocolate chip cookies

ingredients:
  • 1 stick of butter, softened
  • 1 egg
  • 1 egg yolk
  • 1-3/4 cup flour
  • 3/4 cup sugar
  • 3/4 cup brown sugar
  • 1/2 tsp baking powder
  • 1/2 tsp baking soda
  • pinch of salt
  • 12 oz (or 1 bag) chocolate chips, any kind is fine
  • 18-24 pieces of bourbon-sea salt caramel or any soft caramel of your choice

directions:
  1. preheat oven to 350°F. line baking sheet with parchment paper or silicone sheet.
  2. cream softened butter (or melt butter in microwave safe bowl) and sugar together. then add in the egg. once mixed, add in the baking soda, baking powder, salt and flour. mix until incorporated, then add in the chocolate chips.
  3. scoop out a tablespoon portion (ball-like) and make an indent in the middle and place (or push in) the soft caramel. then spoon out a little bit more dough and cover the caramel. shape the cookie dough into a ball and place it onto the baking sheet. make sure to spread them out at least 2 to 3 inches apart. these cookies will spread so you may just want to put 9 cookies on a sheet versus say a typical 12.
  4. bake for 10-12 minutes until golden but still soft in the center (baking time varies depending on how chewy or crunchy you like your cookies). let the cookies cool down a little bit on the cookie sheet before transfering them onto a cooling rack. after a few minutes, they're ready to eat! best eaten warm when the caramel is still gooey. yum. enjoy. :)

makes 18-24 large cookies. enjoy! :)

Thursday, December 19, 2013

12 days of christmas baking - day 7: caramel-filled chocolate cookies

12 Days of Christmas Baking - Day 7: Caramel-Filled Chocolate Cookies via design. bake. run.

i have been wanting to bake some chocolate cookies with caramel filling after stumbling upon some crazy good-looking photos of these cookies on pinterest. so, finally, here is my take on it! i didn't have any soft caramels lying around the house and didn't feel up to making my own from scratch so i used some kraft caramel bits and heated it in the microwave with a little bit of water to water it down so that it would be soft enough for a filling (but not too liquify like a sauce). the end result? some tasty chocolate cookies, for sure.

so below's the recipe should you want to bake a batch yourself. these cookies are best eaten warm. you definitely cannot pass up warm baked cookies this time of year, especially when they're filled with oozing caramel. yummmm-y! :)

12 Days of Christmas Baking - Day 7: Caramel-Filled Chocolate Cookies via design. bake. run.
these chocolate cookies with caramel filling are best enjoy warm. make sure you only cool the cookies slightly so that the caramel is still oozing out of them when you break into it.

12 Days of Christmas Baking - Day 7: Caramel-Filled Chocolate Cookies via design. bake. run.
soft caramels produce the best results in these caramel-filled chocolate chip cookies.

12 Days of Christmas Baking - Day 7: Caramel-Filled Chocolate Cookies via design. bake. run.
any chocolate and caramel lover would not be able to resist this tasty treat. so go ahead and bake a bunch and give it away as a mini gift this holiday season!

chocolate cookies with caramel filing

ingredients:
  • 1 cup all-purpose flour
  • 1/3 cup cocoa powder
  • 3/4 cup sugar
  • 1/4 cup brown sugar
  • 1/2 tsp baking powder
  • a pinch of salt
  • 1 egg
  • 1/4 cup (1/2 stick) butter, room temperature
  • 12 soft caramels
  • some sea salt (for sprinkling, optional)

directions:
  1. preheat oven to 350°f. line a baking sheet with parchment paper or a silicone mat.
  2. sift the flour, cocoa powder, and baking powder into a medium bowl.
  3. in the bowl of a stand mixer fitted with the paddle attachment (or you can use a medium-size bowl with a handmixer like i do), beat the butter on low speed until smooth, 1 to 2 minutes. add the sugar and mix on low speed until well combined. then mix on medium speed until the mixture gets lighter in color and texture becomes fluffier, about 5 minutes.
  4. with the mixer on medium speed, add the egg and mix until well-incorporated and very smooth, about 30 seconds. then mix on medium speed for 30 more seconds. feel free to scrape down the sides to get all the mixture in.
  5. then add the flour mixture. mix on low speed just until uniform in texture. mix on low until everything is combined.
  6. using a cookie scoop (about 1 tablespoon in size), scoop out 1-1/2 tablespoons and form into a ball. place them on the baking sheet, spacing them at least 2 inches apart. then using your finger or thumb, make an indentation in the center and put in your soft caramel (or you can just lightly squash in the caramel). at this point, you can sprinkle a little bit of sea salt on top of the caramel if you like and cover it up with a little bit of dough to seal it. make sure the caramel isn't visible so that when it bakes it will be contained until you break into it.
  7. bake for 10-12 minutes, until the cookies are slightly firm to the touch and the surface is no longer glossy, rotating the pan halfway through the baking time.
  8. let the cookies cool on the pan for a few minutes before removing. then eat and enjoy! best enjoy warm. of course, you can store them in an airtight container at room temperature for 3 days. or if you don't want to use all the dough at once, the dough can be stored in an airtight container in the refrigerator for up to 5 days.
makes a dozen 3-inch cookies.

check out last year's day 7 recipe: peppermint and coffee nutella french macarons

Tuesday, December 17, 2013

12 days of christmas baking - day 5: jam thumbprints

12 Days of Christmas Baking - Day 5: Jam Thumbprints via design. bake. run.

hello there! here is day 5's recipe – jam thumbprints. i have to say they are for sure some of my favorite things this time of year. i went through the entire holiday season last year without making these goodies because there were so many other recipes i wanted to try last time. but this year, i'm not skipping out on these guys again. they are so, so good. i love how buttery the cookies are and those coconut flakes/pieces gives you that nice added crunch.

this particular jam thumbprint recipe is near and dear to my heart. it was one of the first cookie recipes i ever baked when i started baking several years back. after having c and being home during the holidays, i watched so many food network cooking shows, ina garten's barefoot contessa to be more precise. i couldn't help it but pick up my mother-in-law's hand mixer and try ina's jam thumbprint recipe out. and i'm so glad i did because this recipe is for sure my favorite by far of all jam thumbprint recipes. i've tried others since, but have always gone back to this one. i think it must be the added coconut or something that does it. or maybe that it's more like a shortbread. whatever it is, it's very good.

so below's the recipe if you'd like to give these a try. i'm sure you'll fall in love with it just like i did. enjoy and happy baking this holiday season! :)

12 Days of Christmas Baking - Day 5: Jam Thumbprints via design. bake. run.
these jam thumbprints are so, so good. it's like a buttery shortbread cookie with toasted coconut flakes.

12 Days of Christmas Baking - Day 5: Jam Thumbprints via design. bake. run.
these thumbprint cookies are just some of my favorite things this time of year.

jam thumbprints
recipe from ina garten of the food network

ingredients:
  • 3/4 pound (3 sticks) unsalted butter, at room temperature
  • 1 cup sugar
  • 1 teaspoon pure vanilla extract
  • 3 1/2 cups all-purpose flour
  • 1/4 teaspoon kosher salt
  • 1 egg beaten with 1 tablespoon water, for egg wash
  • 7 ounces sweetened flaked coconut
  • Raspberry and/or apricot jam (you can use any jam you have around, i used blackberry and apricot)

directions:
  1. Preheat the oven to 350 degrees F.
  2. In an electric mixer fitted with the paddle attachment, cream together the butter and sugar until they are just combined and then add the vanilla. Separately, sift together the flour and salt. With the mixer on low speed, add the flour mixture to the creamed butter and sugar. Mix until the dough starts to come together. Dump on a floured board and roll together into a flat disk. Wrap in plastic and chill for 30 minutes.
  3. Roll the dough into 1 1/4-inch balls. (If you have a scale they should each weigh 1 ounce.) Dip each ball into the egg wash and then roll it in coconut. Place the balls on an ungreased cookie sheet and press a light indentation into the top of each with your finger. Drop 1/4 teaspoon of jam into each indentation. Bake for 20 to 25 minutes, until the coconut is a golden brown. Cool and serve.

makes about 4 dozen cookies.

check out last year's day 5 recipe: mrs. jew's crispy cookies

Friday, December 6, 2013

12 days of christmas baking - day 2: snickerdoodles

12 Days of Christmas Baking - Day 2: Snickerdoodles via design. bake. run.

okay, i'm a little slow posting day 2's recipe here. but here it is. i decided on snickerdoodles. and i have to admit, i've never really had a snickerdoodle cookie before until i finally tried blue bottle coffee's vanilla-saffron snickerdoodle a few months back. some people say why did they even put saffron in their cookie, because it totally ruins the classic taste. i'm like, does it matter? it tastes fine to me!

my mother-in-law is a big fan of snickerdoodles. she said they're super simple to make (which they are) and for some reason, if you're a sweet tooth, the sugar really comes out in this recipe. so it's like this extra sweet goodie, without too much sugar really. i mean, chocolate chip cookies use way more (or slightly more) sugar.

anyway, below's the recipe for these yummy looking cookies. it's slightly adapted from blue bottle coffee's recipe. i took out the vanilla bean and saffron because i didn't have those ingredients on hand. oh, and i added the cinnamon sugar coating to give it a more festive taste, being that it's the holidays and all. so if you'd like to try and make some, i say go ahead. enjoy and happy baking! :)

snickerdoodles
recipe adapted from blue bottle craft of coffee cookbook

ingredients:
  • 2 cups (9.9 oz / 280 g) all-purpose flour
  • 1 teaspoon baking soda
  • 1/2 cup (4 oz / 113 g) unsalted butter, at room temperature
  • 1/2 cup (3.5 oz / 100 g) granulated sugar
  • 1/2 cup (3.8 oz / 109 g) packed light brown sugar
  • 1 teaspoon kosher salt
  • 1 egg (1.8 oz / 50 g), at room temperature
  • 2 tablespoons milk
  • 1 teaspoon vanilla extract

optional (to coat the dough before baking):
  • 1/4 cup sugar
  • 2 tablespoons ground cinnamon

directions:
  1. Preheat oven to 350°F (175°C).
  2. Sift the flour and baking soda into a medium bowl.
  3. In the bowl of a stand mixer fitted with the paddle attachment, beat the butter on low speed until smooth, 1 to 2 minutes. Add the granulated sugar, brown sugar, and salt and mix on low speed until well combined. Scrape down the sides of the bowl, then mix on medium speed until light and fluffy, 4 to 5 minutes.
  4. In a medium bowl, combine the egg, milk, and vanilla extract and whisk vigorously until well blended. With the mixer on medium speed, add the egg mixture very slowly, in a steady stream, and mix until well-incorporated and very smooth, about 30 seconds. Scrape down the sides of the bowl, then mix on medium speed for 30 more seconds. Scrape down the sides of the bowl, then add the flour mixture. Mix on low speed just until uniform in texture.
  5. Line a baking sheet with parchment paper or a silicone mat. Roll 1 tablespoon portions of the dough into balls (and if you want to roll them in the cinnamon sugar mix, this is when you do it). Then place them on the baking sheet, spacing them at least 2 inches (5 cm) apart. Bake for about 10 minutes, until golden but not too dark, rotating the pan midway through the baking time. Ideally, the baked cookies will be tall and slightly undercooked in the center, and will buckle shortly after coming out of the oven. If the cookies don't buckle, don't worry; they'll still be delicious. Let the cookies cool on the pan for 10 minutes before removing. These cookies are best when eaten warm, shortly after they come out of the oven. However, they can be stored in an airtight container at room temperature for up to 2 days. Alternatively, the dough can stored in an airtight container in the refrigerator for up to 5 days, so consider baking only as many cookies as needed and saving the rest of the dough to bake another day.

makes about 4 dozen small cookies or 9 large cookies (1/4-cup dough balls, bake for 16 mins).

check out last year's day 2 recipe: chocolate snowcap cookies

Monday, December 2, 2013

12 days of christmas baking - day 1: soft chocolate chip cookies

12 Days of Christmas Baking - Day 1: Soft Chocolate Chip Cookies via design. bake. run.

happy december! is it really december, already?! well, that's okay... because this is THE best time of the year. i do love the holidays; it's the perfect excuse of all that baking. ;)

last december i decided i would chronicle my 12 days of christmas baking. i've done it the the past, just never wrote about it. last year's was quite a success in my eyes because i had plenty of eaters to gobble up all the goodies. but not just that, i actually baked all those days in a row, or close to it anyway. this year, i'm not so sure. but regardless, i will go ahead and do my 12 days of christmas baking again. i have new recipes i'd like to try this year. this first one here was one i stumbled upon on pinterest. i have to say the cream cheese as the secret ingredient in this chocolate chip cookies recipe was a surprising but pleasant and effective ingredient. it actually yields softer cookies. and they're not as sweet so if you aren't the so-sweet kind of person, then this is the one for you. i love how soft these cookies stayed even a day or two later. it's unlike any of the chocolate chip cookies i've tried in the past. now, is it the best ever chocolate chip cookies i've baked or eaten? ummm... that's a toughy. i wouldn't say it's the best ever, but it's one that i'd probably make again when i feel like it and have cream cheese lying around.

below's the recipe should you like to make some. it's pretty easy, so why not?! chocolate chip cookies are a classic and they do make for the perfect gift this holiday season. :)

Soft Chocolate Chip Cookies via design. bake. run.
cream cheese is the secret ingredient in these chocolate chip cookies. it produces a less sweeter cookie, soft and delicious in every bite.

12 Days of Christmas Baking - Day 1: Secret Ingredient Chocolate Chip Cookies via design. bake. run.
i love how these cookies stay soft even days later. just make sure you keep it in an airtight container.

secret ingredient chocolate chip cookies
recipe from just a taste

ingredients:
  • 2 1/4 cups all-purpose flour
  • 1 teaspoon baking soda
  • 1 teaspoon salt
  • 3/4 cup (1 1/2 sticks) unsalted butter, at room temp
  • 1/4 cup cream cheese, at room temp
  • 1/2 cup sugar
  • 1 cup packed light brown sugar
  • 1 1/4 teaspoons vanilla extract
  • 2 large eggs
  • 2 cups semi-sweet chocolate chips

directions:
  1. in a medium bowl, whisk together the flour, baking soda and salt.
  2. n the bowl of a stand mixer fitted with the paddle attachment, cream together the butter, cream cheese, sugar, light brown sugar and vanilla extract until light and fluffy, about 2 minutes, scraping down the sides as needed. add the eggs, one at a time, beating well after each addition. add the flour mixture, beating to combine, then stir in the chocolate chips.
  3. cover the bowl with plastic wrap and refrigerate the dough for a minimum of 2 hours and up to 3 days.
  4. when ready to bake, preheat the oven to 375°F and line two baking sheets with parchment paper or silpats.
  5. drop 2- to 3-tablespoon mounds of dough onto the baking sheets, spacing the mounds at least 2 inches apart.
  6. bake the cookies for 9 to 11 minutes, or until golden brown. cool the cookies on the baking sheets for 2 minutes then transfer them to a wire rack to cool completely.

makes a good amount depending on how big your dough mounds are. mine were about a tablespoon or two and i got about 3-4 dozen (2-3 inches) cookies. enjoy and happy baking and eating!

notes: measure 1/4 cup cream cheese by spooning/scraping it into a dry measuring cup and leveling it off.

Monday, July 29, 2013

kids art cookies

Kid's Art Cookies via design. bake. run.

several weeks ago c really wanted to make some cookies. instead of our usual chocolate chip cookies, we decided to do something different. he said he'd love to decorate some cookies. and me being me (i can't handle or have too much patience for sugar cookie cutouts and decorating), i opted for a much simpler approach to a decorated cookie with martha stewart's art cookie recipe.

these cookies turned out fabulous. they were quite the little edible art masterpieces. i say c did a very good job painting on the food coloring. the recipe said to use a straw and blow the paint around the cookie canvas, but that wasn't very successful with us. we did half blowing and half painting before baking our little cookie pieces. the overall results were great; abstract art pieces.

below's the recipe should you want to make some (with your little ones or grownups even). it's still summer so make some before school starts. hey, it could even be a neat little back-to-school treat for the teachers. :)

Art Cookies via design. bake. run.
these cookies are quite the cookie art masterpieces and they taste delicious. so good and buttery.

kids art cookies
recipe from martha stewart

ingredients:
  • 4 cups sifted all-purpose flour, plus more for dusting
  • 1/2 teaspoon table salt
  • 1 teaspoon baking powder
  • 1 cup (2 sticks) unsalted butter
  • 2 cups sugar
  • 2 large eggs
  • 2 teaspoons pure vanilla extract
  • assorted liquid food coloring, for decorating

directions:
  1. line two baking sheets with parchment paper; set aside. in large bowl, sift together flour, salt, and baking powder; set aside.
  2. in the bowl of an electric mixer fitted with the paddle attachment, cream butter and sugar until fluffy. beat in eggs.
  3. add reserved flour mixture; mix on low speed until well combined. stir in vanilla. wrap in plastic; refrigerate for 45 minutes.
  4. preheat oven to 325°f. on a floured work surface, roll dough 1/4 inch thick. transfer rolled dough to a prepared baking sheet; chill until firm, about 15 minutes. cut dough into large rectangles. place the cut cookies 2 inches apart on both of the prepared baking sheets. to decorate, place a few drops of food coloring on a cookie. using a straw, gently blow food coloring over cookie. place baking sheet of decorated cookies in refrigerator; chill until dough is firm, about 15 minutes.

makes 12 to 16 cookies.

cook's note: since this cookie is so buttery, keep the dough well chilled so it's easier to work with.

Thursday, March 21, 2013

york peppermint pattie cookies

York Peppermint Pattie Cookies via design. bake. run.

i'm not a big fan of peppermint patties, but i don't not like it enough to pass up on it. well, my MIL and m are big peppermint patties fan. right after the holidays i picked up a couple bags of york peppermint patties (because being the frugal person i am – i know, it doesn't show here, these were on clearance at half off!) with the intention of using them to make some yummy baked goodies. three months later i finally got around to making something with them.

these york peppermint pattie cookies turned out great. they taste delicious and i love how good they turned out (look-wise). they're like a different version of your classic delicious mint chocolate chip cookie you can say. i love how the minty sweet cream is scattered in various parts of the cookie as you bite into it. oh! and during the baking, some of them melted and crystalized turning into something that's toffee-like when it cooled and hardened. those bites are also delish.

below's the recipe should you want to try and bake some yourself. i say go for it, because these just like all the other chocolate chip cookies (or any cookie recipe really) that i've made are superb. of course, i'm biased here. enjoy! :)

York Peppermint Pattie Cookies Make Perfect Gifts! via design. bake. run.
i gave some of these away as mini gifts to coworkers. oh, and also tested out some hand-lettered packaging.

York Peppermint Pattie Cookies via design. bake. run.
if you're a minty chocolate chip kind of fan, i say this is a must try recipe!

york peppermint pattie cookies

ingredients:
1 stick of butter, room temperature
1 cup granulated sugar
1/2 cup brown sugar
2 eggs
1-3/4 cups + 2 tablespoons all purpose flour
1 teaspoon baking soda
a pinch of salt
1 bag of york peppermint patties (you may not need the whole bag)

directions:
  1. preheat oven to 350° f.
  2. in a medium bowl, sift the flour, salt and baking soda and set aside.
  3. in a separate bowl with a fork (or you can do all of this in a mixer or hand mixer if you like) beat the butter and sugar (both granulated & brown) together until the nice and fluffy.
  4. add in the eggs and mix until everything is combined.
  5. then add in the dry ingredients and mix until everything is incorporated.
  6. now, at this point you'll want to take the peppermint patties out of their individual wrappers (assuming they came individually wrapped because that's what i used). break up each pattie into 3-4 pieces and add it to the cookie dough batter. once you have enough patties (i say about 20-25 or you can use the entire bag) broken up and added, mix the dough until everything is combined.
  7. then using a small cookie scooper (about 1 tablespoon in size) or you can use whatever you like (a spoon is fine too!), spoon about 1 tablespoon of the cookie dough onto a parchment-lined (or silicone mat) baking sheet. make sure each dough tablespoon is at least 2 inches apart.
  8. bake for 9-10 minutes or until the cookies are a light golden brown and outer edges start to harden yet centers are still soft and puffy.
  9. take cookies out of the oven and let them cool on the sheet for 10 minutes before removing them.
  10. enjoy at slightly warm temperature or put them in an airtight container/cookie jar.
makes 30-36 small cookies. enjoy! happy baking and eating. :)

Monday, February 11, 2013

white chocolate chip chocolate cookies inspired by blue bottle coffee

White Chocolate Chip Chocolate Cookies via design. bake. run.

i have to admit i am a sucker for baked goods these days. who knew i'd love cookies, cakes and pastry so much? chocolate chip cookies are for sure one of my favorite cookies. double or triple chocolate is even better!

this recipe here calls for two kinds of chocolate. actually, you can even throw in more if you prefer, but i wanted to keep it simple so i just went with the two (chocolate cocoa and white chocolate). these were inspired by the ever so popular and san francisco-famous blue bottle coffee double chocolate chip cookies. their double chocolate chip cookies are just delish! if you're ever in san francisco, you must stop by for a cup of their famous drip coffee and double chocolate chip cookies. it is for sure the perfect anytime snack/indulgence.

below is the recipe for these delicious (white) chocolate chip cookies inspired by blue bottle coffee. i absolutely love how you get both the sweetness of the chocolate and hint of the sea salt in one bite. when making these i had forgotten to put in the sea salt with the sugar during the step where you mix the butter and sugar together. so i threw it in at the very end with the white chocolate. i have to say i'm so glad i did that by mistake because i think the hit of the sea salt with the chocolate and sugar is absolutely wonderful! feel free to make some yourself and let me know how you like it. oh, and did i mention, these also make for the perfect homemade gifts as well?! happy baking and eating (and giving)! ;)

White Chocolate Chip Chocolate Cookies via design. bake. run.
these blue bottle coffee-inspired chocolate chip cookies are just divine. they melt in your mouth and is so, so, good.

white chocolate chip chocolate cookies
inspired by blue bottle coffee

ingredients:
1 cup all-purpose flour
1/3 cup cocoa powder
1/2 teaspoon baking soda
5 tablespoons unsalted butter, at room temperature
1 cup sugar
1 teaspoon sea salt
1 egg
1/2 tablespoon vanilla extract
4 ounces white chocolate chips (or chopped white chocolate)

directions:
  1. preheat oven to 350° f. line a baking sheet with parchment paper or a silicone mat.
  2. sift the flour, cocoa powder, and baking soda into a medium bowl.
  3. in the bowl of a stand mixer fitted with the paddle attachment (or you can use a medium-size bowl with a handmixer), beat the butter on low speed until smooth, 1 to 2 minutes. add the sugar and mix on low speed until well combined. then mix on medium speed until the mixture gets lighter in color and texture becomes fluffier, about 5 minutes.
  4. in a separate bowl, combine the egg and vanilla extract and whisk vigorously until well blended.
  5. with the mixer on medium speed, add the egg mixture very slowly, in a steady stream, and mix until well-incorporated and very smooth, about 30 seconds. then mix on medium speed for 30 more seconds. feel free to scrape down the sides to get all the mixture in.
  6. then add the flour mixture. mix on low speed just until uniform in texture. scrape down the sides of the bowl, then add in the white chocolate chips and sea salt. mix on low until everything is combined.
  7. using a cookie scoop (about 1 tablespoon in size), scoop out 2 tablespoons and form into a ball. place them on the baking sheet, spacing them at least 2 inches apart.
  8. bake for 8 minutes, until the cookies are slightly firm to the touch and the surface is no longer glossy, rotating the pan halfway through the baking time.
  9. let the cookies cool on the pan for 10 minutes before removing. then eat and enjoy! best enjoy warm. of course, you can store them in an airtight container at room temperature for 3 days. or if you don't want to use all the dough at once, the dough can be stored in an airtight container in the refrigerator for up to 5 days.
makes 15-16 3-inch cookies. enjoy, because these cookies are really, really good! :)

note: you can let the dough sit in the refrigerator for 30 minutes to 3 hours if you like before baking (i think blue bottle says you should put it in the fridge for at least 3 hours?!). i believe they're supposed to come out even better. personally, i cannot wait that long and i don't like it when the dough is a little tough to handle so i just bake my dough right away. the cookies still come out delicious regardless.

Tuesday, February 5, 2013

the perfect homemade gift -- brown butter chocolate chip cookies

Brown Butter Chocolate Chip Cookies via design. bake. run.

a while ago one of my co-workers gave me some old thomas the tank engine toys (trains/tracks/etc) that his daughter had outgrown. he asked me if i thought we would want them for c and i said sure. anyway, as a thank you gift, c and i made these yummy smelling and oh so tasty brown butter chocolate chip cookies for them. sure it was 2-3 weeks after the fact, but yes, we eventually got around to thanking them. c loves thomas, and so does little miss v. so it's not like one can never have too many tracks or trains. i don't think he'll really ever outgrow thomas or trains. he's your typical little boy.

below's the recipe for these yummy cookies should you be interested in making some yourself. it's similar to other recipes, but not quite. i have to say browning the butter really makes a difference. i love how they crinkle once they come out of the oven. they give you that perfect chocolate chip cookie look, and taste just as good as they look too!

Brown Butter Chocolate Chip Cookies via design. bake. run.
chocolate chip cookies are one of our favorites! this brown butter recipe is so easy and simple, we'll be making it again soon. :)

brown butter chocolate chip cookies

ingredients:

1/2 cup (1 stick) butter
1-3/4 cups + 2 tablespoons all purpose flour
1 cup brown sugar
1/2 cup granulated sugar
1/2 tsp baking powder
1/2 tsp baking soda
1/4 tsp salt
2 large eggs
1 to 1-1/2 cups semi-sweet chocolate chips (you can use milk or dark if you prefer)

directions:
  1. preheat oven to 350° f.
  2. sift the flour, baking powder, baking soda and salt together in a bowl and set it aside.
  3. in a small saucepan, melt the butter and let it sit until it browns. you'll know it when you see a golden color and your kitchen smells wonderfully sweet!
  4. pour the browned butter into a mixer bowl (if you're using a mixer) or into a medium bowl (if using a hand mixer or fork -- that's my prefer method, easy cleanup!). add in the brown sugar and granulated sugar. mix butter and sugars until thoroughly blended. then mix in the 2 eggs. add the dry ingredients and mix until just combined. then stir in the chocolate chips.
  5. form scant 1/4 cup dough into ball. holding dough ball using fingertips of both hands, pull into two equal halves. rotate halves ninety degrees and, with jagged surfaces exposed, join halves together at their base, again forming a single cookie, being careful not to smooth dough’s uneven surface. place formed dough onto a silpat or parchment-lined cookie sheet, about 6 dough balls per sheet.
  6. bake for 10 minutes or until golden brown. you can rotate the sheet halfway through baking to ensure even baking if you like. i do it sometimes, other times i just skip it.
  7. let the cookies cool on the baking sheet for a few minutes before putting them on a rack to cool completely. serve warm with a glass of milk if you like. delicious!

makes 16 (3-1/2") large cookies. enjoy and happy eating! :)

Friday, January 11, 2013

gluten-free chocolate chip cookies

Gluten-Free Chocolate Chip Cookies via design. bake. run.

i never bothered baking any gluten-free goodies until a few years ago. one of my former coworkers can't have any gluten so everything she consumes must be gluten-free. that was when i started testing out random recipes. every time i brought in goodies, i made sure i had a GF version as well. typically, i'd just take the regular recipes and alter them GF. most of the time i had to play around with random flour combinations. i have to say, i don't care for some of those flours. what i've found is that brown rice flour or white rice isn't that bad and can somewhat holds its ground. this chocolate chip cookies recipe here is an example of that. it uses only brown rice flour as the flour and the outcome is actually very good. it's quite simple really, and the cookies turn out great. of course i've had incidences where some of them can turn out too crunchy or just a horrible mess (but that the fun of testing random flour combos). i guess you just have to play around with it until you find the right combination of ingredients.

below's the recipe for these delicious gluten-free cookies should you want to try them out yourself. i love how the brown rice flour gives the cookie that crumbly texture once it hits your mouth. these really are good whether you're GF or not! oh, for half the cookies i turned them into sandwich cookies and added in some salted caramel filling leftover from my brown sugar salted caramel macarons. i say those were quite a treat. it's a giant load of sugary sweetness, but oh man, they were good.

okay, as usual, let me know how yours turn out if you do make these. happy baking and eating! :)

Gluten-Free Chocolate Chip Cookies via design. bake. run.
the salted caramel filling with these gluten-free chocolate chip cookies just made them even better!

Gluten-Free Chocolate Chip Cookies via design. bake. run.
this easy GF cookie recipe is seriously so simple to make and used only brown rice flour!

gluten-free chocolate chip cookies

ingredients:

1/2 stick (4 oz) butter, softened or melted
1/4 cup sugar
1/2 cup brown sugar
1 egg
1/4 teaspoon baking soda
1/4 teaspoon baking powder
pinch of salt
1 cup + 2 tablespoons brown rice flour
3/4 cup semi-sweet chocolate chips

directions:

preheat oven to 350°F. line baking sheet with parchment paper or silicone sheet.

cream softened butter (or melt butter in microwave safe bowl) and sugar together. then add in the egg. once mixed, add in the baking soda, baking powder, salt and flour. mix until incorporated, then add in the chocolate chips.

scoop out a tablespoon portion (ball-like) onto the baking sheet. make sure to spread out them at least 2-inches apart. bake for 9-10 minutes until golden but still soft in the center (baking time varies depending on how chewy or crunchy you like your cookies). transfer hot cookies with a spatula to a rack to cool. after a few minutes, they're ready to eat! enjoy. :)

makes 18-20 cookies or 9-10 sandwich cookies. store cookies in a tightly sealed container for up to 5 days.

Wednesday, January 9, 2013

brown sugar salted caramel macarons

Brown Sugar Salted Caramel French Macarons via design. bake. run.

who doesn't love salted caramel? i know i do!

so i decided to be a tad adventurous with my usual macaron recipe. instead of your good old white sugar, i went for the brown one instead. and what do you know? the brown sugar works just fine too! in fact, they actually give you a nice tint of brown to the shells and that sweet butterscotch-y flavor. it's really good, i must say. the added salted caramel filling is just scrumptious.

below's the recipe should you be interested. let me know how yours turn out if you do make them. happy baking and eating! :)

Brown Sugar Salted Caramel French Macarons via design. bake. run.
the brown sugar substitution give these macarons a nice butterscotch flavor. and to top it off with the salted caramel filling is just divine.

Brown Sugar French Macarons with Salted Caramel via design. bake. run.
these macarons make for the perfect gift, for anyone and any occasion. :)

brown sugar salted caramel french macarons

ingredients:

macaron batter:
1 cup powdered sugar
3/4 cup almond meal
2 large egg whites, at room temperature
5 tablespoons brown sugar, firmly packed

salted caramel filling:
1 bag of kraft caramel bits
2 tablespoons of milk (you can use water too)
1 teaspoon sea salt
1-2 cups powdered sugar (optional, i use this to thicken my caramel a bit)

directions:

to make the macaron batter/shells:
  1. line two baking sheets with parchment paper and have a pastry bag with a plain tip (about 1/2-inch, 2 cm) ready.
  2. sift together the powdered sugar and almond meal so there are no lumps. set aside.
  3. in the bowl of a standing electric mixer (or if you prefer, you can use a bowl and hand mixer), beat the egg whites until they begin to rise and hold their shape. while whipping, beat in the brown sugar until very stiff and firm, about 2 minutes.
  4. carefully fold the dry ingredients, in two batches, into the beaten egg whites with a flexible rubber spatula. when the mixture is just smooth and there are no streaks of egg white, stop folding and scrape the batter into the pastry bag (standing the bag in a tall glass helps if you’re alone).
  5. pipe the batter on the parchment-lined baking sheets in 1.35-inch circles evenly spaced one-inch apart.
  6. rap the baking sheet a few times firmly on the counter top to flatten the macarons. then let it sit for at least 30-60 minutes depending on humidity before baking them in the oven. about 10-15 minutes before baking, preheat oven to 350 degrees F. bake for 15 minutes.
  7. once macaron shells are out of the oven, let them sit for 30-60 seconds before removing the hot baking sheet underneath. let the macarons cool completely before removing them from the parchment paper.

for the salted caramel filling:
  1. put the caramel bits with the milk and sea salt in a microwaveable bowl and microwave for 1-1/2 to 2 minutes (i usually do it in 30 second increments).
  2. once it looks like the bits are melted or soft enough to stir, take it out and stir until everything is fully incorporated.
  3. let it cool until it's thick enough to spread. if it's still too runny, it's not ready yet. at this point, you can add in the powdered sugar to thicken up the mixture so you can use it quicker if you like. otherwise, i say hang out for a bit until it's ready. of course, if you've gone too long and the mixture is too stiff to spread, you can pop it back in the microwave for a few seconds to soften it.

to assemble the macaron cookies:
  1. before assembling these cookies, make sure to pair up all the cookie shells so they are as close as possible in size.
  2. using a knife, spread a good amount of the salted caramel on the inside of the macarons then sandwich them together.
  3. let them stand at least one day (keep them refrigerated) before serving (serve at room temperature), to meld the flavors.

store in airtight container for up to 5 days. makes 20-24 macarons. happy eating because these are really, really, good! :)

Tuesday, December 18, 2012

12 days of christmas baking - day 12: holiday biscottis

Biscottis via design. bake. run.

on this very last day of my 12 days of christmas baking i am ending with these delicious chocolate drizzled biscottis. i don't make biscottis very often and when i do, it's usually around this time of year. i love how you can make these ahead of time and have them ready for any occasion. these are great for gift-giving, especially if you have to mail them off somewhere. for sure they will not spoil because of their low-moisture content. that is always a plus when you know it'll be a while before they get eaten.

well, below's the recipe should you want to make some yourself. again, these are simple and easy to make. this have been my go-to recipe for many many christmases. the things i put in varies though. sometimes it's with cranberries and pistachio (like here), others it's with chocolate chips or raisins and walnuts. you can pick whatever you like. and to add that festive feel, you can follow the recipe below as is or create your own. i just went with a chocolate drizzle instead. enjoy! :)

Biscottis via design. bake. run.
i love making biscottis. they're simple and easy to make and you can make a bunch ahead of time! plus, they are delicious as well. :)

Biscottis via design. bake. run.
eat up! :)

holiday biscottis
recipe from giada @ the food network

ingredients:
2 cups all-purpose flour
1 1/2 teaspoons baking powder
3/4 cup sugar
1/2 cup (1 stick) unsalted butter, room temperature
1 teaspoon grated lemon zest
1/4 teaspoon salt
2 large eggs
3/4 cup pistachios, coarsely chopped
2/3 cup dried cranberries
12 ounces good-quality white chocolate, chopped
Red and green sugar crystals, for garnish

directions:
Preheat the oven to 350 degrees F.

Line a heavy large baking sheet with parchment paper. Whisk the flour and baking powder in a medium bowl to blend. Using an electric mixer, beat the sugar, butter, lemon zest, and salt in a large bowl to blend. Beat in the eggs 1 at a time. Add the flour mixture and beat just until blended. Stir in the pistachios and cranberries.

Form the dough into a 13-inch long, 3-inch wide log on the prepared baking sheet. Bake until light golden, about 40 minutes. Cool for 30 minutes.

Place the log on the cutting board. Using a sharp serrated knife, cut the log on a diagonal into 1/2 to 3/4-inch-thick slices. Arrange the biscotti, cut side down, on the baking sheet. Bake the biscotti until they are pale golden, about 15 minutes. Transfer the biscotti to a rack and cool completely.

Stir the chocolate in a bowl set over a saucepan of simmering water until the chocolate melts. Dip half of the biscotti into the melted chocolate. Gently shake off the excess chocolate. Place the biscotti on the baking sheet for the chocolate to set. Sprinkle with the sugar crystals. Refrigerate until the chocolate is firm, about 35 minutes.

Note: The biscotti can be made ahead. Store them in an airtight container up to 4 days, or wrap them in foil and freeze in resealable plastic bags up to 3 weeks.

Friday, December 14, 2012

12 days of christmas baking - day 10: chocolate chip cookies with nutella & sea salt

Chocolate Chip Cookies with Nutella & Sea Salt via design. bake. run.

last night we went and watched the nutcracker ballet. it's a traditional annual christmas thing with us. since we got home late and i didn't have time to make something time-consuming or intricate, i decided on your classic chocolate chip cookies, but with a slight twist. instead of the typical, i added in a dab of nutella inside the cookies and sprinkled sea salt on top before putting them in the oven. i have to say the added ingredients add a nice touch to the classic cookie. below's my favorite (so far!) chocolate chip recipe, with the two new ingredients added. feel free to try and make some yourself and let me know how they turn out! happy baking. :)

Chocolate Chip Cookies with Nutella & Sea Salt via design. bake. run.
i love the added nutella and sea salt in these chocolate chip cookies. so good!

Chocolate Chip Cookies with Nutella & Sea Salt via design. bake. run.
mmmm... yum. these cookies with a nice glass of milk is just perfect!

chocolate chip cookies with nutella & sea salt
recipe adapted from cook's illustrated

ingredients:
2-1/8 cups bleached all-purpose flour (about 10 1/2 ounces)
1/2 tsp table salt
1/2 tsp baking soda
12 tbsp unsalted butter (1 1/2 sticks), melted and cooled slightly
1 cup brown sugar (light or dark), 7 ounces
1/2 cup granulated sugar (3 1/2 ounces)
1 large egg
1 large egg yolk
2 tsp vanilla extract
1-2 cups chocolate chips or chunks (semi or bittersweet)
1 jar of nutella (you won't need the whole jar, just some)
sea salt

directions:
  1. Heat oven to 325 degrees. Adjust oven racks to upper- and lower-middle positions. Mix flour, salt, and baking soda together in medium bowl; set aside.
  2. Either by hand or with electric mixer, mix butter and sugars until thoroughly blended. Mix in egg, yolk, and vanilla. Add dry ingredients; mix until just combined. Stir in chips.
  3. Form scant 1/4 cup dough into ball. Using finger or thumb, make an indentation and scoop 1/2 tsp of Nutella and put it in. Then close up the dough (roll it back into a ball again). Place formed dough onto one of two parchment paper-lined 20-by-14-inch lipless cookie sheets, about nine dough balls per sheet. Lightly press down on the cookie dough and sprinkle sea salt over it. Smaller cookie sheets can be used, but fewer cookies can be baked at one time and baking time may need to be adjusted.
  4. Bake, reversing cookie sheets’ positions halfway through baking, until cookies are light golden brown and outer edges start to harden yet centers are still soft and puffy, 15 to 18 minutes (start checking at 13 minutes). Cool cookies on cookie sheets. Serve or store in airtight container.
Makes 18-20 large (3-inch) cookies. Enjoy!

Note: To ensure a chewy texture, leave the cookies on the cookie sheet to cool.

Tuesday, December 11, 2012

12 days of christmas baking - day 7: peppermint & coffee nutella french macarons

Peppermint & Coffee Nutella French Macarons via design. bake. run.

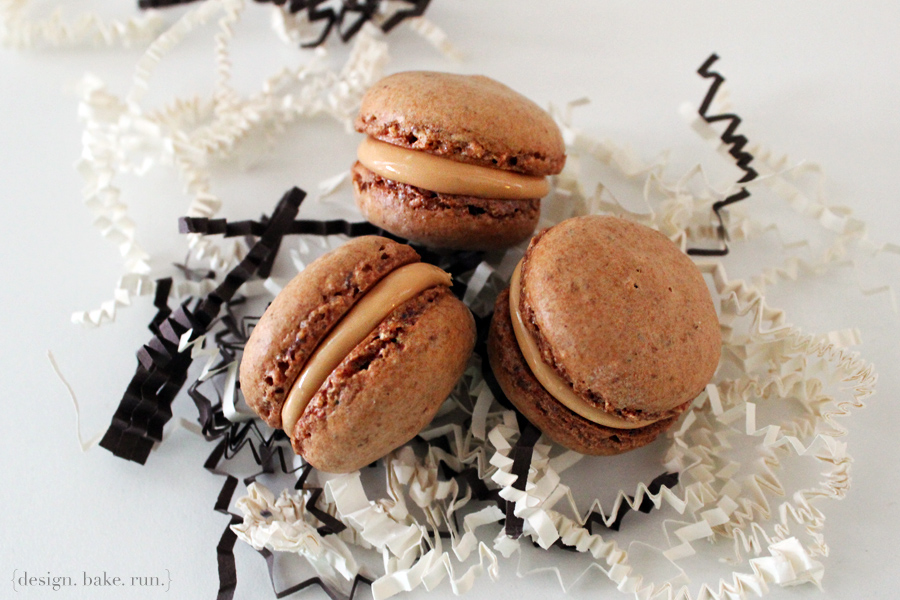
who doesn't love french macarons? yes, i've finally made some again since that last giant batch of macarons i made for a wedding. i can't believe i haven't made any since then. to go with the whole christmas theme, i decided on the peppermint flavor macarons, sprinkled with peppermint candy on the side. and to add to that, since i personally like to have more than one flavor of macarons whenever i'm making/eating them, i went with (almost) everyone's favorite, the coffee nutella.

i know, i haven't gotten my recipe up for these macarons yet, but again, i promise i will write a blog post soon and post the recipe here as soon as i have it written out. in the meantime, you can browse through these previous posts and get david lebovitz's recipe from one of these posts.

enjoy and happy baking! :)

***UPDATE 12/18/12***

i've finally got the recipe written up. scroll below for the peppermint recipe. for the coffee nutella macaron recipe, please click here. enjoy and let me know how yours turn out if you make them! :)

Peppermint Macarons via design. bake. run.
i love how festive and flavorful these peppermint french macarons are!

Peppermint & Coffee Nutella Macarons via design. bake. run.
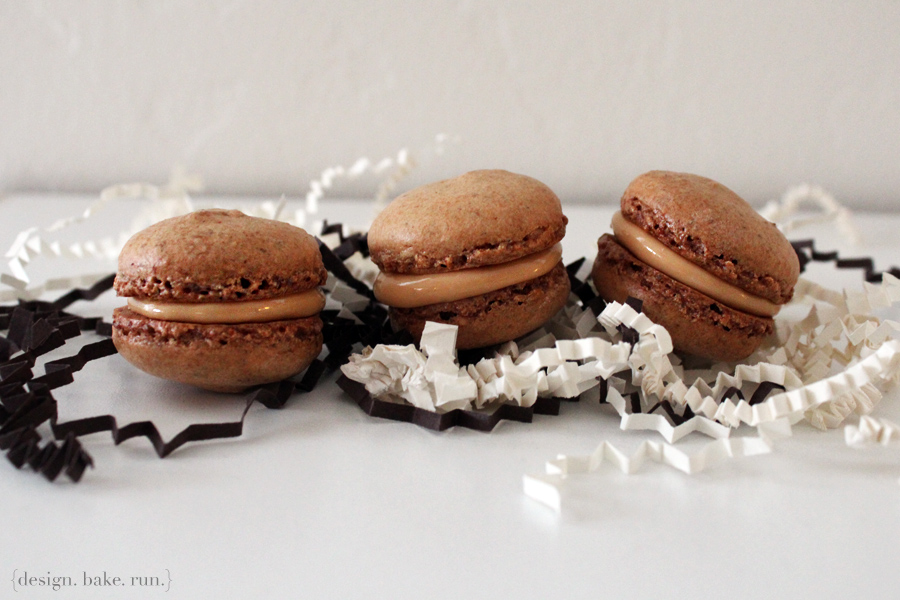
these peppermint and coffee nutella macarons really turned out great. so yummy and just the perfect treat for a cold day with warm coffee/tea.

Peppermint & Coffee Nutella French Macarons via design. bake. run.
i absolutely love making and eating french macarons. i really can eat all of these delicious peppermint and coffee nutella macarons. ;)

Peppermint Macarons via design. bake. run.
another shot of the peppermint macarons. yum!

peppermint macarons

ingredients:

macaron batter:

1 cup (100 gr) powdered sugar

3/4 cup almond meal (about 3 ounces or 75 grams)

red gel food coloring (optional)

2 large egg whites, at room temperature

5 tablespoons (65 gr) granulated sugar

peppermint buttercream filling:
1 stick of butter, softened
2 cups powdered sugar
1/2 tbsp peppermint extract
up to 2 tbsp heavy cream or milk
3 candy canes, crushed (optional)

peppermint candy decorations:
6 candy canes, crushed

directions:
to make the macaron shells: Preheat oven to 350º F (180º C).

Line two baking sheets with parchment paper and have a pastry bag with a plain tip (about 1/2-inch, 2 cm) ready.

Sift together the powdered sugar, almond meal and 2 tablespoons of espresso so there are no lumps (usually I just use a fork to break any large lumps). If your almond meal isn't so fine, you can put the ingredients into a blender or food processor to make it finer. Personally, I'd just use the sifter and dump out any remaining crumbs that didn't make it through the sifting process.

In the bowl of a standing electric mixer (or if you prefer, you can use a bowl and hand mixer), beat the egg whites until they begin to rise and hold their shape. While whipping, beat in the granulated sugar until very stiff and firm, about 2 minutes.

Carefully fold the dry ingredients, in two batches, into the beaten egg whites with a flexible rubber spatula. If you want your macaron shells to be red, this is where you'd to add in the food coloring (with the dry ingredients), otherwise, you can just skip it and use the food coloring as paint to paint it on once the cookies are assembled (like I did!). When the mixture is just smooth and there are no streaks of egg white, stop folding and scrape the batter into the pastry bag (standing the bag in a tall glass helps if you’re alone).

Pipe the batter on the parchment-lined baking sheets in 1.35-inch (3.5 cm) circles evenly spaced one-inch (3 cm) apart. Quickly after it's piped, sprinkle a few espresso powder over each shell (this step is optional, personally I do it because I like how they macarons look once they're baked).

Rap the baking sheet a few times firmly on the counter top to flatten the macarons. Then it let sit for at 30-60 minutes (okay, I've done it with just 15 minutes before and they turn out fine, but whatever you do, do not skip this step; even at just 15 minutes) before baking them in the oven, 15-17 minutes. Let cool completely then remove from baking sheet.

to make the peppermint buttercream frosting filling: beat butter for a few minutes with a mixer with the paddle attachment on medium speed (or you can use a hand mixer). add the 2 cups of powdered sugar and turn your mixer on the lowest speed (so the sugar doesn’t blow everywhere) until the sugar has been incorporated with the butter. increase mixer speed to medium and add peppermint extract, and 1 tablespoon of milk/cream and beat for 3 minutes. if your frosting needs a more stiff consistency, add a little more sugar. if your frosting needs to be thinned out, add remaining tablespoon of milk, a little at a time. once you've gotten the right consistency and the buttercream is complete, add in the crushed peppermint candy cane pieces and mix until incorporated. of course, this last part here is optional, you can skip it if you like. i personally like the added crunch when biting into my peppermint macaron, so i do this last step. :)

to assemble: Before assembling these cookies, make sure to pair up all the cookie shells so they are as close as possible in size. Then using a knife, spread a good amount of the peppermint filling on the inside of the macarons then sandwich them together. Sprinkle the crushed peppermint candy cane pieces over the filling portion of the assembled macaron. Or you can roll the cookie on the candy pieces. This last step adds a nice decorated touch to these peppermint macarons. They are so cute and delicious!

Let them stand at least one day (keep them refrigerated) before serving (serve at room temperature), to meld the flavors. Or if you can't wait to dig in and eat, I say wait a few hours, at least! (Shhhh, I've eaten them newly assembled too, and they taste just as yummy! hahahaha). But really, for the best optimal flavor and taste, you must wait at least one day. They really are THAT good and worth the wait!

Store in an airtight container for up to 5 days.

Makes about 16-20 cookies. Enjoy and happy eating! :)

Note: I typically just bake mine for 15 minutes and they turn out fine. But yours may be different as all oven temperatures vary so letting them bake the full 17 minutes may be fine. I say set your timer for 15 minutes and add on from there.
Related Posts Plugin for WordPress, Blogger...